The product screen is one of the most important in Revo XEF.
Whenever you want to create, edit, print, or cash a bill, you’ll use this screen. Below are the actions you can perform:
Header

At the top of the screen, several actions are available:
-
Exit: Saves the order and returns to the table plan.
-
Search: Use the search tool to find products or check their prices.
-
Open till: Opens the cash drawer if you have the privilege.
-
Employee: Switch users by tapping on the active employee.
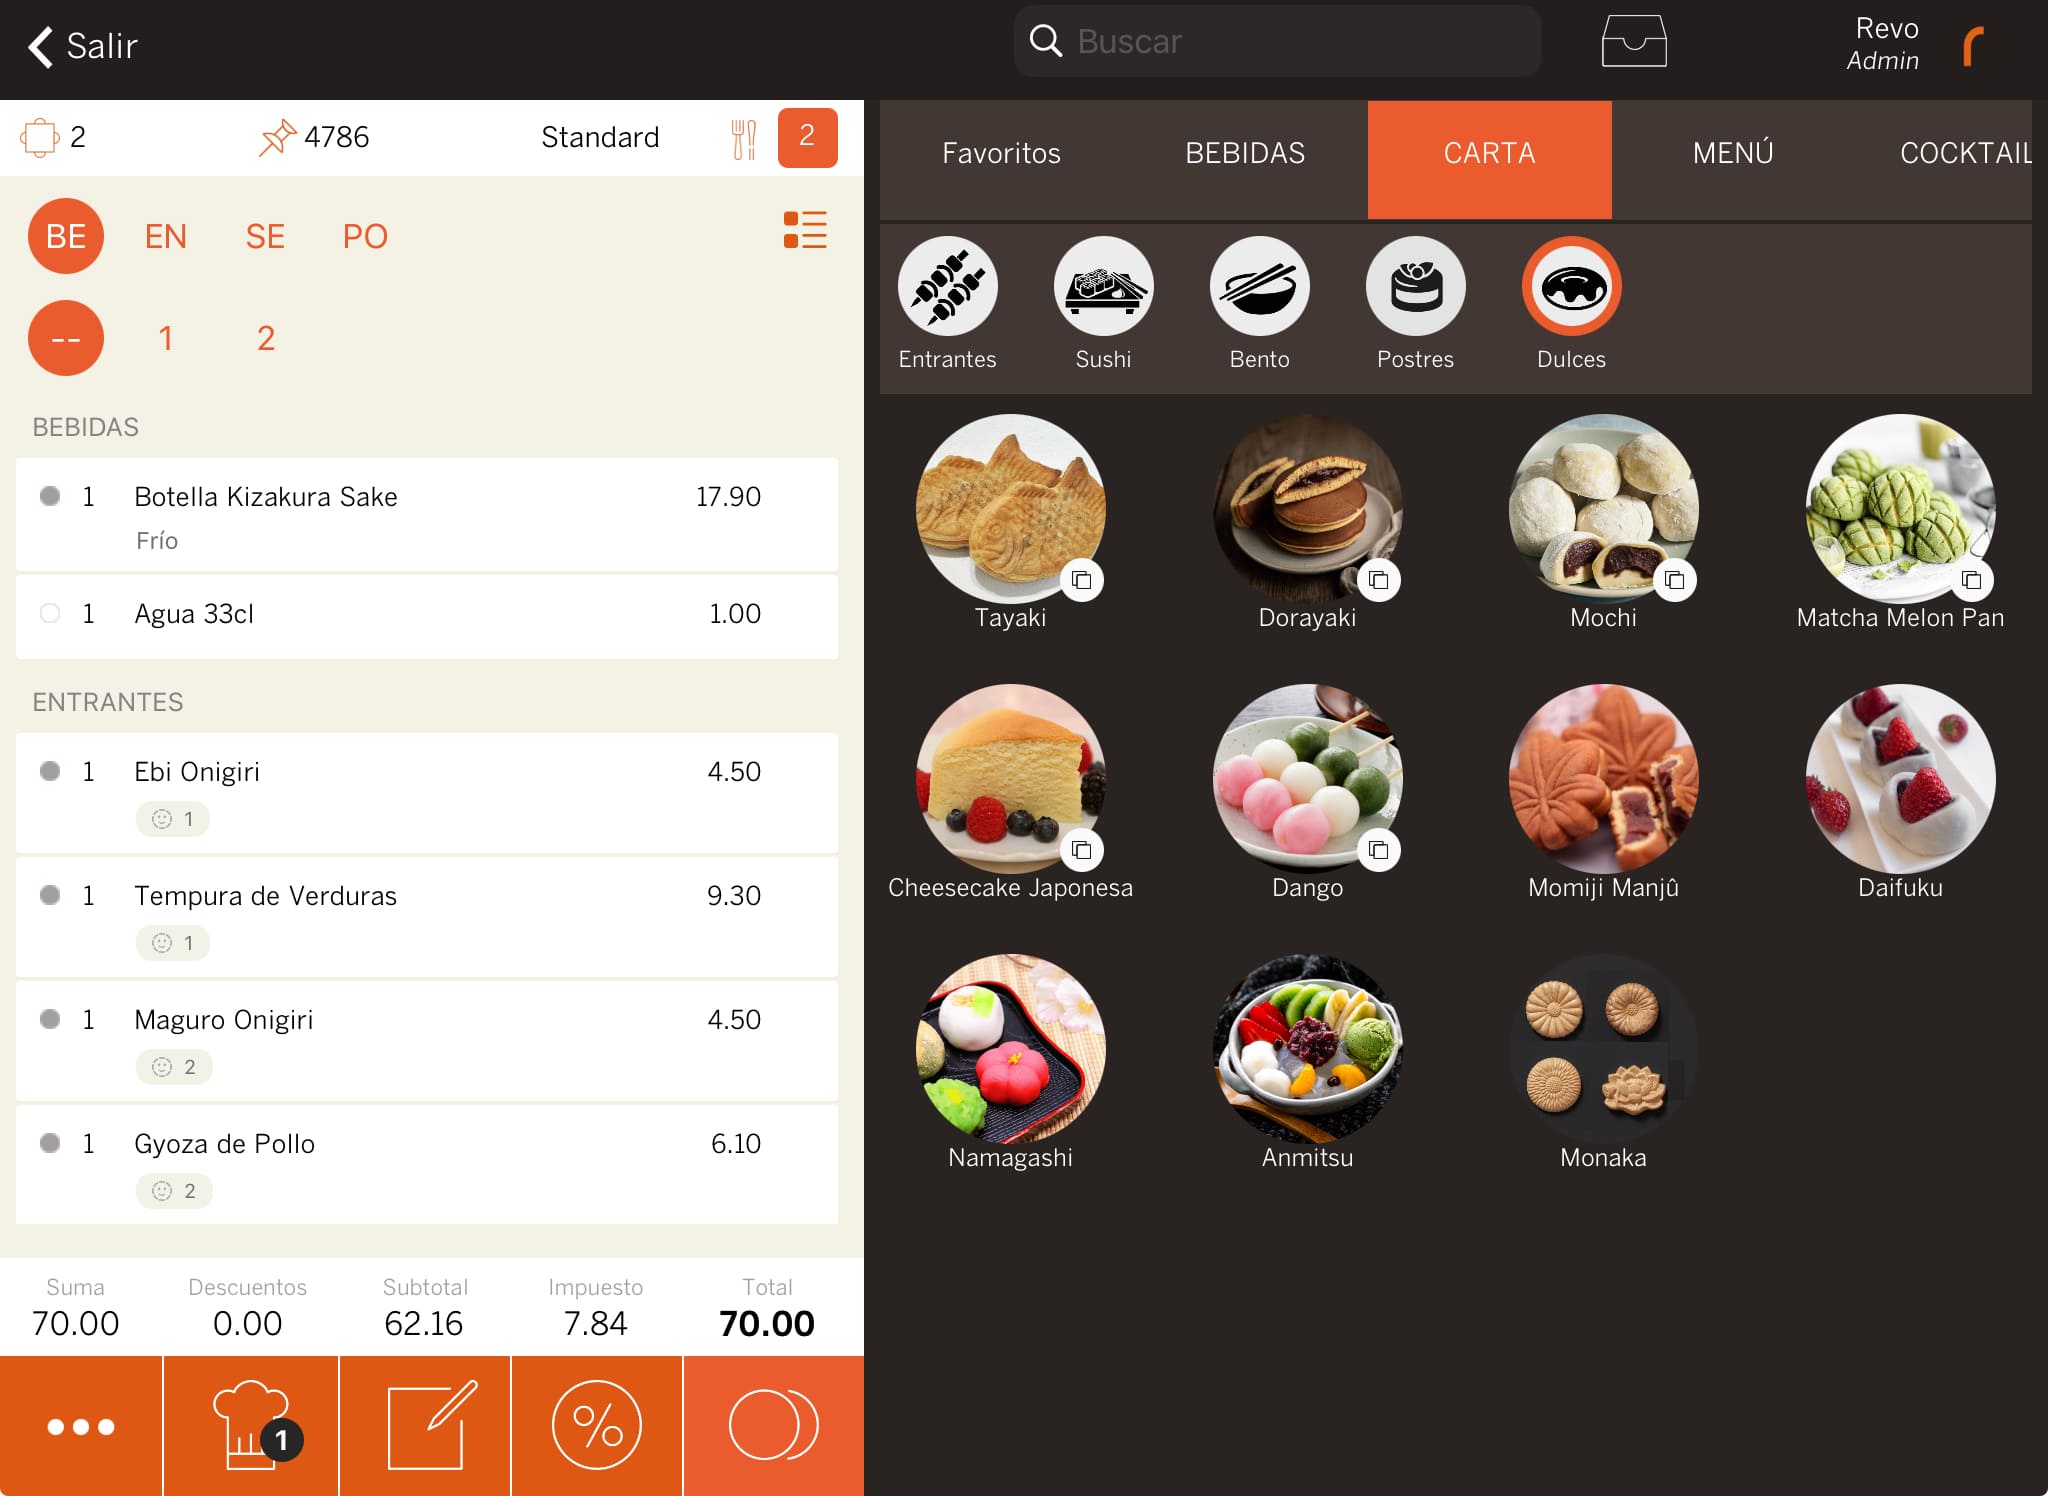
Order Information
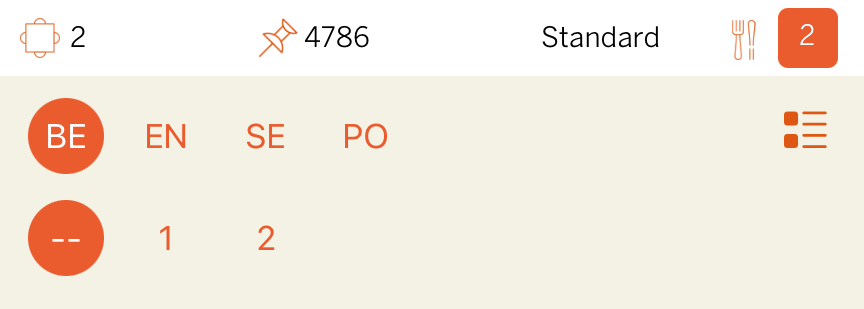
From left to right:
-
Table: Name or number of the table.
-
Order Number: Order number.
-
Rates: Change the current rates.
-
Number of diners: Modify the number of diners.
-
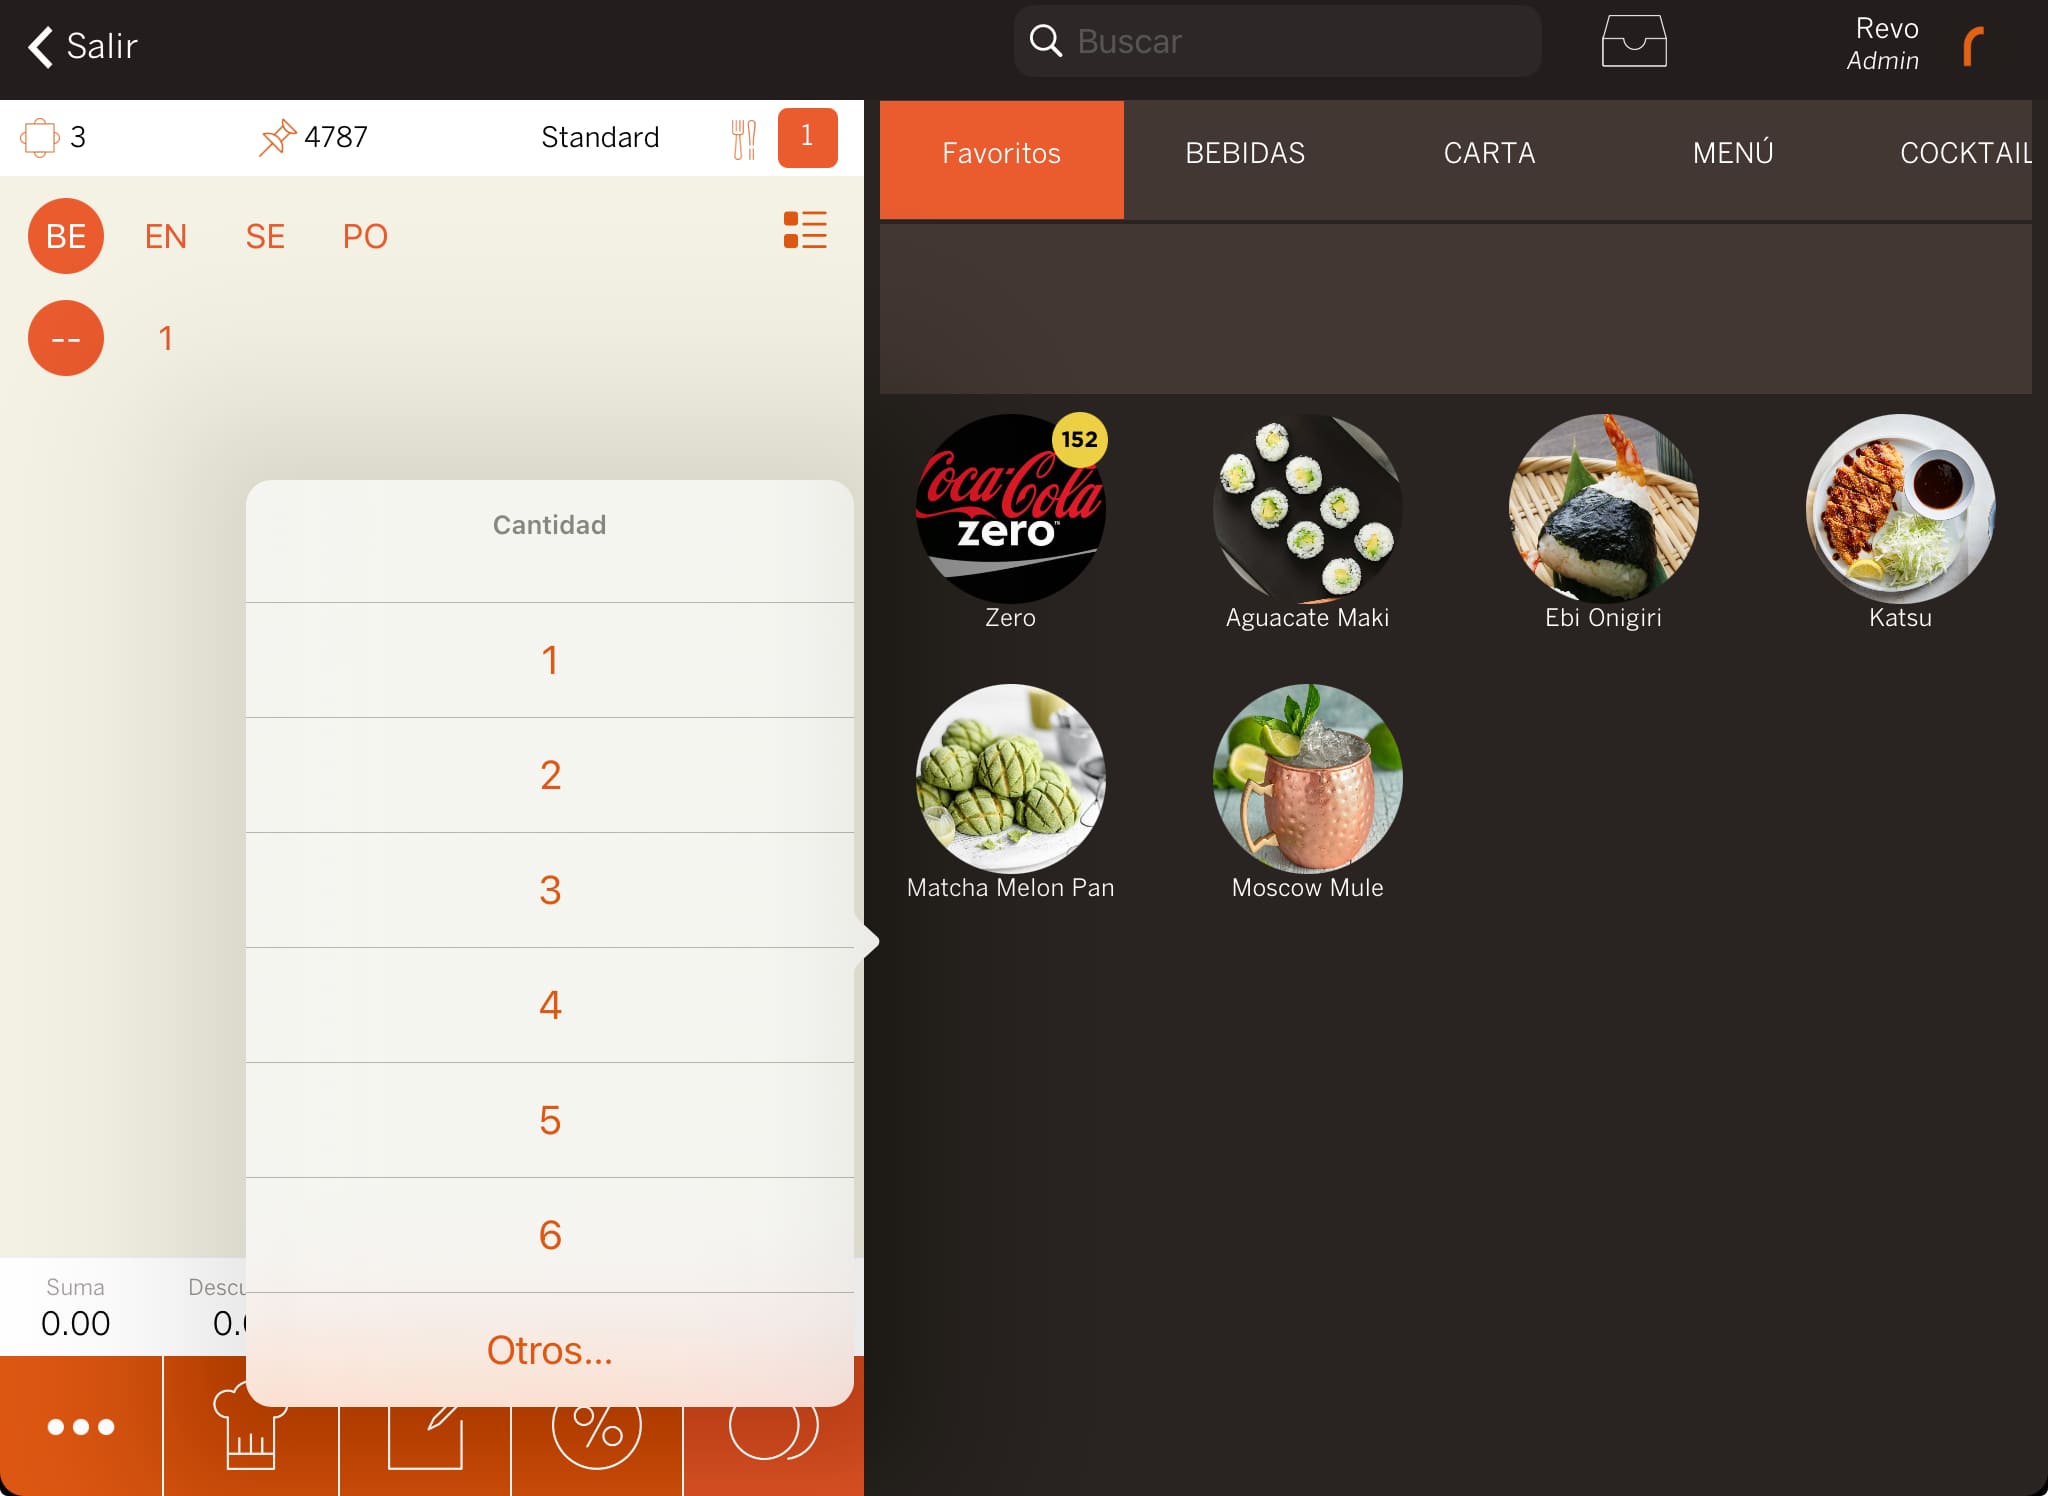
Dish orders: Use dish orders to organise the bill. Edit them in the dish orders section of the back-office.
In the image, you can see the dish orders: DR (Drinks), ST (Starters), MA (Mains), and DS (Desserts). First select the order, then the product.
-
Multi-selector: Select several products at once.
-
Seat management: Assign products to diners using seat management. Enable it from the order configuration in the back-office.
Order Screen
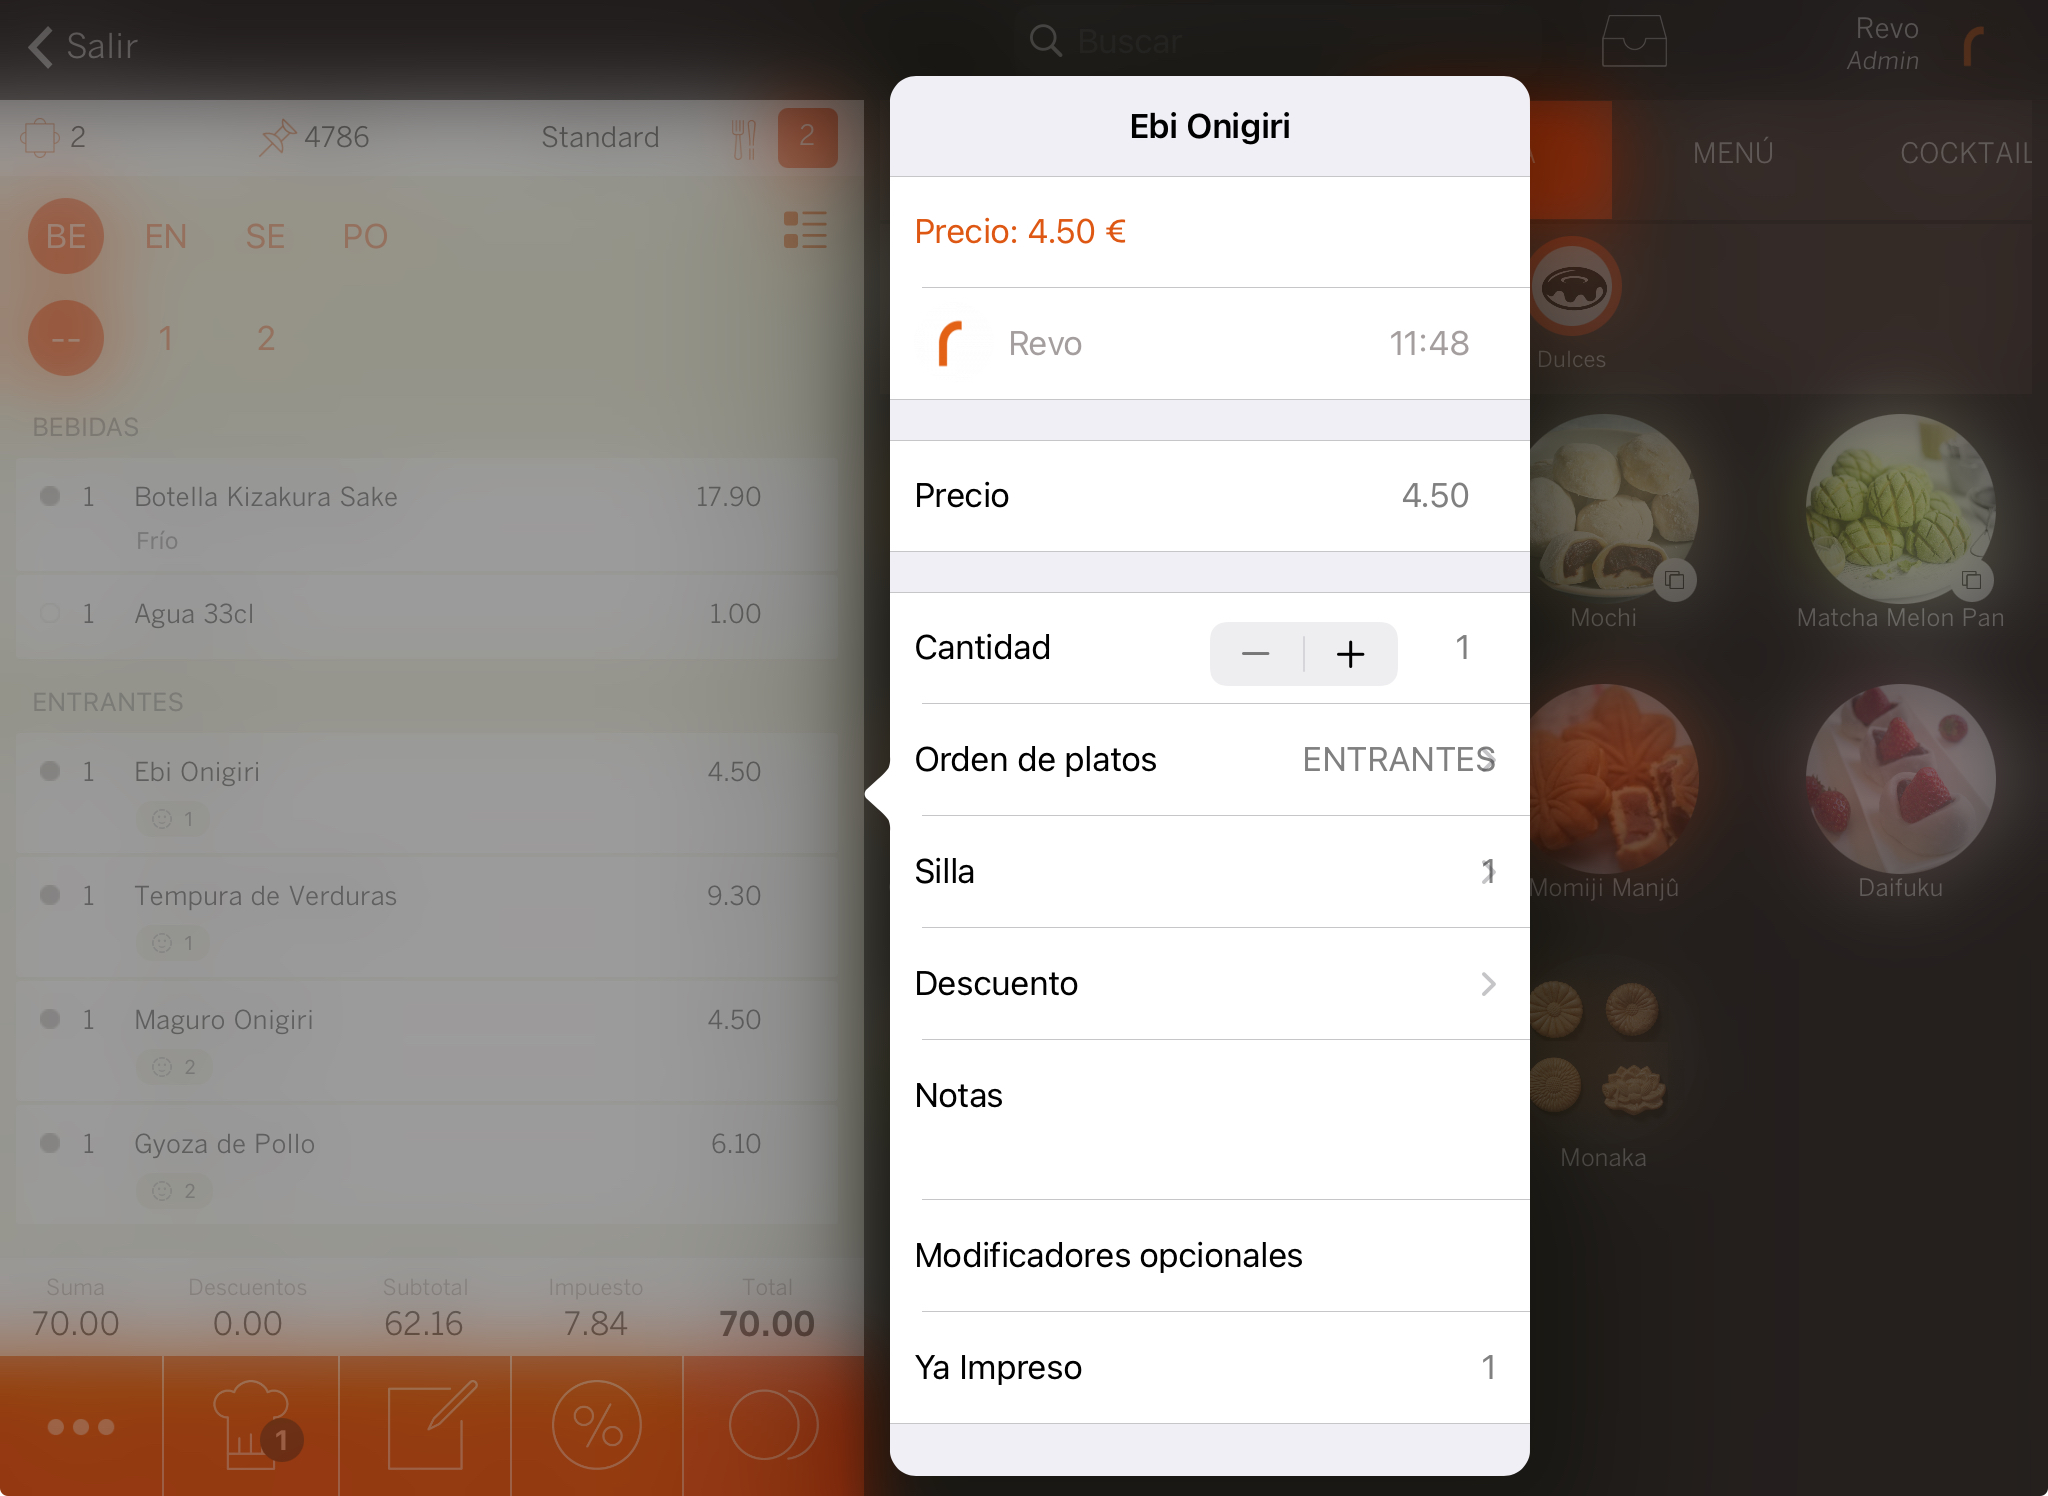
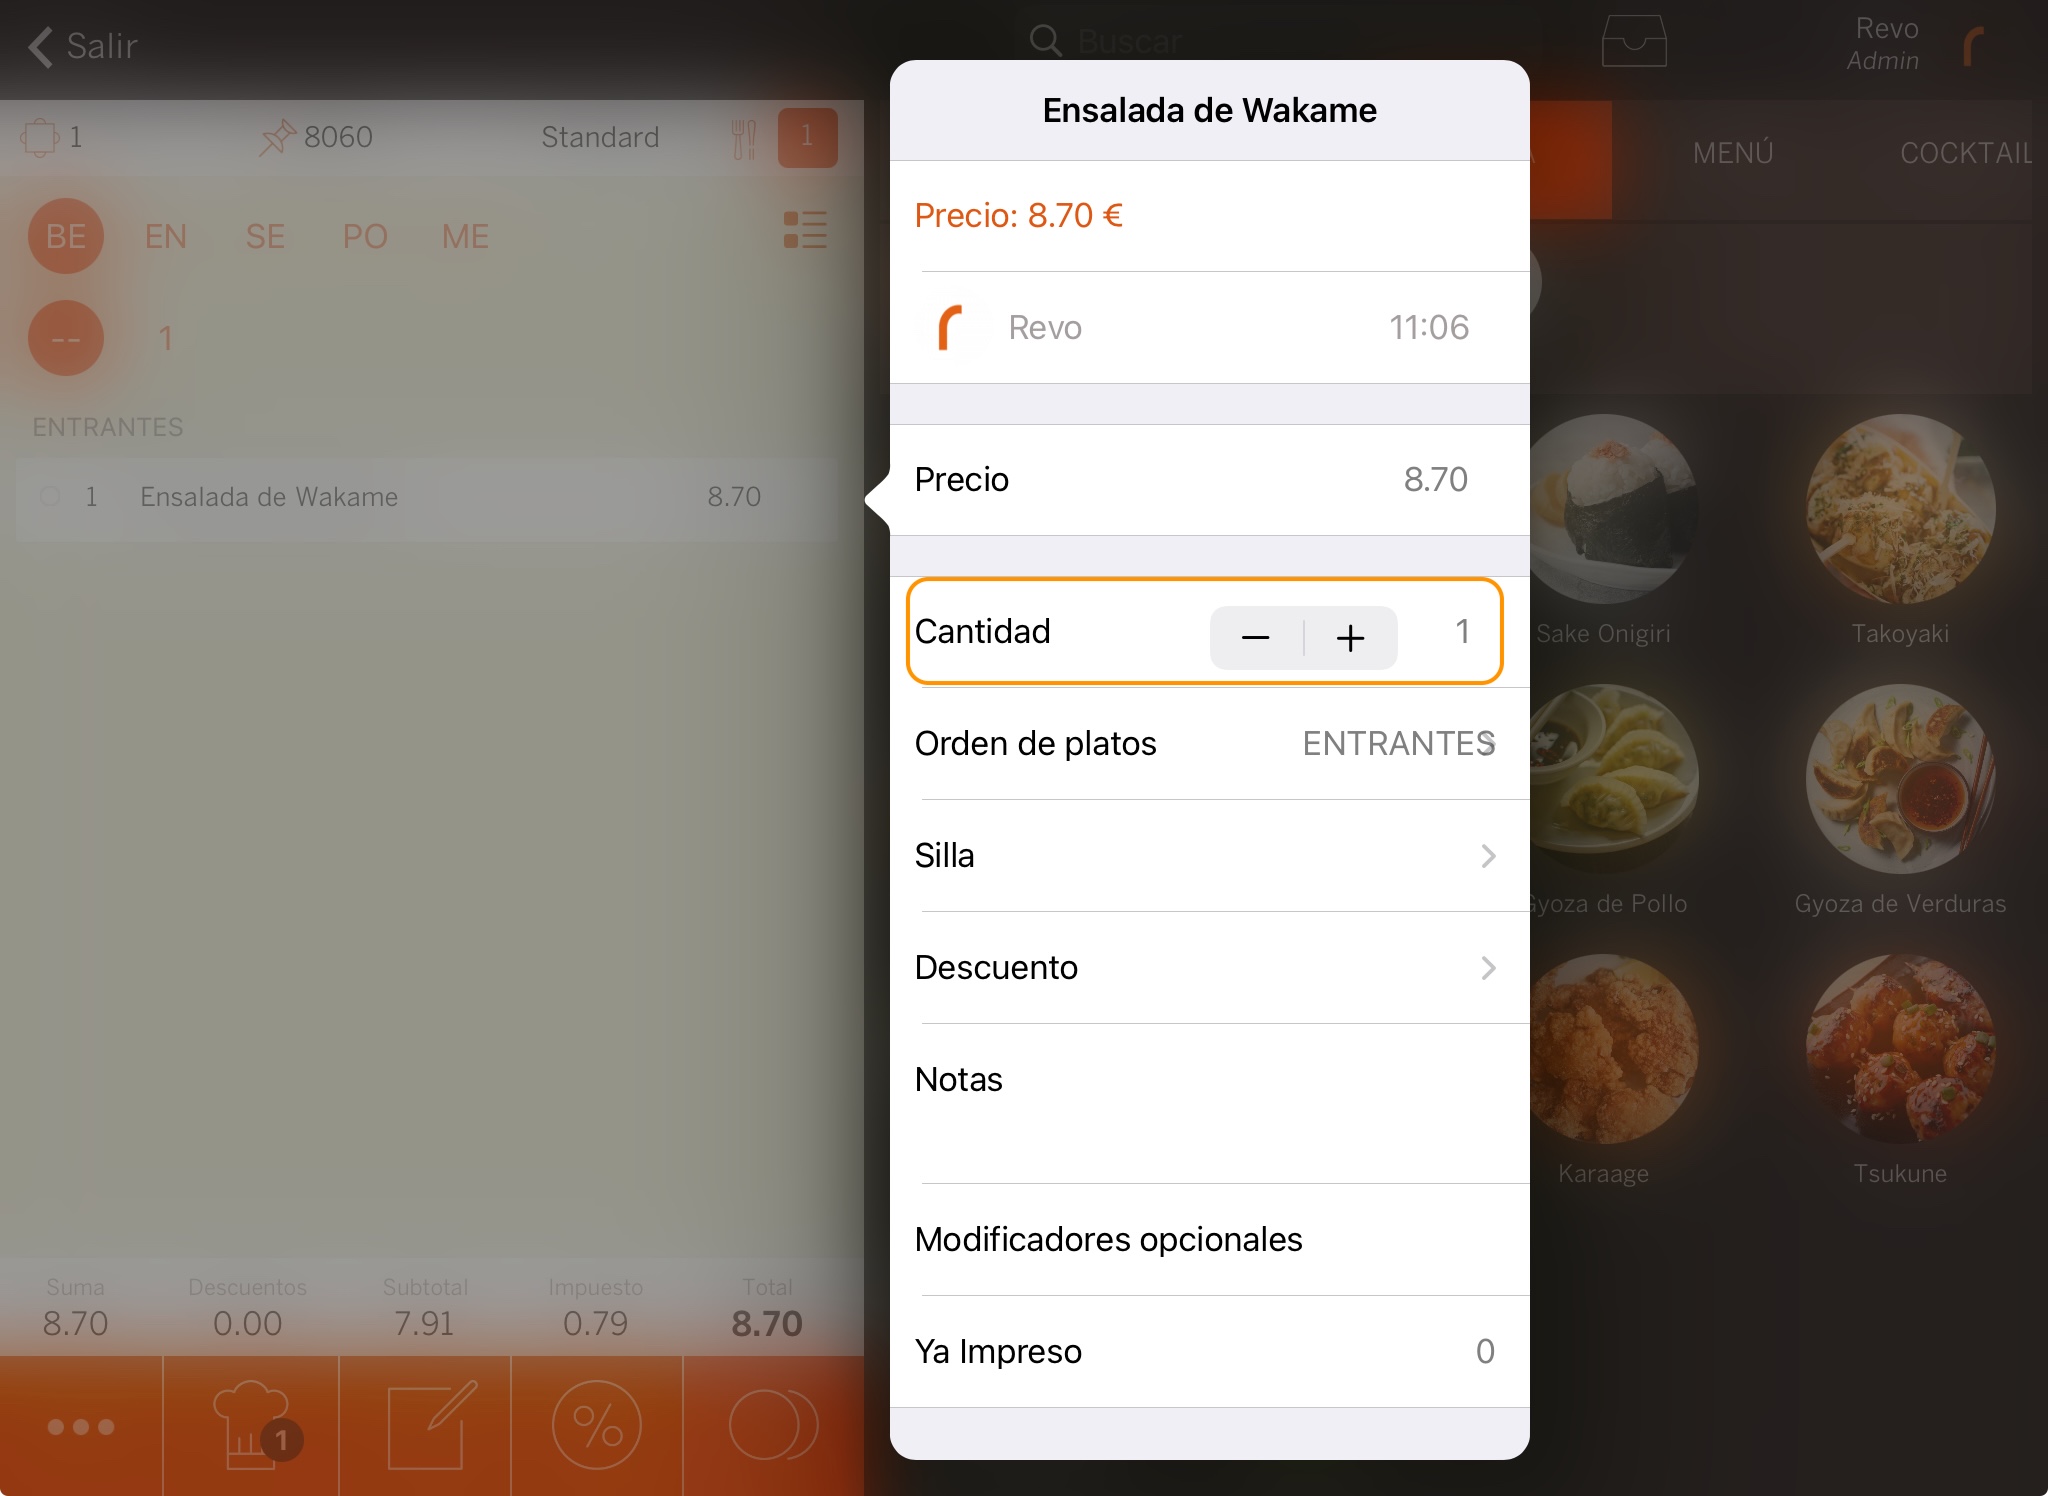
Here, the added products are shown. You can perform the following actions when selecting them:
-
Price: Modify the rates if needed.
-
Employee and time: Shows which employee added the product and the time.
-
Price: Displays the price. If you have the privilege, you can modify it.
-
Quantity: Increase or decrease the product quantity.
AVAILABLE IN REVO XEF ADVANCE
-
Half portion: Add a half portion of a product.
1. Add a product, select it and tap on Quantity.
2. Enter the portion and tap the . For example: 3.5 to indicate 3 and a half portions of salad.
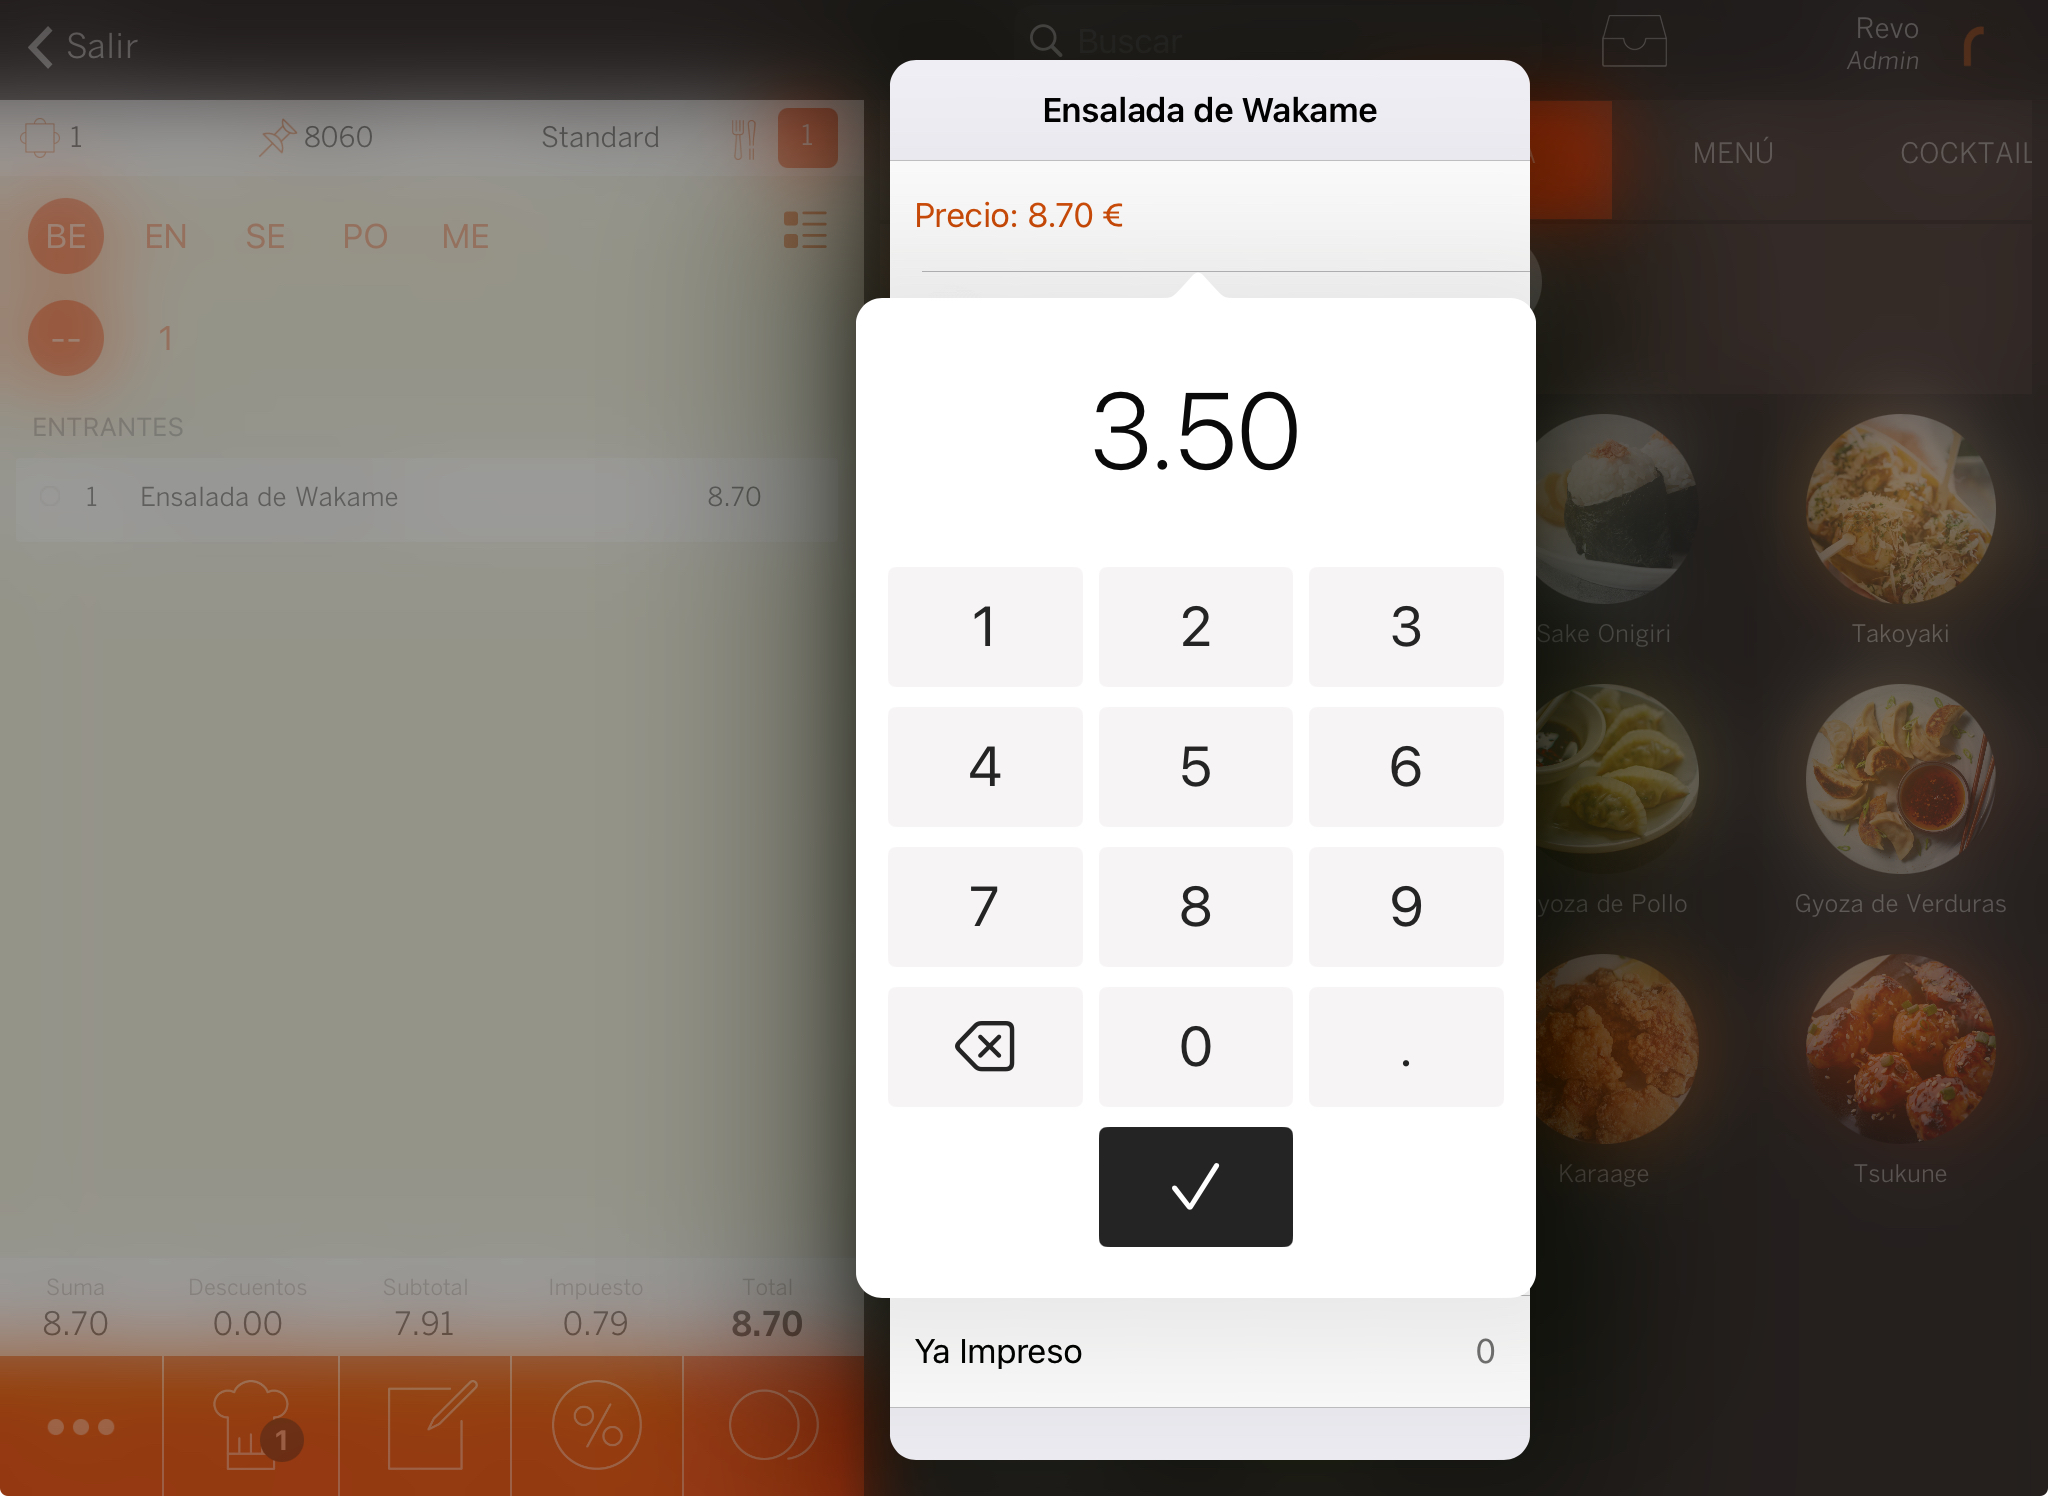
3. The product quantity will be updated.
IMPORTANT
- Payments by item are not allowed if there is a half portion.
-
-
Dish order: Change the dish order for the selected product.
-
Seat: Change the seat assignment.
-
Discount: Apply a discount.
-
Notes: Add comments or notes that will be printed.
-
Optional modifiers: Select optional modifiers.
-
Already printed: Shows how many times the item has been sent to the kitchen.
-
Separate: Separate products if you want to add specific notes or discounts.
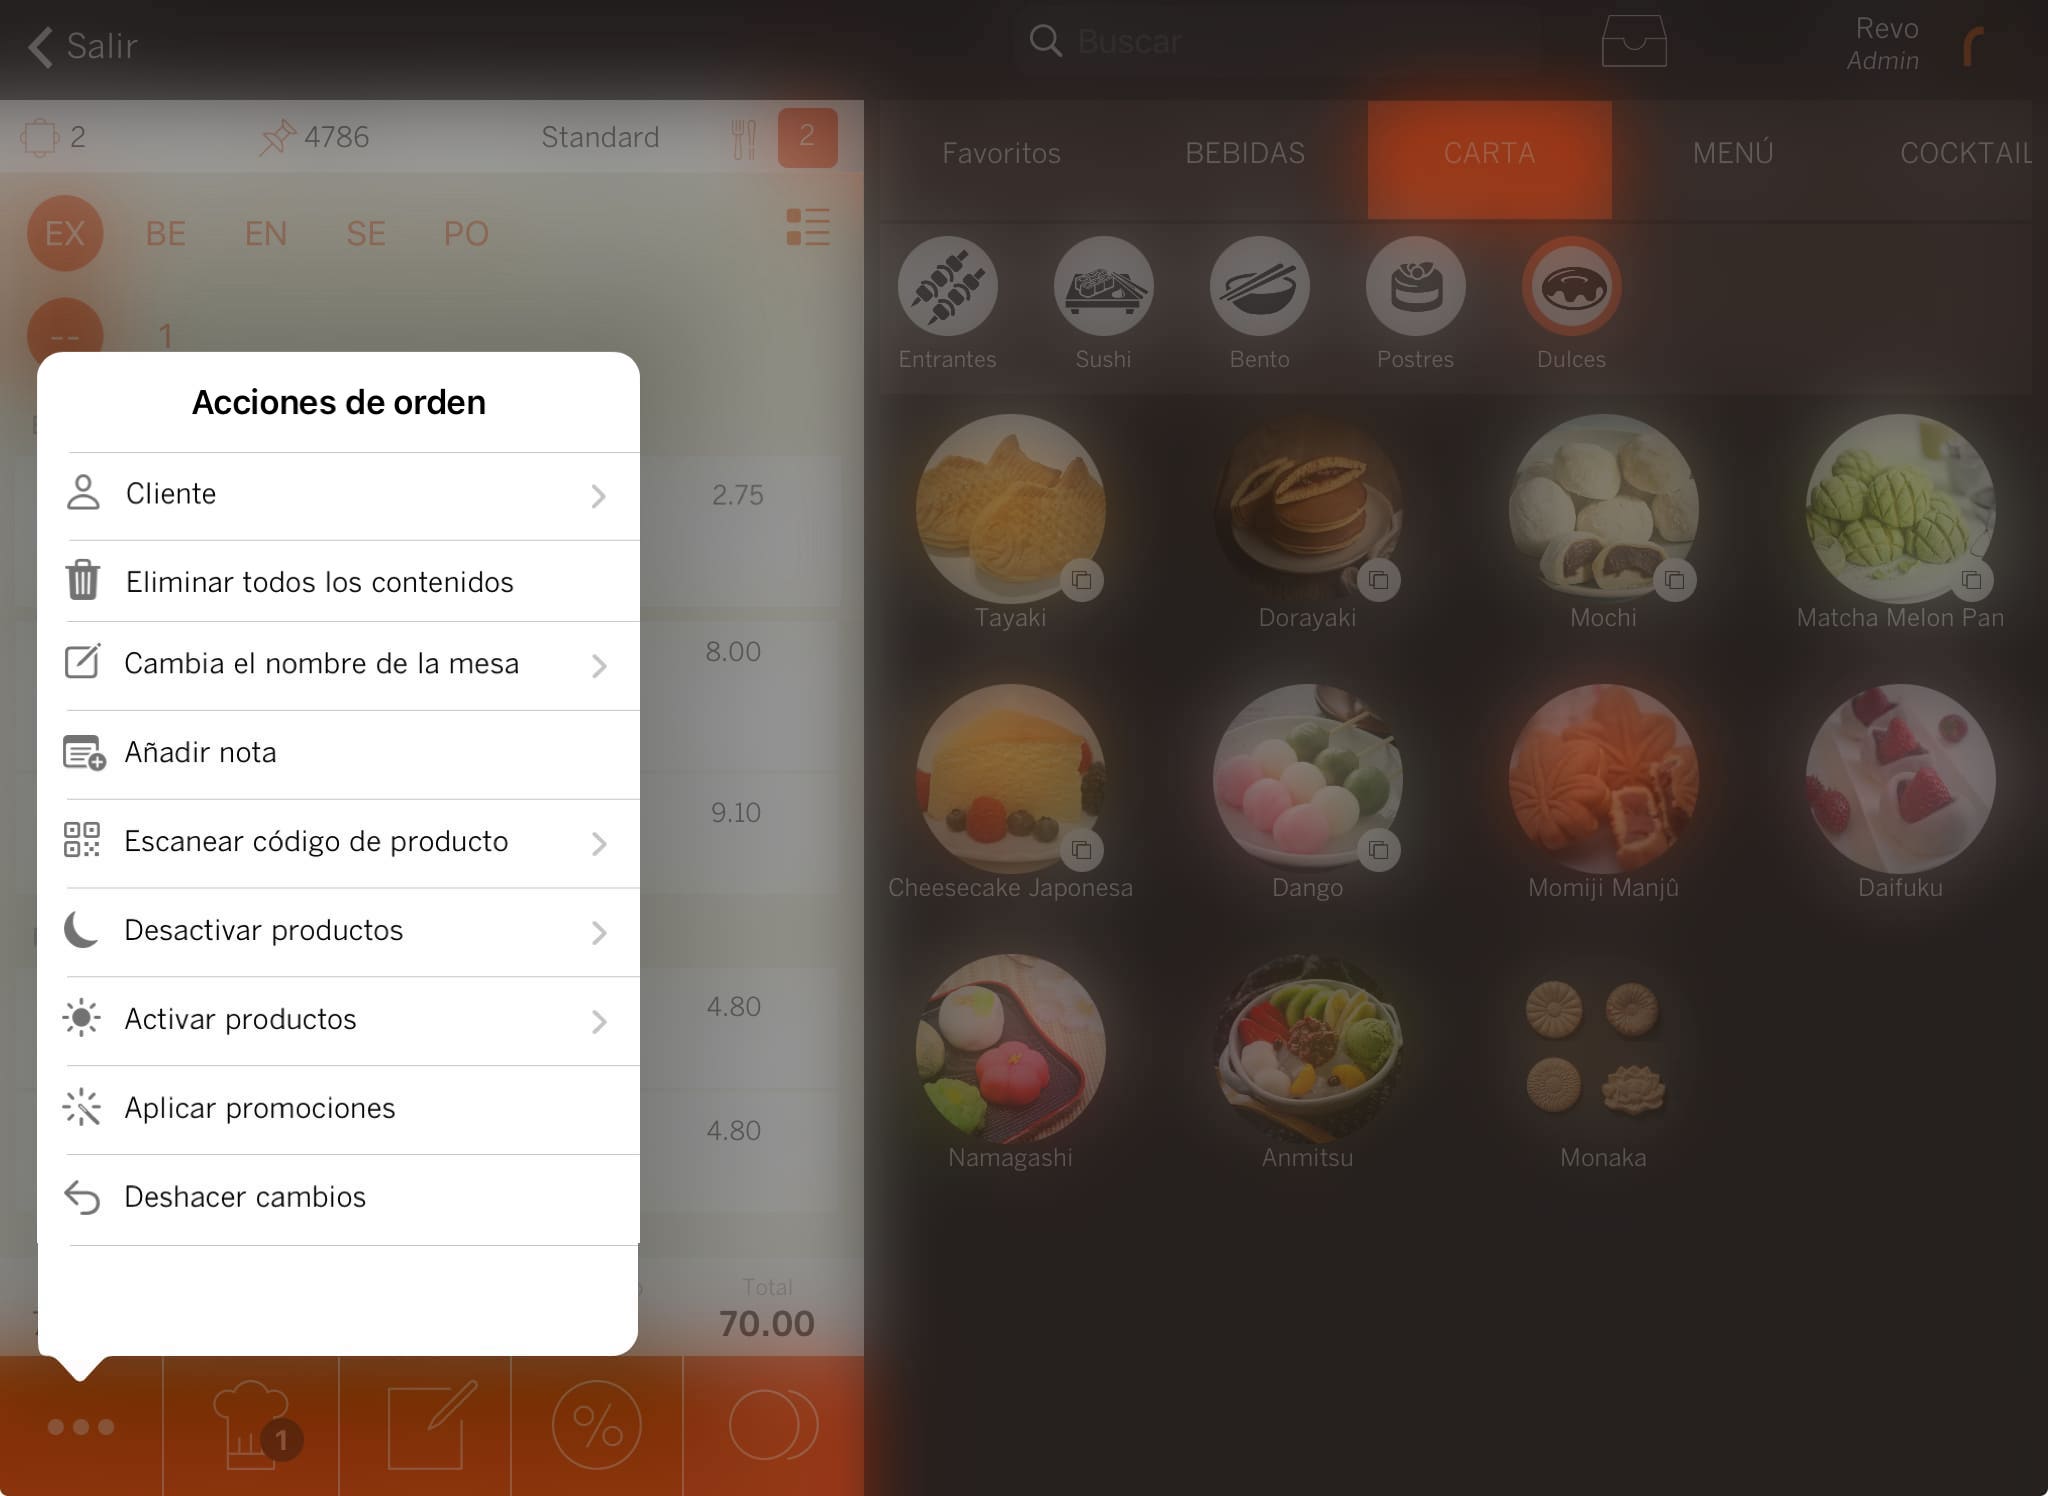
Main Order Actions
In the lower-left corner, you’ll see five important buttons:

From left to right:
-
Order actions: Access more actions.
-
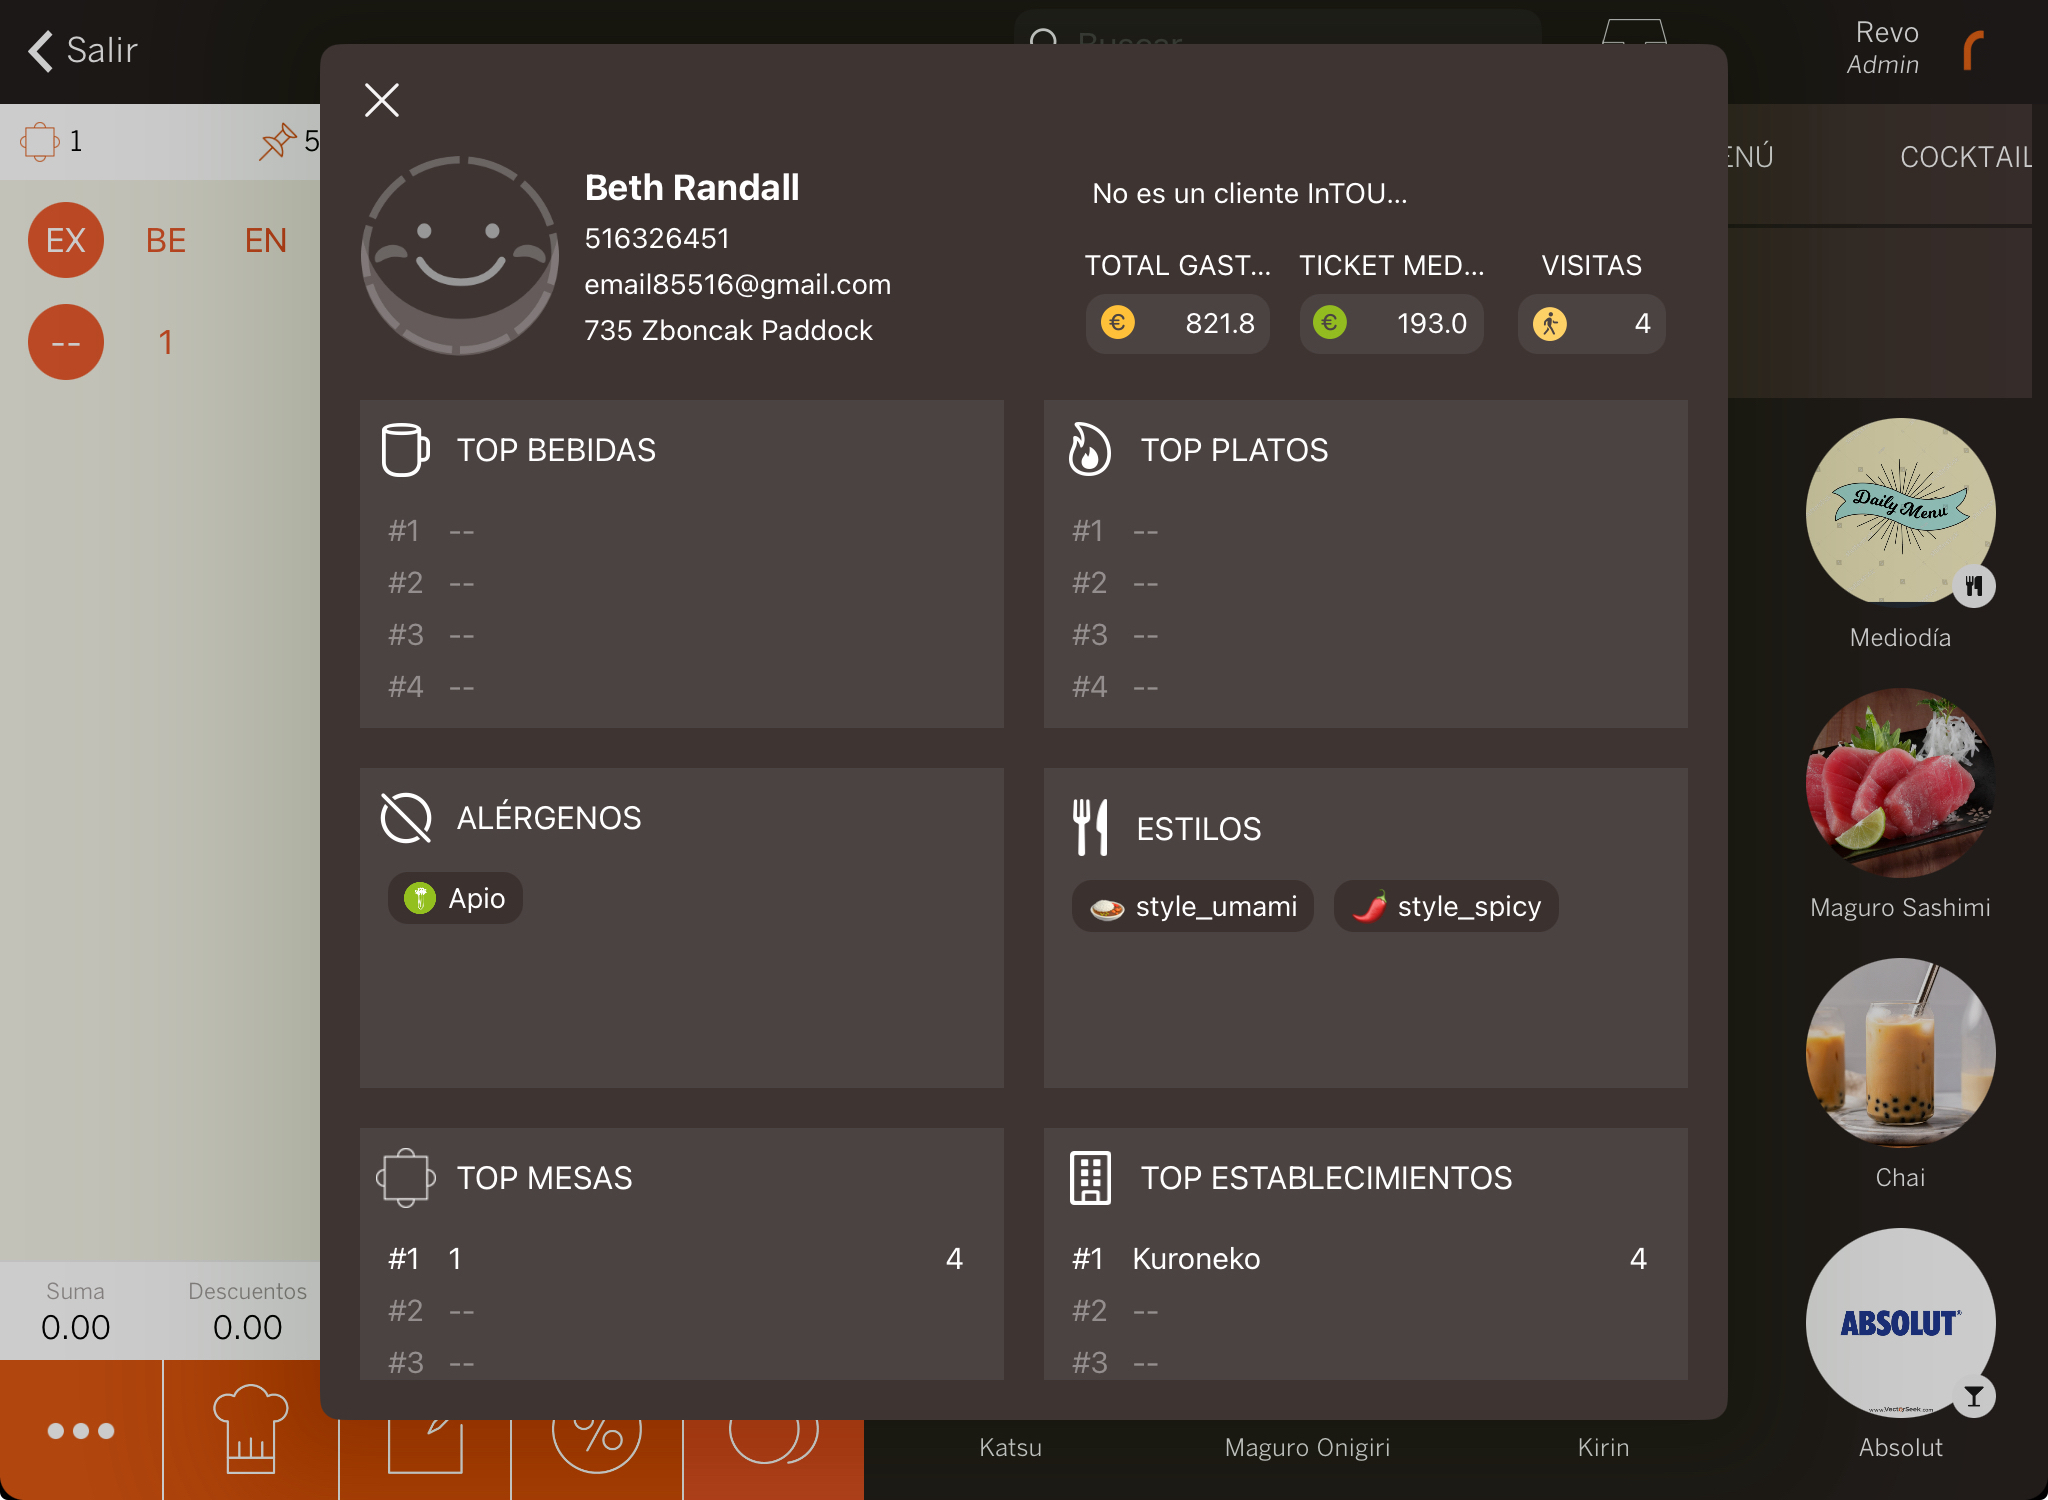
AVAILABLE IN REVO XEF ADVANCE Customer: Link a customer to the order. It will display general customer information, such as most purchased products, allergens, etc.
-
Delete all items: Removes all the products from the order.
-
Change the table name: Change the table name.
-
Add a note: Add a note to the order.
-
Scan product code: Scan QR codes of products.
-
Deactivate products: Temporarily or permanently deactivate products. For example, if you’re out of stock.
-
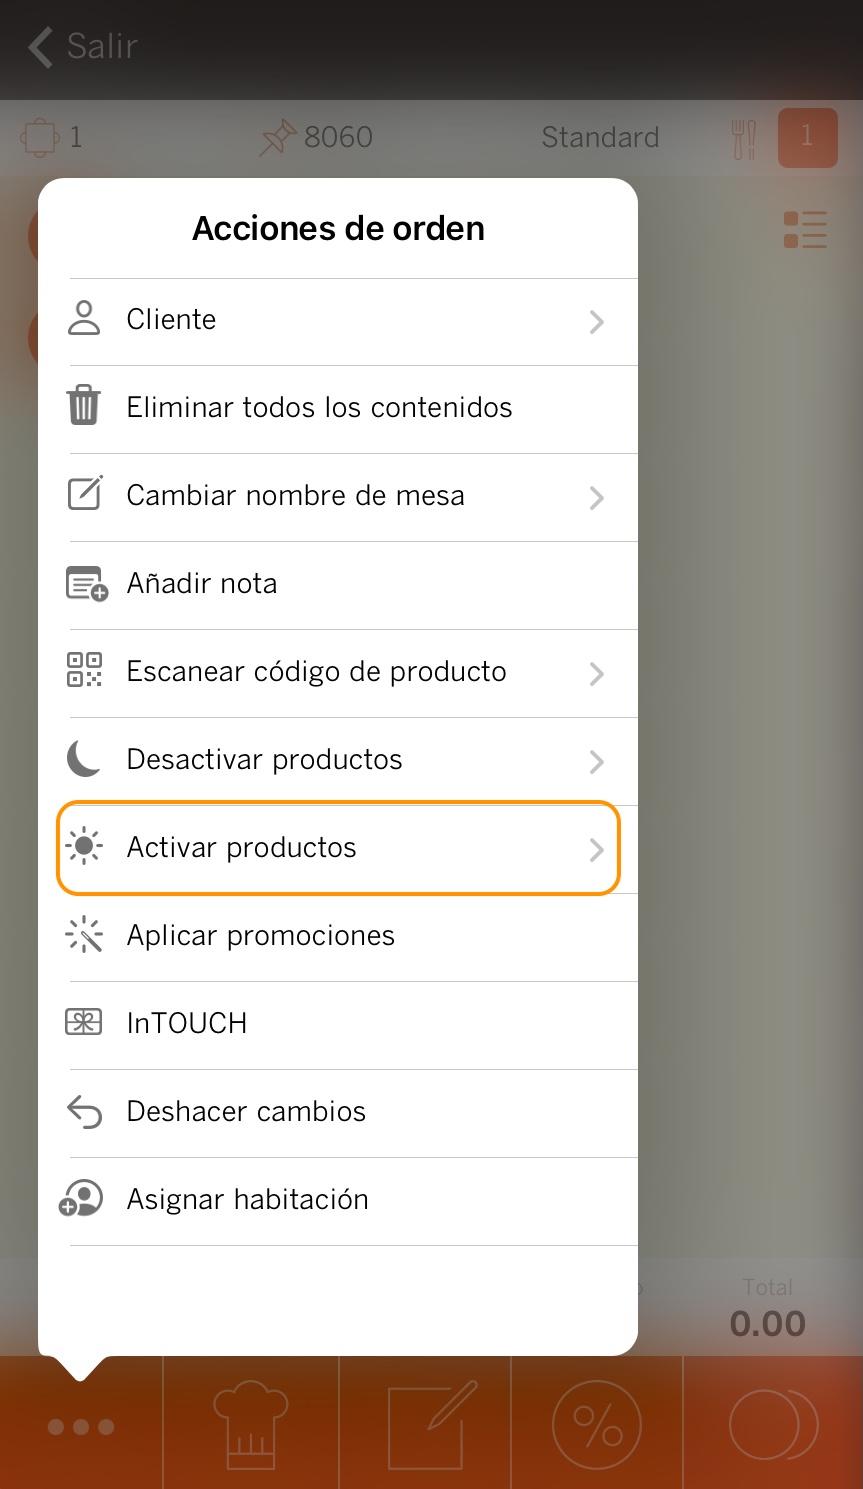
AVAILABLE IN REVO XEF ADVANCE Activate products: Activate products in XEF or SOLO.
You must have the permission enabled to use this feature.
-
Go to the order actions and click on Activate product.
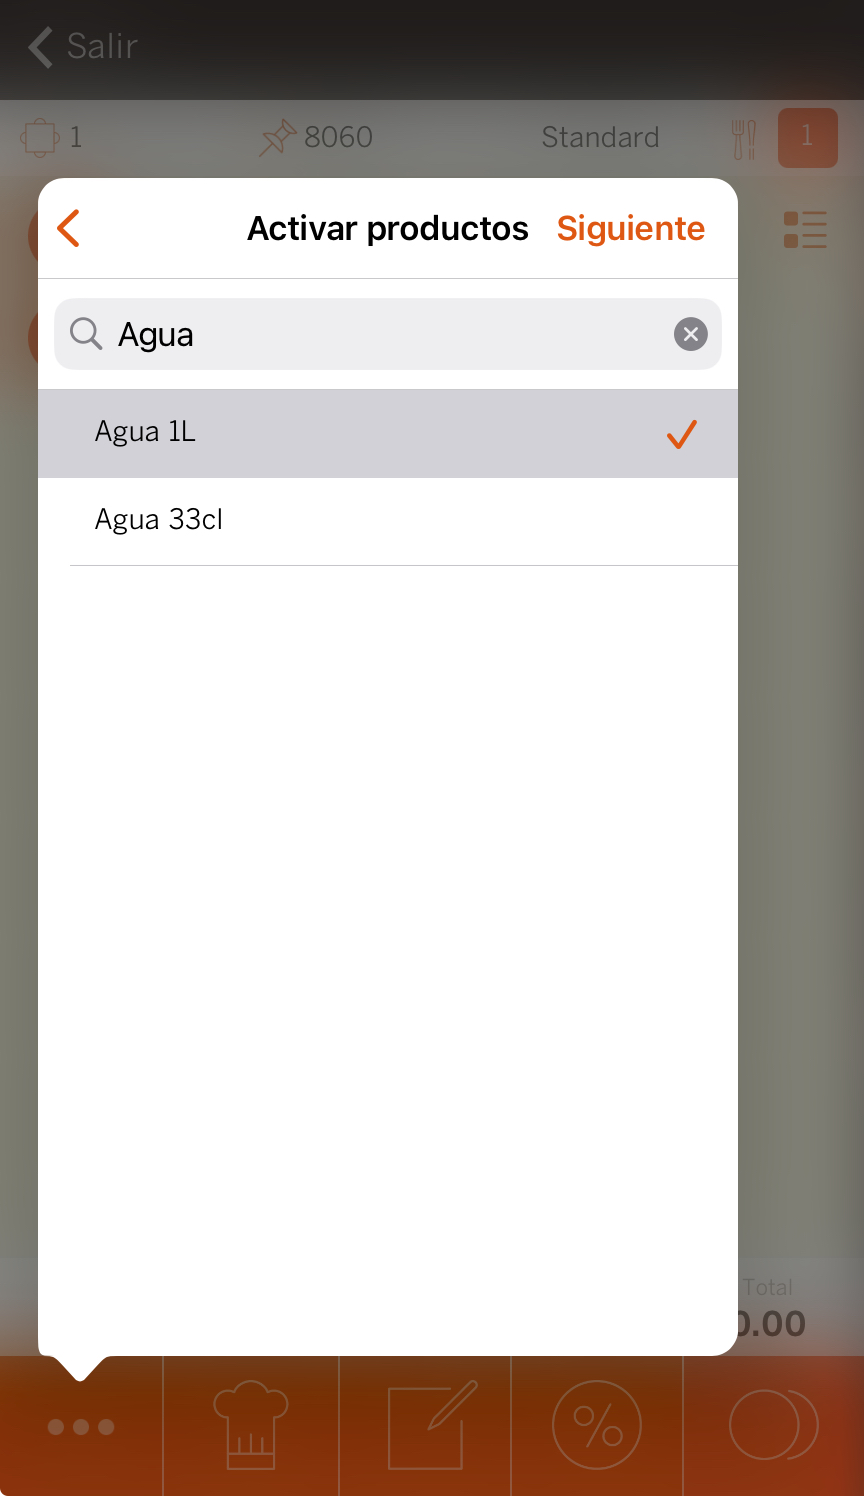
-
Select the product you want to activate and click Next.
-
Activate it if you want the product to also appear in menus and containers. Choose where you want to activate it and click Activate.
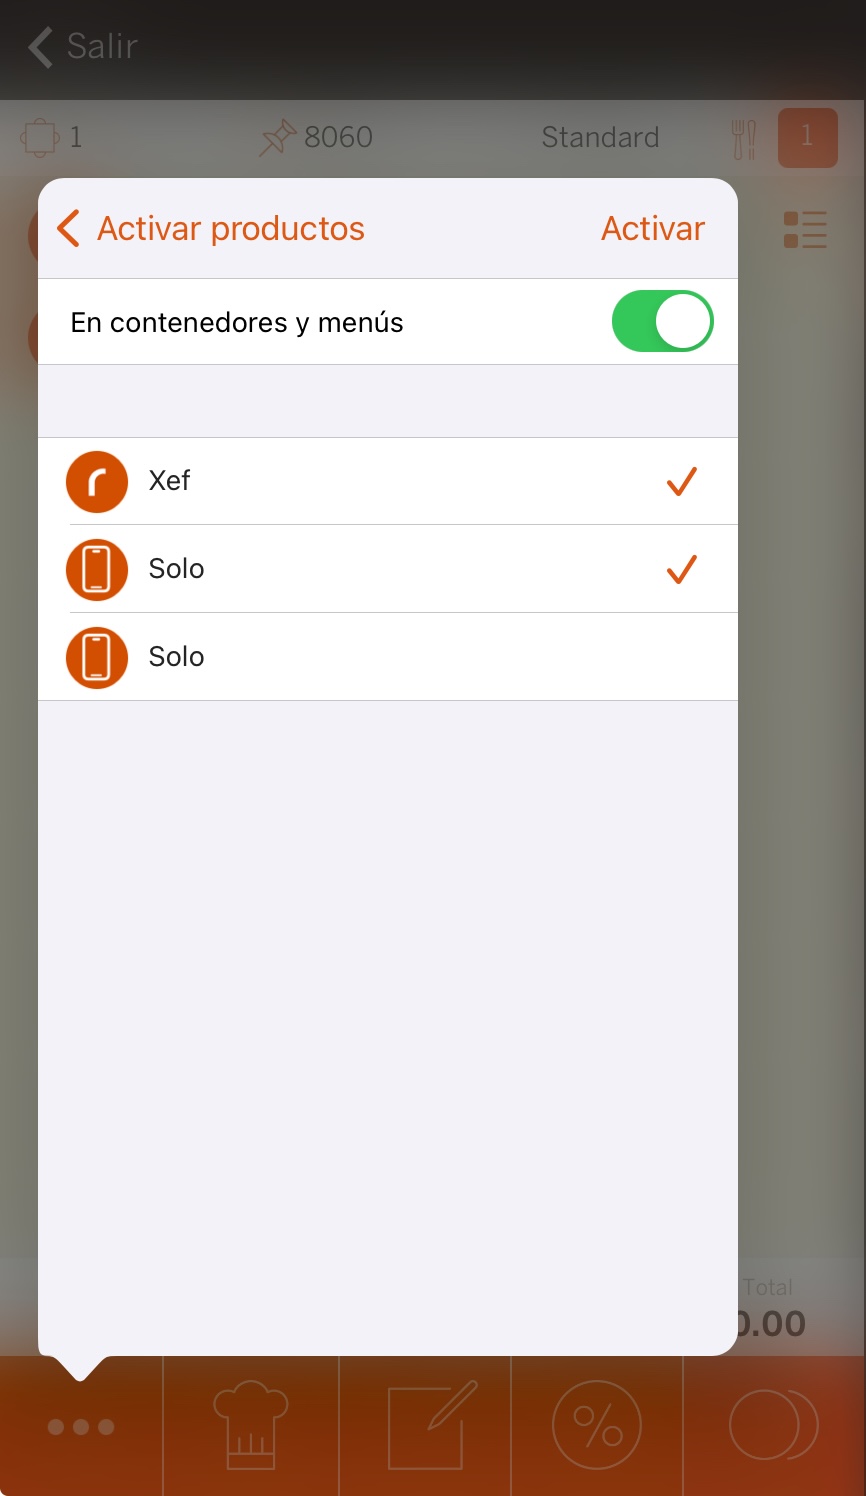
If you have a profile on the device where the product is deactivated, it will not appear.
-
-
Apply promotions: Apply active promotions.
-
Undo changes: Undo any changes made.
-
-
Print: Press this button to send the products to the corresponding printers (kitchen, bar, KDS, etc.). The black number indicates the products pending to be printed. If there are different dish orders, the app will ask if you want to print them individually or all at once. This can be configured in the back-office under Order Configuration.
-
Kitchen notes: Select pre-set notes or create a note on the spot and choose which printer to print it on. More information here.
-
Discounts: Apply pre-set discounts to the entire order or create a custom discount. Learn how to create them here.
You must have the discount permission enabled to use this feature.
-
Cash: Tap this button to open the payment screen and close the order.
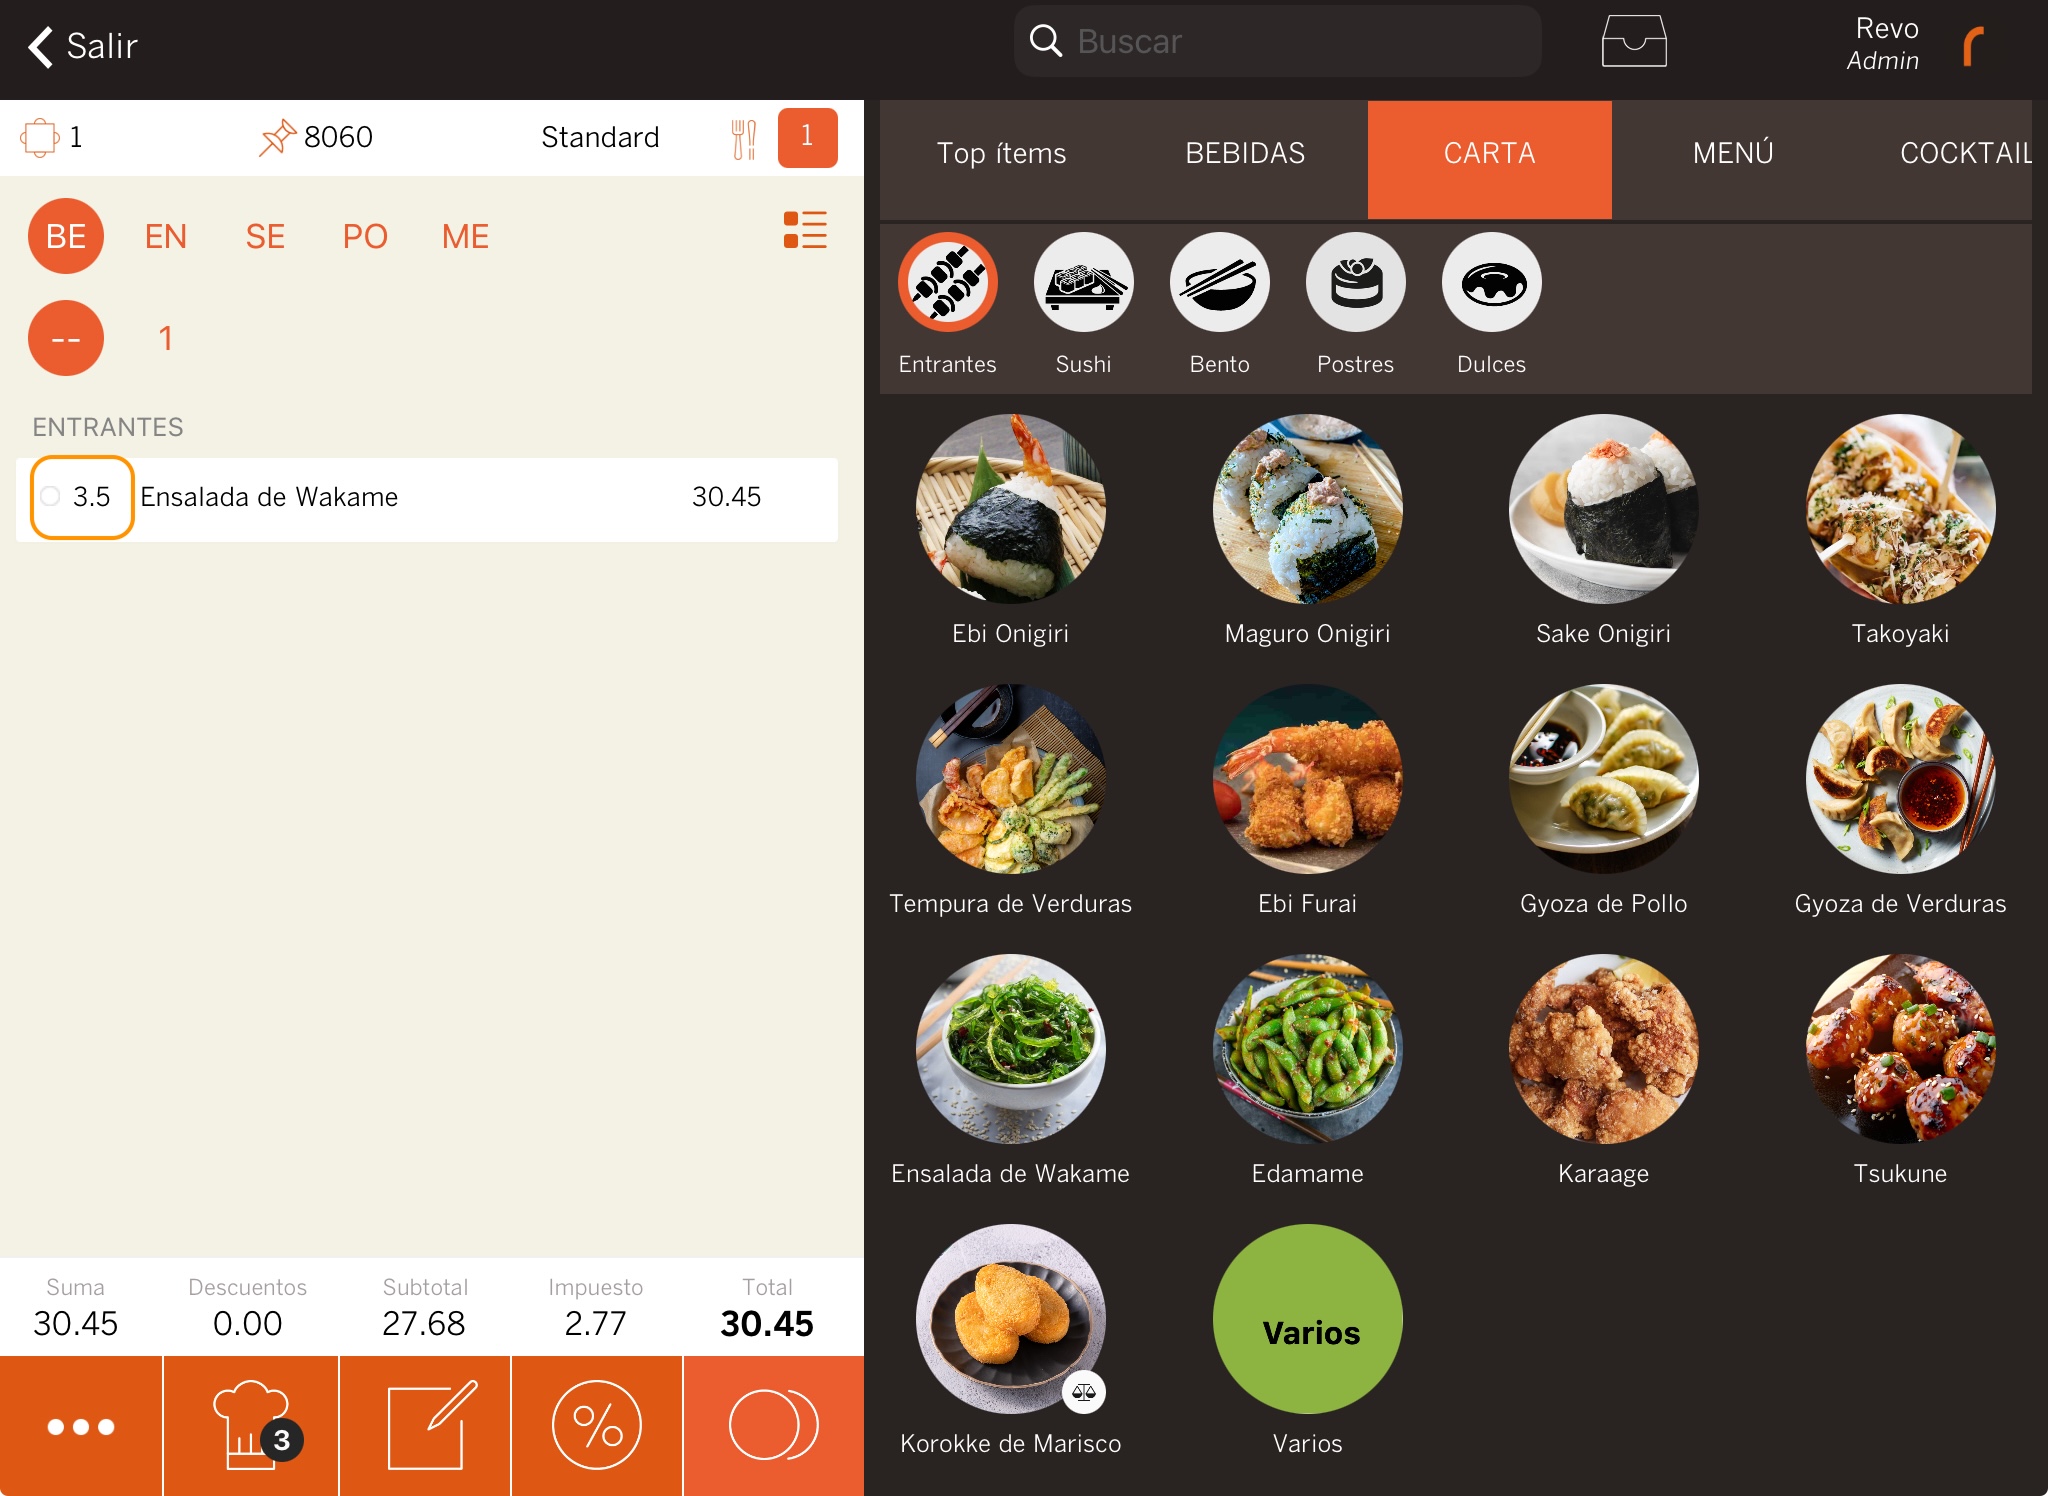
Groups / Categories
Revo XEF organises information into three levels: groups, categories, and products. By tapping on a group, you navigate through its categories, and when selecting a category, its products are displayed.
In the example, the group is "Menu", the category is "Sweets", and all the products in this category are displayed.
-
Top items: The top items automatically display the 16 best-selling products and are regularly updated.
You can disable the top items or show favourites in the app preferences.
Products
When selecting a category, you’ll see its products, which can have different types:
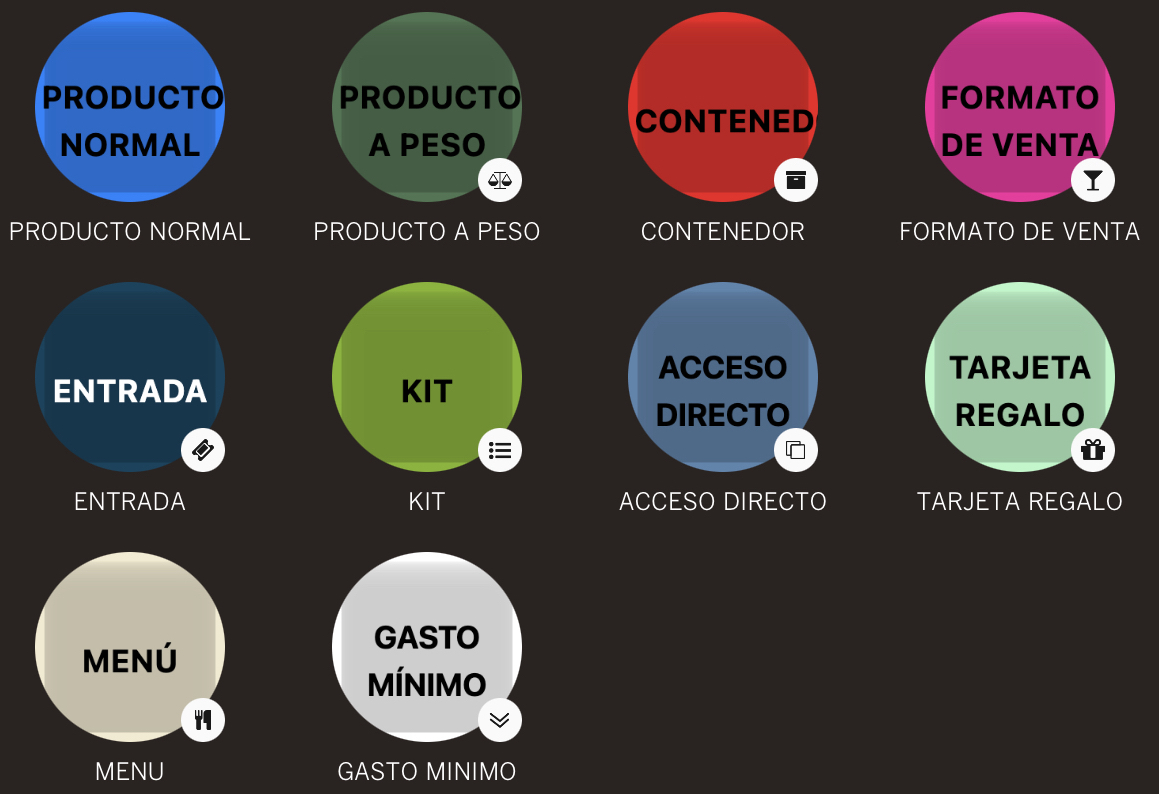
- Standard products: Standard product type.
- Weight: If your business sells products by weight, they can be connected to the scales to automatically calculate the exact weight and price.
- Containers: These are folders used to display similar products. For example, if you have many juices, they could be organised into a container under the "Drinks" group and "Soft Drinks" category, with a container called "Juices" to group all the varieties like orange, pineapple, peach, strawberry, etc.
- Sales format: Products sold in different formats. For example, a wine that is sold by the bottle and by the glass.
- Tickets: Create tickets for special events or if your business needs to sell entry tickets.
- Kits: These pre-select all the products that make up a set and automatically add them to the order. For example, a tasting menu.
- Shortcut: Create a shortcut to products from other categories, avoiding duplication.
- Gift cards: Another product type you can use is gift cards, allowing you to reward loyal customers or manage prepaid amounts efficiently. You can also use this great feature if, for example, someone wants to gift an experience at your venue.
- Menus: Due to the complexity and large number of products a menu can contain, Revo XEF has created an ideal way to manage them.
- Minimum spend: Revo XEF has a product to ease the management of prepayments.
Actions on Products
In this section, you can perform two interesting actions on products:
-
Add quantity: Instead of tapping on the product, press and hold to bring up a screen where you can input the desired quantity. For example, if you want to add 6 soft drinks, press and hold, and select 6 from the list.
-
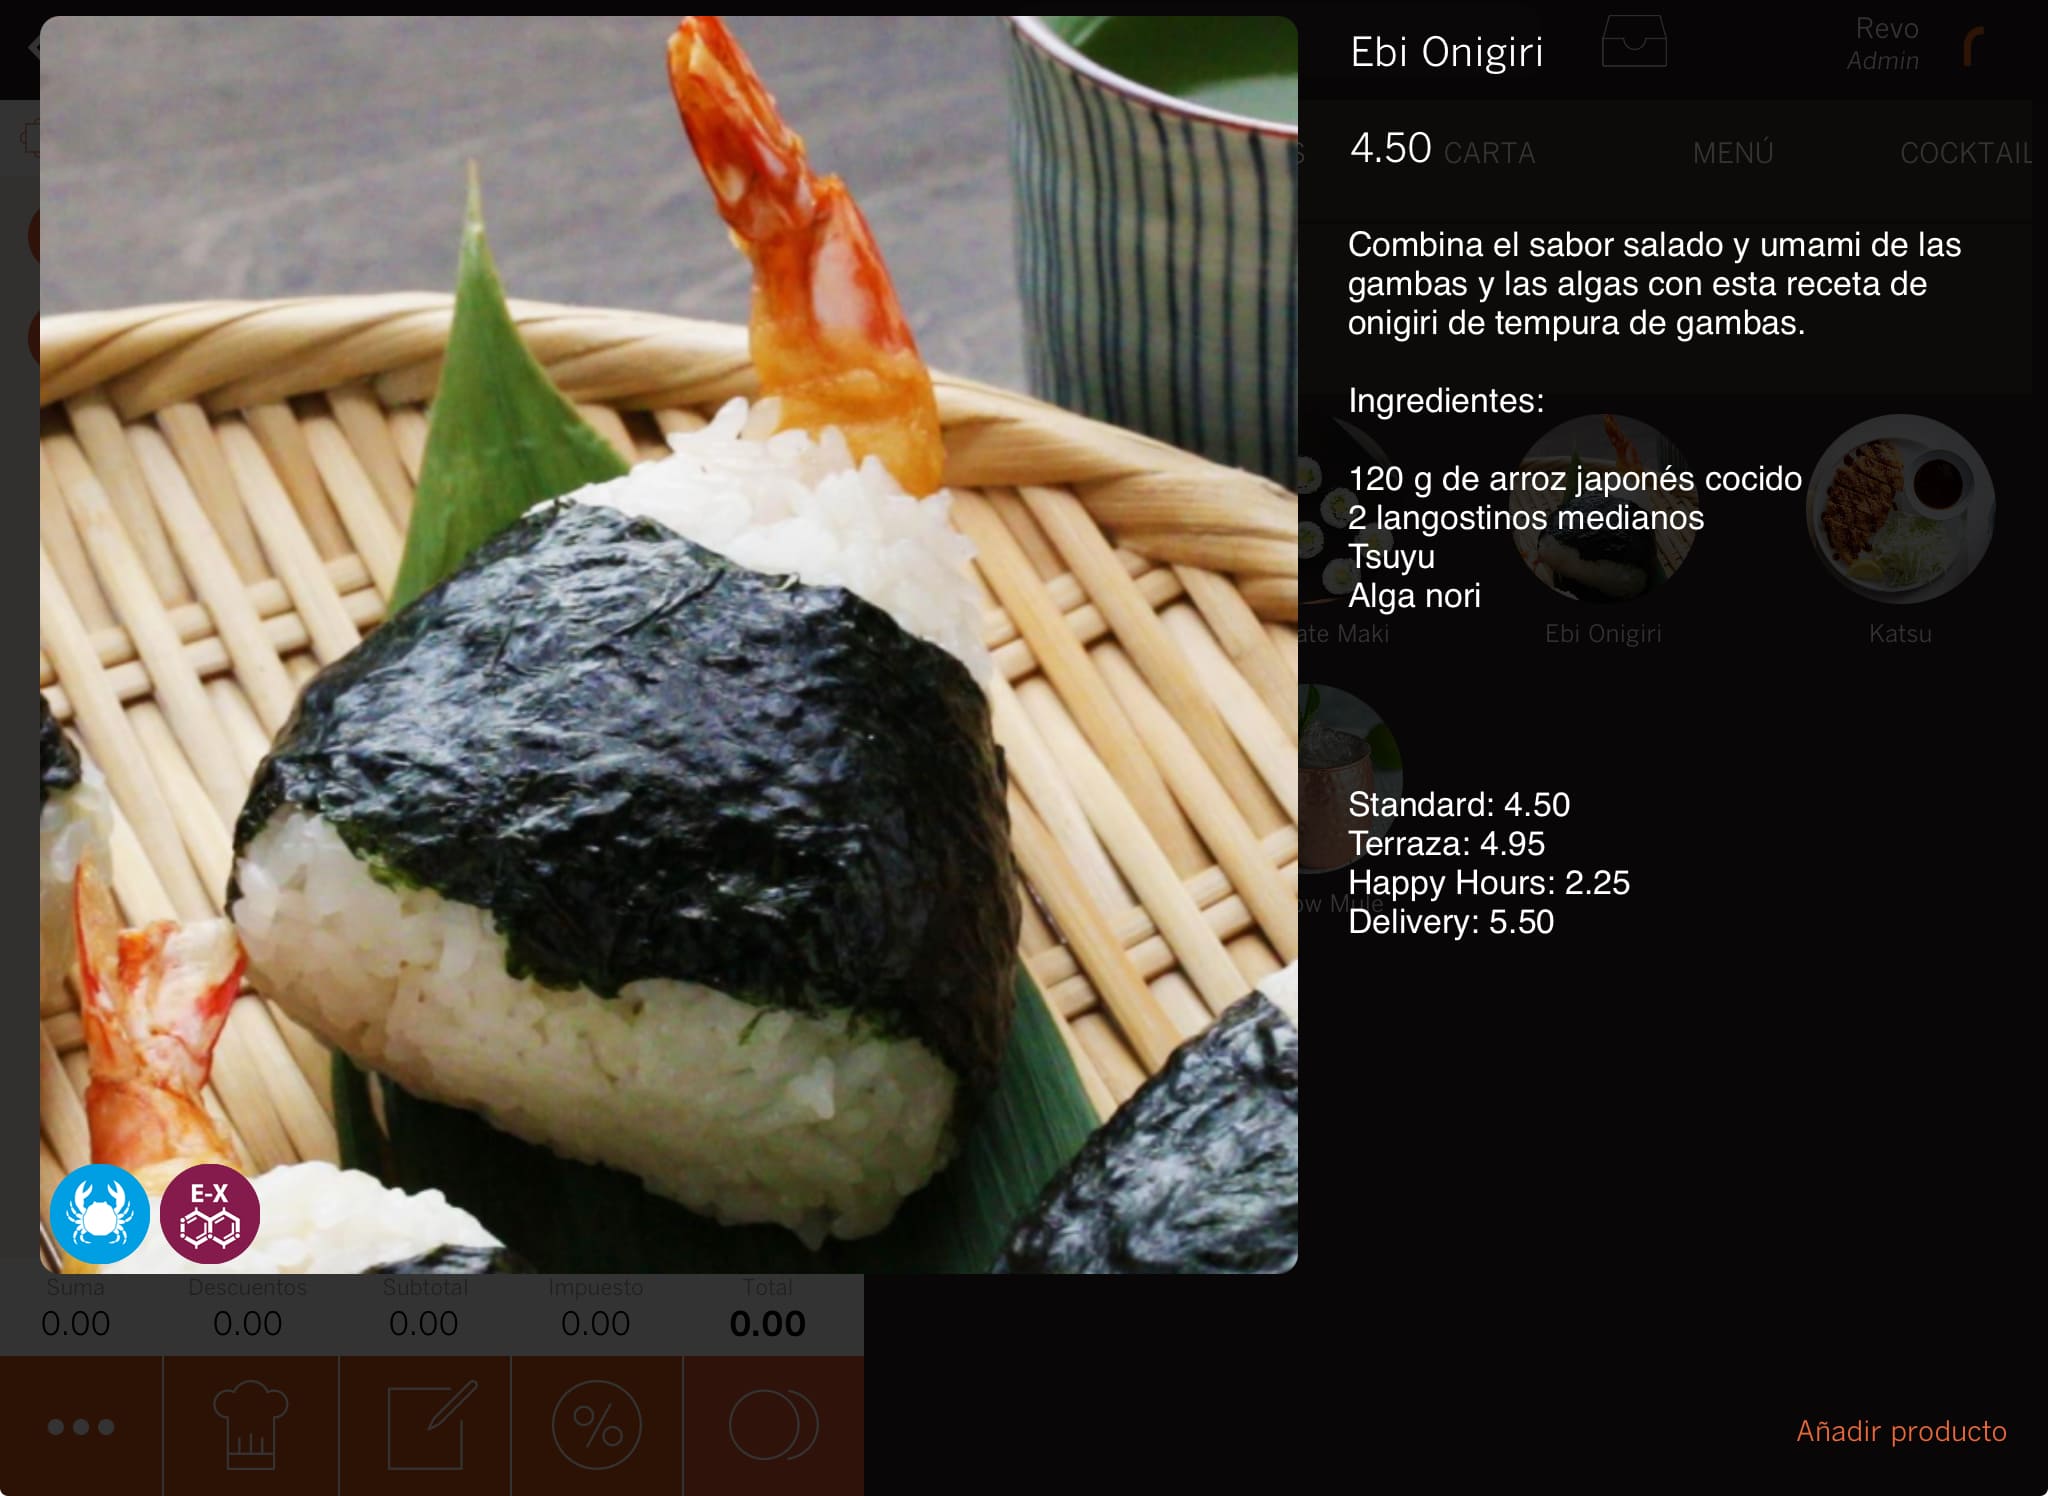
Product info screen: Tap with two fingers on the product to bring up the product preview screen. Here you can see information added in the product info field (back-office), price, rates, allergens, etc.