1. CONFIGURATION IN THE BACK-OFFICE 2. APPLYING AND REMOVING DISCOUNTS IN THE APP 3. PRACTICAL EXAMPLES
Discounts let you apply reductions on certain products in your order, on the whole order, or both.
1. CONFIGURATION IN THE BACK-OFFICE
1. Log in to the back-office of Revo XEF.
2. Go to Configuration / DISCOUNTS.
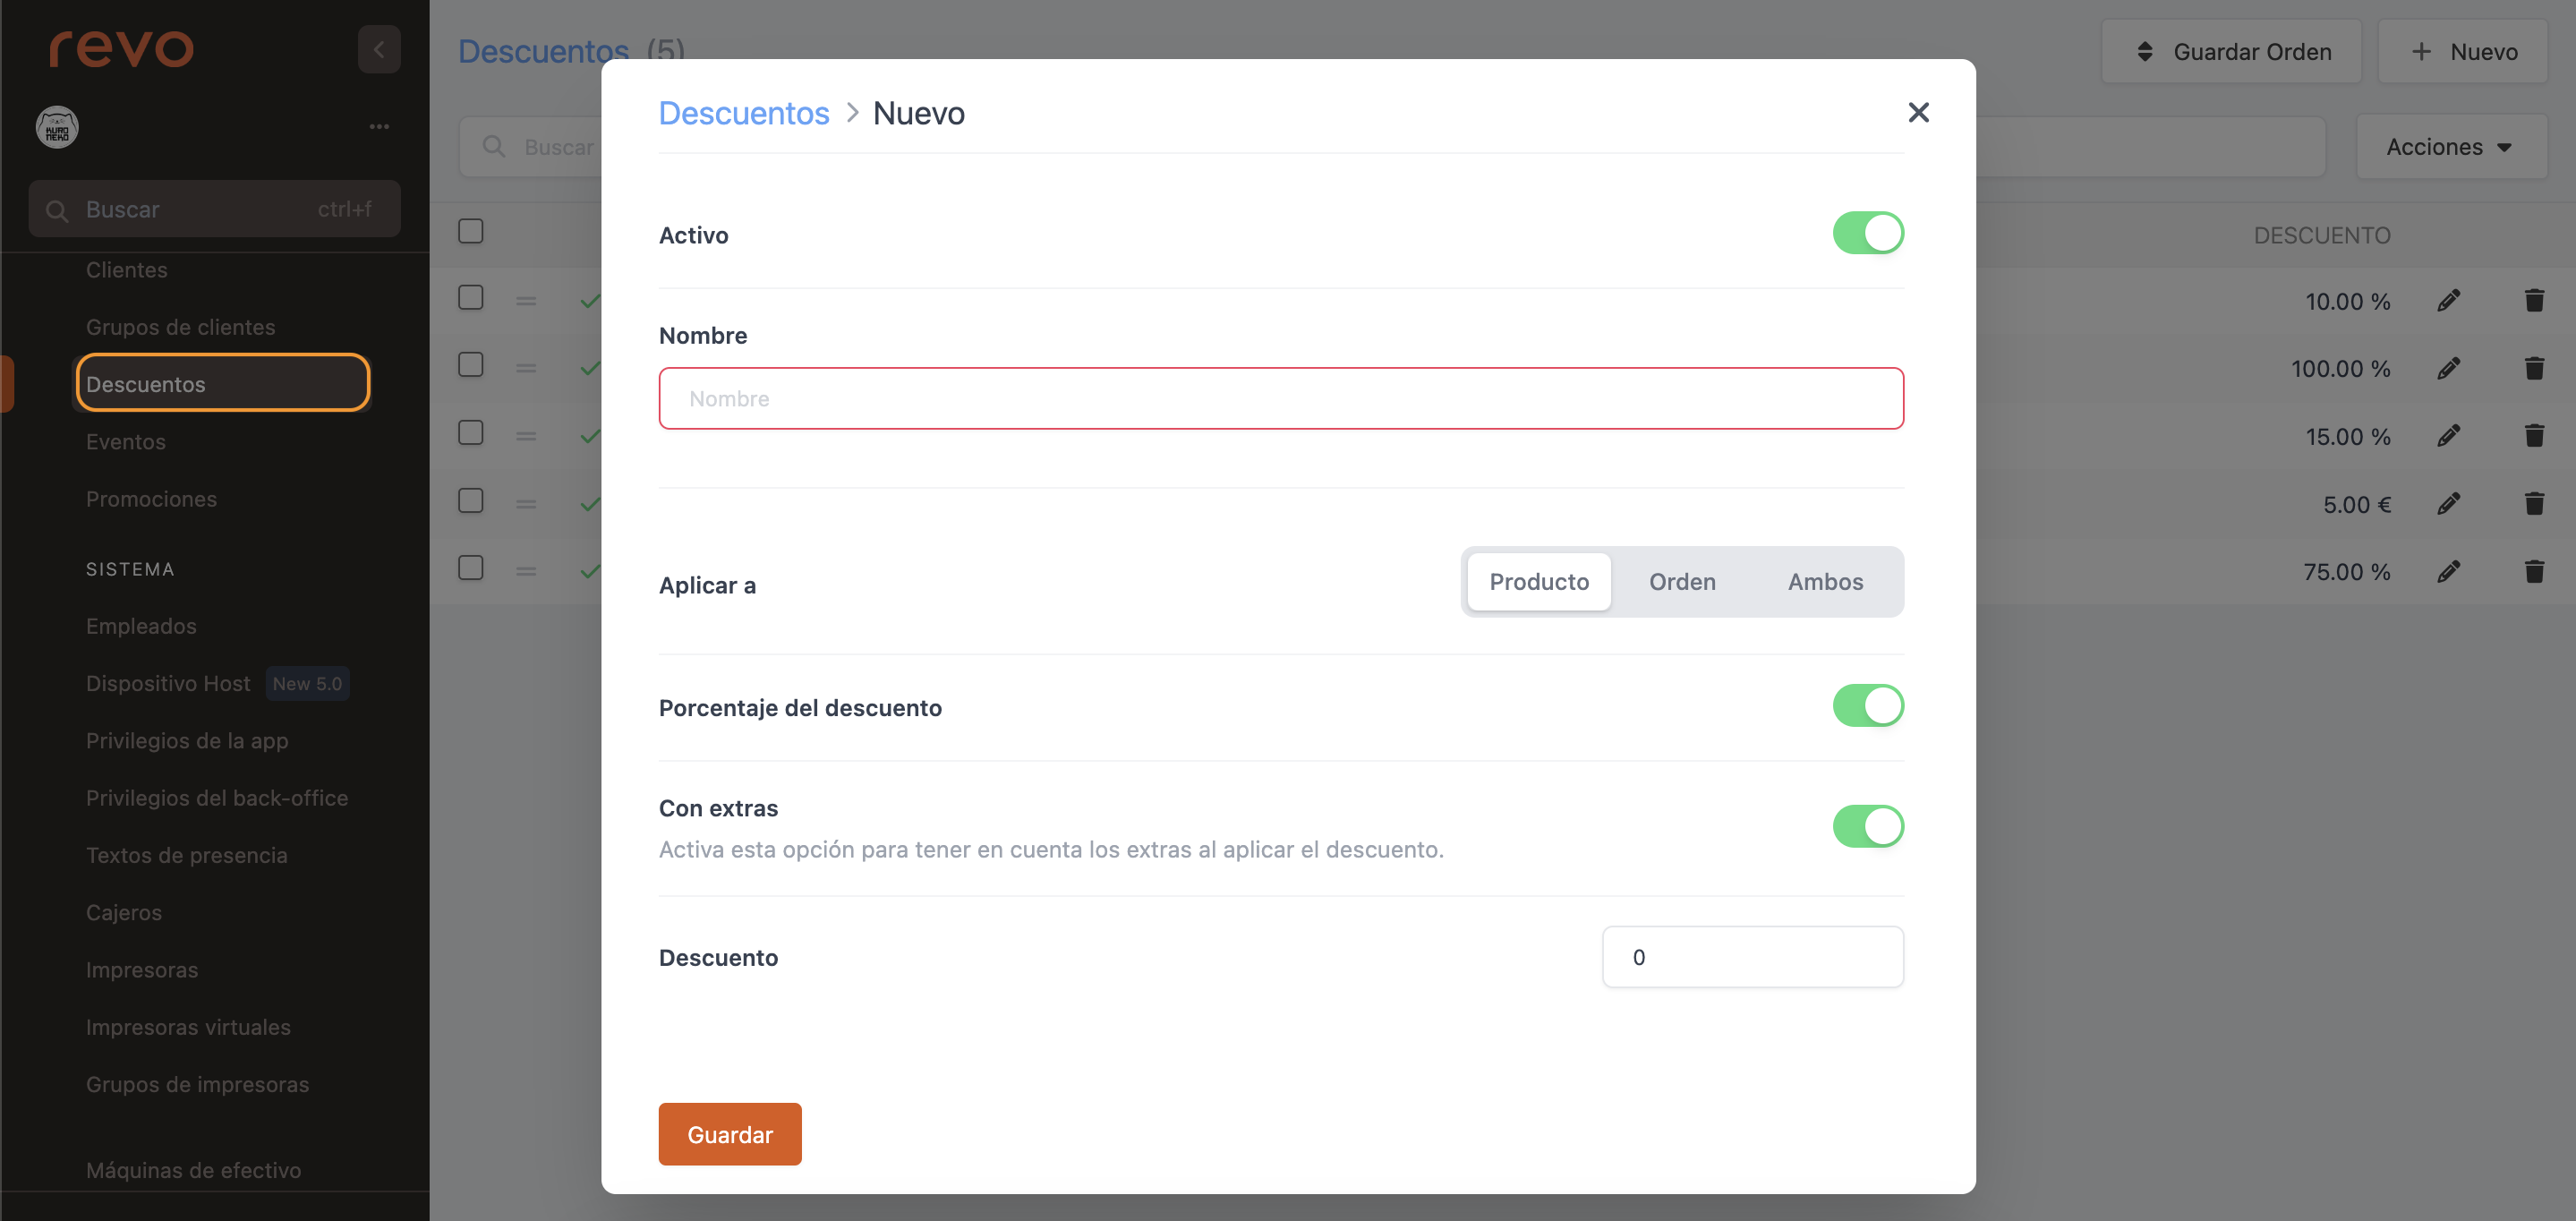
3. Click on +New and fill in the following information:
-
Active: Activate to make this discount available in the app.
-
Name: Give the discount a name. This name will appear in the app and on the receipt.
-
Apply to: You have 3 options:
- Product: The discount applies only to products.
- Order: The discount applies only to the total order.
-
Both: The discount applies to products and the order.
-
Discount percentage: Activate if you want the discount to be a percentage. If not, it will be an amount.
-
With extras: Activate if you want the discount to apply to product extras. Only valid for product discounts.
-
Discount: Indicate the value of the discount.
-
Fiscal discount: Can only be used for order and percentage discounts. If you activate it, the discount will become a fiscal discount. This means the remaining percentage up to 100% will be added as taxes. For example, if you set an 80% discount, the remaining 20% will be added as taxes.
4. Click on Save.
You can edit, delete if you no longer need it, or simply deactivate it to stop it appearing in the app temporarily.
2. APPLYING AND REMOVING DISCOUNTS IN THE APP
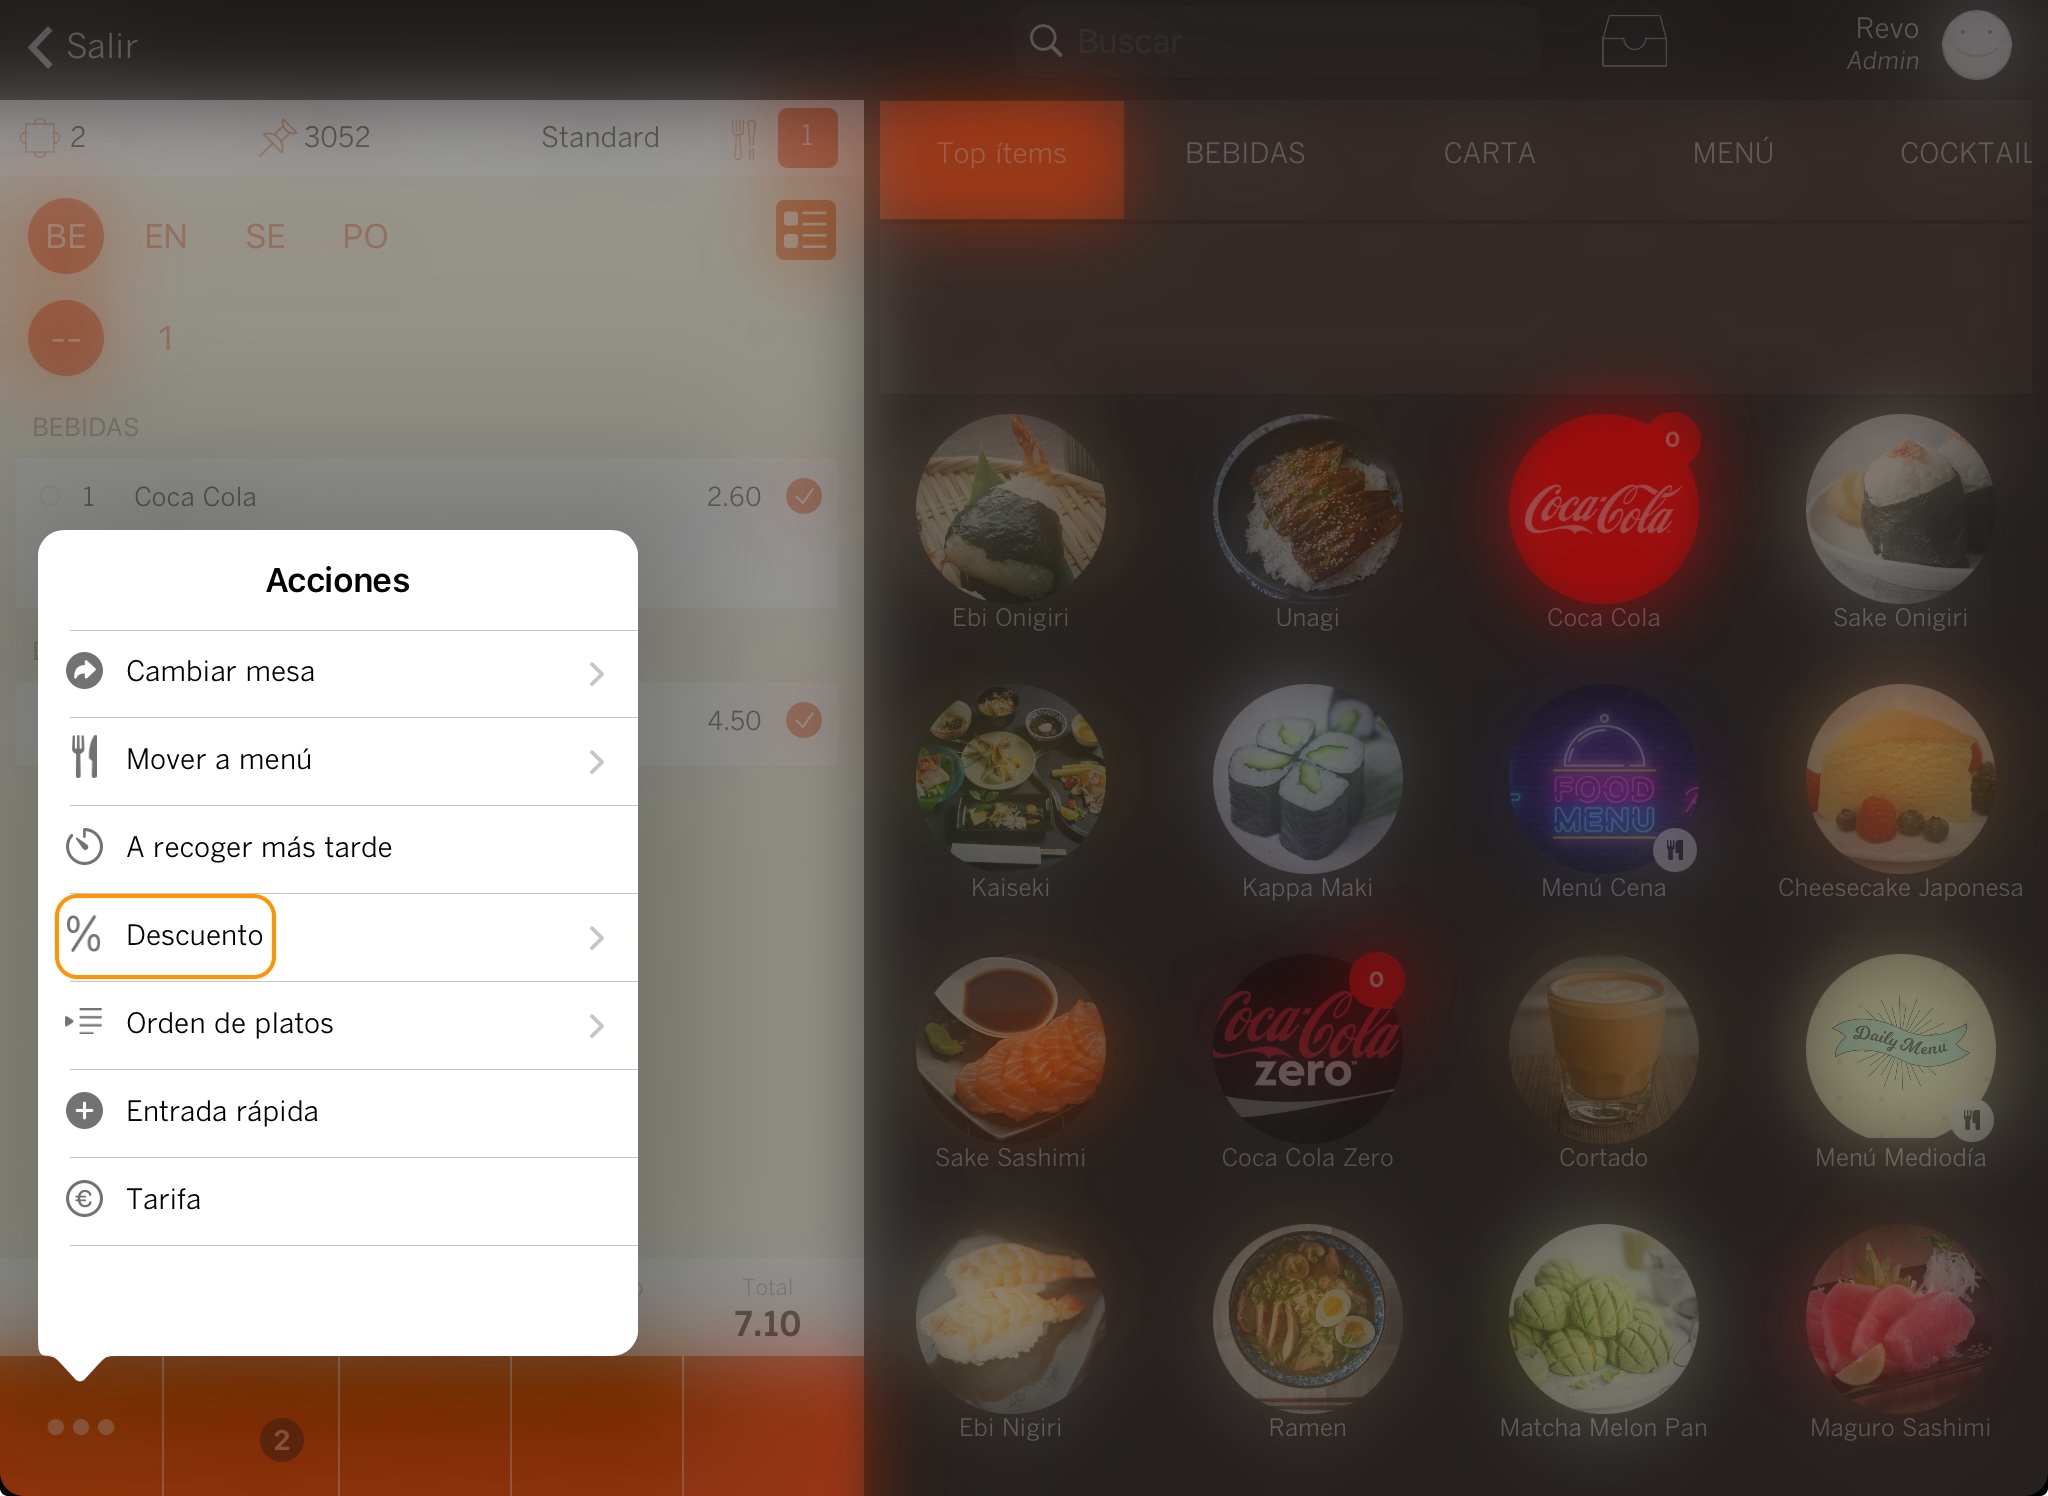
To apply discounts from the app, you can do it in five different ways:
1. Tap on Discounts.

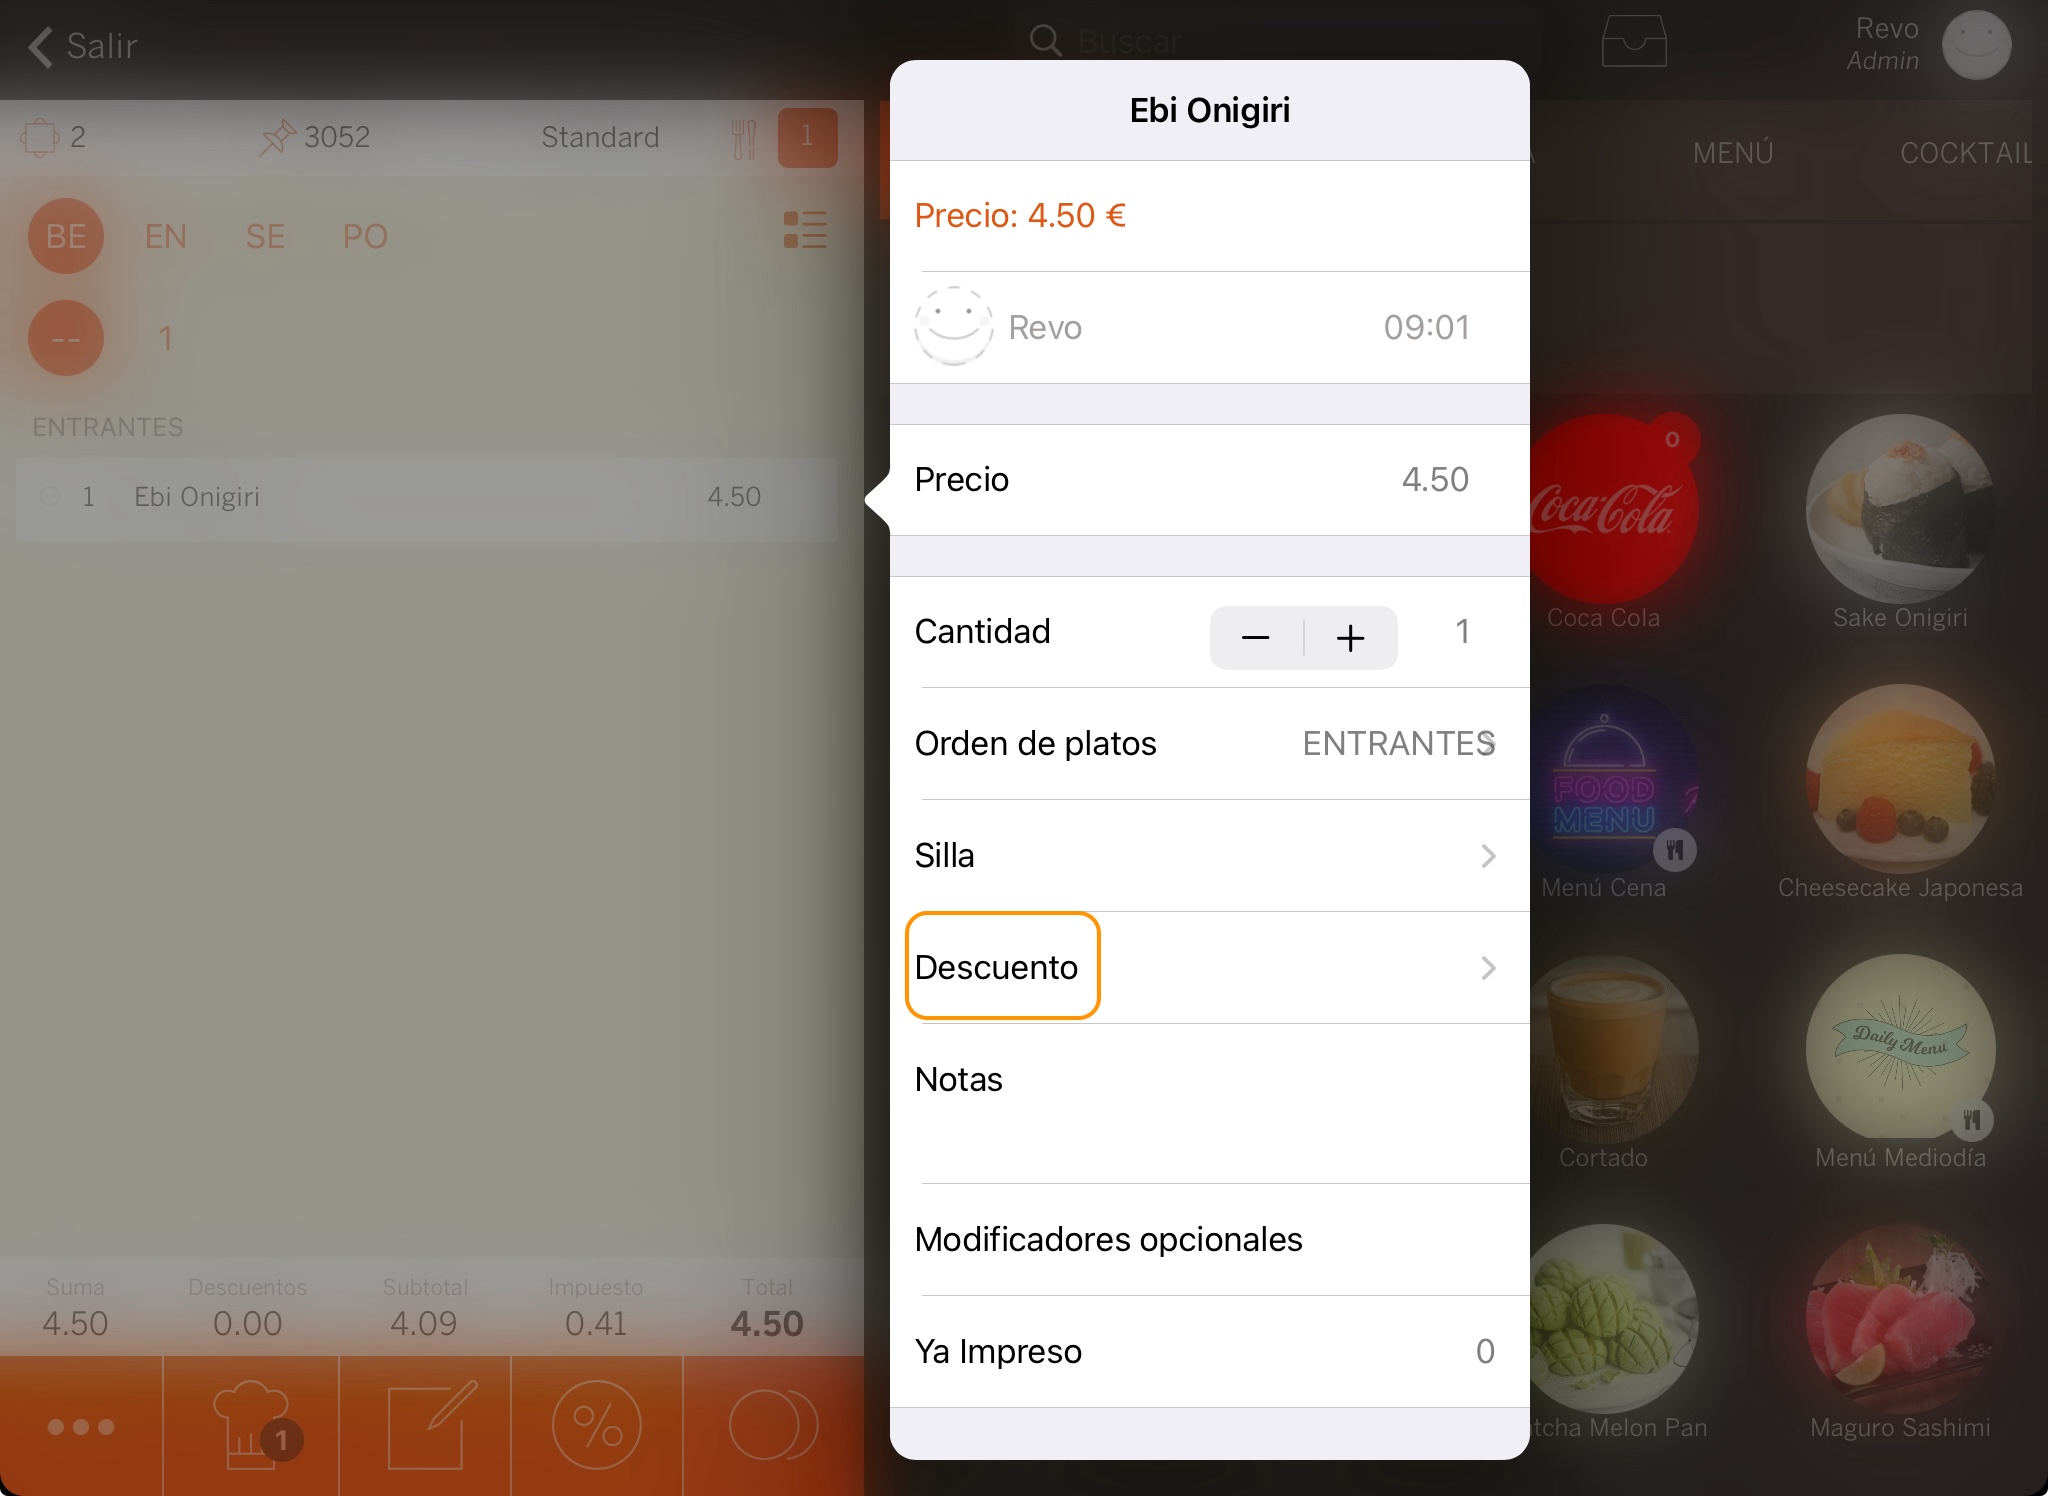
2. Select the product and then tap on Discounts.
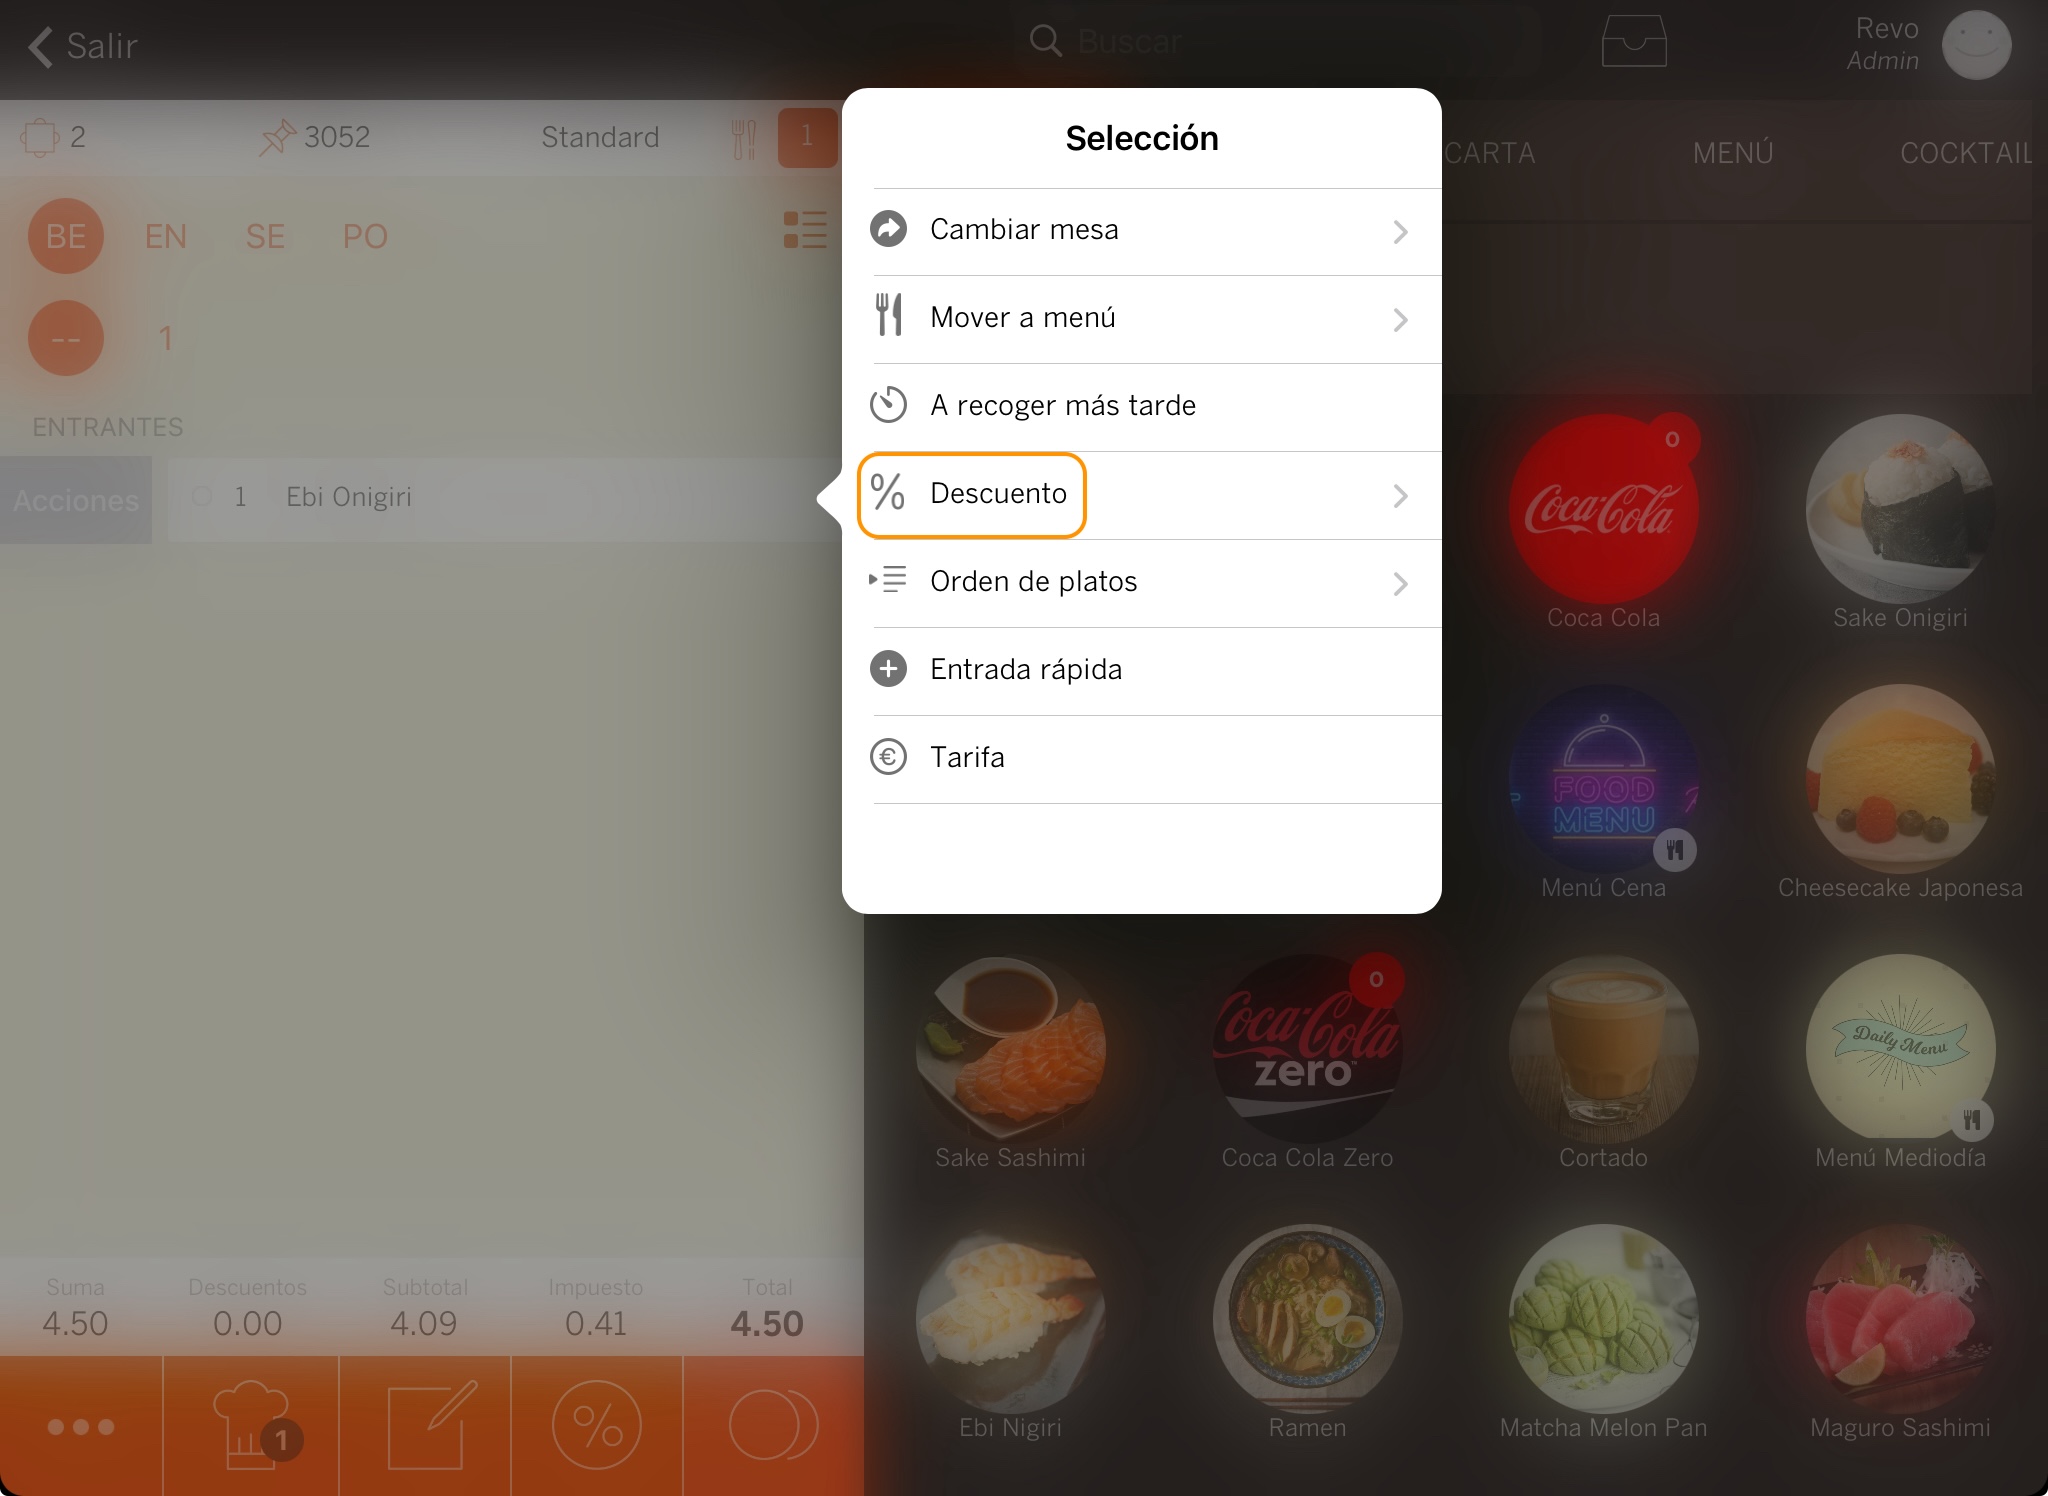
3. Swipe the product to the right to see the actions, tap on them, and then on Discounts.
4. If you have multiple products, select them all with the multi-select button, then tap on and Discounts.
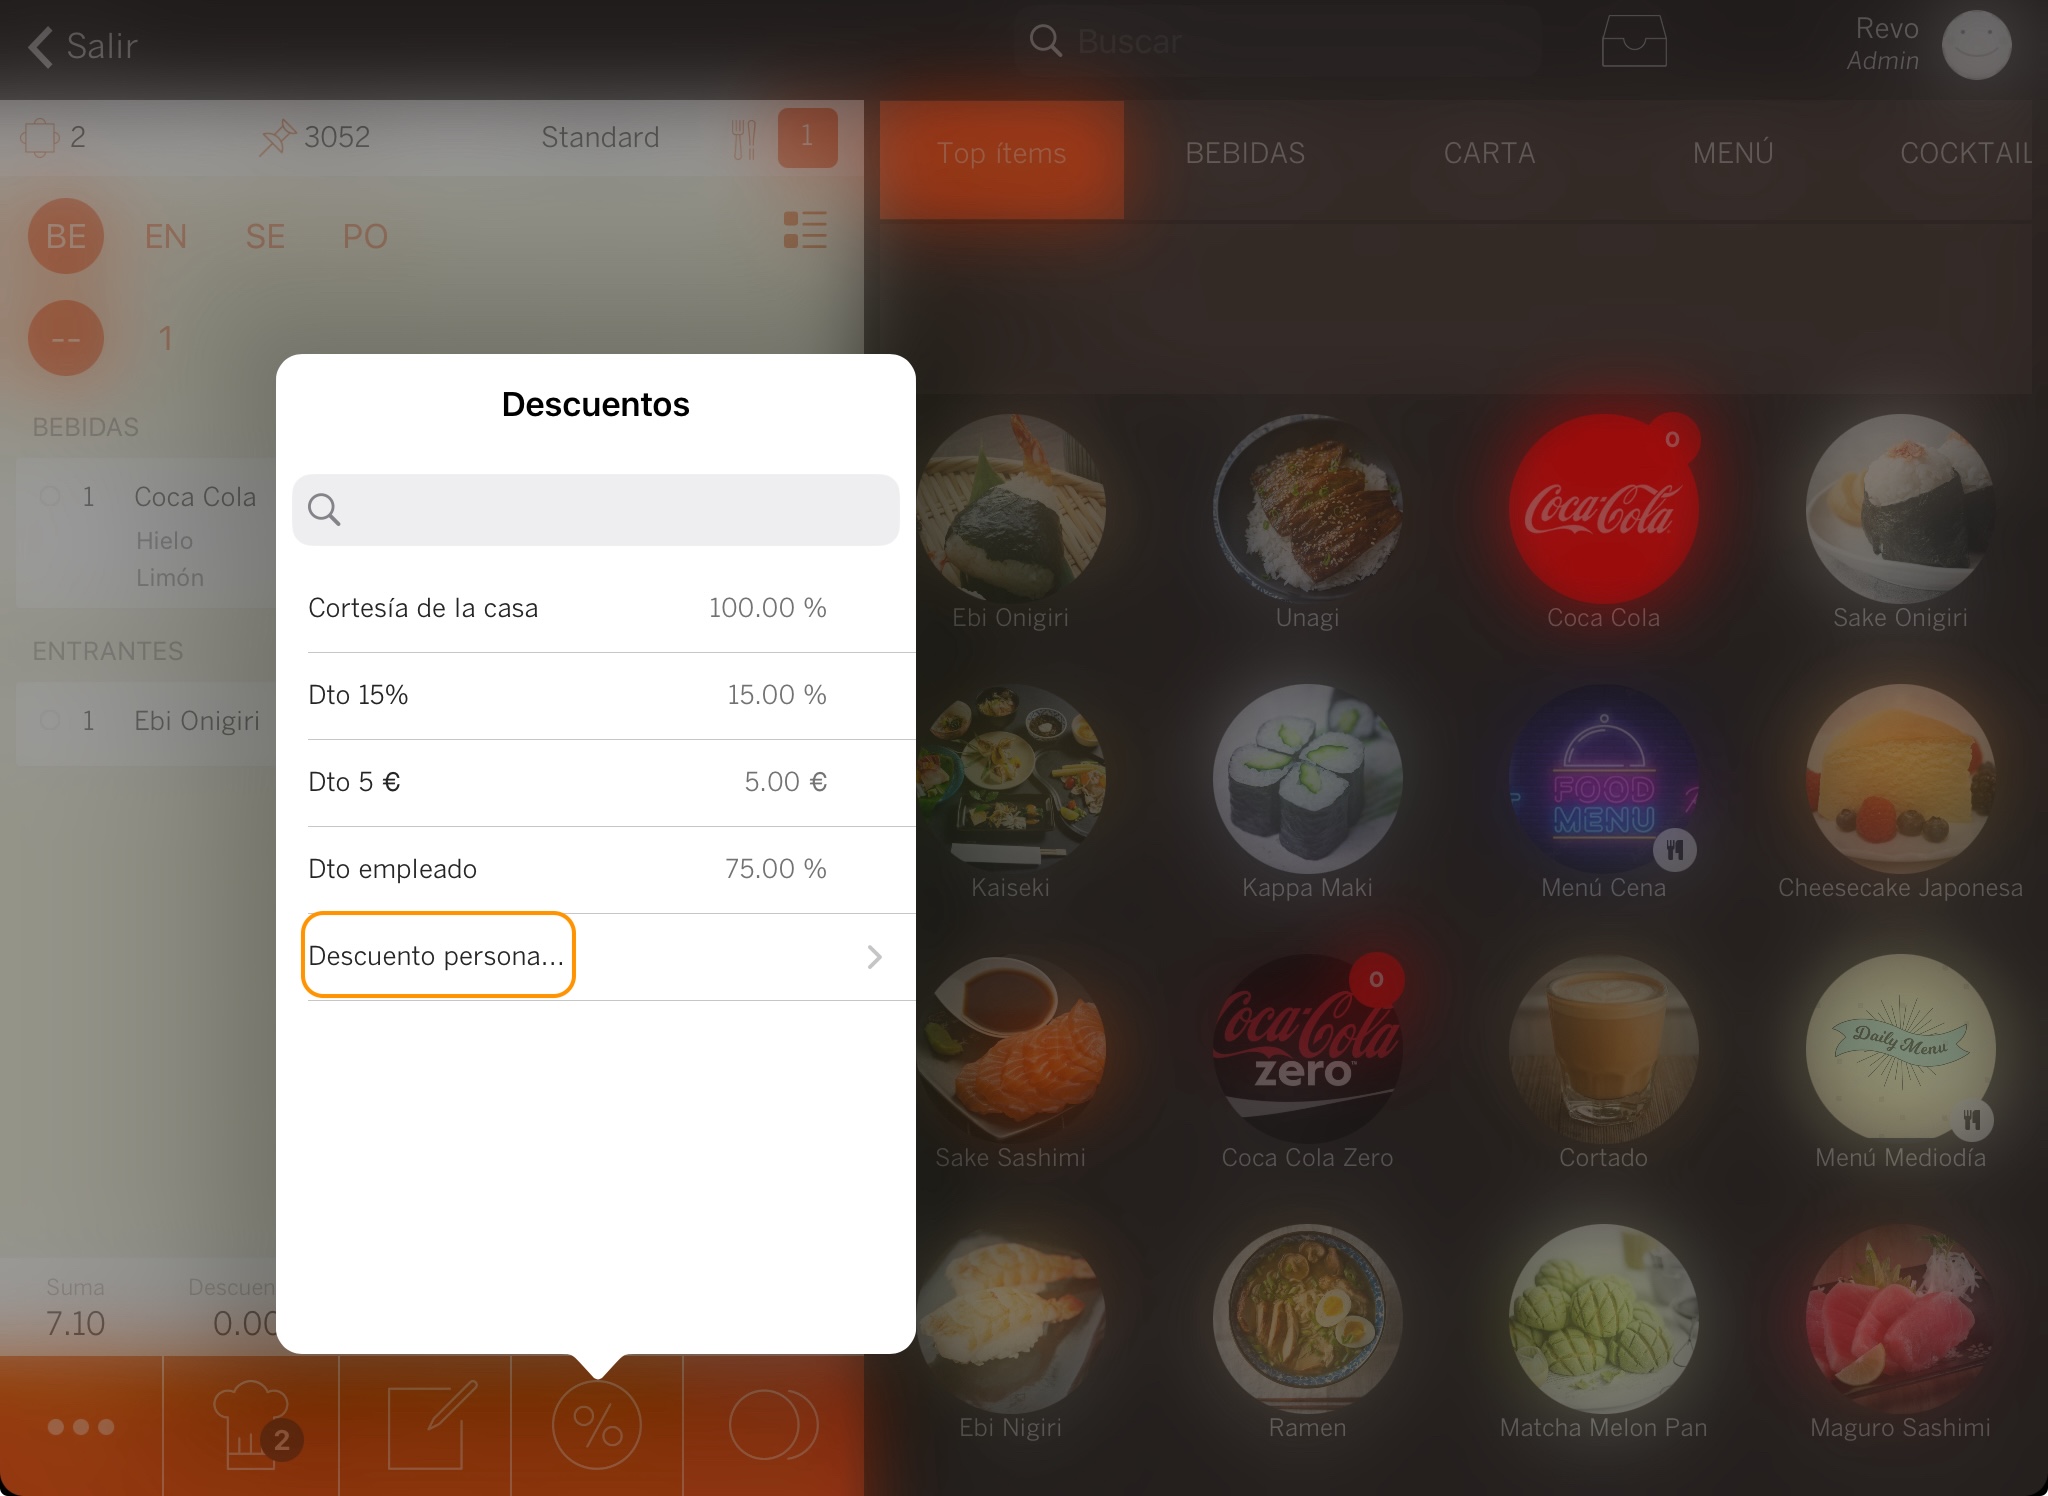
5. You can also apply custom discounts:
-
Tap on the discount button (works the same as in the previous ways) and select Custom Discount.
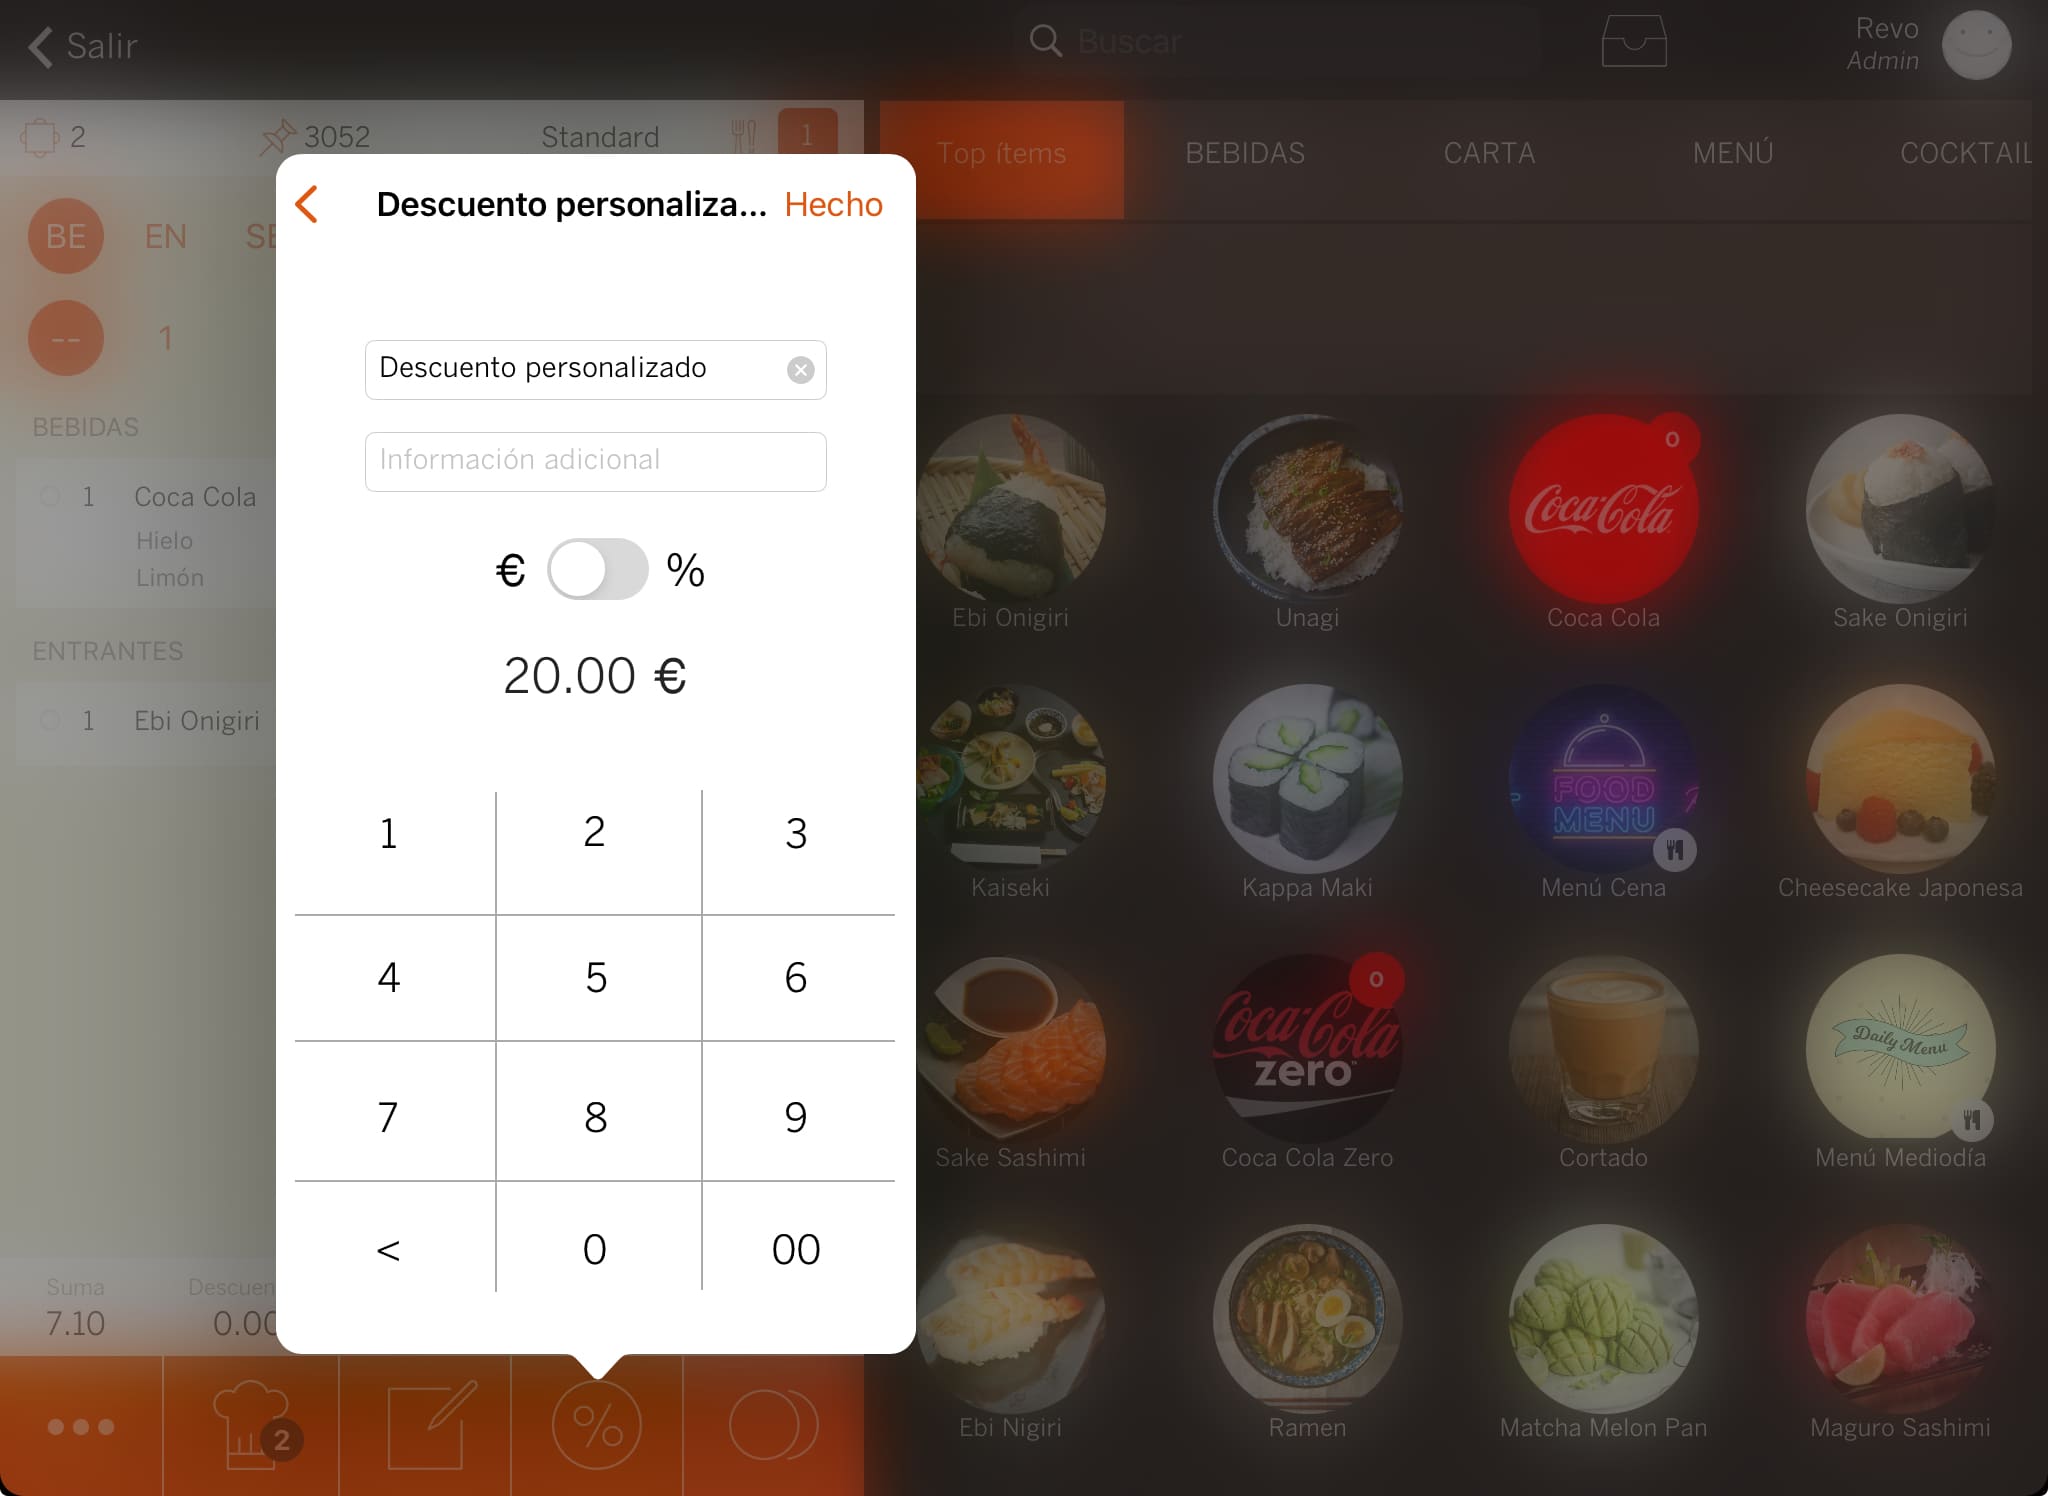
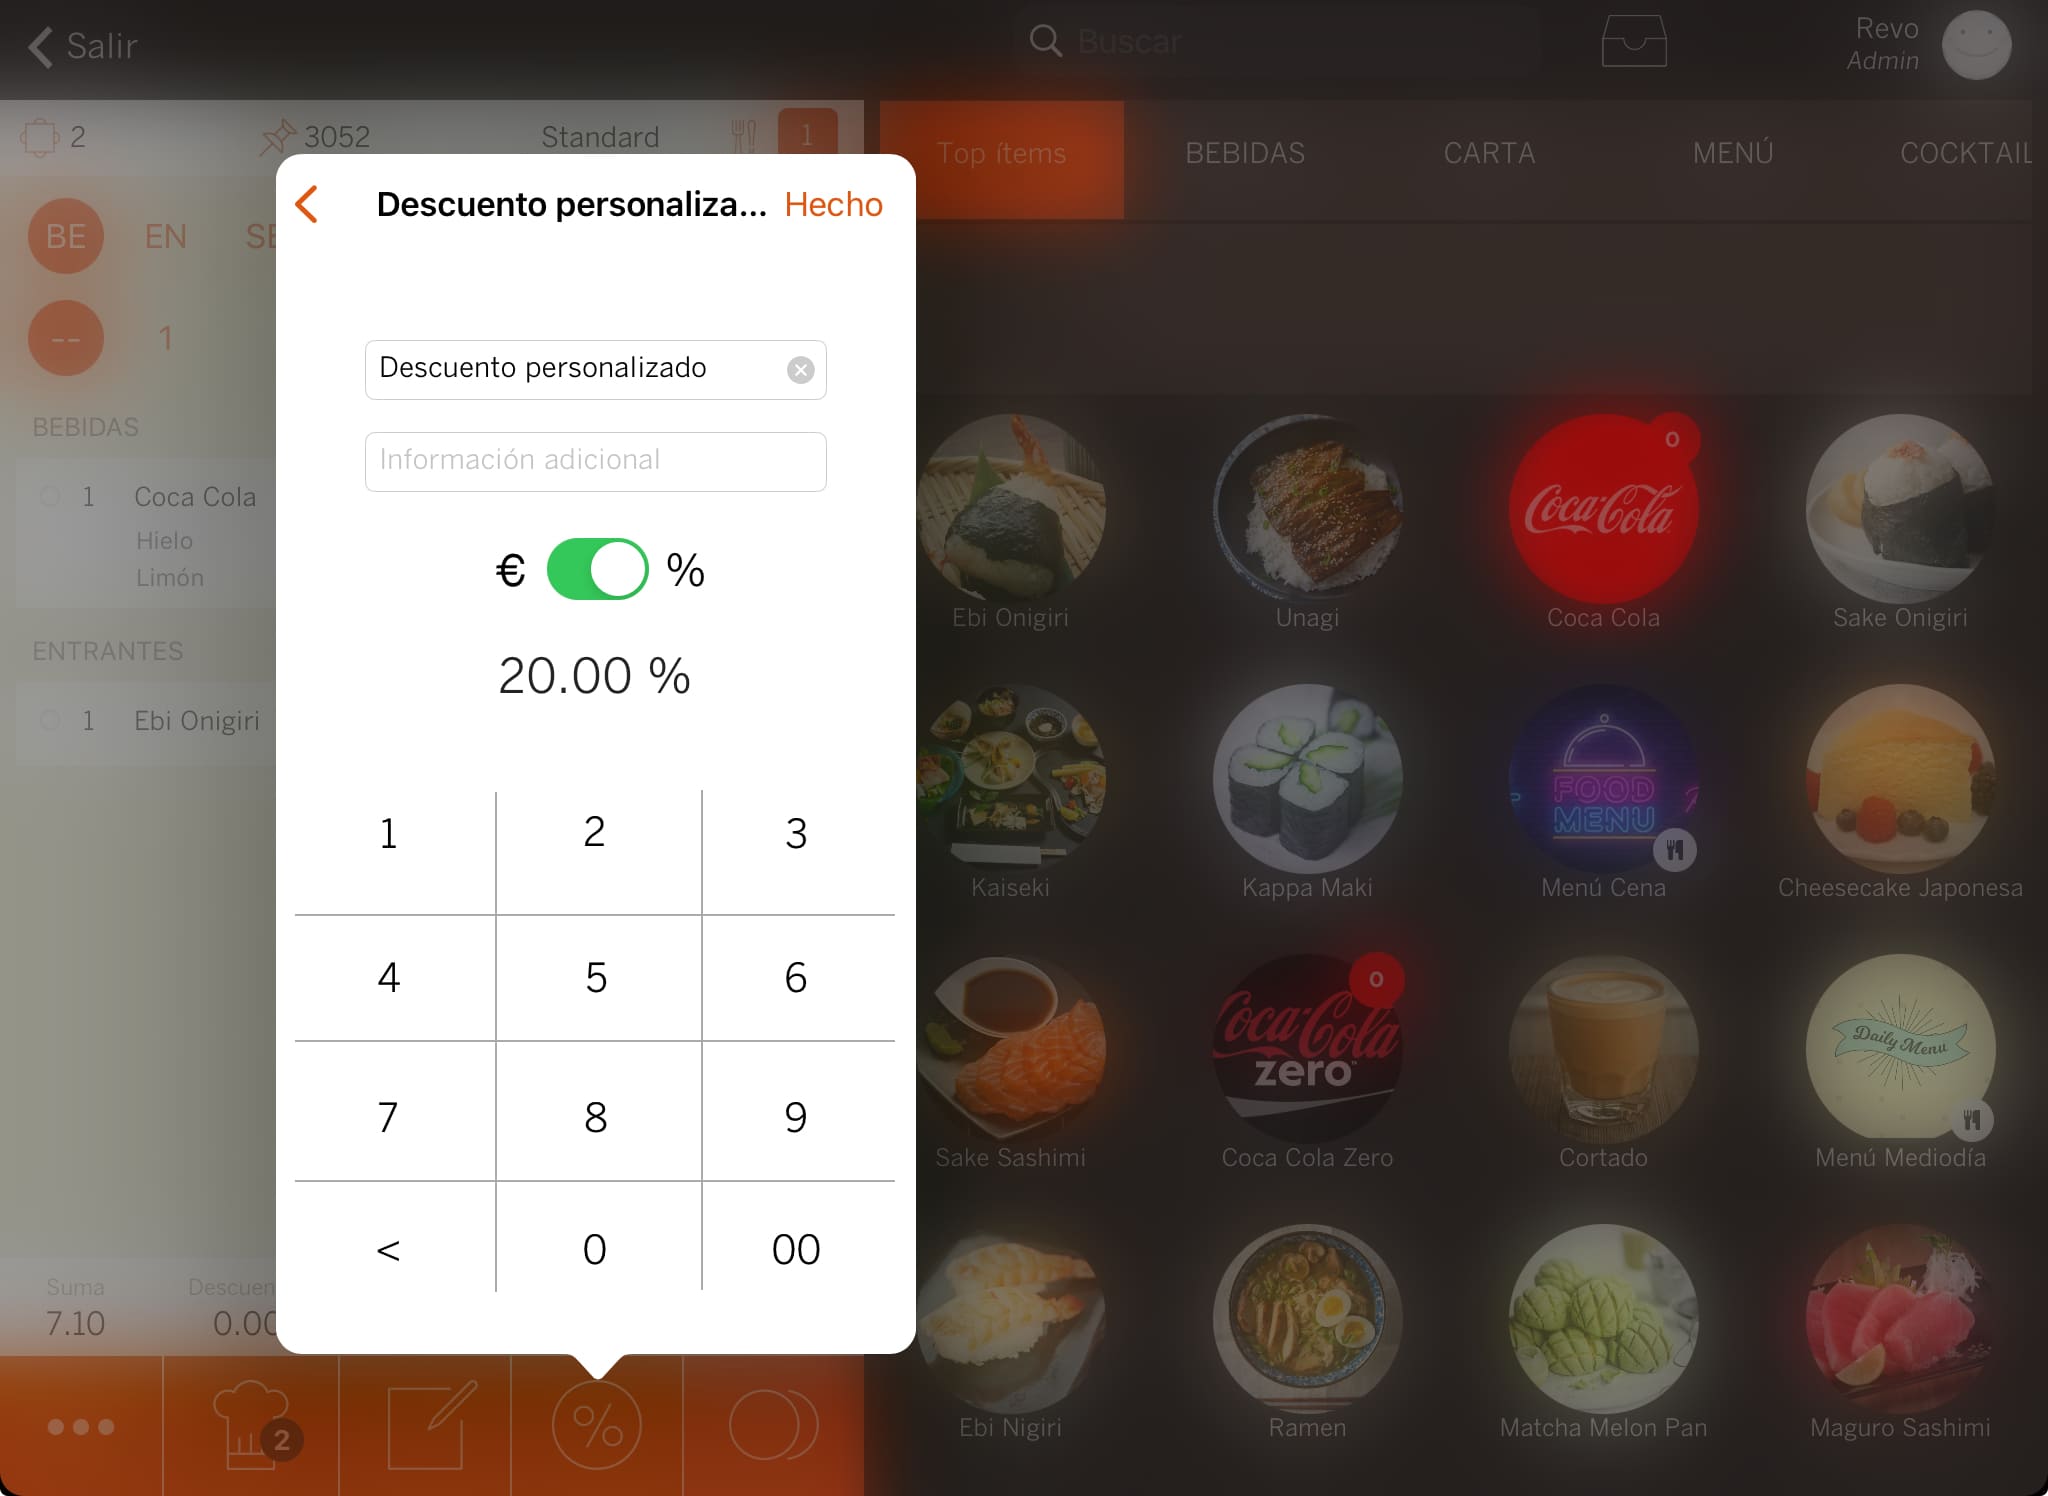
-
Modify the discount name, add extra information, choose if it's in € (price) or % (percentage), and add the amount.
To remove a discount, you can do it in two ways:
1. Tap on the Discounts button and on Cancel Discount.
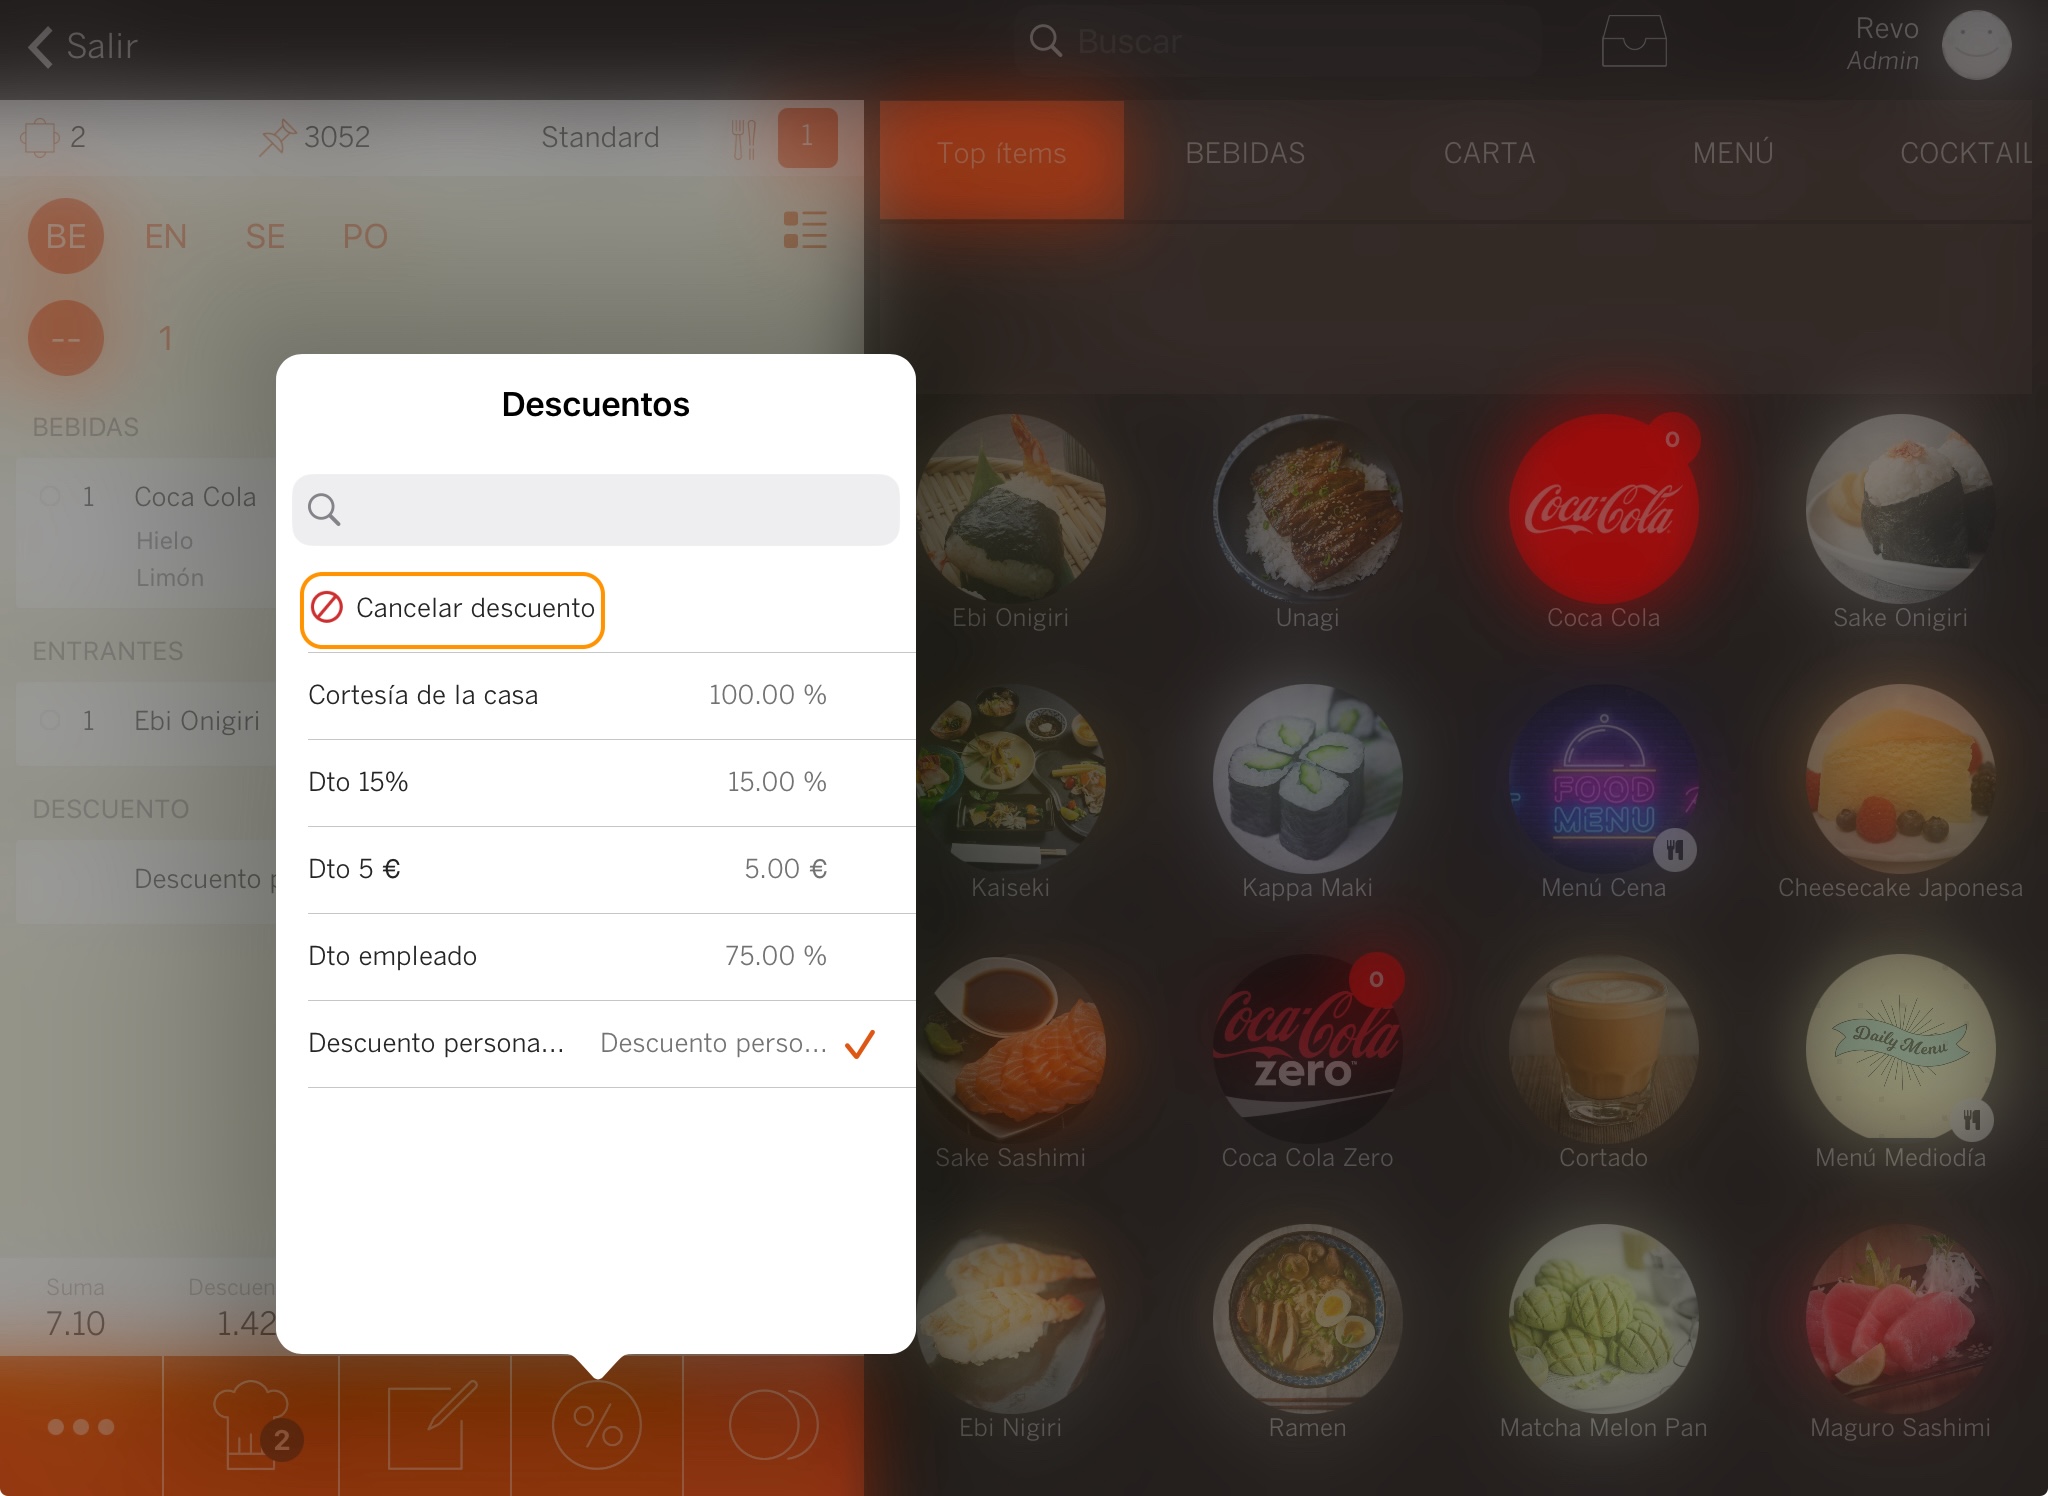
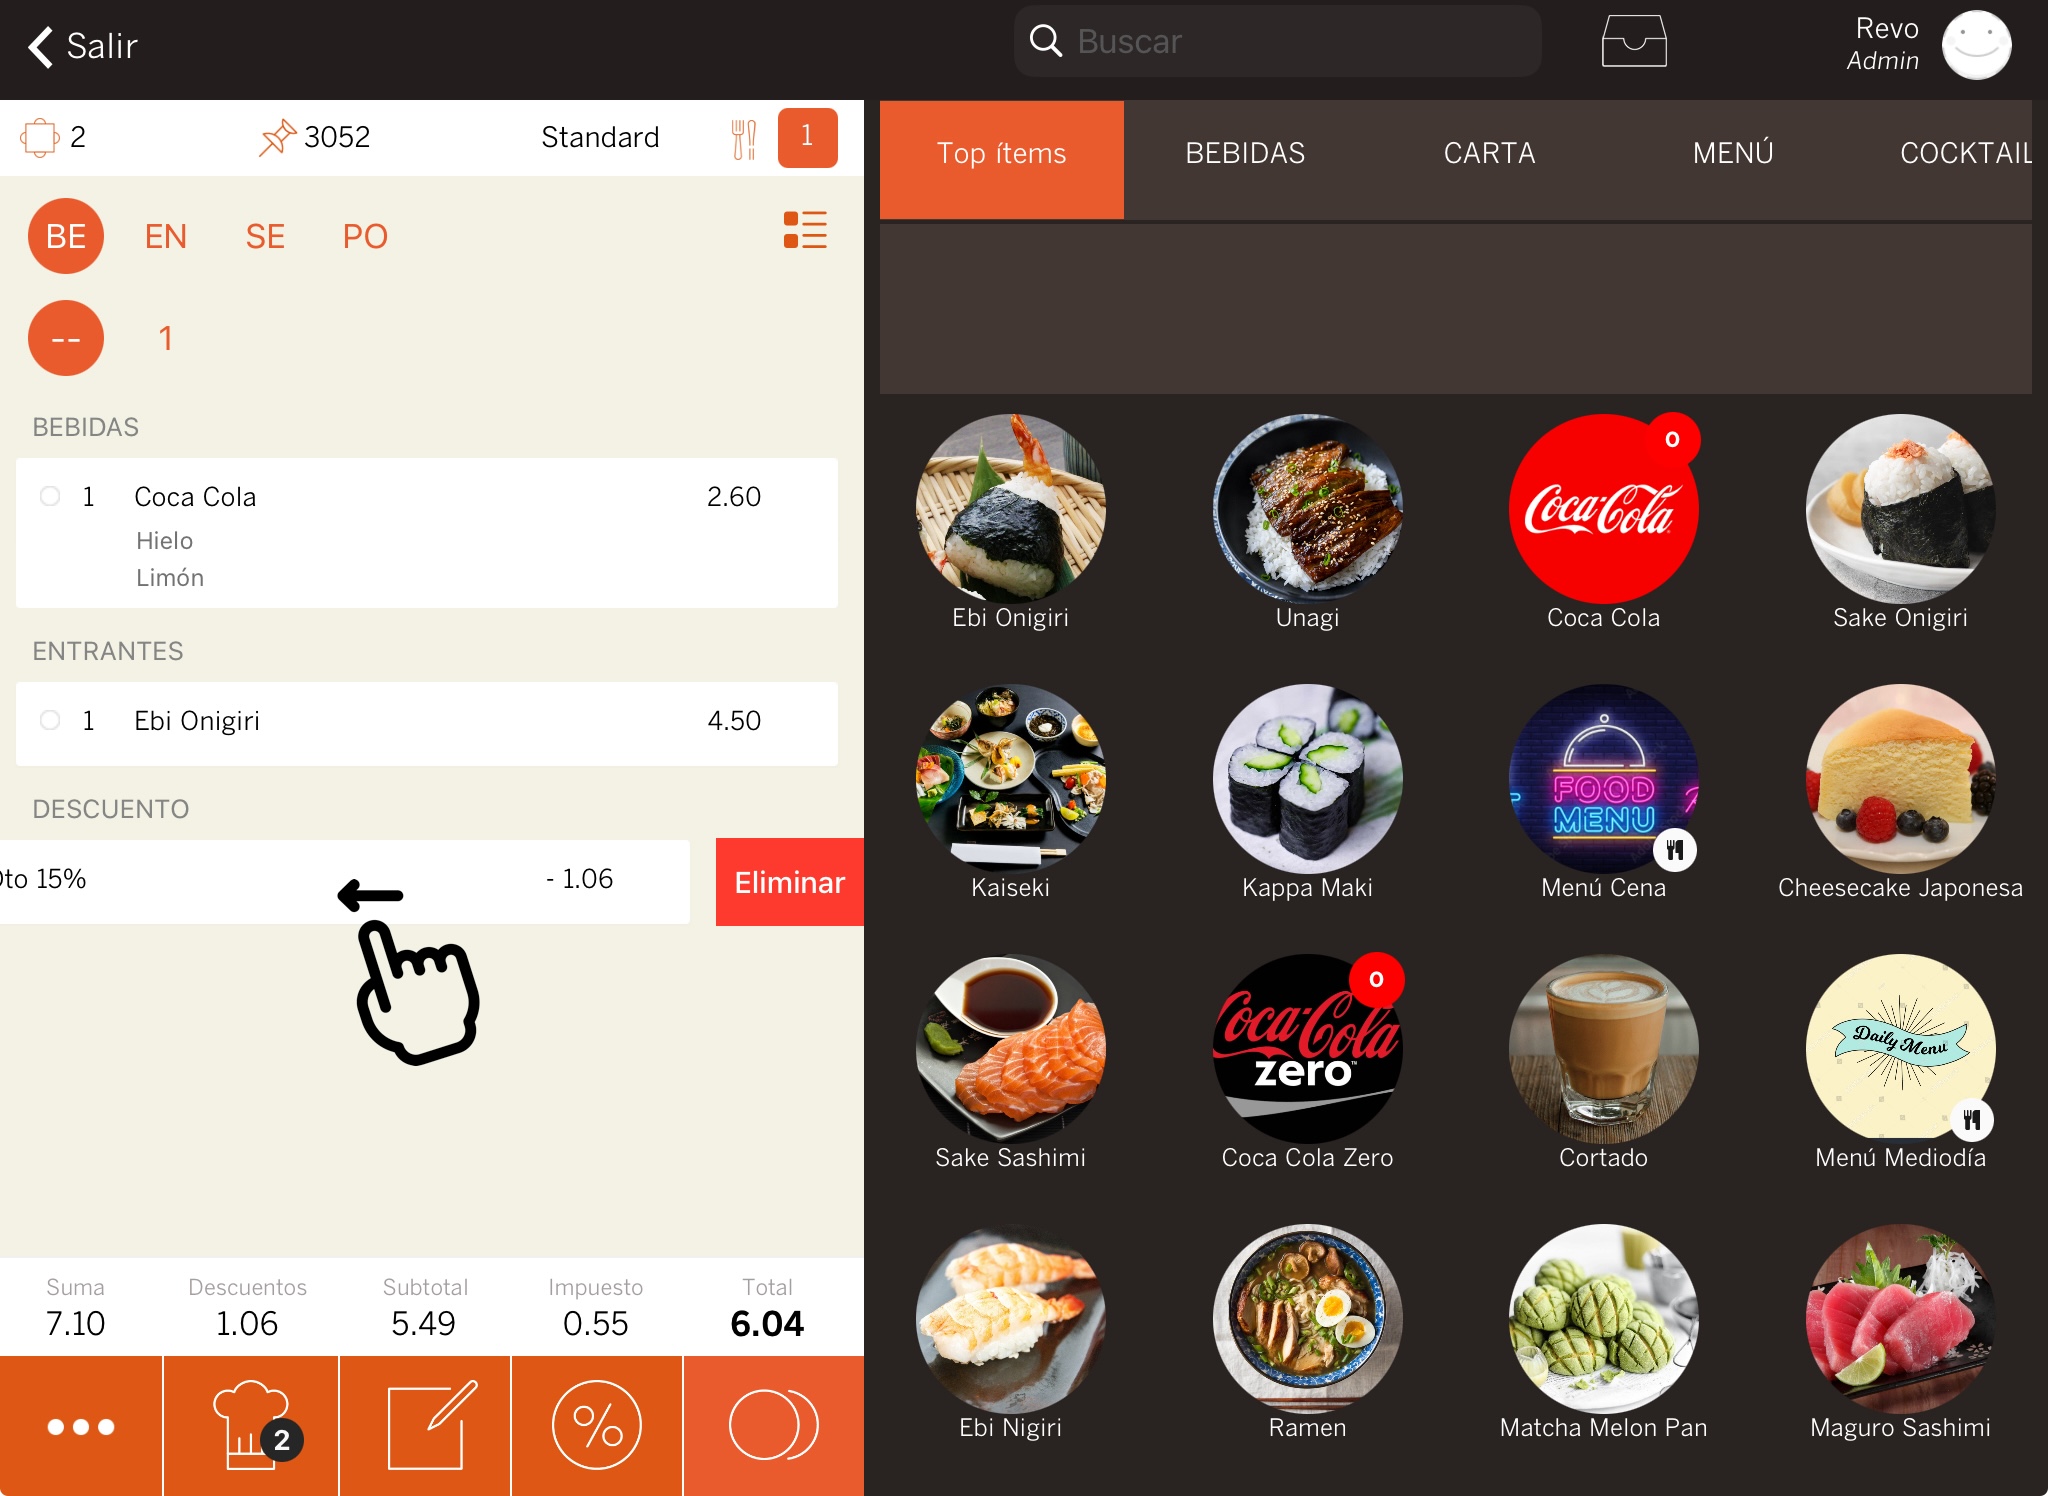
2. Swipe the discount completely to the left or, when the Delete option appears, tap on it.
3. PRACTICAL EXAMPLES
€5 DISCOUNT ON THE ORDER
1. Go to the back-office of Revo XEF.
2. Click on Settings / DISCOUNTS.
3. Click on +New and fill in the information as shown in the image:

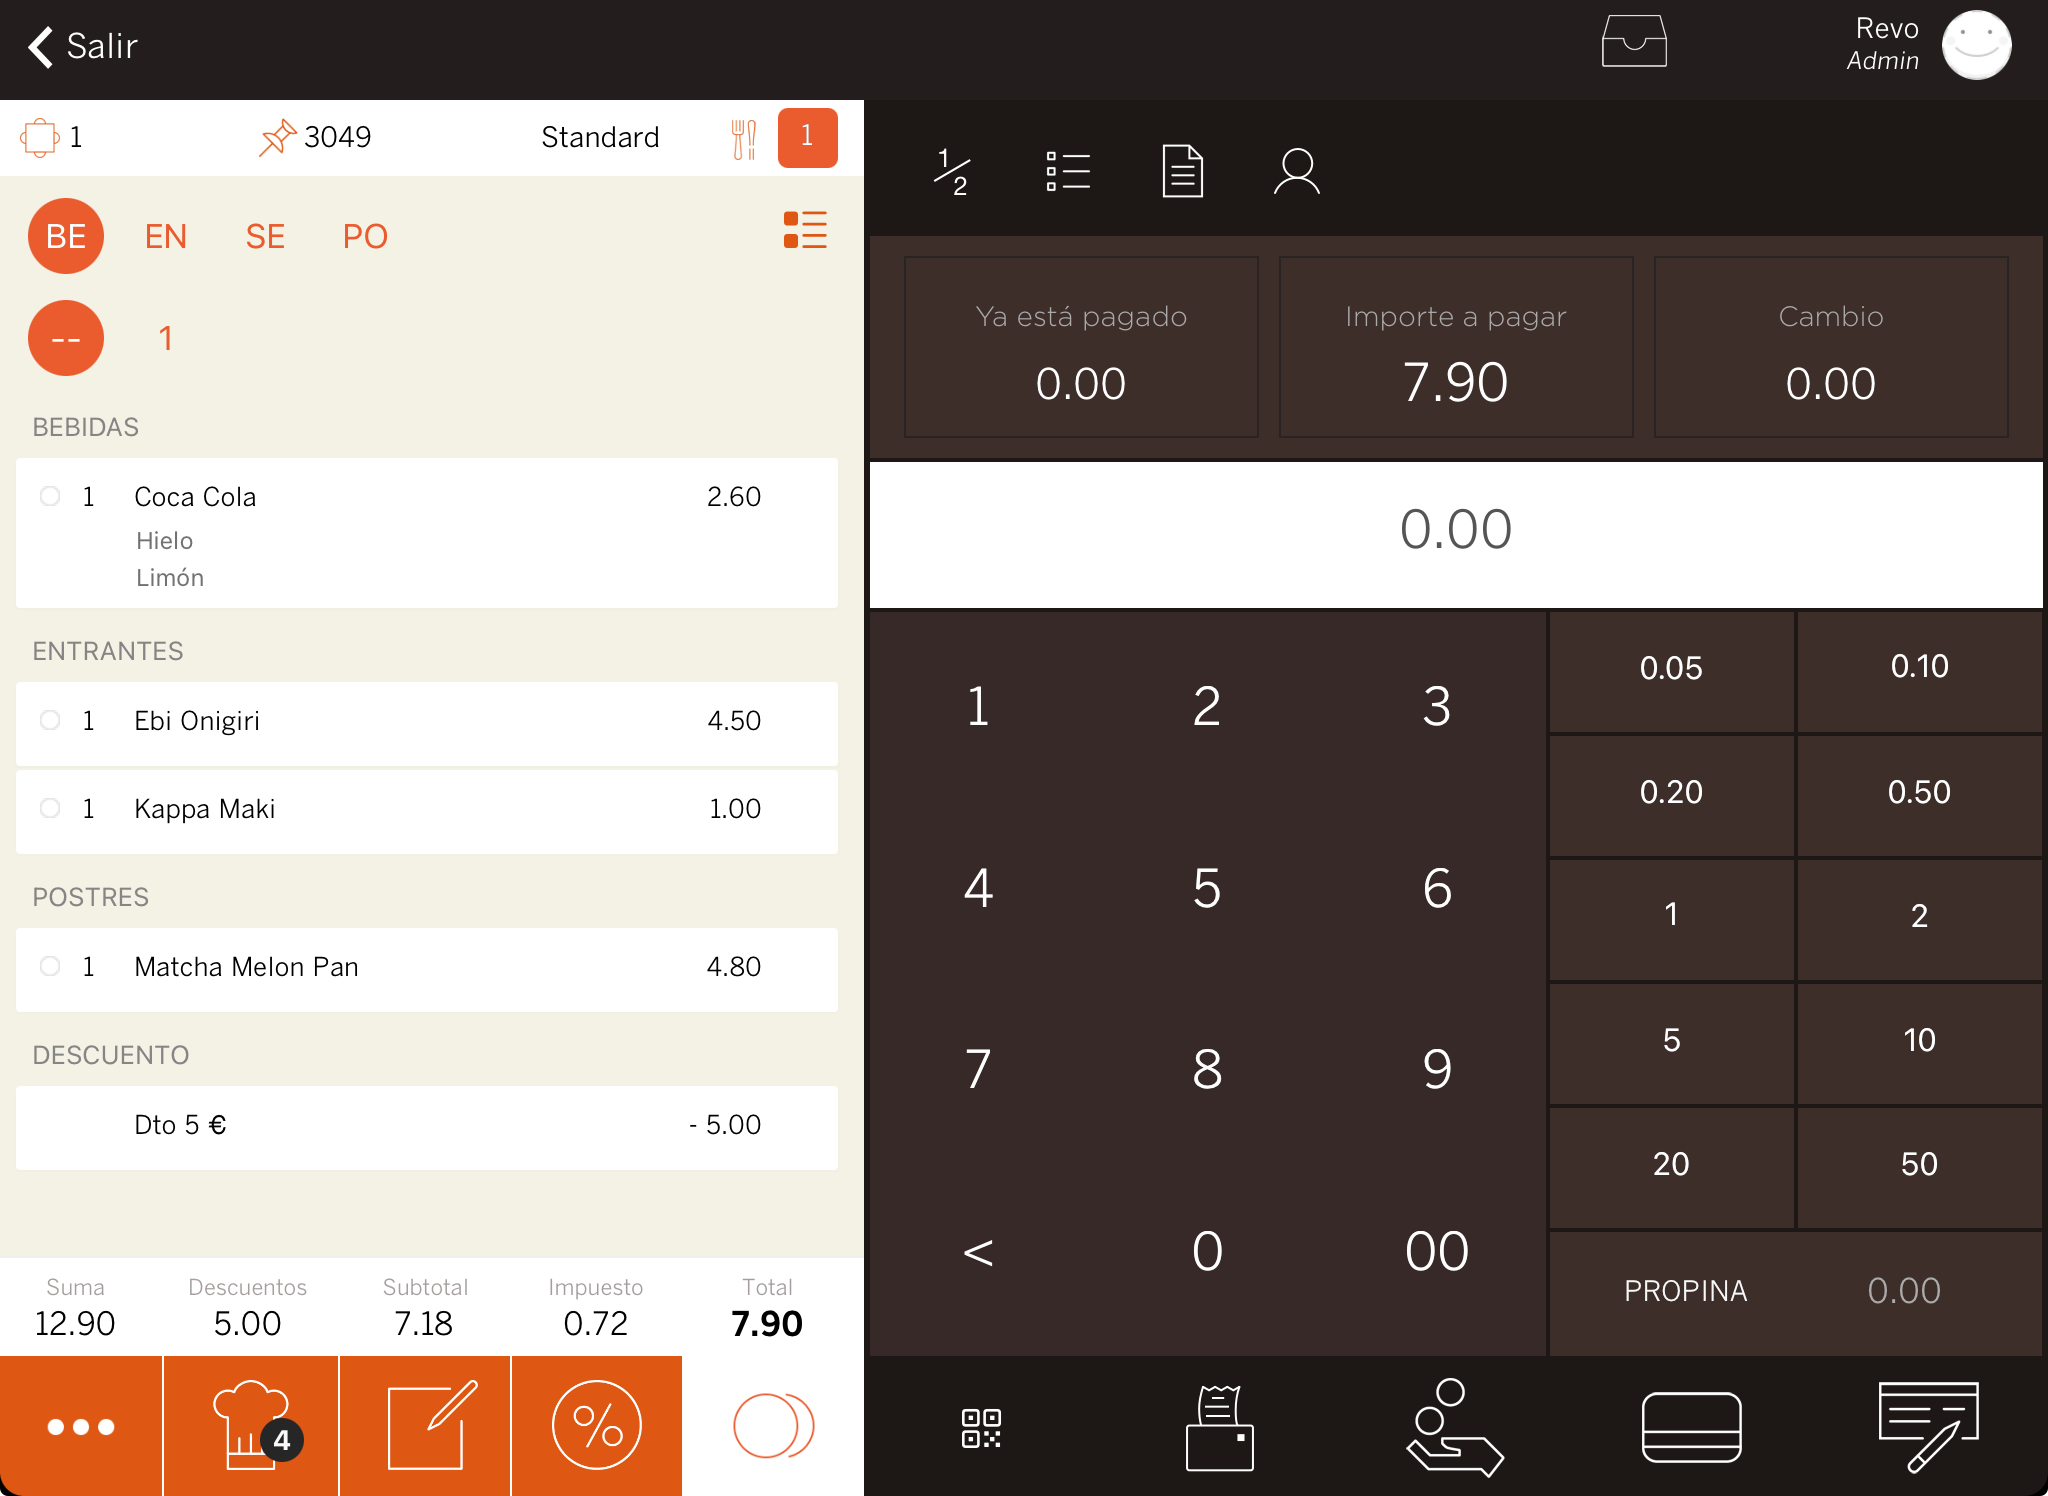
4. Once in the app, add the products to the order, tap on and select the discount created €5 Off. You will see the discount appear at the end of the order with the amount to be deducted in negative.
10% DISCOUNT ON PRODUCTS
In this case, the 10% discount on products will not include the value of supplements, as we do not want the extras to be discounted.
1. Access the back-office of Revo XEF.
2. Click on Settings / DISCOUNTS.
3. Click on +New and fill in the information as shown in the image:
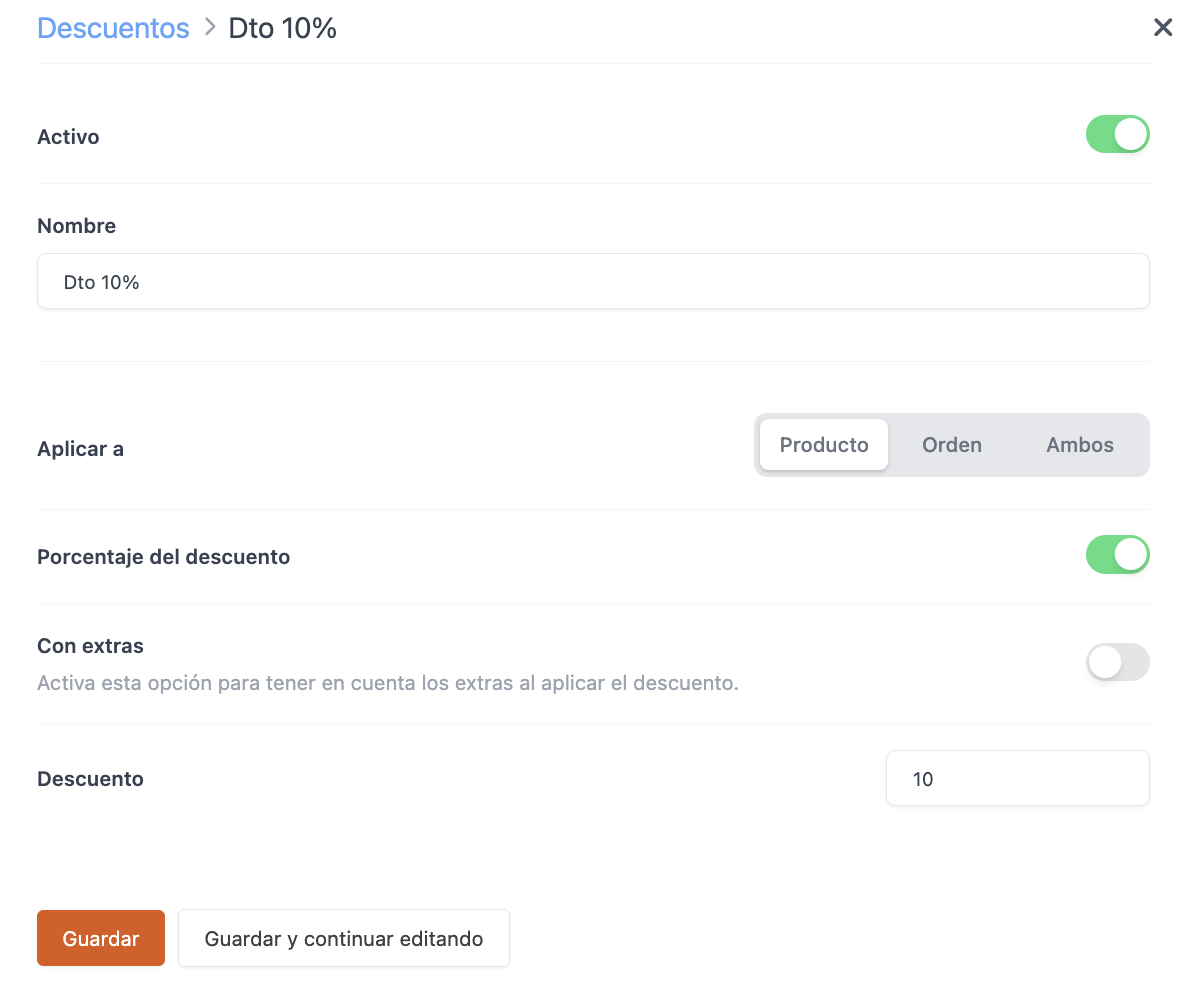
4. Once in the app, add the products to the order, click on the product and select Discount. Click on the created discount, 10% Off. You will see the discount applied to the coffee without including the value of the supplements.

15% DISCOUNT ON PRODUCTS OR ORDER
1. Access the back-office of Revo XEF.
2. Click on Settings / DISCOUNTS.
3. Click on +New and fill in the information as shown in the image:
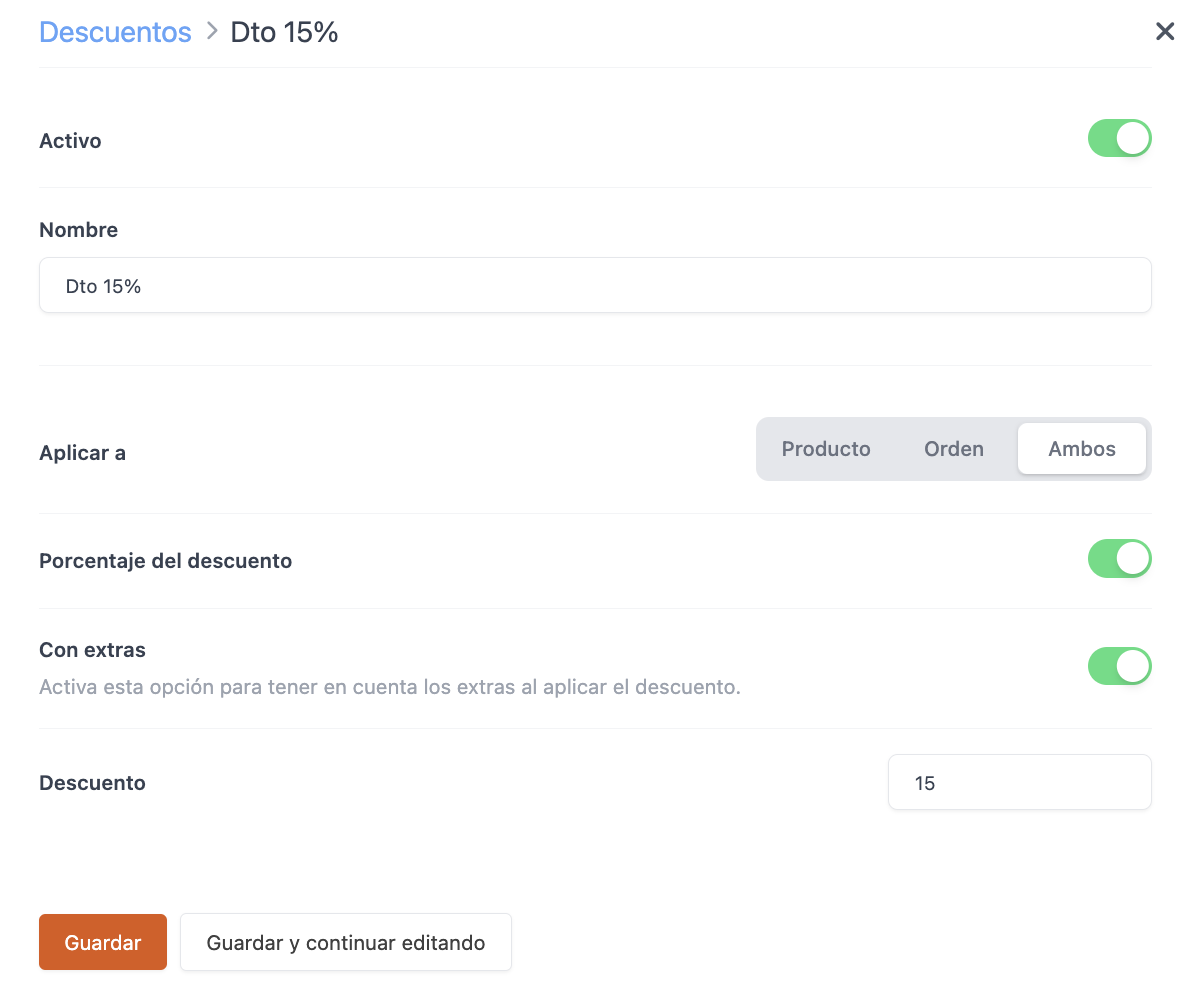
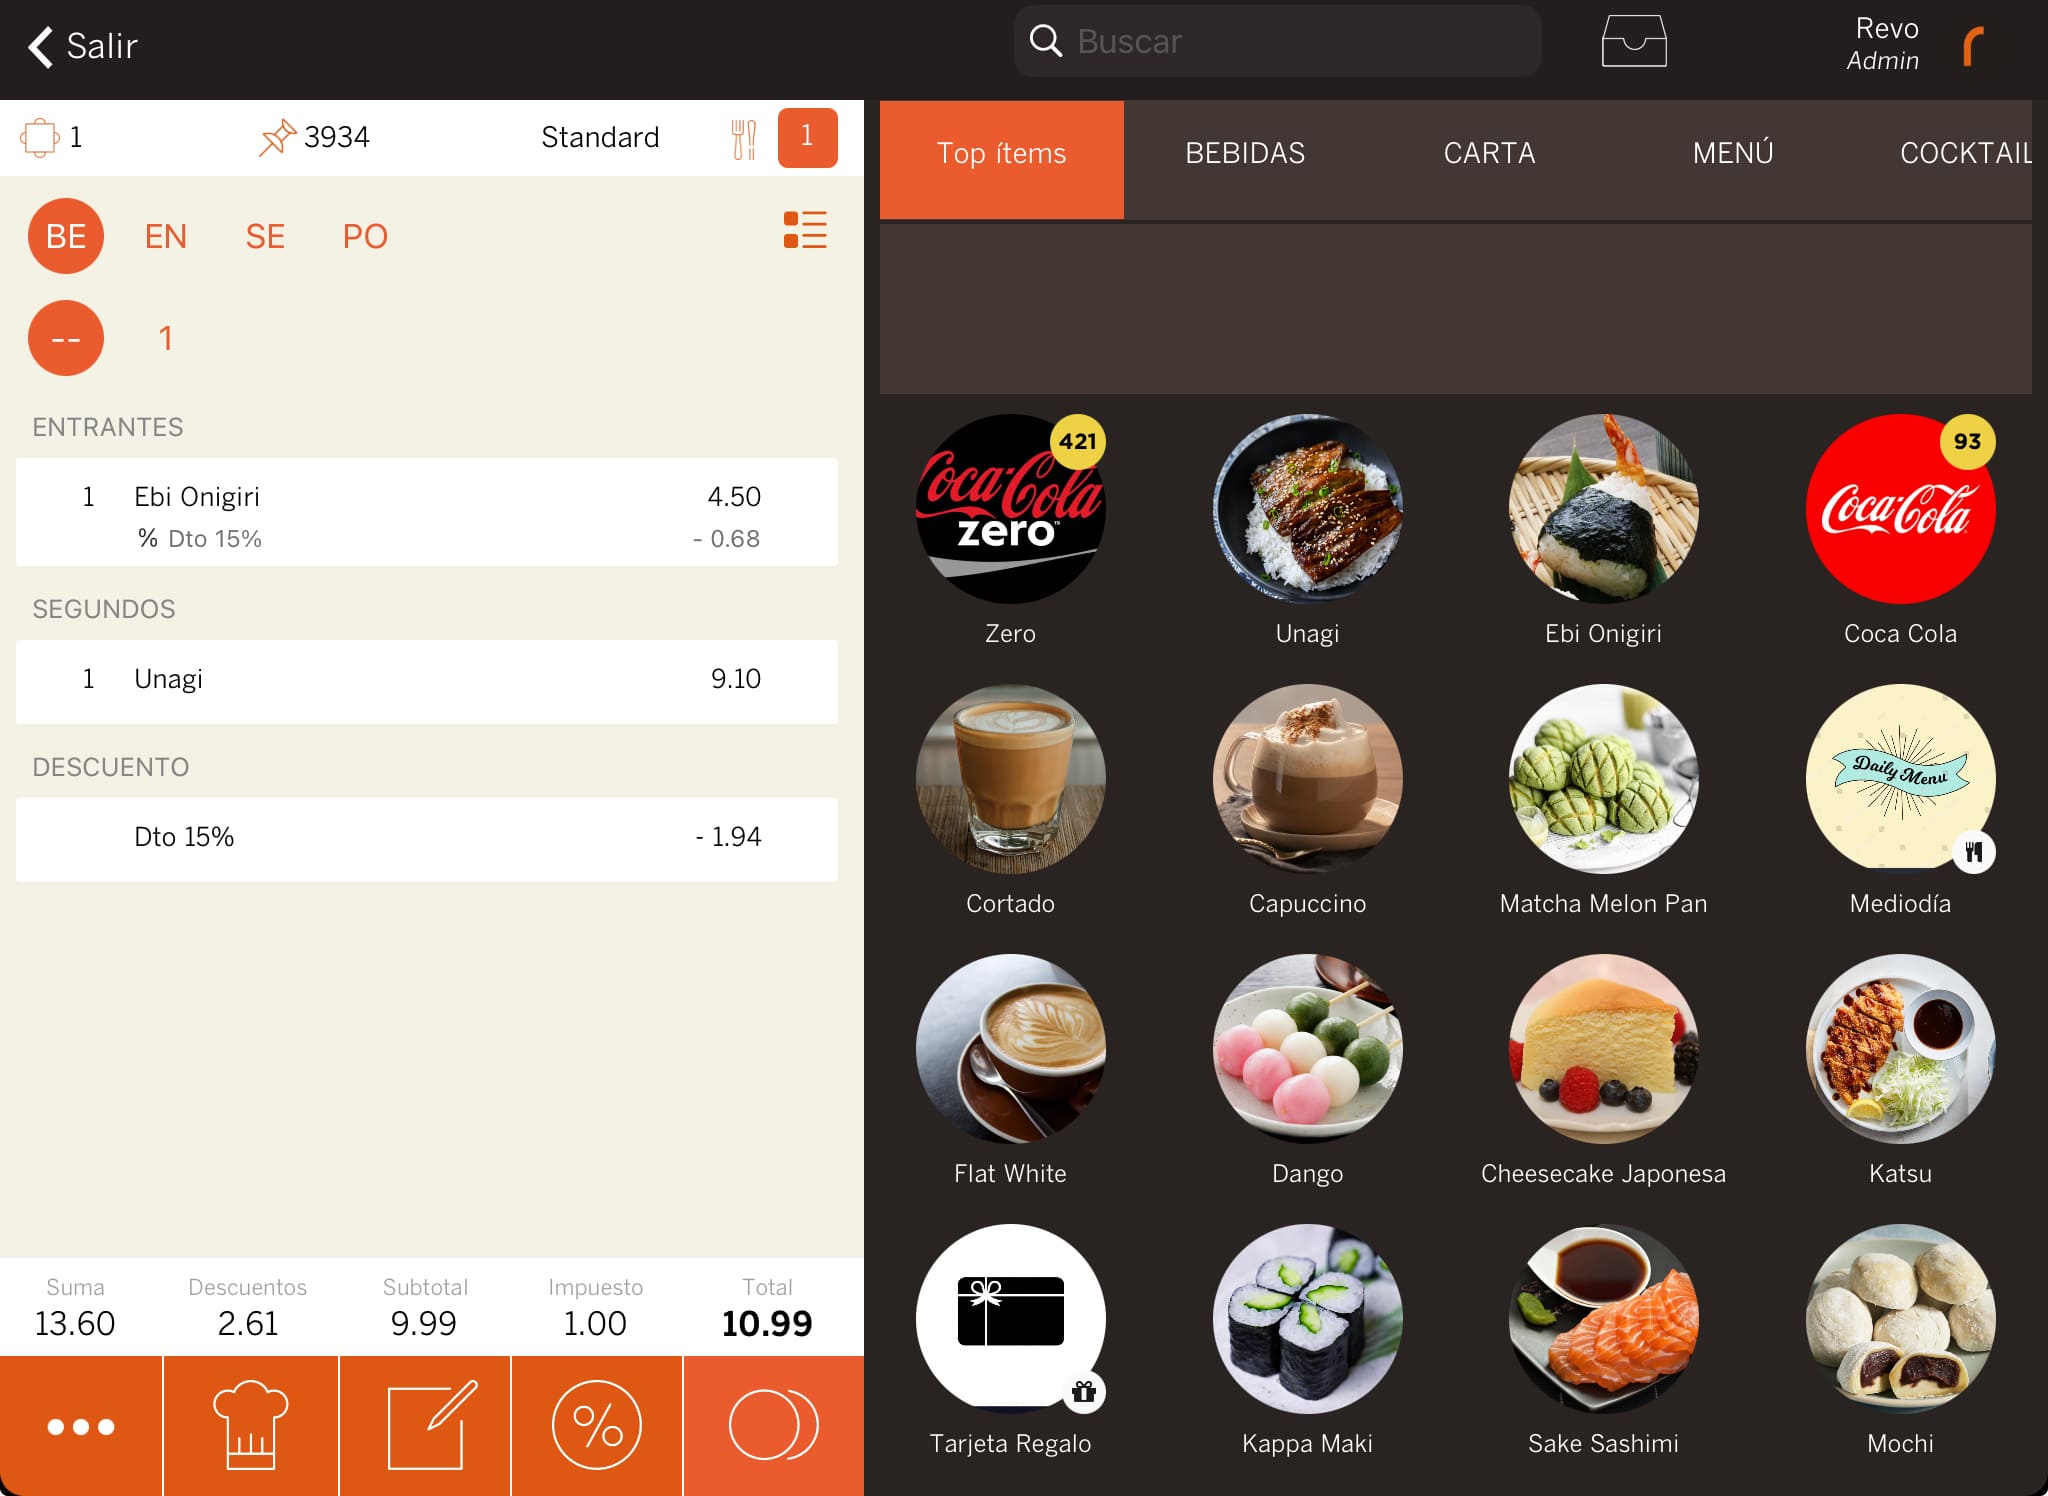
4. Once in the app, add the product to the order, click on it and select Discount. Click on the created discount, 15% Off. If you click on the , you will also see the same discount, meaning you can apply it to the order if you wish.
If you apply a discount to a product and then to the order, the final value of the product with the discount will be taken into account.
For example, if you have an onigiri at €4.50 with a 15% discount (final value €3.82), the value of €3.82 will be taken into account when applying the 15% discount to the entire order.