1. CONFIGURE DEVICE PREFERENCES 2. IMPORTANT CONSIDERATIONS 3. CHANGE PREFERENCES PROFILE IN THE APP
NEW FUNCTIONALITY AVAILABLE FROM VERSION 4.5
In Device Preferences, you can configure the app's settings in one place, avoiding individual configurations on each device.
The first time you log into the app, you will be prompted to create a profile in the back-office, which will be created and will maintain the existing settings.
1. CONFIGURE DEVICE PREFERENCES
1. Access the Revo XEF back-office.
2. Go to Settings / DEVICE PREFERENCES.
3. Select the options:
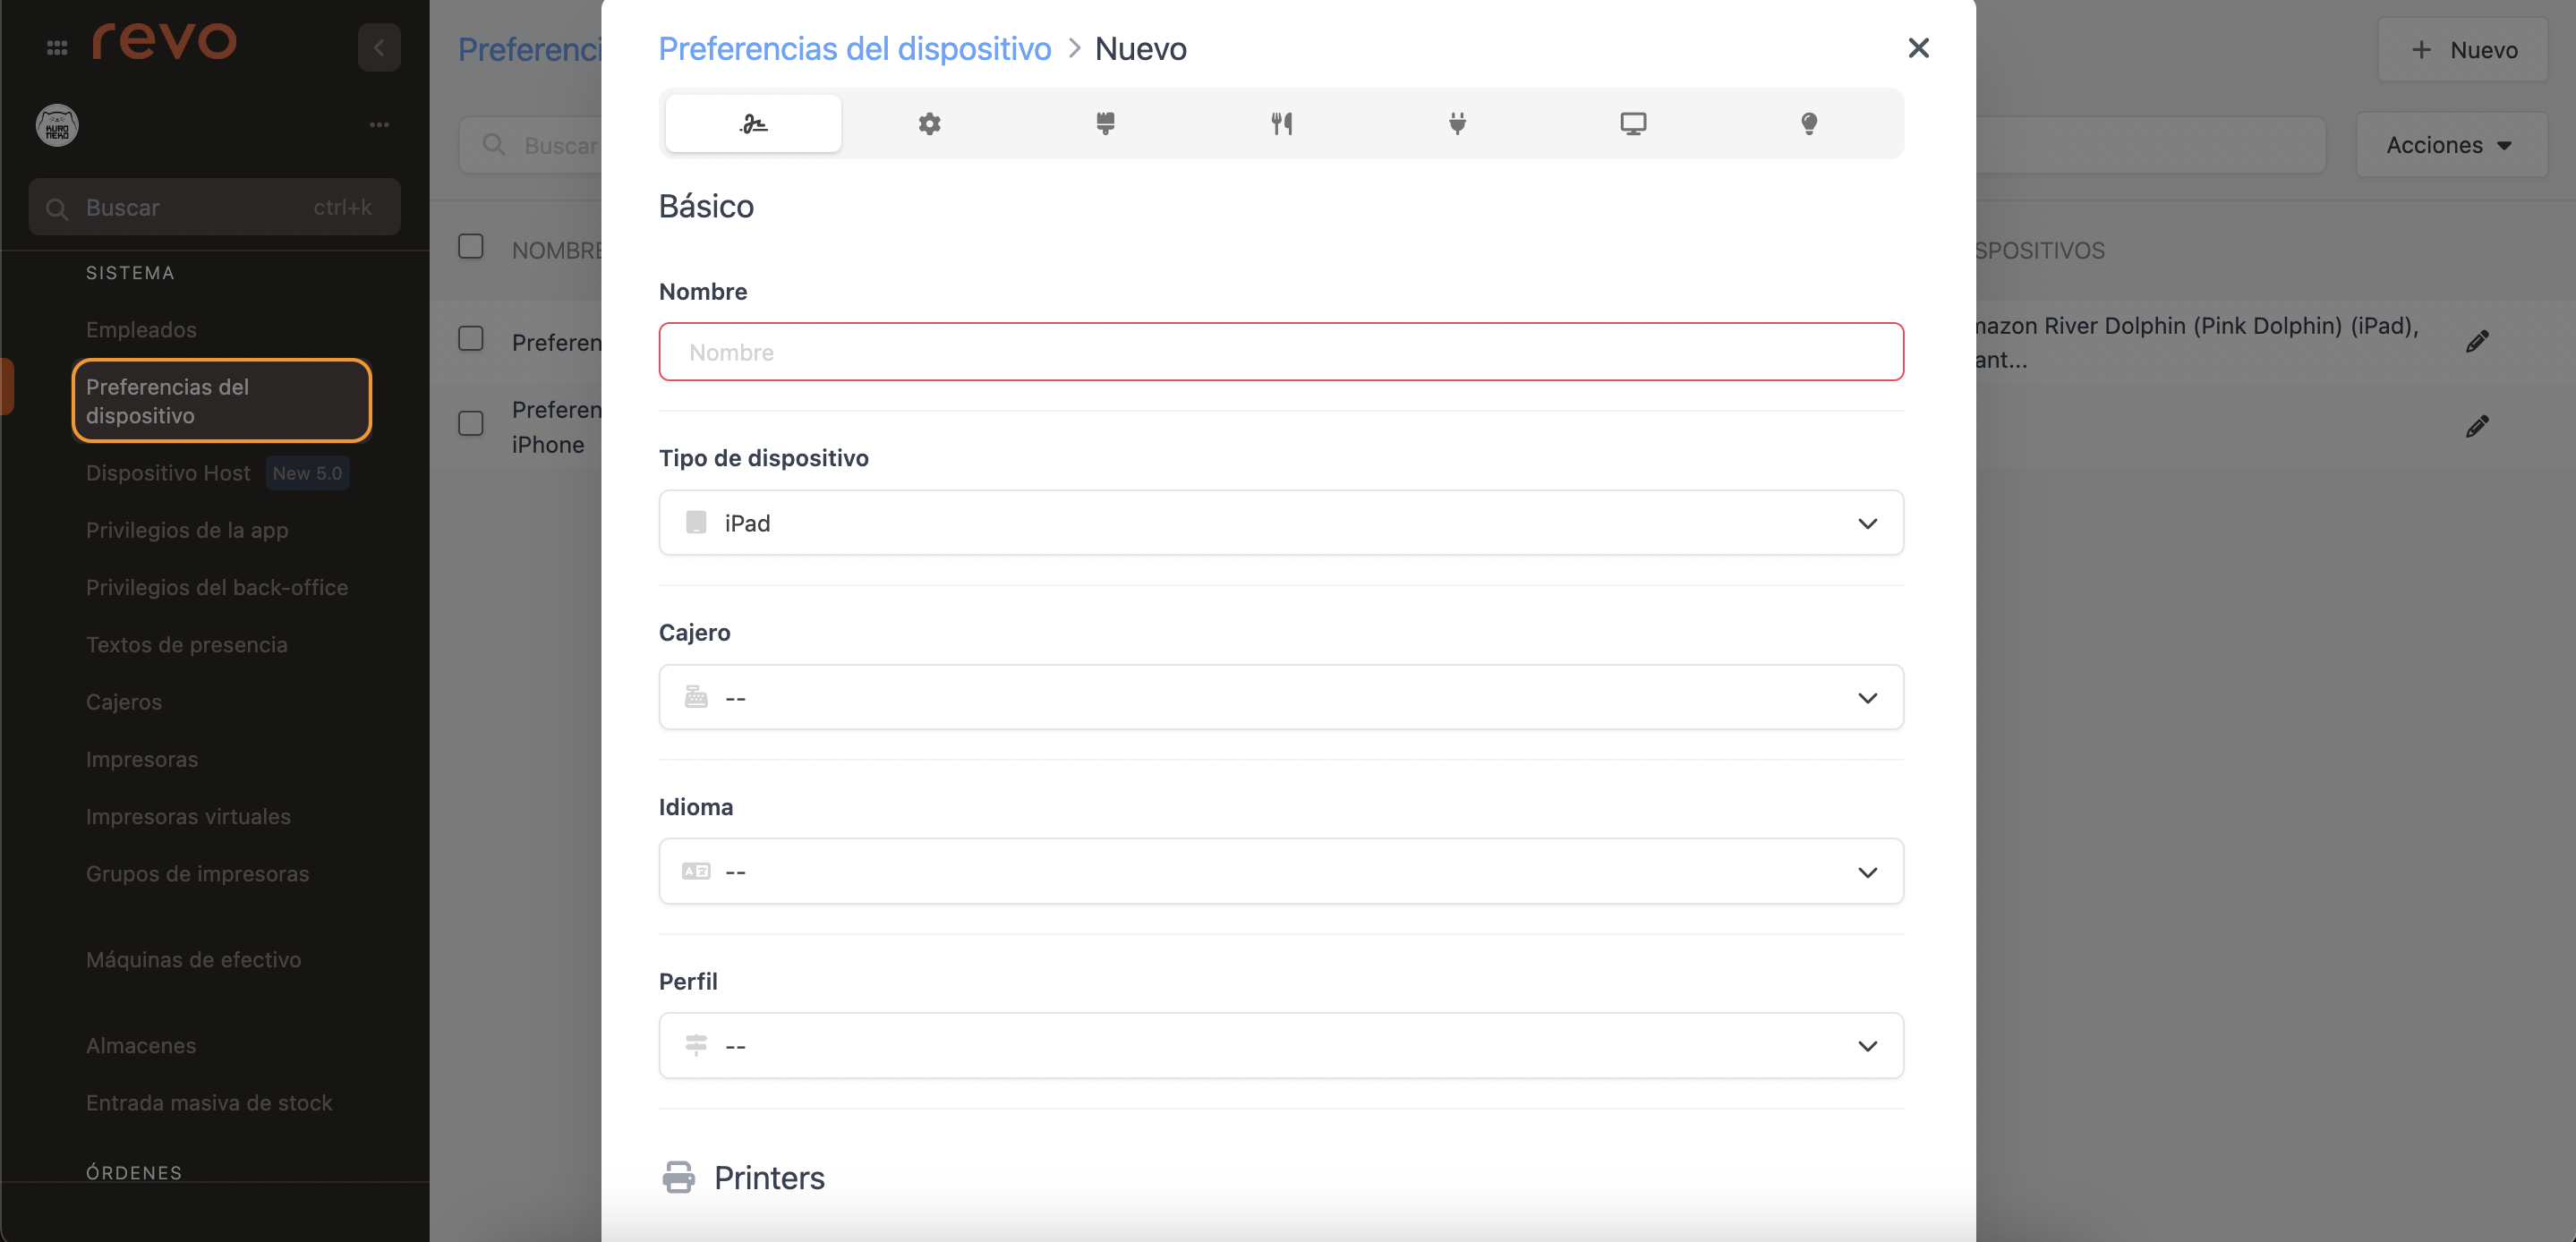
BASIC
-
Name: Add a name.
-
Device Type: Select iPad or iPhone.
-
Cashier: Select a cashier. More information here.
If no cashier is added, the app will prompt you to select one during payment; this action will be temporary.
-
Language: Select the language.
-
Profile: Allows special configurations by device. You must create the profiles in the back-office first, more information here.
If the profile is changed in the back-office, it is necessary to log back into the app to synchronise.
-
Printer: Choose a printer from the dropdown, or use the default one from the back office.
-
Alternative printers: Select from all printers or a customised list.
KDS are not available for this feature.
-
Alternative printers list: Select printers from the list.
BEHAVIOUR
-
Work Method: REVO offers various methods adaptable to different types of businesses. You can have different methods on different devices.
- Full Service: For restaurants, with table plan, virtual tables, and POS.
- Virtual Tables: Shows only virtual tables. More information here.
- POS: Direct sales without an associated table. More information here.
- Takeaway POS: Combination of takeaway service and POS. More information here.
- Takeaway: Combination of takeaway service and full system. More information here.
- Night: For nightclubs or cocktail bars. More information here.
- DDS: Shows orders being prepared or ready. More information here.
- Delivery: Management of home delivery and takeaway orders. More information here.
-
Bar Service: To manage orders from the POS without needing to assign a table. More information here.
-
Show pin: Select when to show the pin.
- After inactivity period: Shows the pin after a period of inactivity on the iPad. You can set the inactivity period in Order Settings in the back-office.
- When closing the order: Shows the pin screen every time an order is closed.
-
When returning to the table plan: Shows the pin screen when returning to the table plan.
-
Automatic synchronisation: Enable this option to automatically synchronise changes from the back-office.
-
Print on close: Enable this option to print pending items to the kitchen when closing the order.
This option is typically used with the takeaway work method. -
Keep orders open: Enable this option to keep orders open at the table when paying. Instead of the pay button, the validate button will appear. Once clicked, the order will be closed.
You can also close the order by accessing it; the payment button will become the validate button. You can add more items, and the payment button will reappear.
-
Keep order when printing bill: Enable this option to stay on the order screen when printing a pro forma ticket for the customer.
-
Keep order when printing to kitchen: Enable this option to stay on the order screen when printing to the kitchen for preparation.
-
Airprint options: Enable this option to show printing options via Airprint.
-
Sound on Ready status: Decide when to emit a sound when the order is ready.
APPEARANCE
-
PIN screen theme: Choose the colour for the PIN screen background.
-
Show preview: The preview screen is crucial during service, allowing you to track orders and perform actions like kitchen notes and ticket printing. Enable it to display.
Using the preview screen does not lock the order.
-
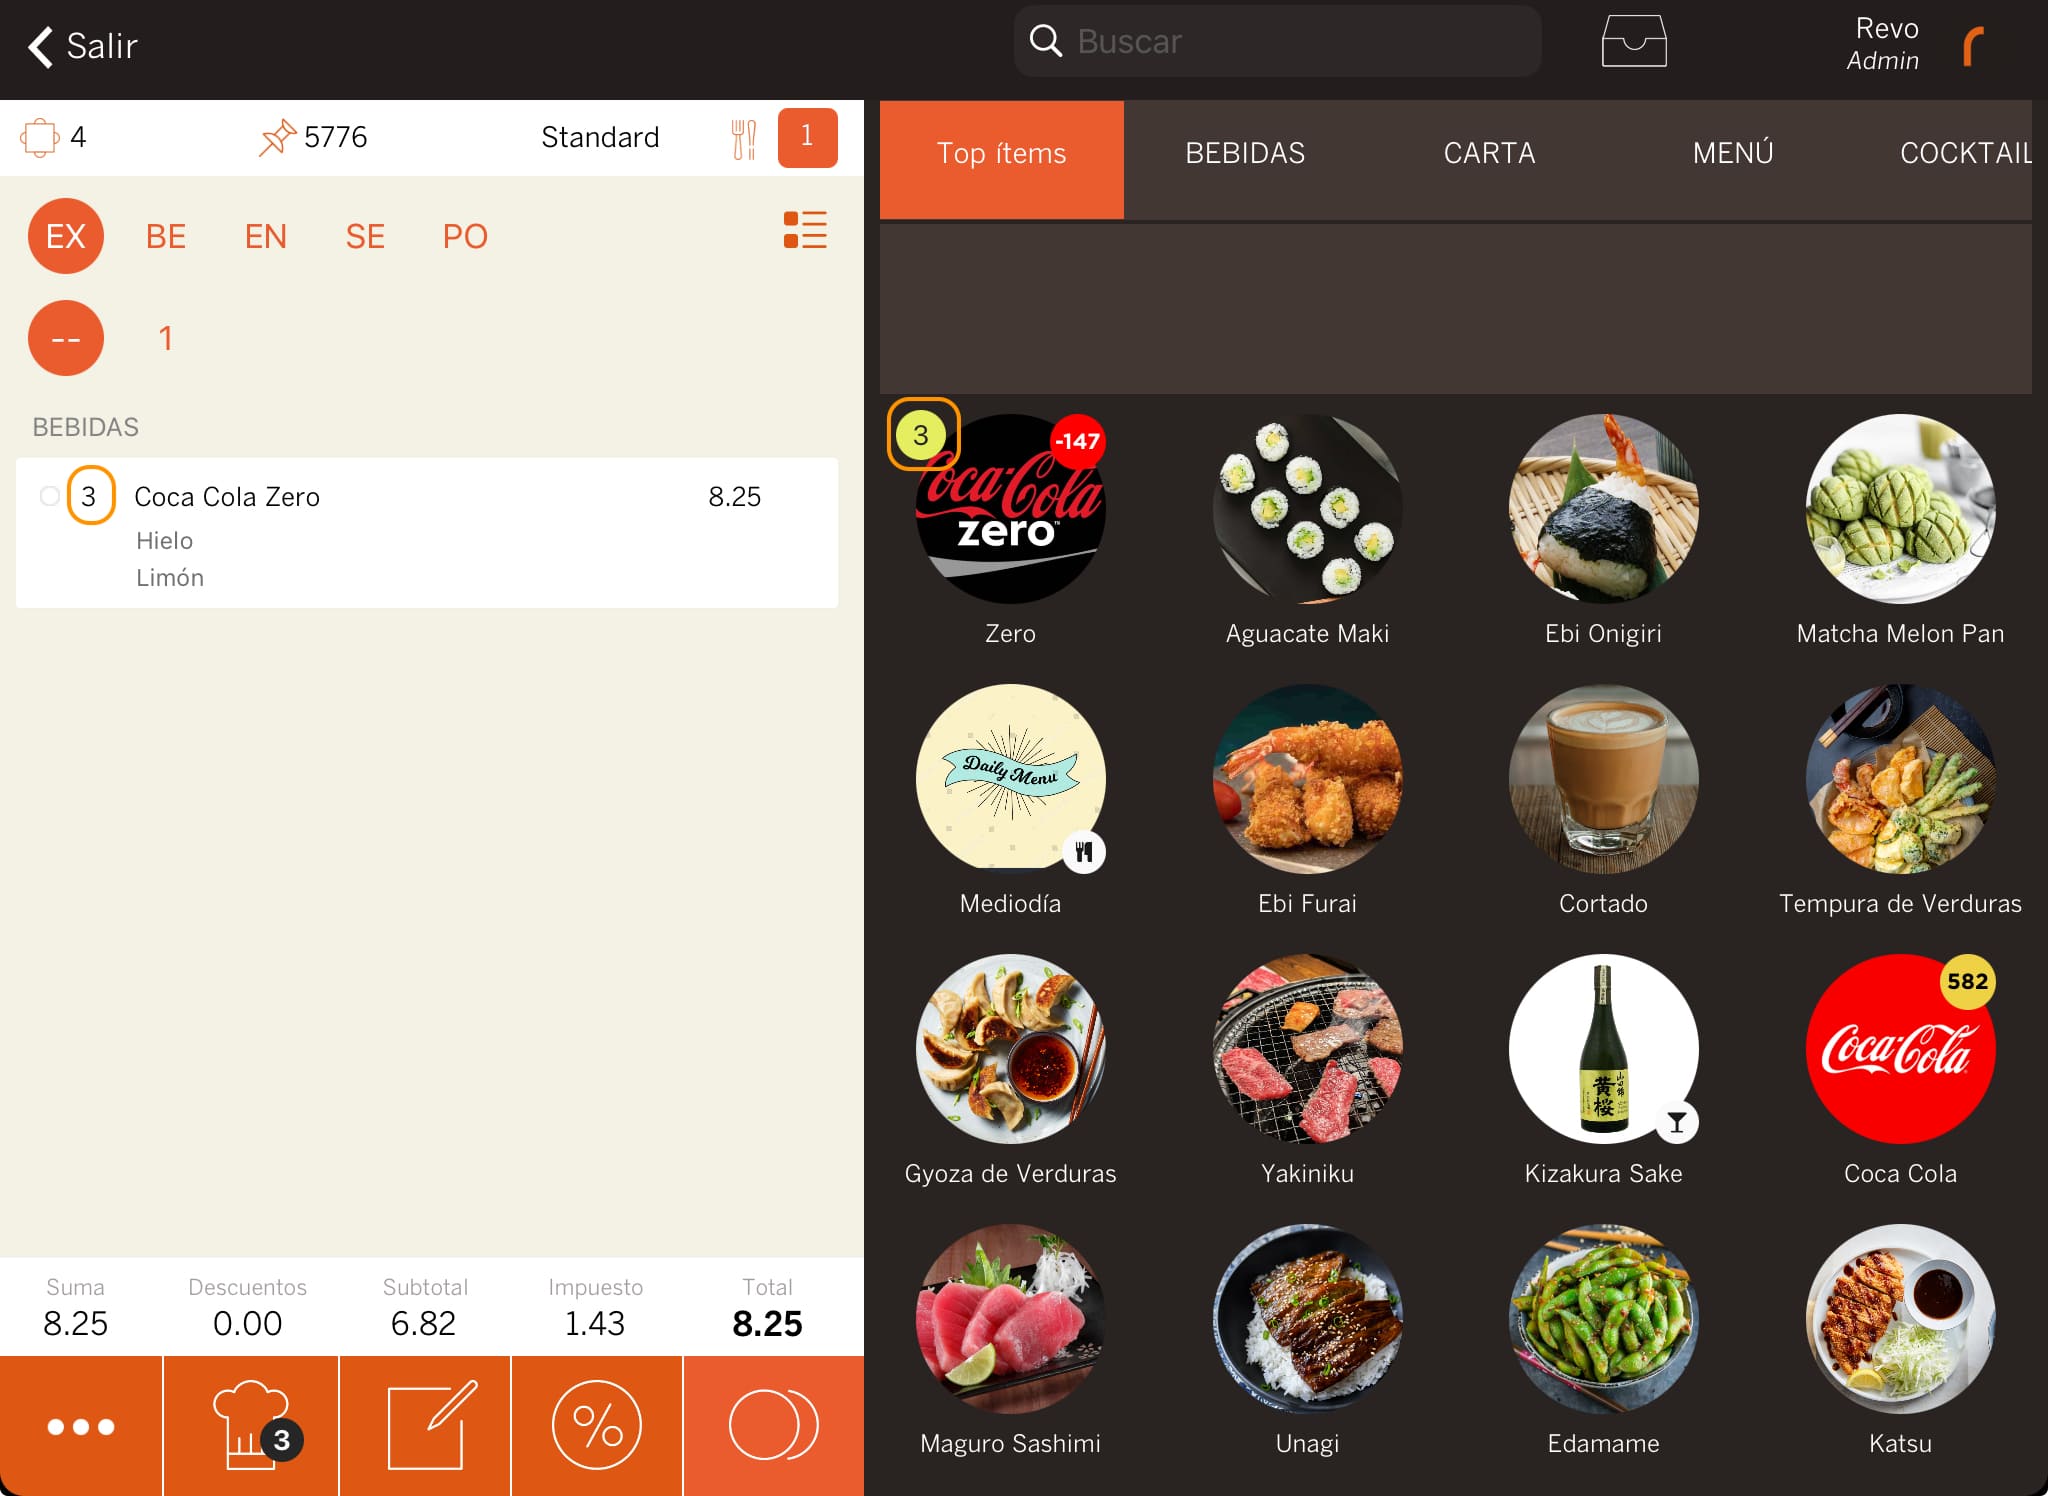
Featured products: Display options for best-selling products.
- Auto: Automatically displays the top 16 best-selling products if no favourite items are configured.
- None: Disables the display.
- Top items: Displays the top 16 best-selling products.
-
Favourites: Displays products marked as favourites in the back-office. More information here.
-
Catalogue size: Select the ideal size for the catalogue.
-
Optional modifiers on tap: Enable this option to display optional modifiers when tapping a product. Tap and hold for 1 second to show the default options.
-
Content calculator: Choose when to display the calculator.
-
Zoom transition: Enable this option to open a table with a zoom transition when tapped.
-
IN REVO XEF ADVANCE Selection counter: Activate this option to briefly show a bubble with the number of times a product has been selected.
MENU
-
Quick Entry: When working with Menus in REVO, you can choose between two ways to create them:
-
Quick Entry Enabled : Simplifies the entry by allowing you to enter the desired number of menus at once.
For example: You have a table with three customers and they all order the menu of the day. With quick entry enabled, it would go like this:
- Select the menu of the day.
- Select 3 on the numeric screen.
- Order the dishes and drinks for all three customers simultaneously.
-
Send the order to the kitchen and bar.
-
Quick Entry Disabled : Requires ordering each menu individually.
For example: For the same three customers:
- Select the menu of the day.
- Order the dishes and drinks for each customer one by one.
-
Send the order to the kitchen and bar, which will show individually on the ticket.
-
-
Simplified View: If enabled , only the menu name and total price are shown. For example: 3 Menus of the day £10 £30.
If disabled , all the dishes included in the menu are displayed below its name.The view option only affects the display in the app, not on the bill. On the bill, only menu dishes with a price supplement are printed.
-
Menu size: Choose the most suitable size for the menus.
INTEGRATION
-
Auto print: Enable this option to automatically print received orders.
-
Close orders when paid: Enable this option to automatically close paid orders.
-
Print orders from Revo HANDY: Enable this option to print Revo HANDY orders to the kitchen.
-
On receiving an external payment: Select how the app should react when receiving an external payment.
DDS
-
DDS Mode: Select which orders are displayed on the screen in DDS mode.
- All: Shows all open orders.
- Delivery: Shows only open delivery orders.
-
Table: Shows only open table orders.
-
Values: You can choose to display the last 2 digits of the order, the order number, or the table name.
MARKETING
-
Forms: With REVO, you can easily create and customise marketing forms to get your customers' feedback before closing an order. For example, did you enjoy the food? Rate from 1 to 10.
You can create the forms from the back-office and select them in the preferences so that they appear when closing an order. Here is a guide to create these forms.
-
Show form on Revo DISPLAY: Enable this option to show the form on Revo DISPLAY instead of on the iPad.
2. CONSIDERATIONS TO KEEP IN MIND
-
A cashier or printer associated with a profile cannot be deleted. First, modify the profile and select another cashier/printer.
-
The first profile in the back-office cannot be deleted, ensuring that there is always one available.
-
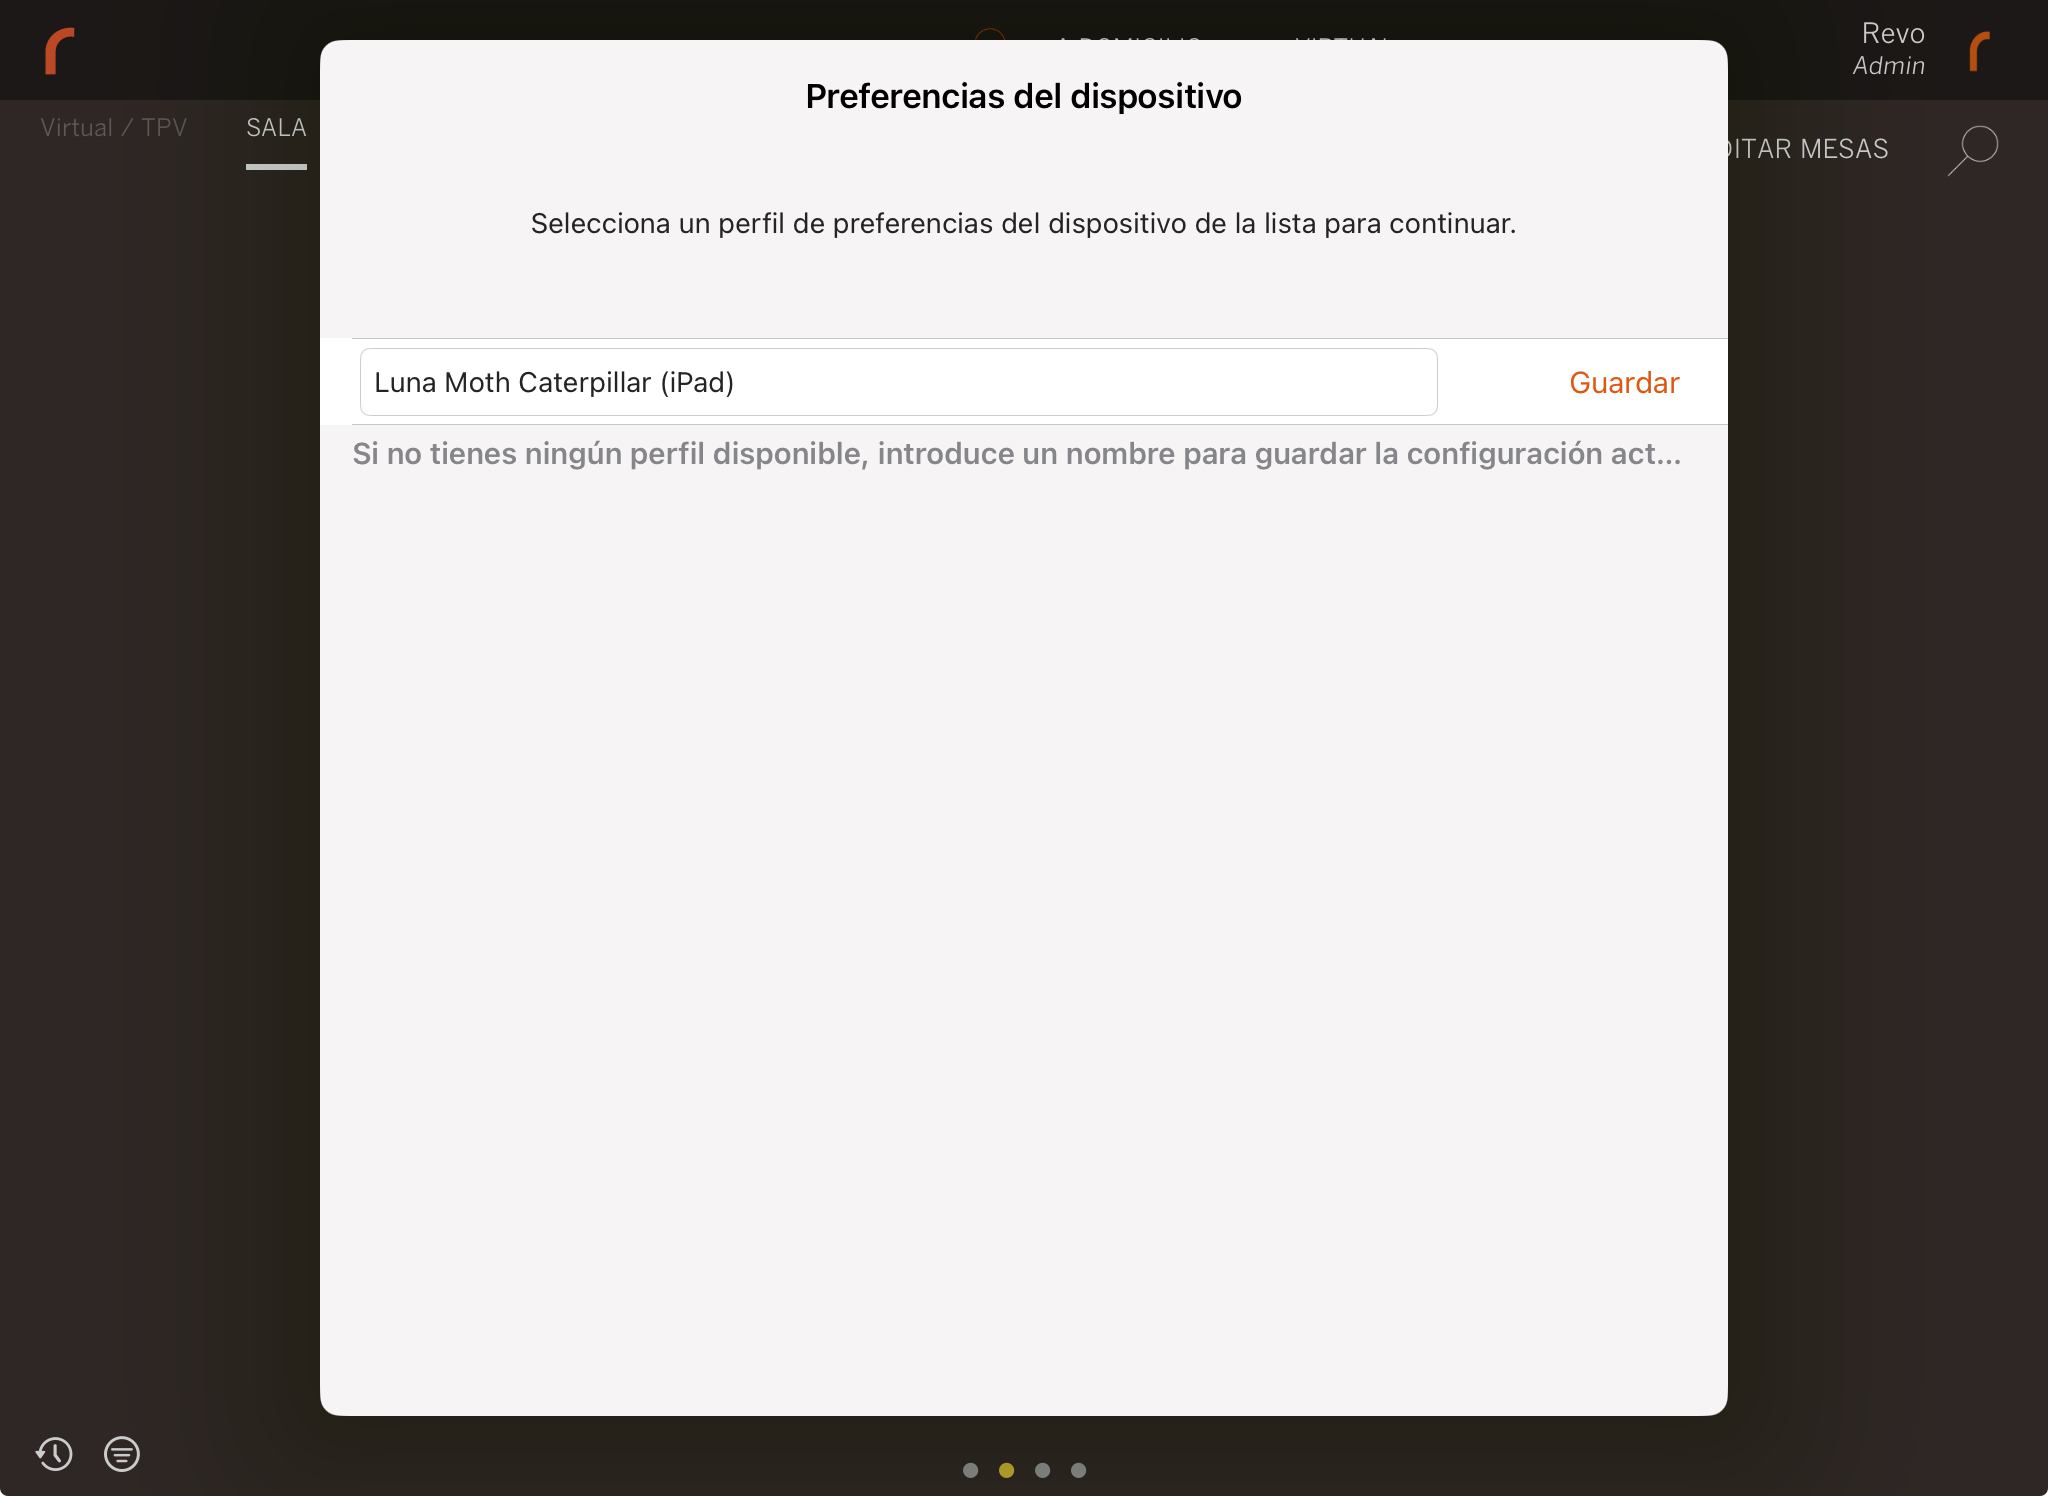
Starting from version 4.4.3, it is mandatory to select a profile on the device to continue working.
-
If the app is closed, the profile remains. You only need to reselect it if it is disassociated from the device from the back-office.
-
If the employee does not have the privilege to access the preferences, the profile will remain. They can only select and create a profile if they access it for the first time after updating.
-
The created profile can be added to the devices from the devices section. More information here.
-
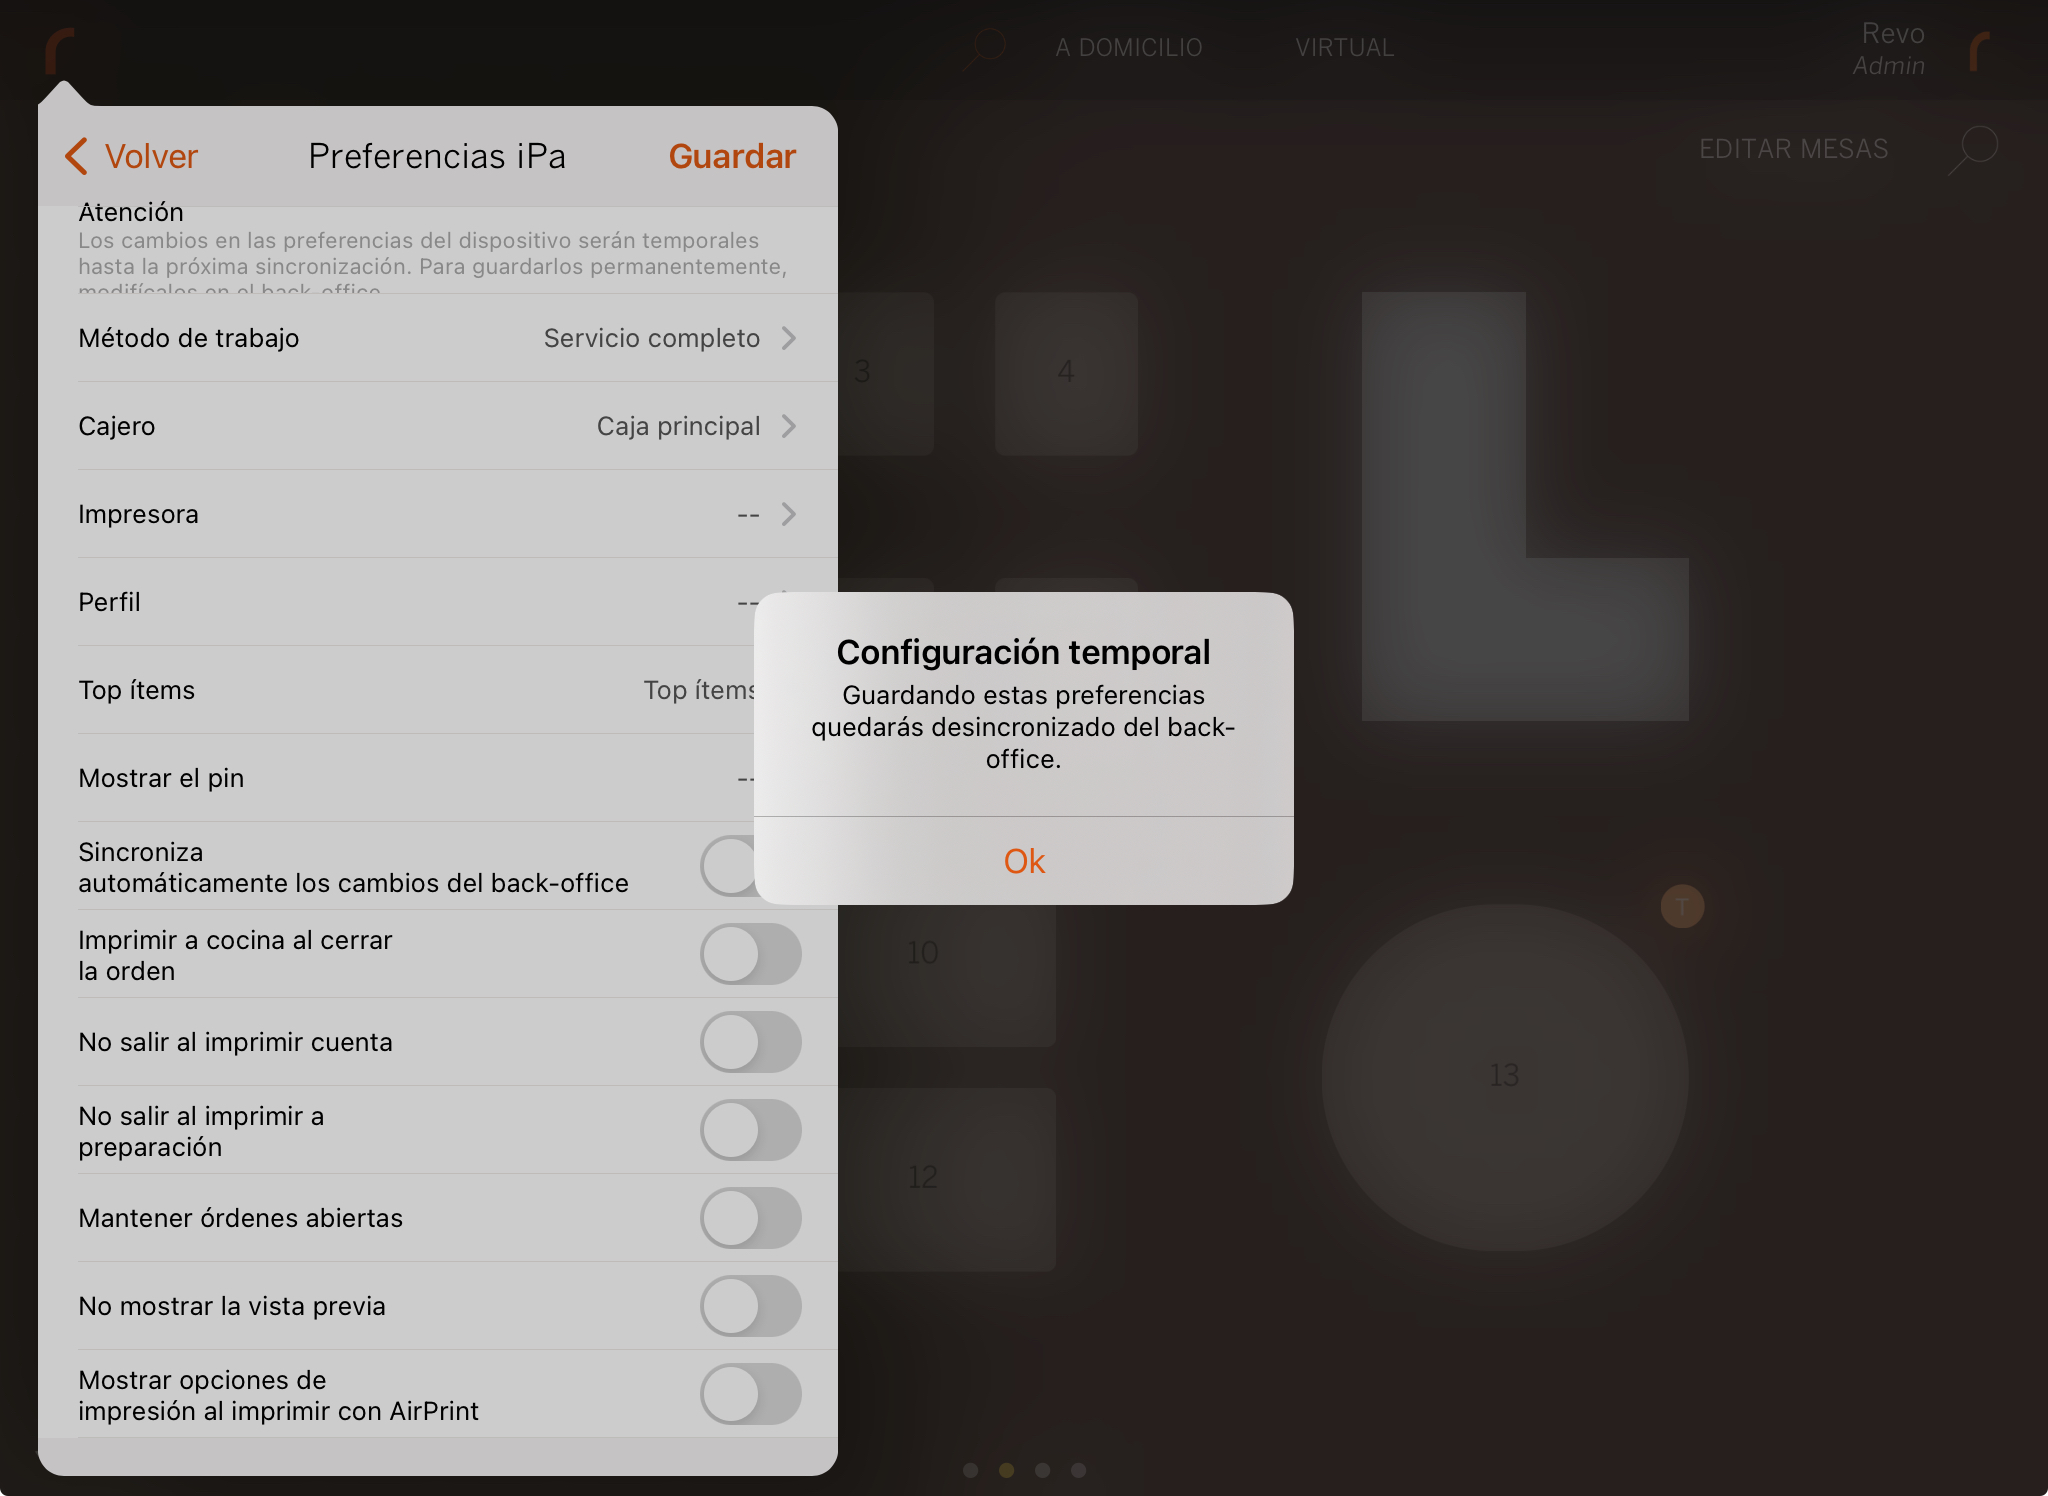
The changes you make to the preferences from the app will be temporary.
-
If you make modifications, a message will appear:
-
If they do not match those in the back-office, the alert symbol will appear
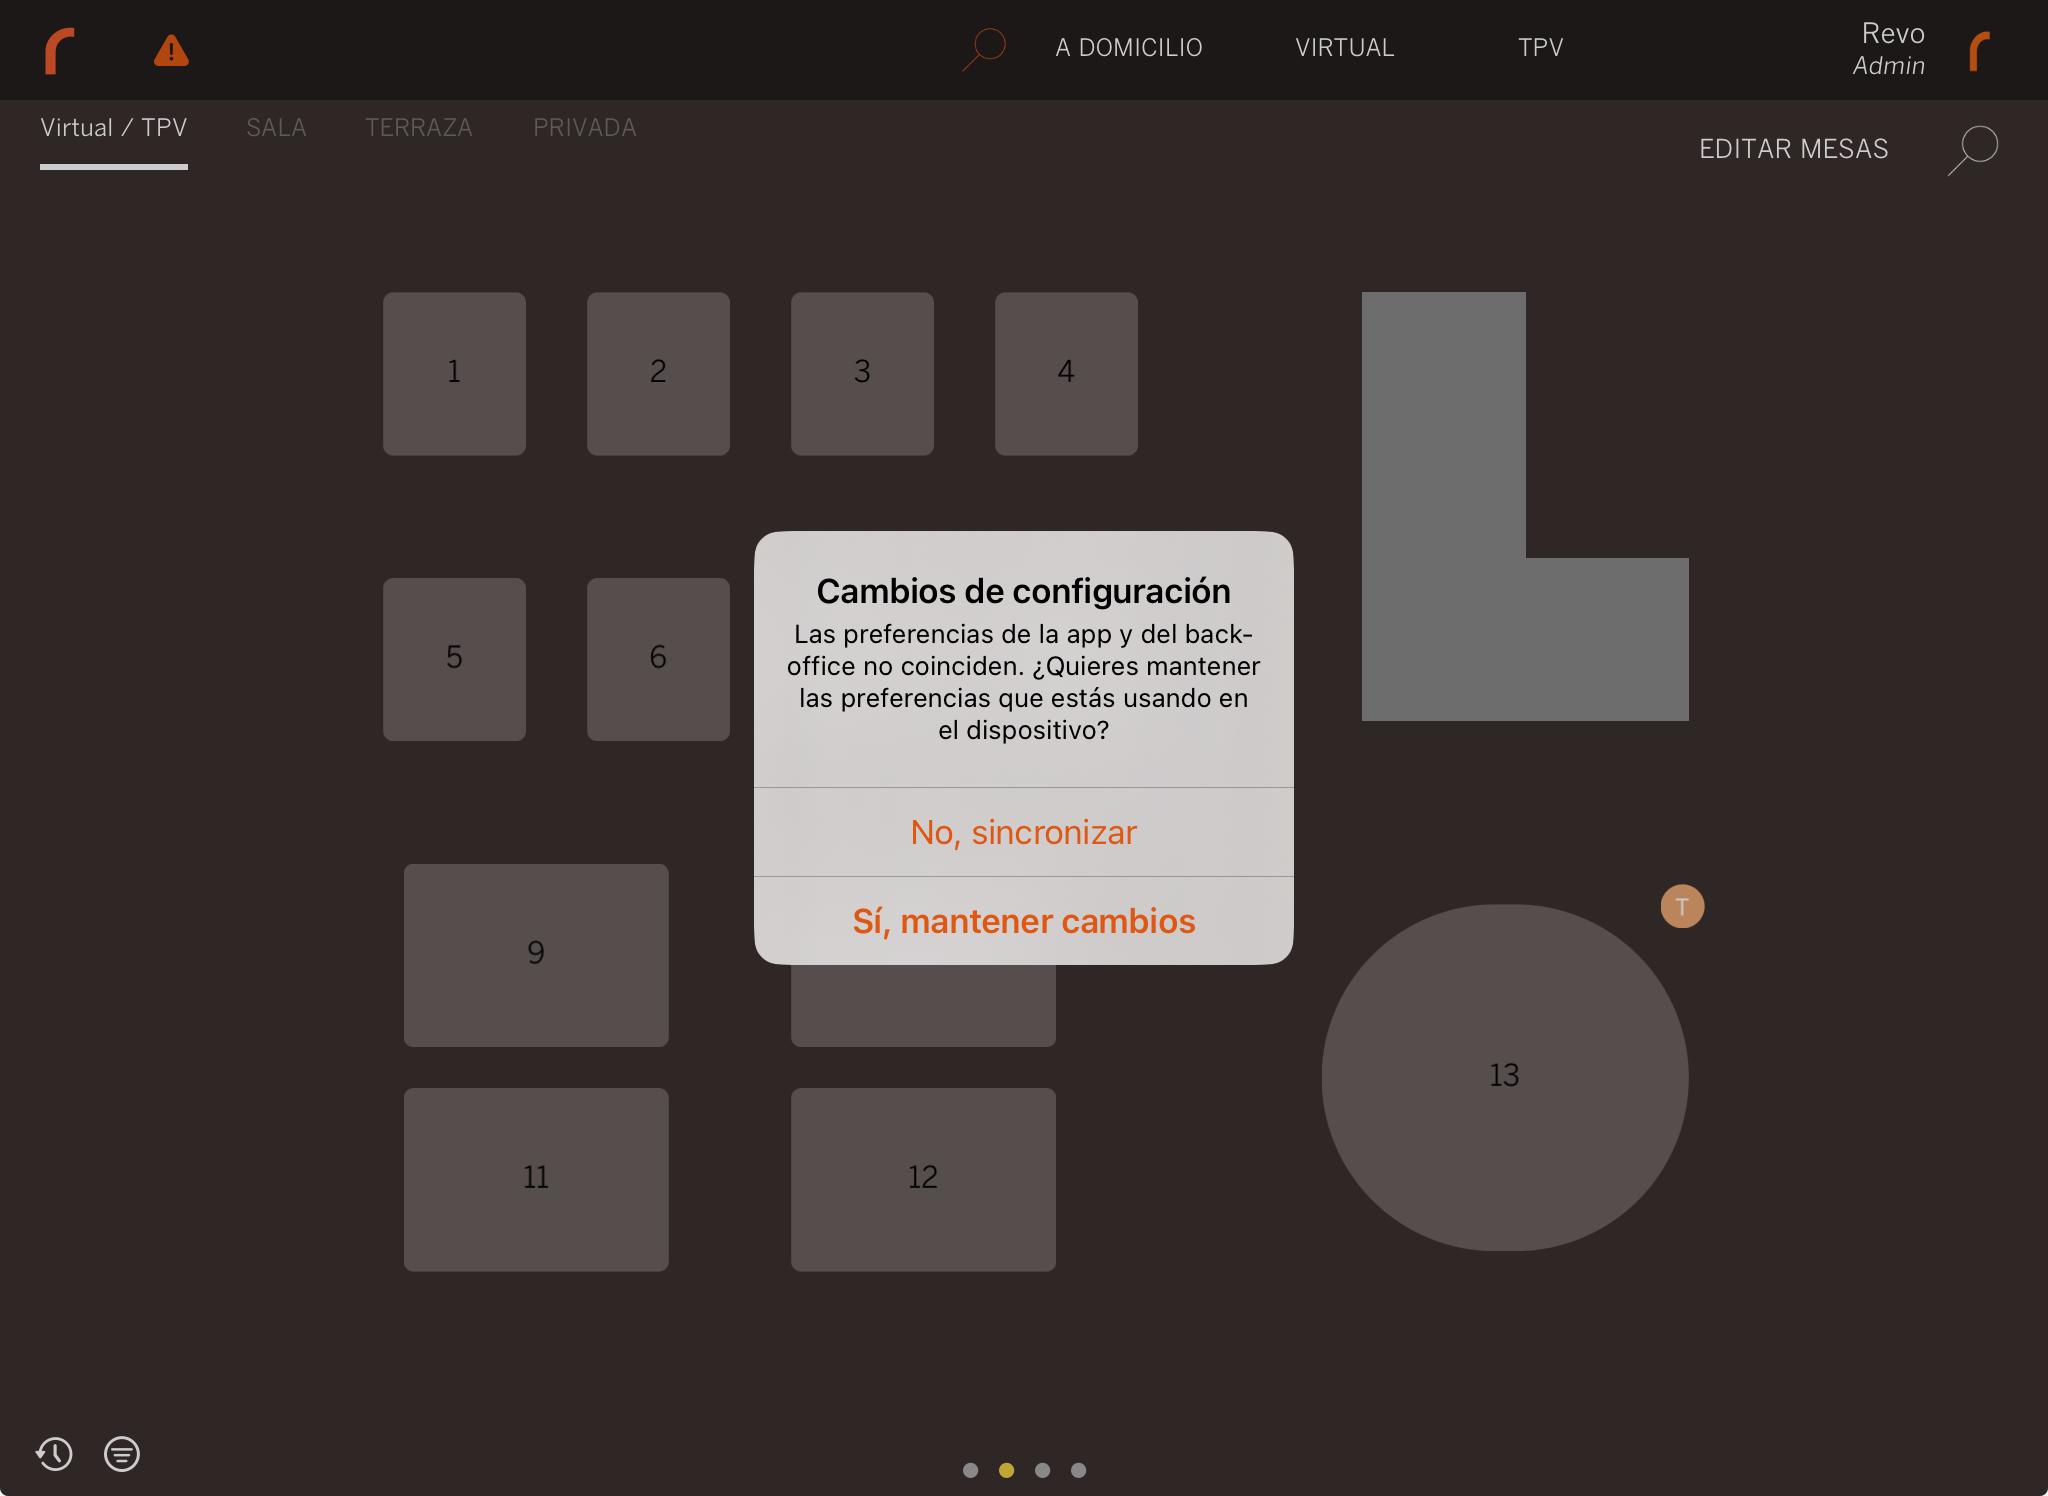
-
If you tap on a message will appear:
- No, synchronise: Resynchronises the configuration from the back-office.
- Yes, keep changes: Keeps the changes made in the app.
-
-
3. CHANGE PREFERENCES PROFILE IN THE APP
If you have created different profiles, you can easily switch between them in the app. To do this:
1. Tap the r.
2. Select Preferences Profile.
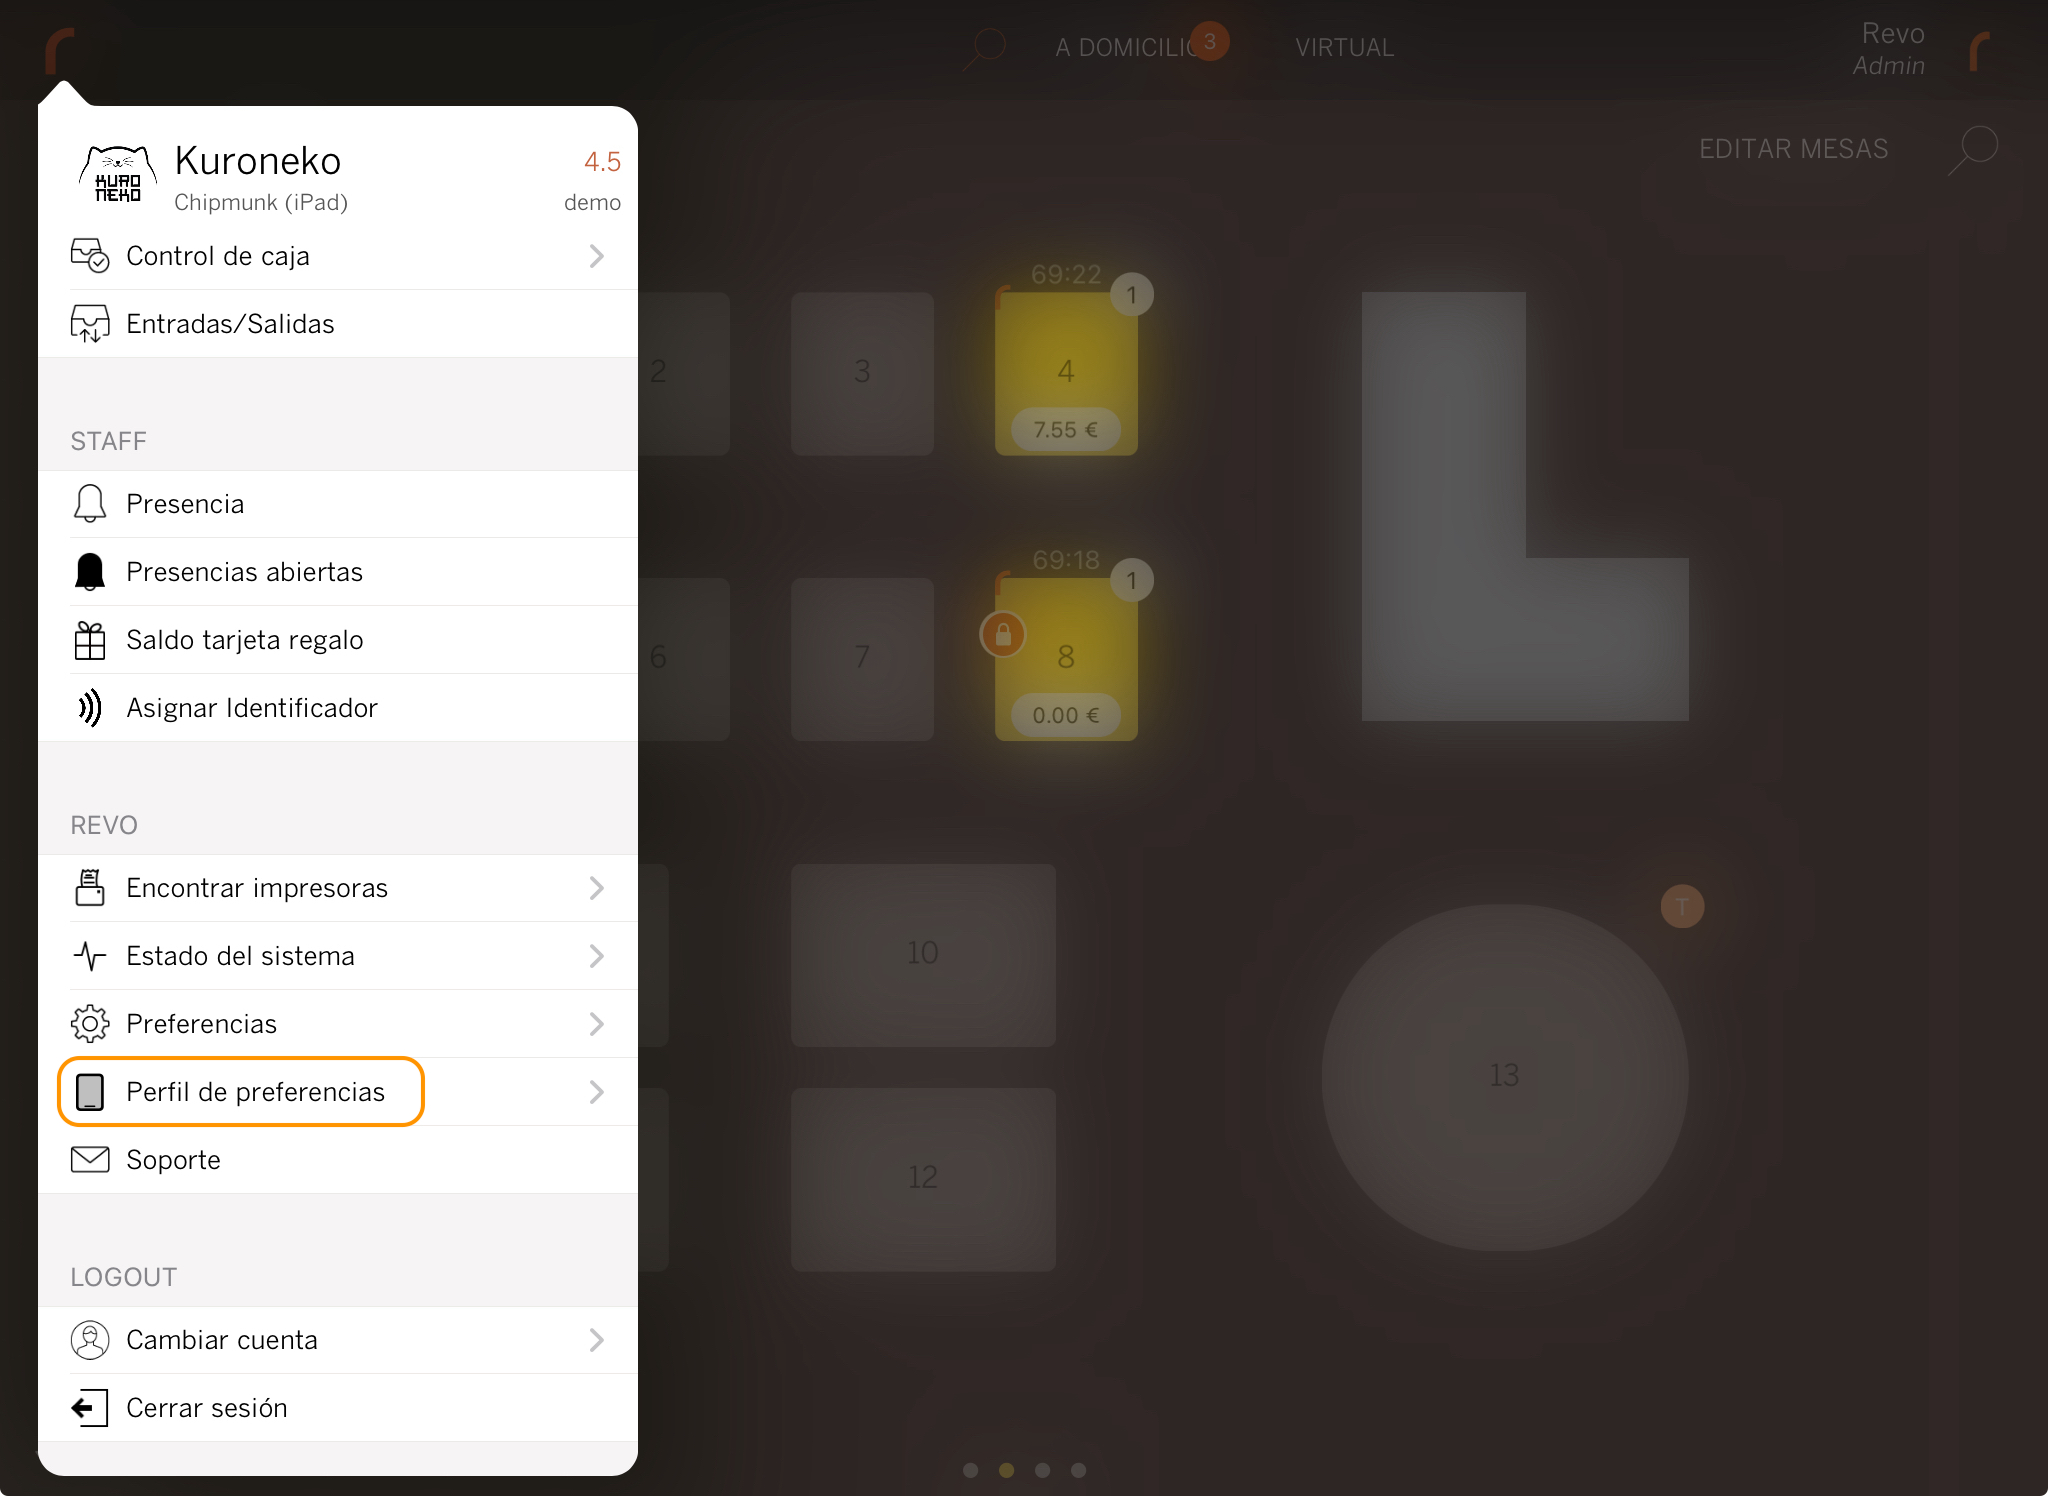
3. Tap the profile you want to switch to.
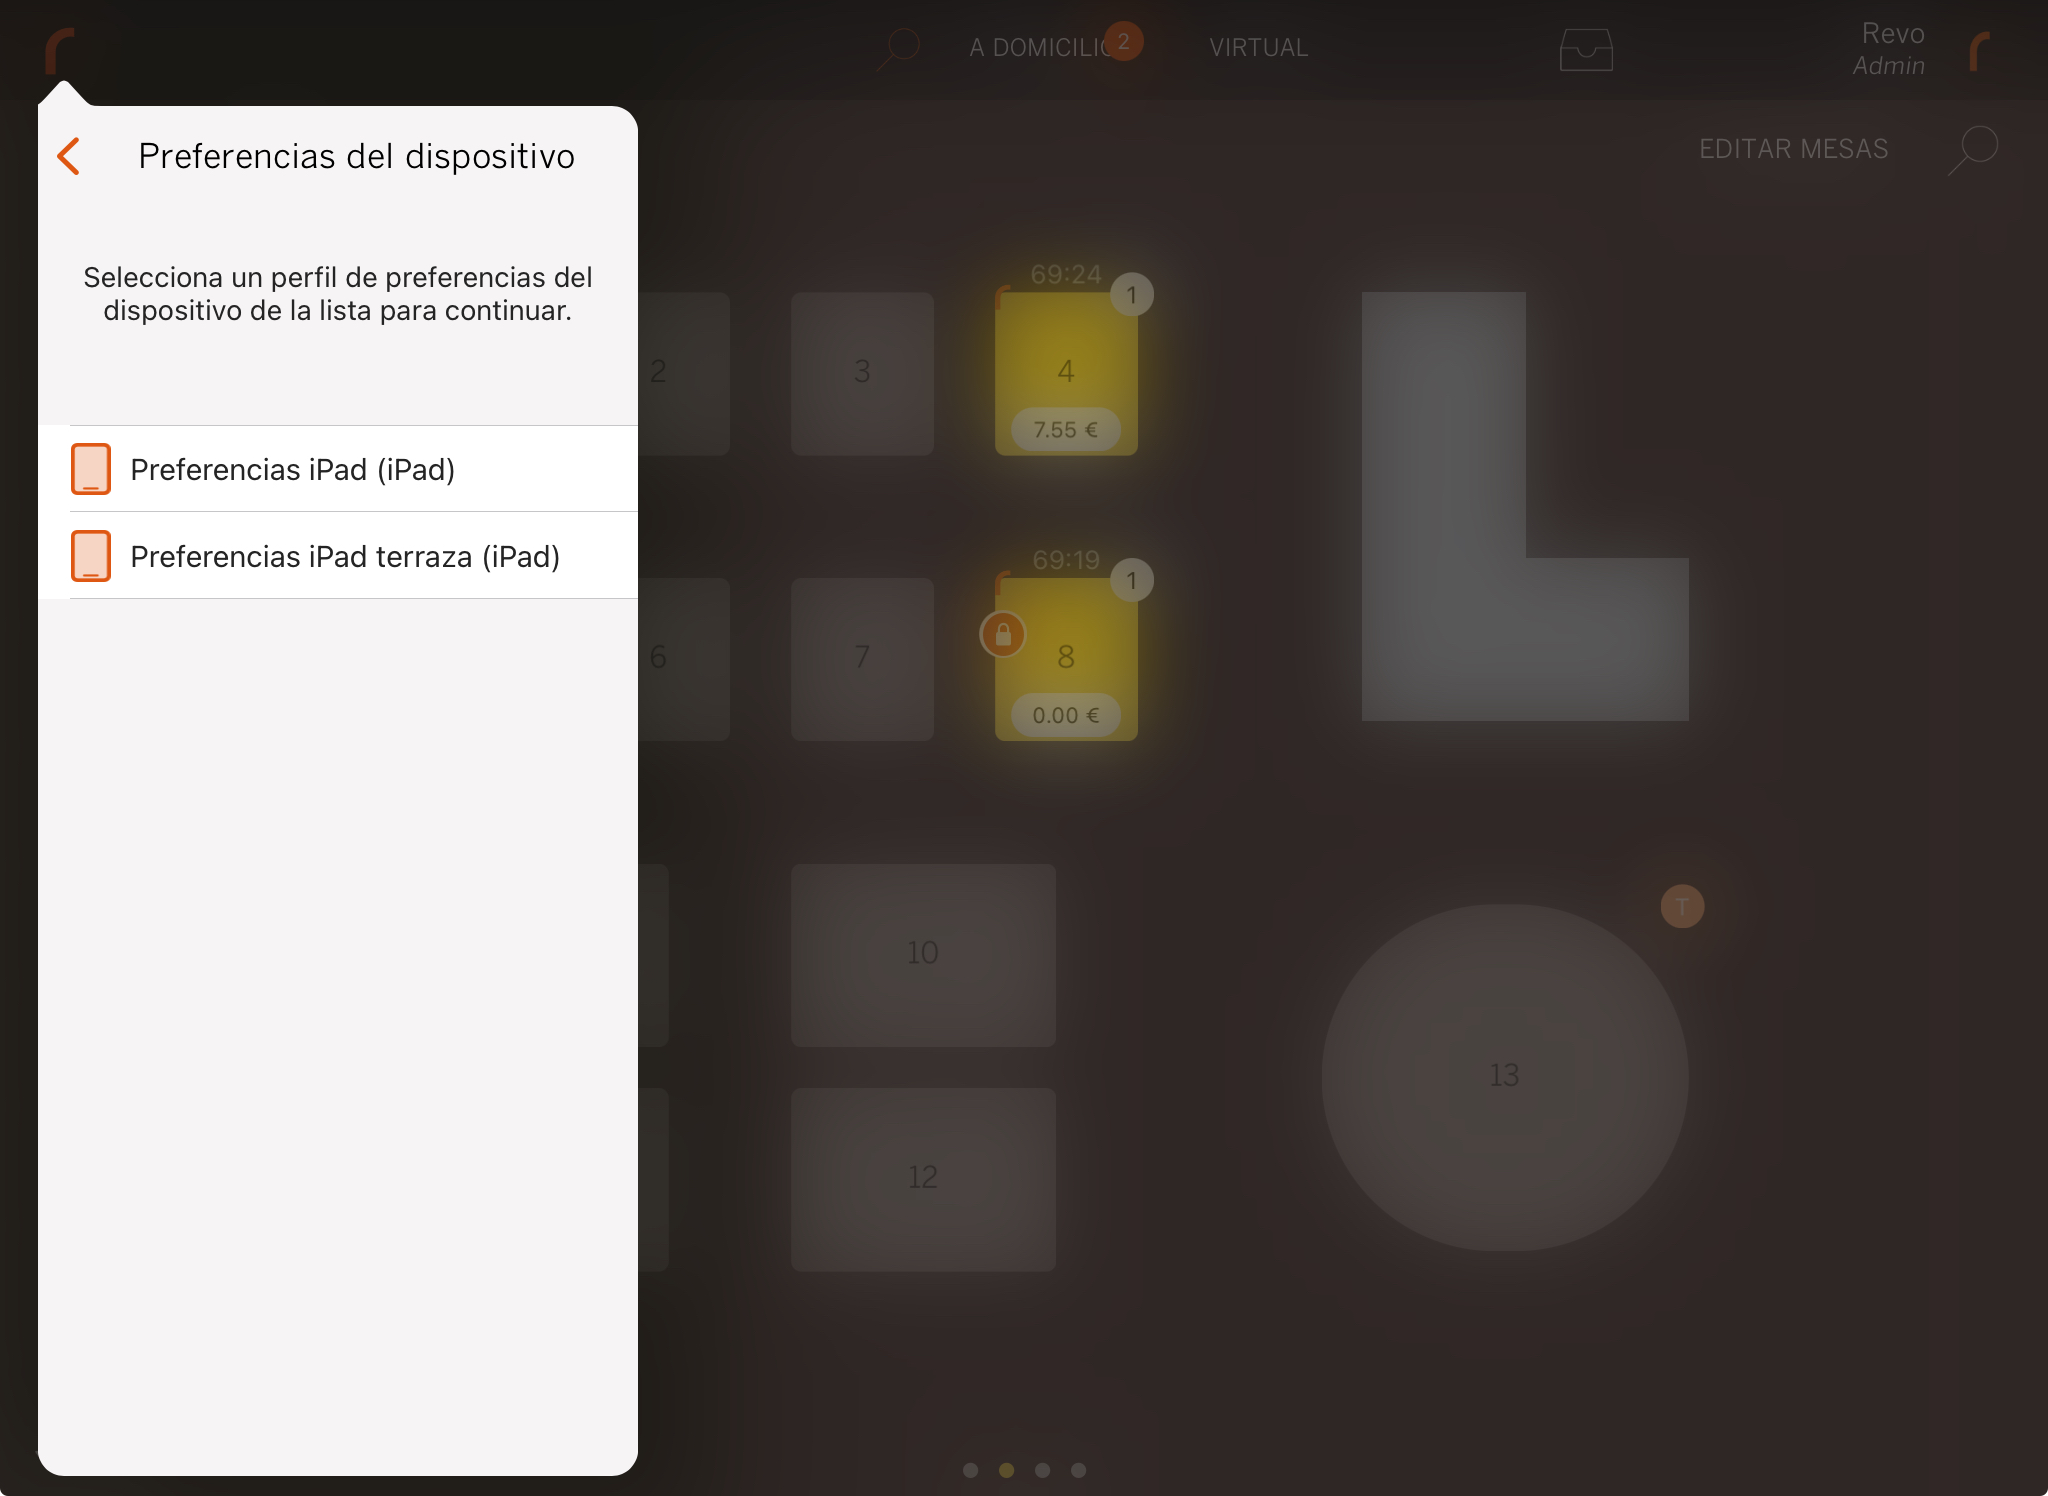
4. The preferences will automatically switch to the selected profile's settings.