1. OVERVIEW 2. CREATE A MARKETING FORM 3. ACTIVATE A FORM IN REVO XEF
Marketing forms allow you to gather your customers' opinions. You can create forms with questions tailored to your needs.
Once activated, the forms will appear when closing an order. If you don’t want them to appear, you can skip them with a button or temporarily disable them.
1. OVERVIEW
MARKETING FORM
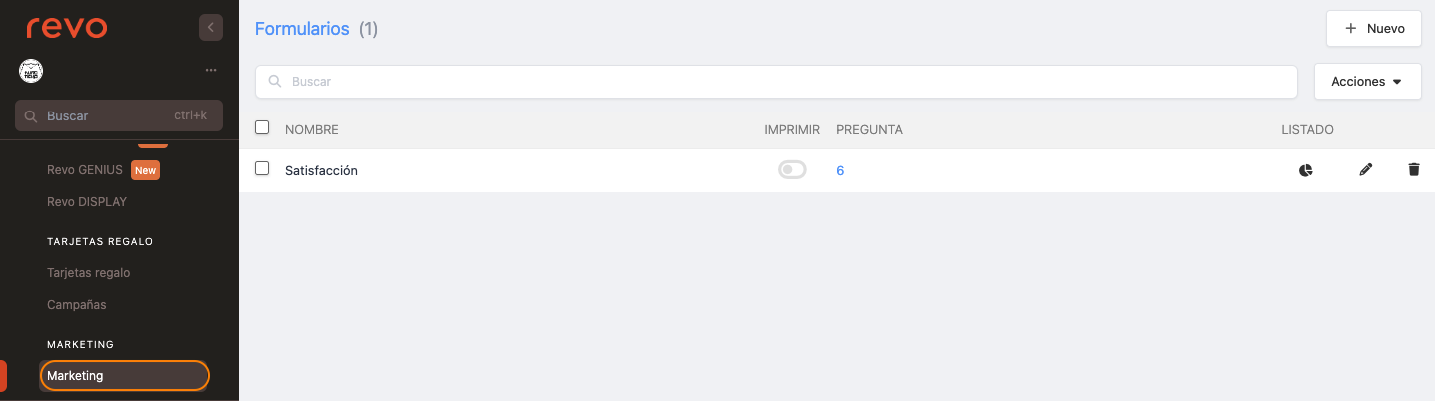
1. Access the back-office.
2. Go to Integrations / MARKETING.
-
+ New: Create a form.
-
: Search for a form.
-
Actions: Delete selected forms.
-
: Select forms.
-
Name: Form name.
-
Print: Printing enabled or disabled .
-
Questions: Number of questions. Click to create or delete them.
-
: View statistics.
Deleting a question will also remove its associated statistics.

-
: Edit the form.
-
: Delete the form.
FORM QUESTIONS
1. Click on the 0 in the questions' column.
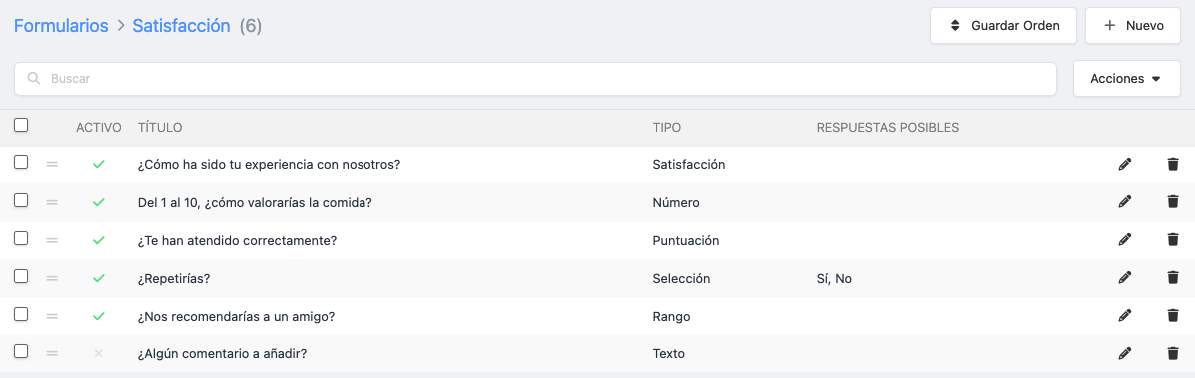
- Save order: Save the new order of the questions.
- + New: Create a question.
- : Search for questions.
- Actions: Delete selected questions.
- : Select questions.
- : Reorganise questions.
- Title: Question title.
- Type: Type of question.
- Possible answers: Add answers if the type allows it.
- : Edit questions.
- : Delete questions.
2. CREATE A MARKETING FORM
1. Go to Integrations / MARKETING.
2. Click + New and complete the information.
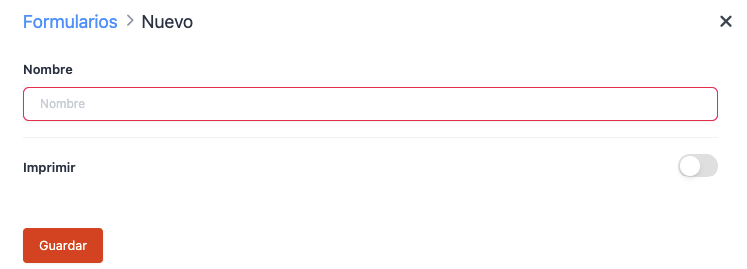
- Name: Form name.
- Print: Enable to print when closing the order.
3. Click Save.
4. Click on the 0 in the questions' column.
5. Click + New to add questions.
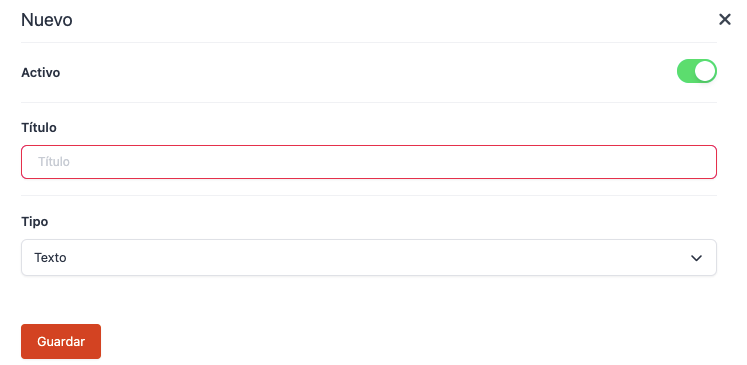
- Active: Enable the question.
- Title: Write the question or title. This will be visible in the app.
-
Type: Select the type of question:
- Text: Free text field.
- Numbering: Numeric field.
- Range: A bar to select a value.
- Rating: Selection from 1 to 5.
- Selection: Add options to choose from.
-
Satisfaction: Range of five faces to choose the satisfaction level.
6. Click Save.
3. ACTIVATE A FORM IN REVO XEF
1. Go to the REVO menu r
2. Click Sync to download the changes.
3. Access Preferences.
4. Select the form in Marketing Forms.
5. If using Revo DISPLAY, enable to display the form.
6. Click Save.
7. Each time you close an order, the form will appear for completion.
You can skip it by clicking "Skip" or disable it in Preferences.