1. OVERVIEW 2. HOW TO CREATE A CASHIER
In cashiers, you configure the registers for your company. A basic cashier setup includes a device (like an iPad), a printer, and a cash drawer.
To process transactions with REVO, you need at least one cashier. By default, one cashier is already added. You can add as many cashiers as needed.
1. OVERVIEW
1. Access the back-office of Revo XEF.
2. Go to Configuration / CASHIERS.
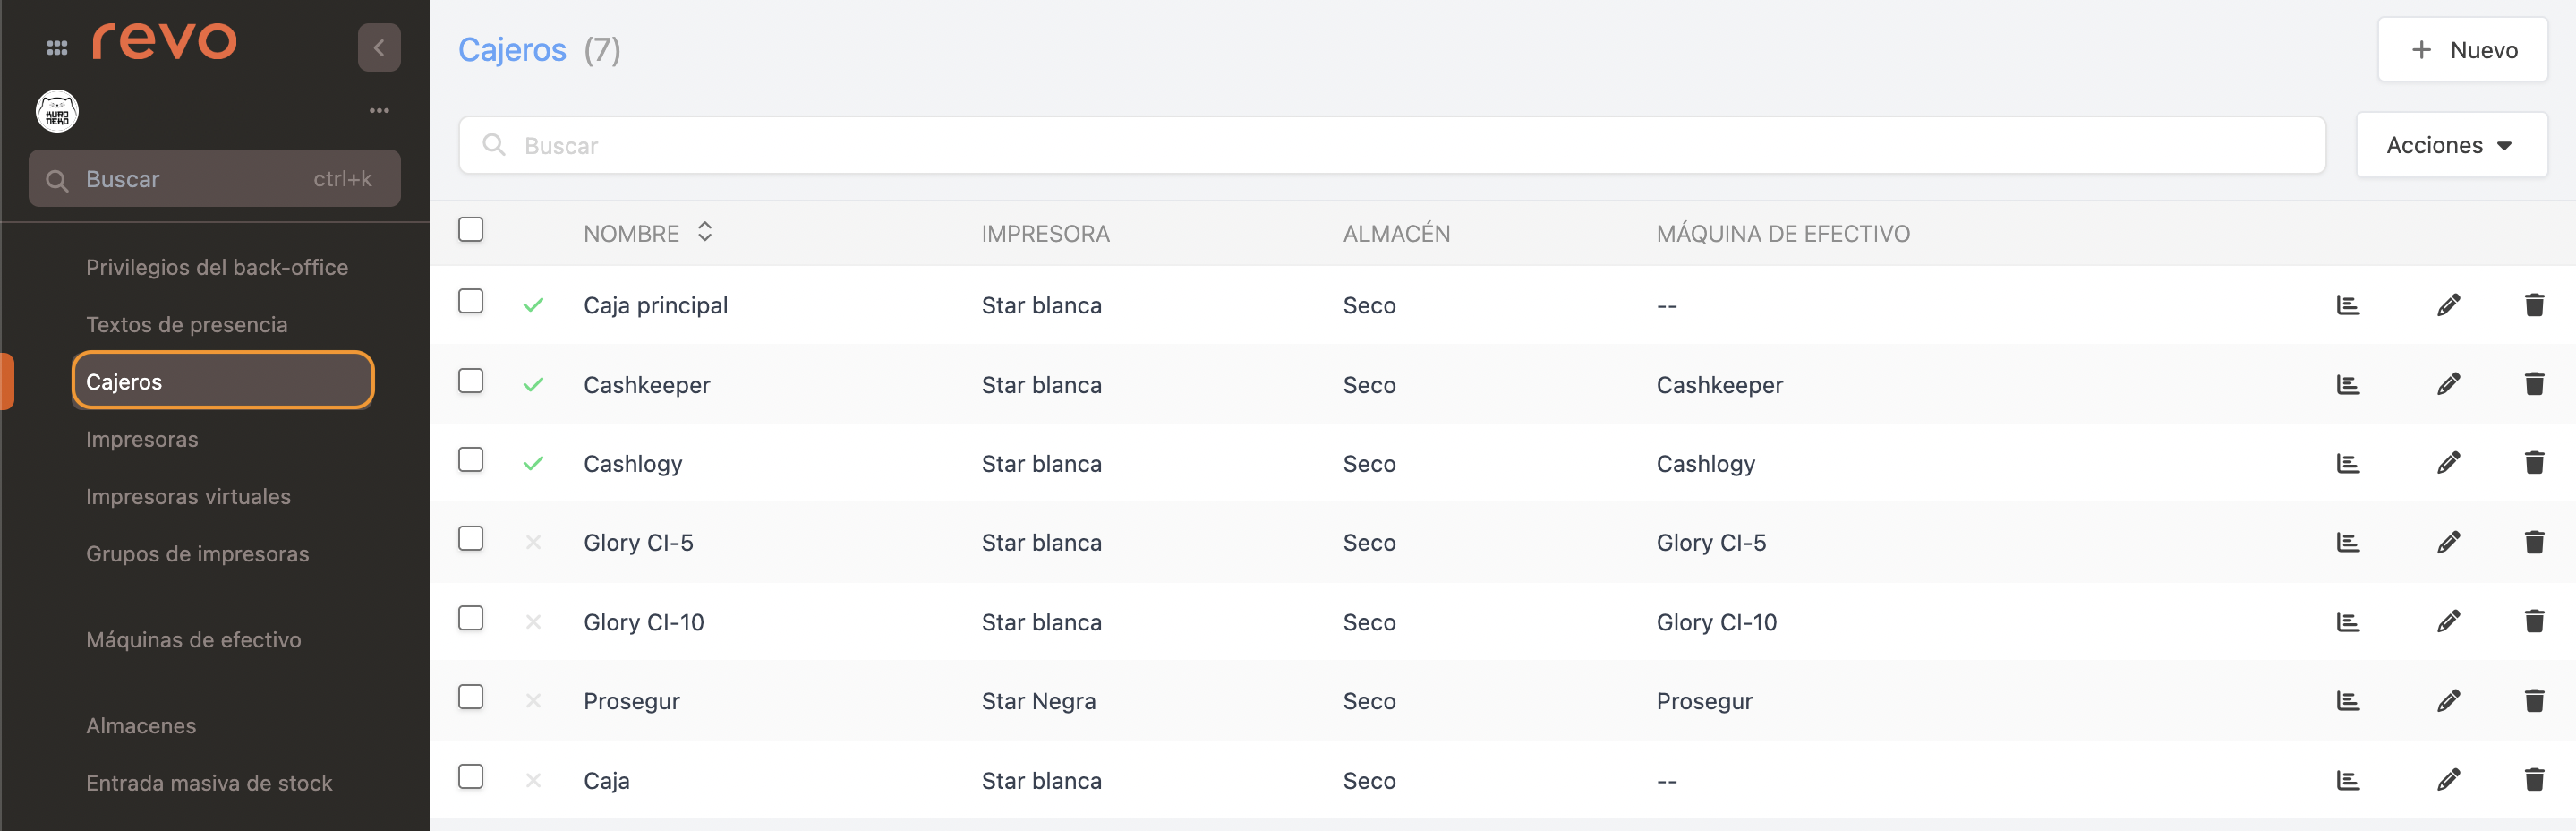
-
+ New: Create a new cashier.
-
: Search for cashiers.
-
Actions: Delete one or more selected cashiers.
-
: Select all or multiple cashiers.
-
: Cashier activated or deactivated.
-
Name: Name of the cashier.
-
Printer: Printer associated with the cashier.
-
Warehouse: Warehouse associated with the cashier.
-
Cash Machine: Cash machine associated with the cashier.
-
: List of payments made by the cashier.
-
: Edit the cashier.
-
: Delete the cashier.
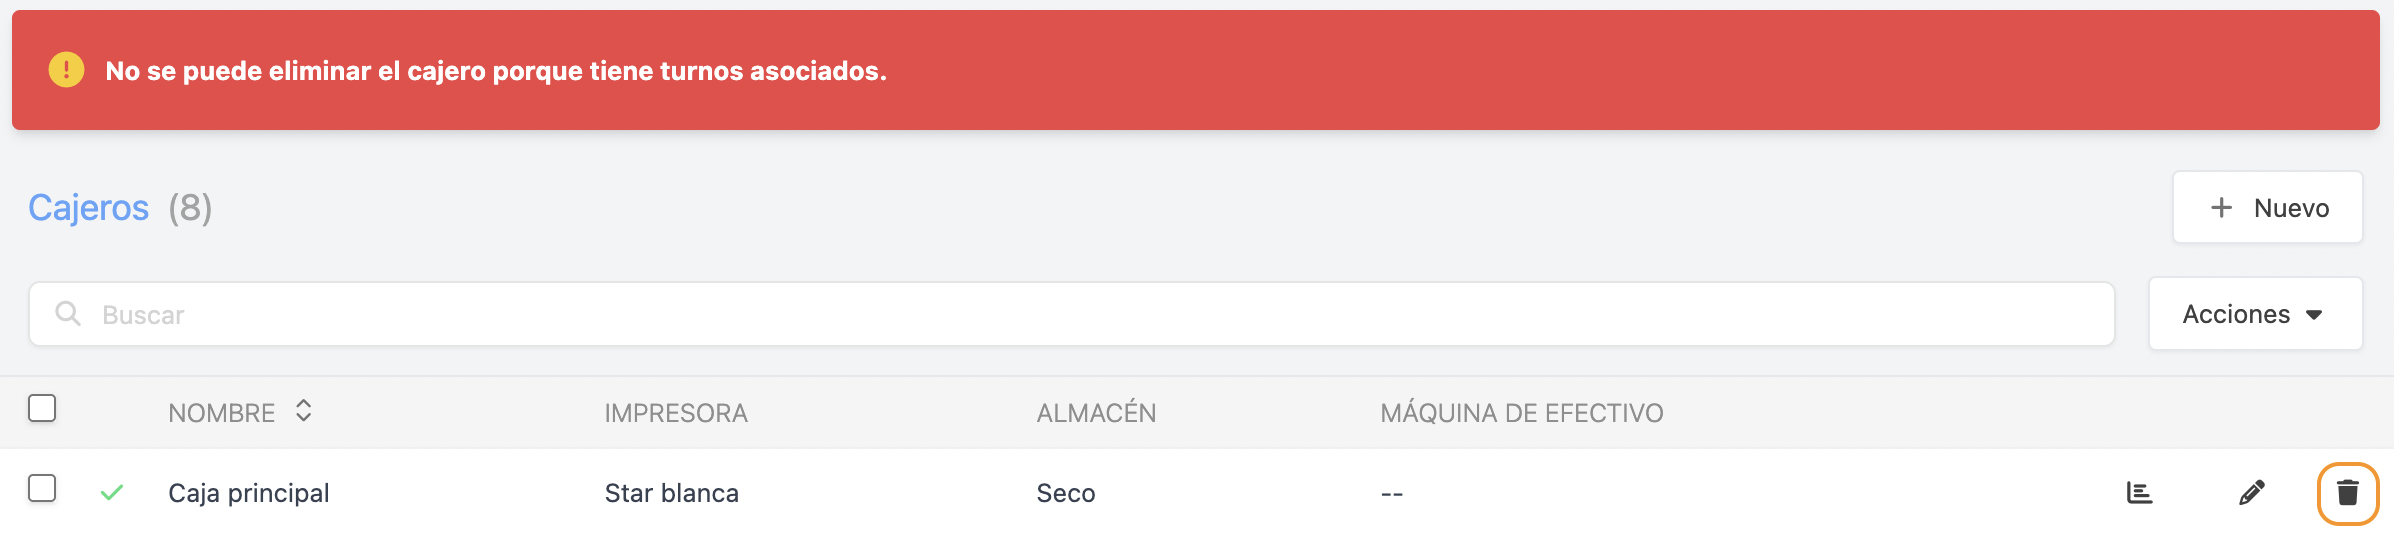
It is not possible to delete a cashier who has been assigned shifts.
2. HOW TO CREATE A CASHIER
1. Click + New and fill in the information:
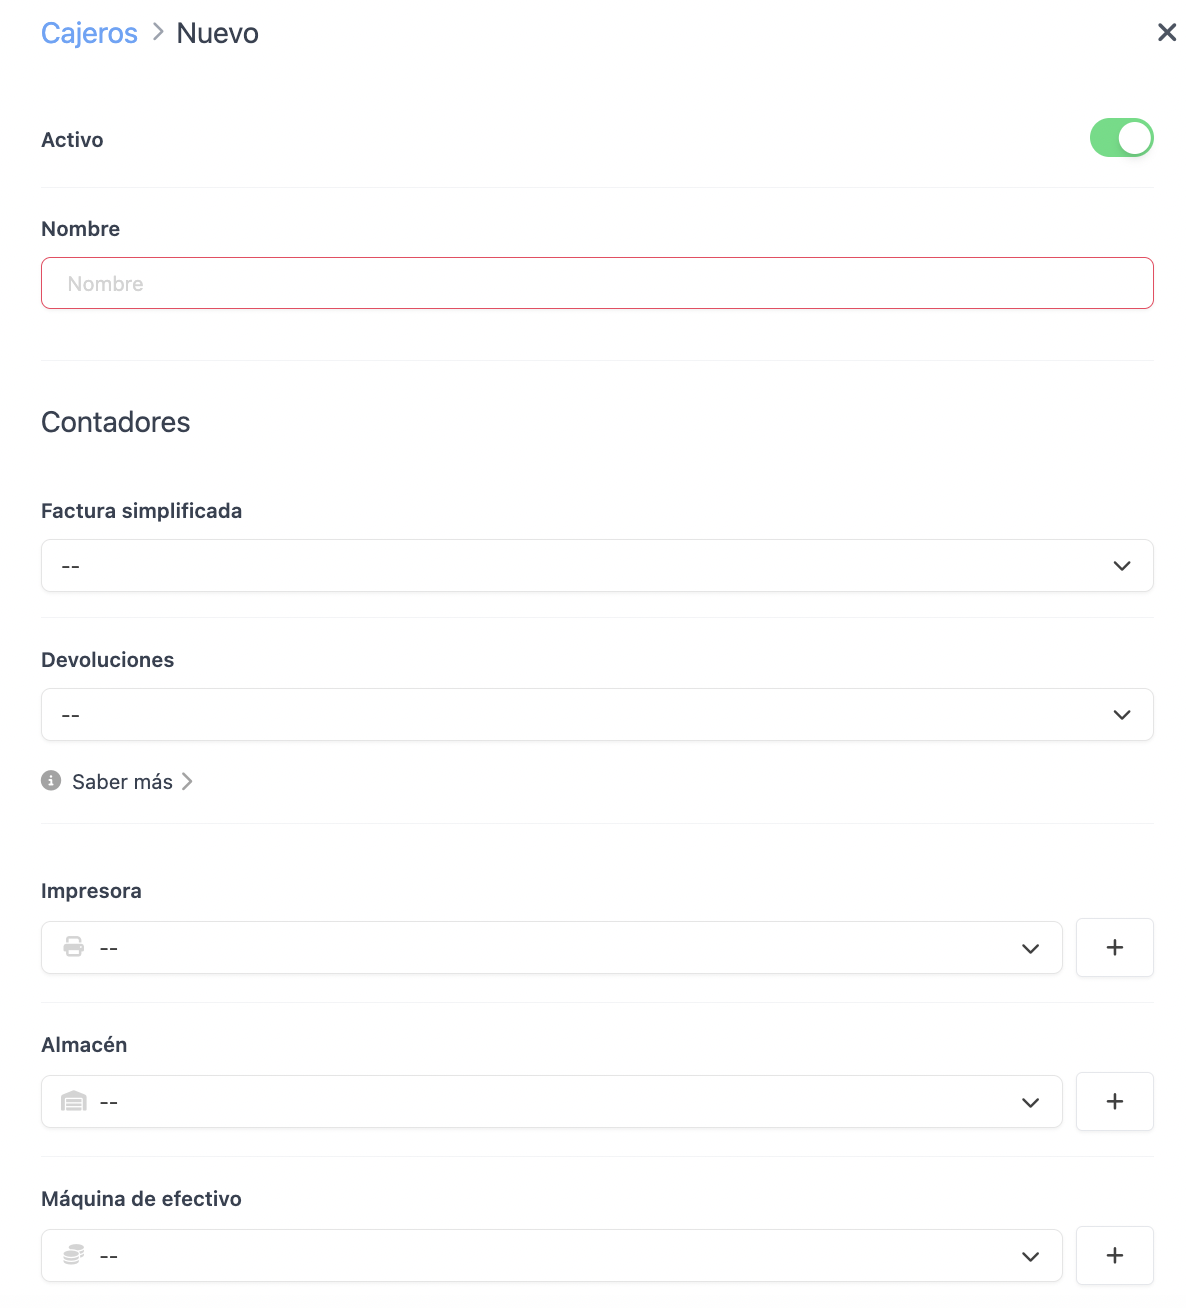
- Active: Enable the cashier.
- Name: Add a name for the cashier.
COUNTERS
- Simplified Invoice: Select a specific counter for simplified invoices if you do not want to use the general one.
- Returns: Select a specific returns counter if you do not want to use the general one.
IMPORTANT: Without a printer, cash register entries and exits will not work as the receipt cannot be printed.
-
Printer: Select the printer for invoices and cash register entries/exits. It must be created beforehand.
You can create a new one by clicking . More information here.
-
Warehouse: Select the warehouse for this cashier. It must be created beforehand. It is important to select it if you keep a stock control so that it can discount the products.
You can create a new one by clicking . More information here.
-
Cash Machines: Select a cash machine from the list. If you do not have one, leave the field blank (--).
You can create a new one by clicking . More information here.
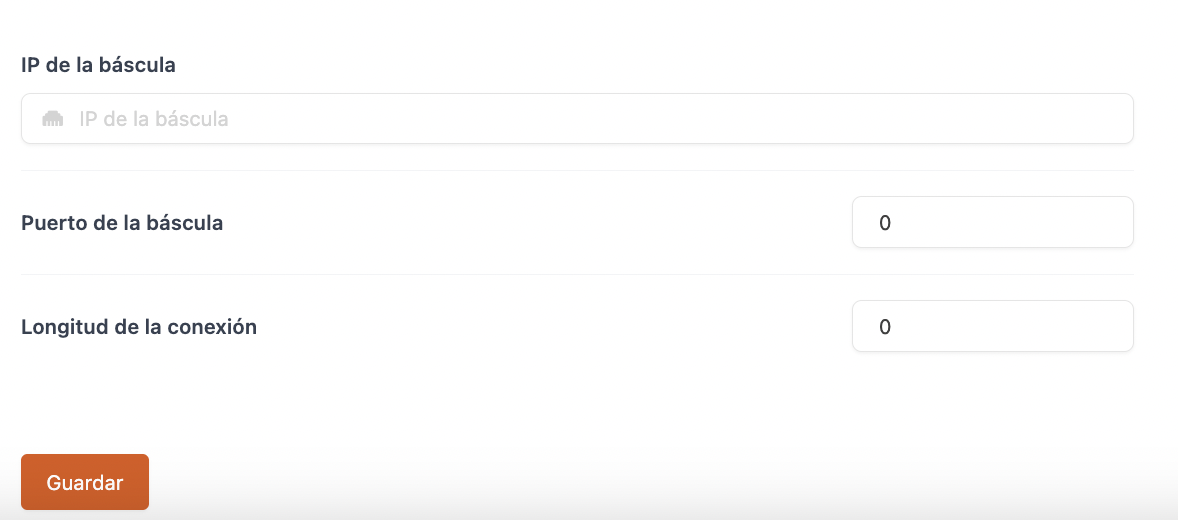
- Scale IP: Add the IP of the scale. If you do not use a scale, leave the field blank (--).
- Scale Port: If you use a scale, add the port.
- Connection Length: Some models require this parameter. If not applicable, leave the field blank.
2. Click Save.