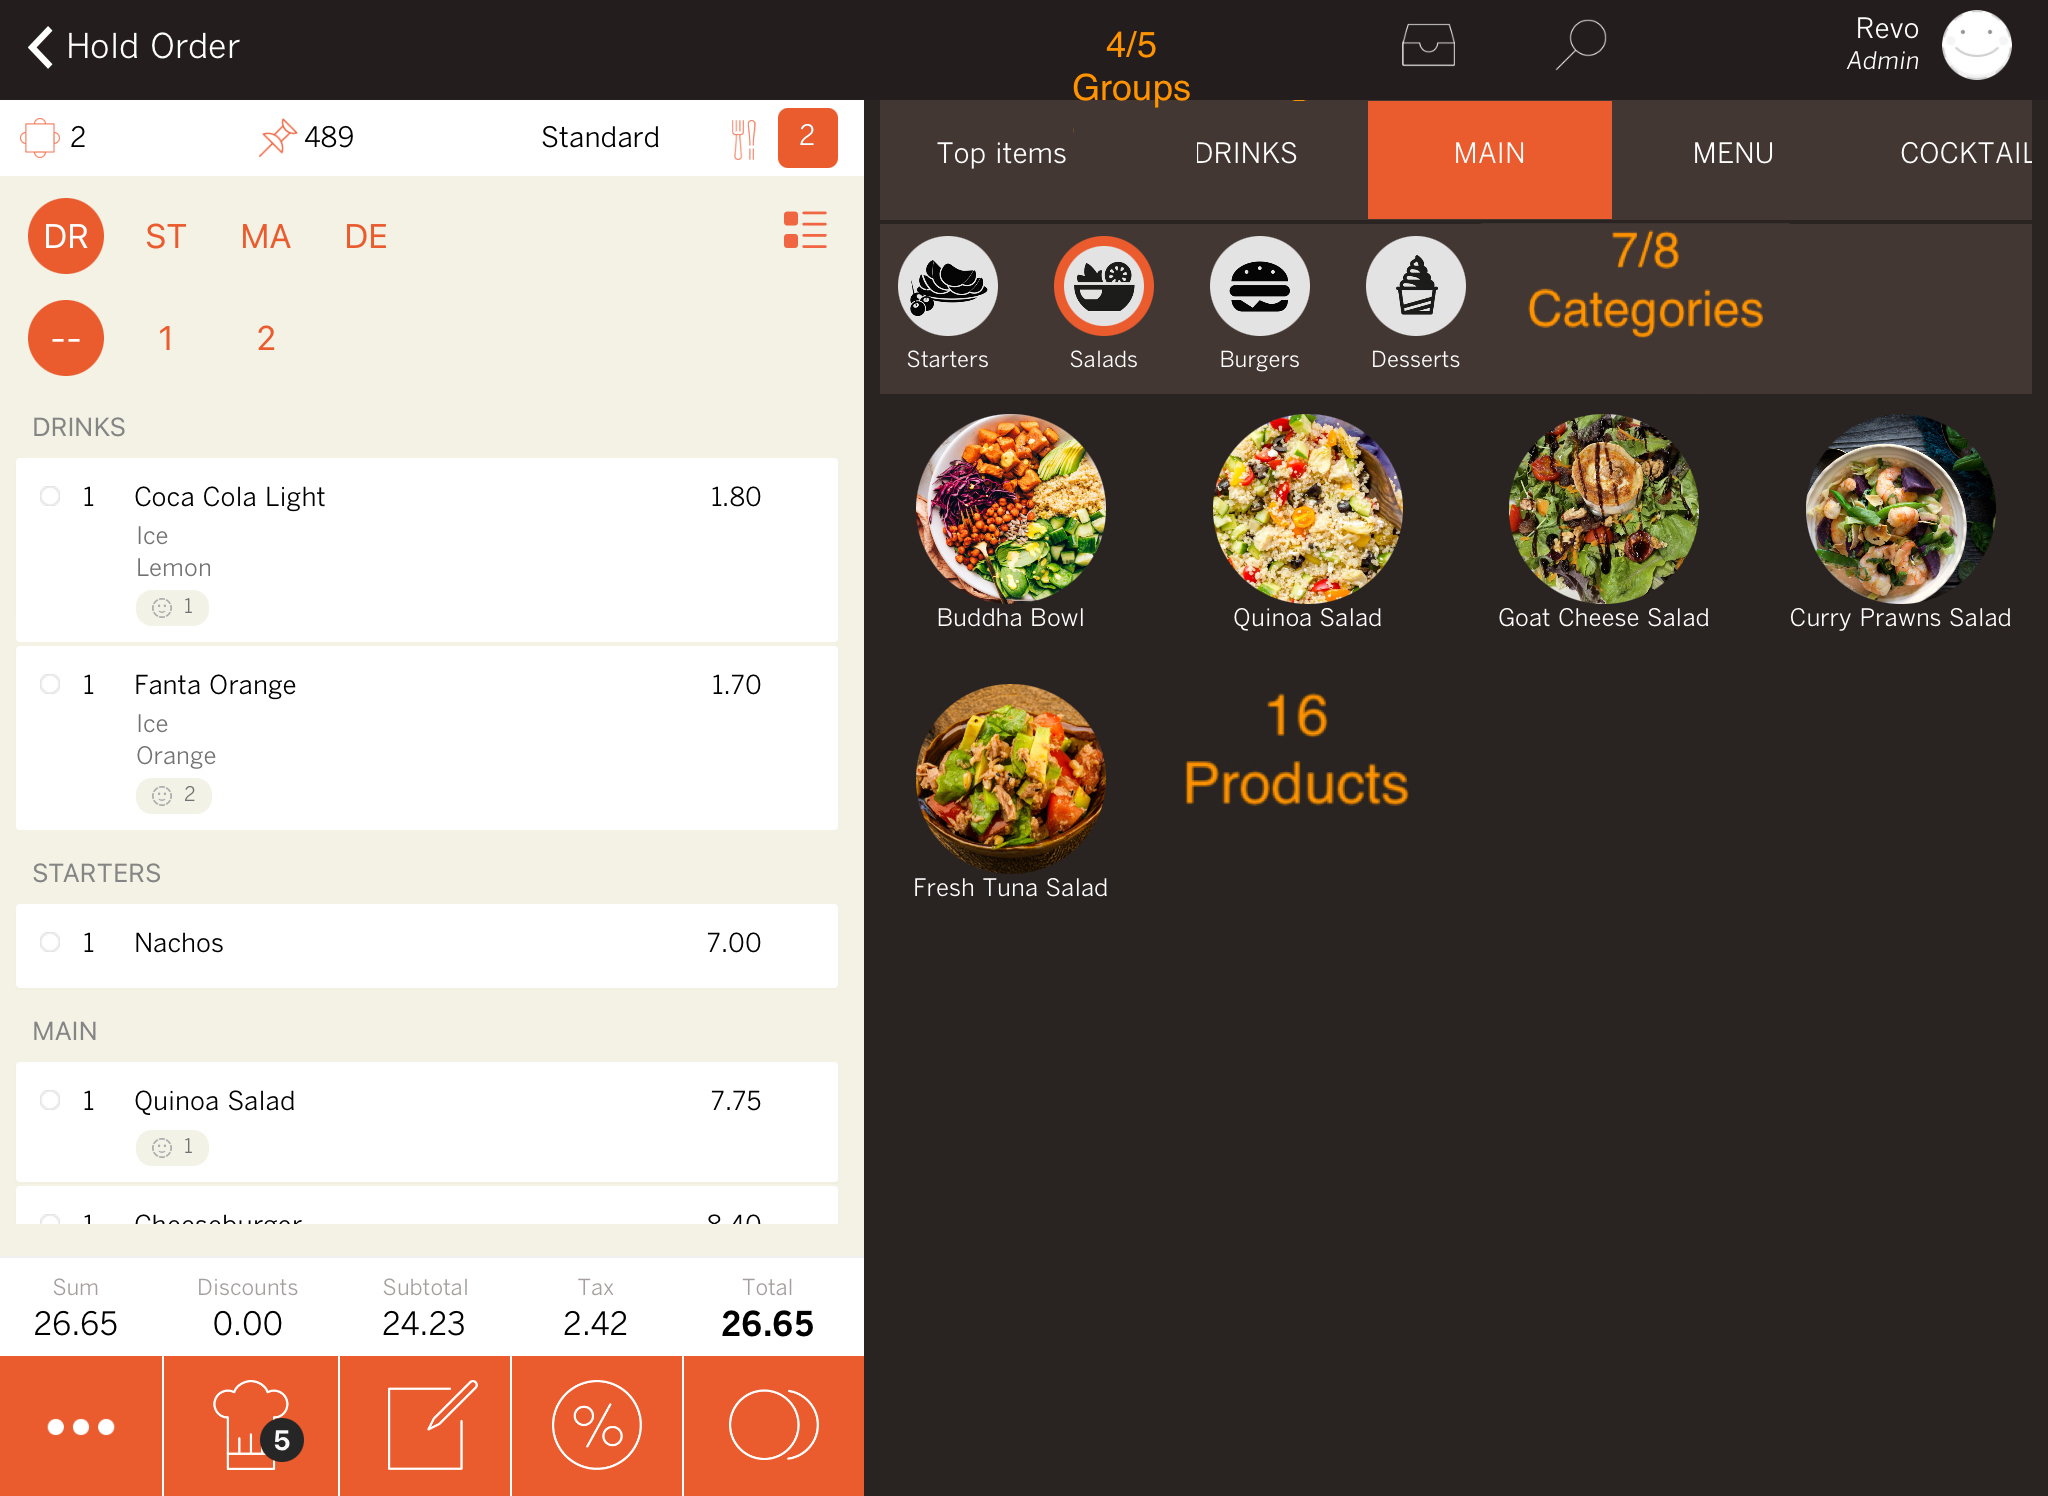
REVO uses a three-tier system of configuration and organization (Groups, Categories, and Products). This is how you will view your product list in the back-office and in the app:
        Group 1 --> Category 1 --> Product 1
                                --> Product 2
                                --> Product 3
                                --> Etc.

                --> Category 2 --> Product 1
                                --> Product 2
                                --> ...
                                --> Product 16

                --> Category 3 --> Product 1
                                --> Product 2
                                --> Product 3
REVO allows you to create groups, categories, and products without limits, but the most optimal configuration for using the Revo XEF app is:
- Four or five main Groups.
- Each group displays up to seven Categories (iPad version) without scrolling left to right.
- Each category displays up to sixteen Products without scrolling up and down.
Creating a group with REVO is very simple. To do so:
1. Access the back-office.
2. Go to Catalogue / GROUPS.
3. Click on + New. This screen will appear for you to fill in:
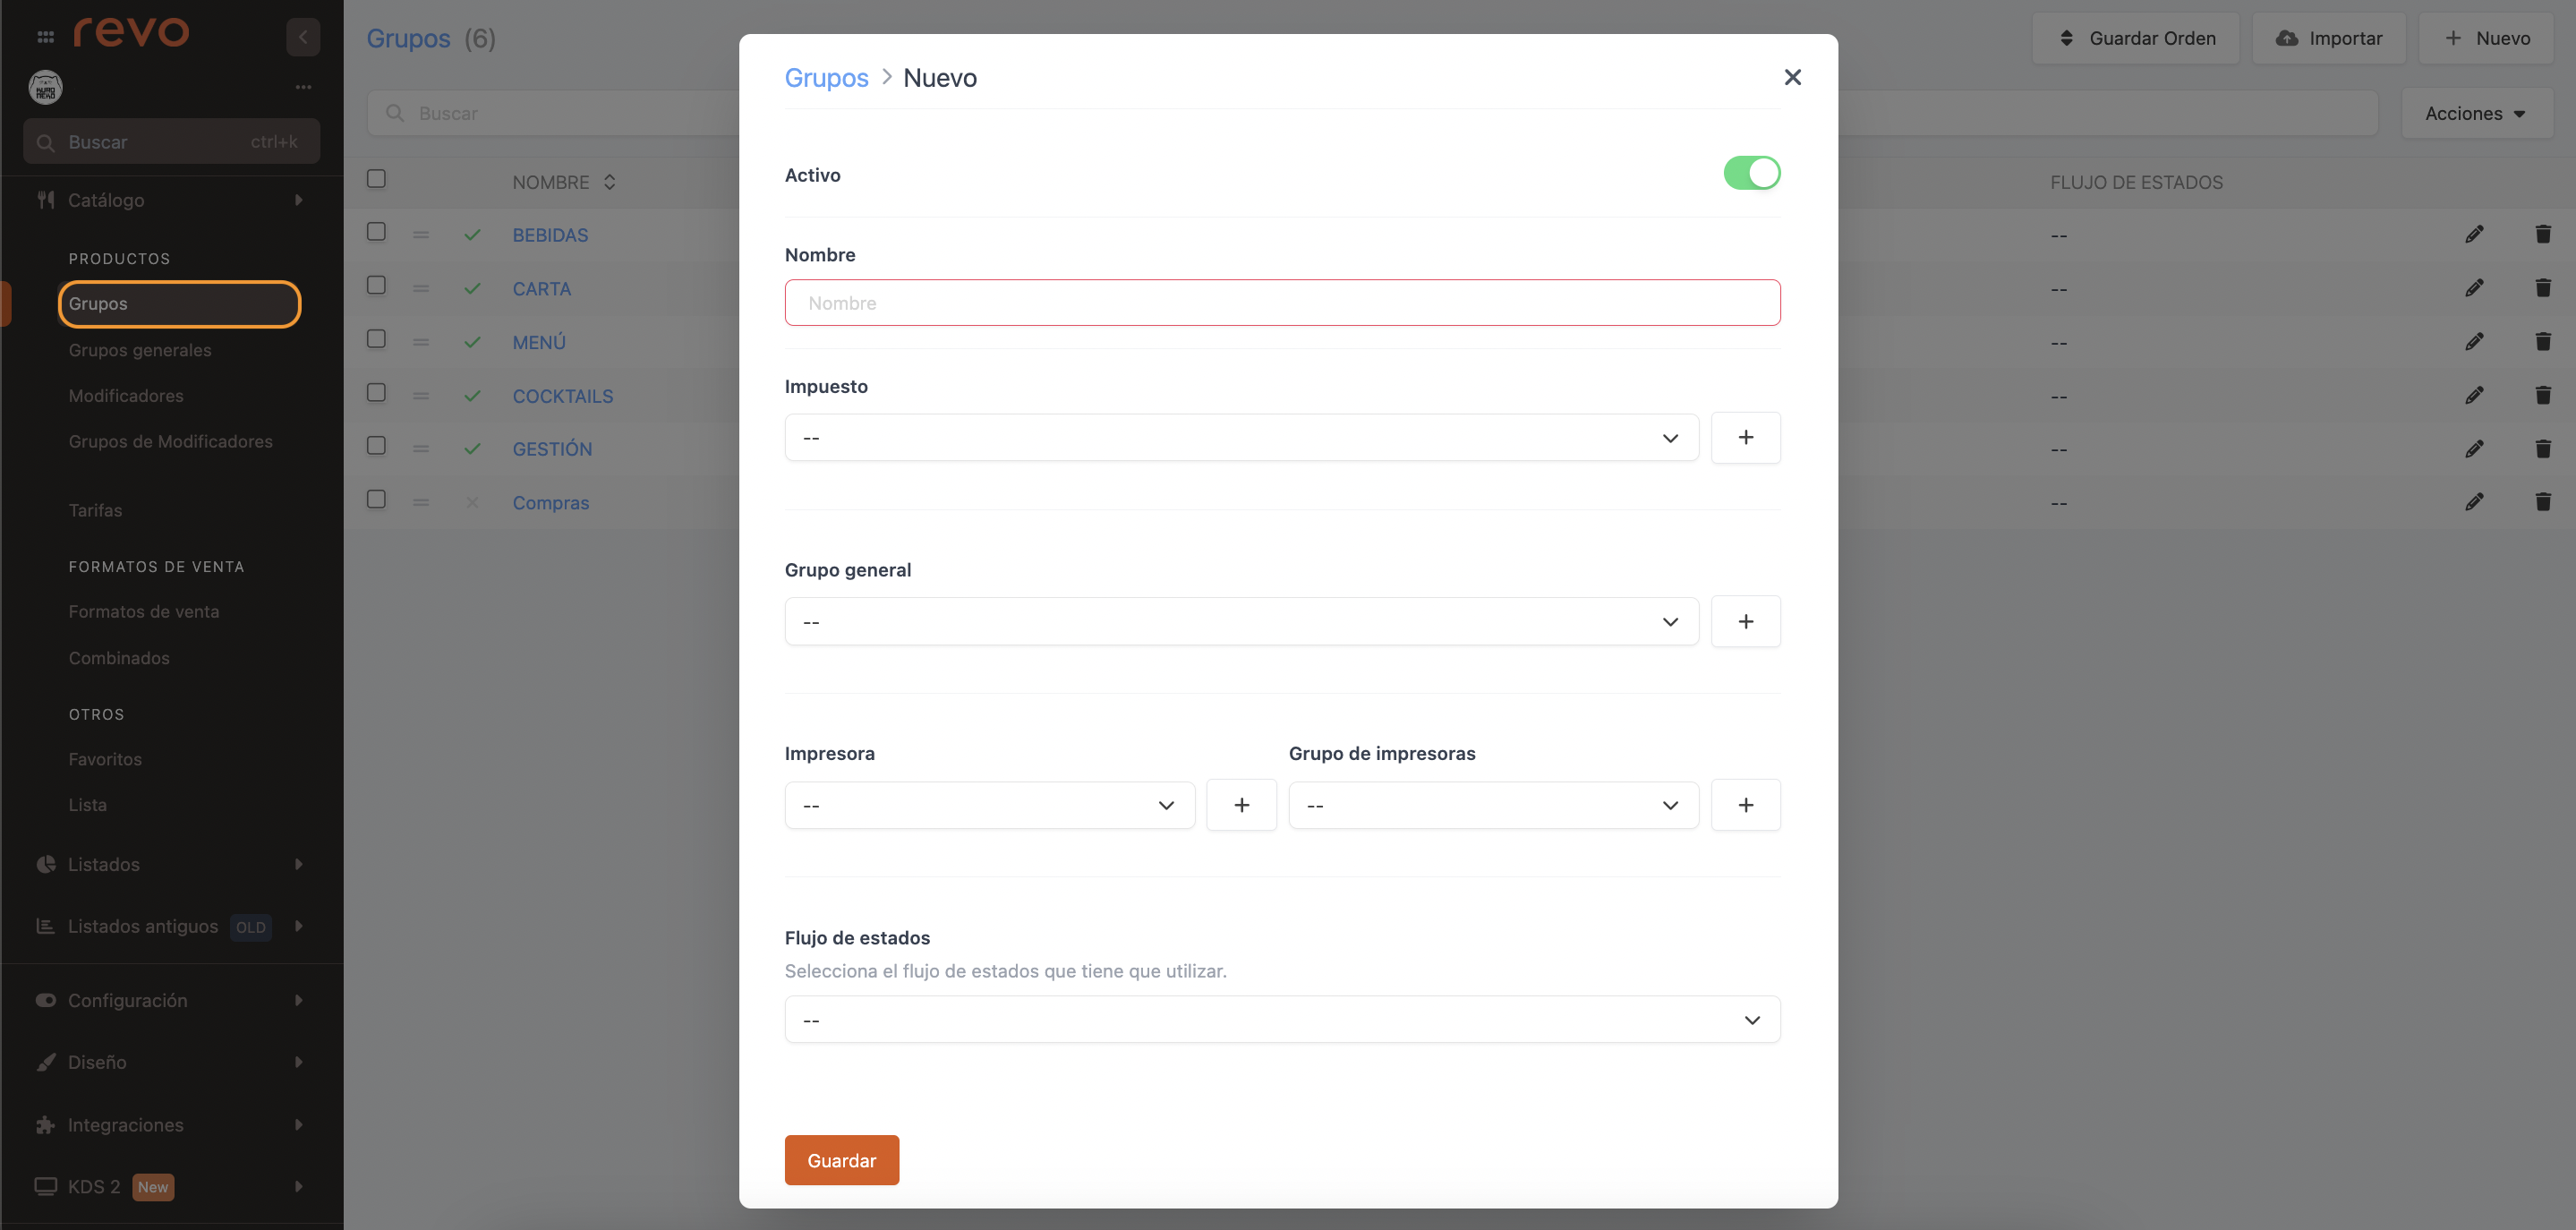
-
Active: Enable for the group to be visible in the app. If disabled, the group, its categories, and products will not be visible.
-
Name: Enter the name of the group.
-
Tax: Select the type of tax.
If all categories and products use the same tax, adding it only to the group will automatically apply it to all subcategories.
By clicking , you can create a new tax from this screen. More information here.
-
General Group: Select the general group. This is used to break down the invoice into supergroups. E.g., total food and total drink.
By clicking , you can create a new general group from this screen. More information here.
-
Printer: Select the printer to print the order tickets. You must first configure the printers.
By clicking , you can create a new printer from this screen. More information here.
-
Printer Group: Select the printer group if you want to print on more than one printer.
By clicking , you can create a new printer group from this screen. More information here.
-
State flow: Selects the KDS 2 state flow to be used.
4. Click Save to confirm the changes.