1. CREATE CUSTOMERS FROM THE BACK-OFFICE 2. CREATE CUSTOMERS FROM THE APP 3. PAY ON CREDIT 4. CUSTOMER LIST
In the customers section, you can retain and associate sales with your customers. This way, you'll have a history of sales, quotes, delivery notes, customer orders, and credit.
You can create customers from the app or from the back-office.
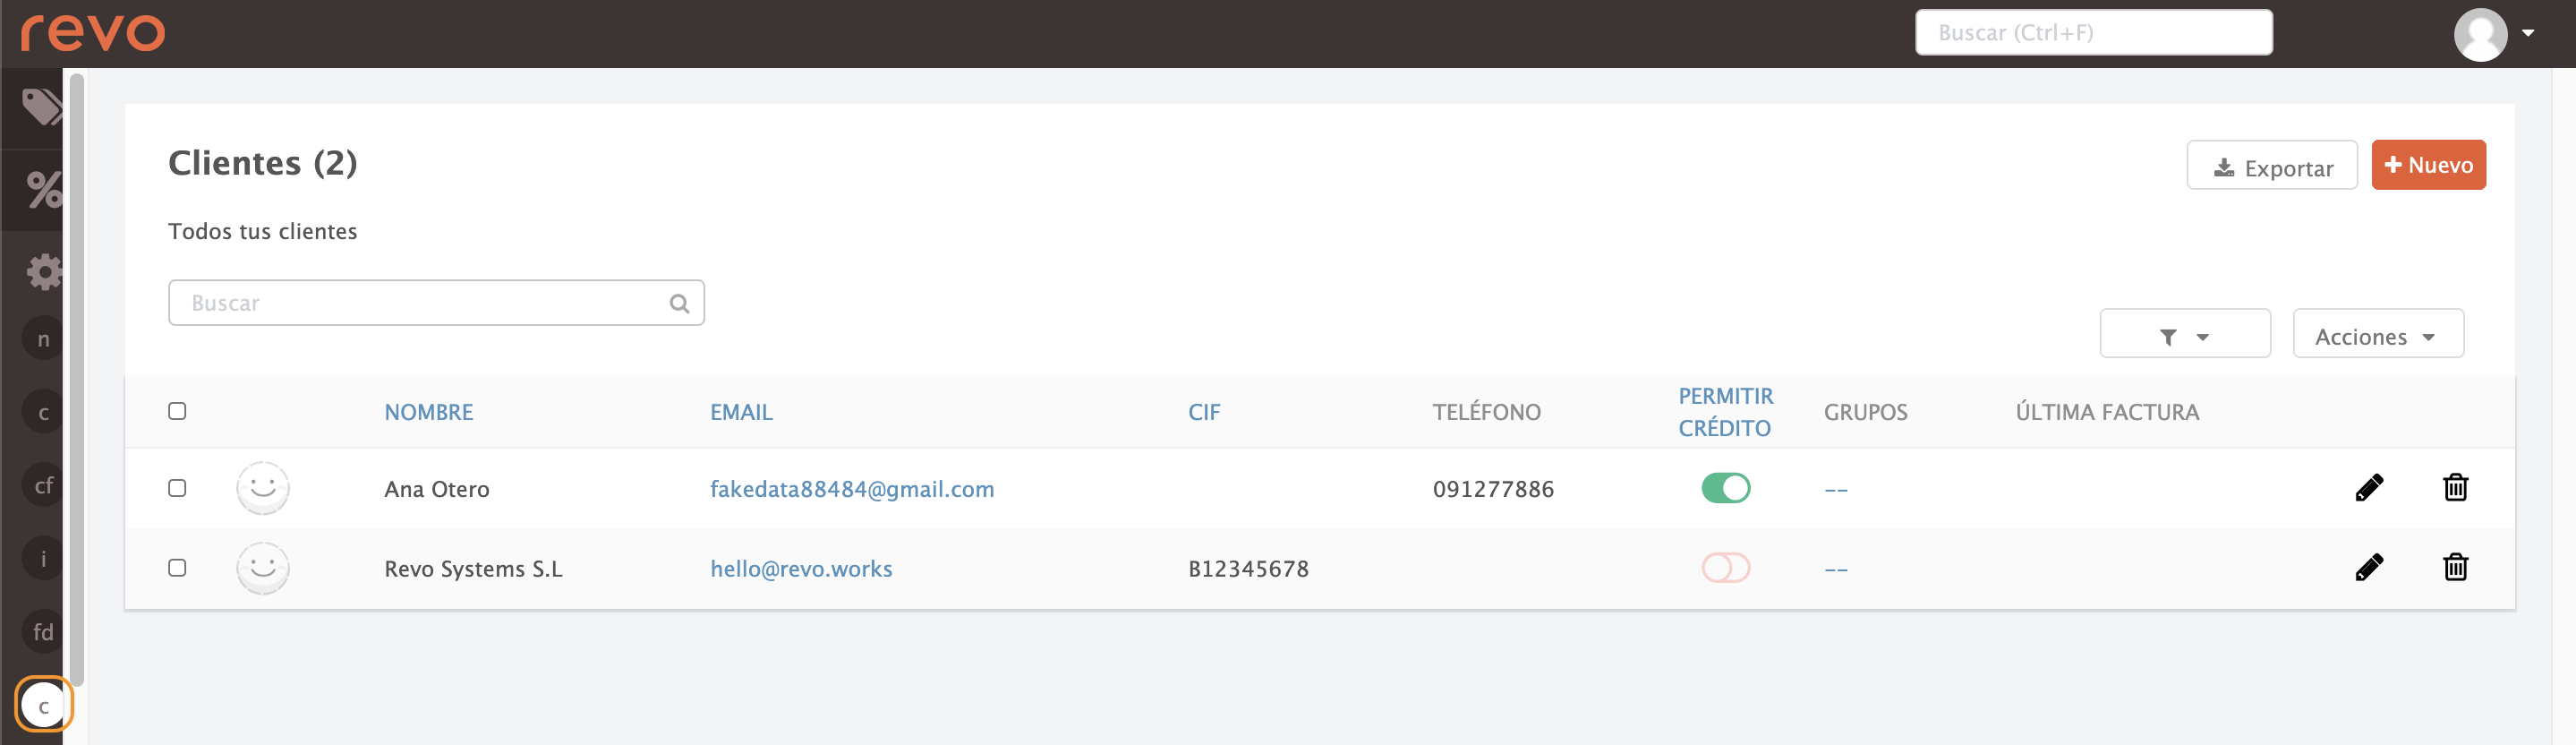
1. CREATE CUSTOMERS FROM THE BACK-OFFICE
1. Access the back-office of Revo RETAIL.
2. Go to Settings / CUSTOMERS
3. Click +New to create a customer.
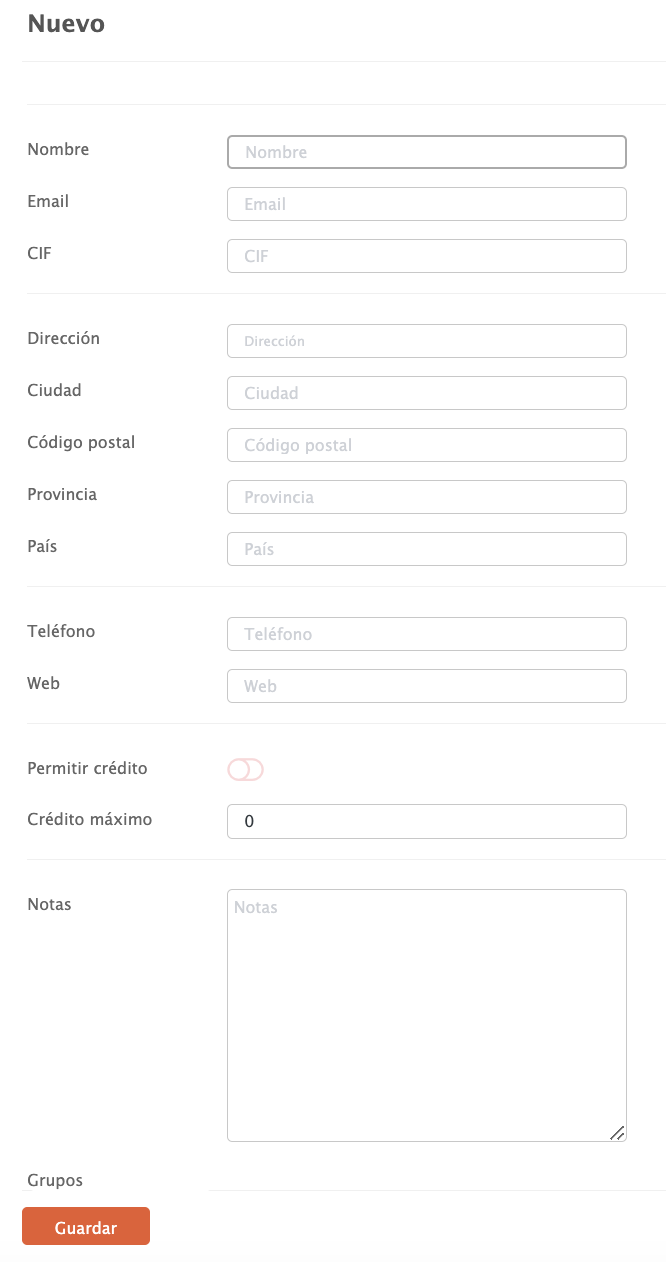
4. Fill in the necessary details and click Save to confirm.
The NIF must be valid, and the address is mandatory.
2. CREATE CUSTOMERS FROM THE APP
1. Click on Occasional customer and select Add new customer.
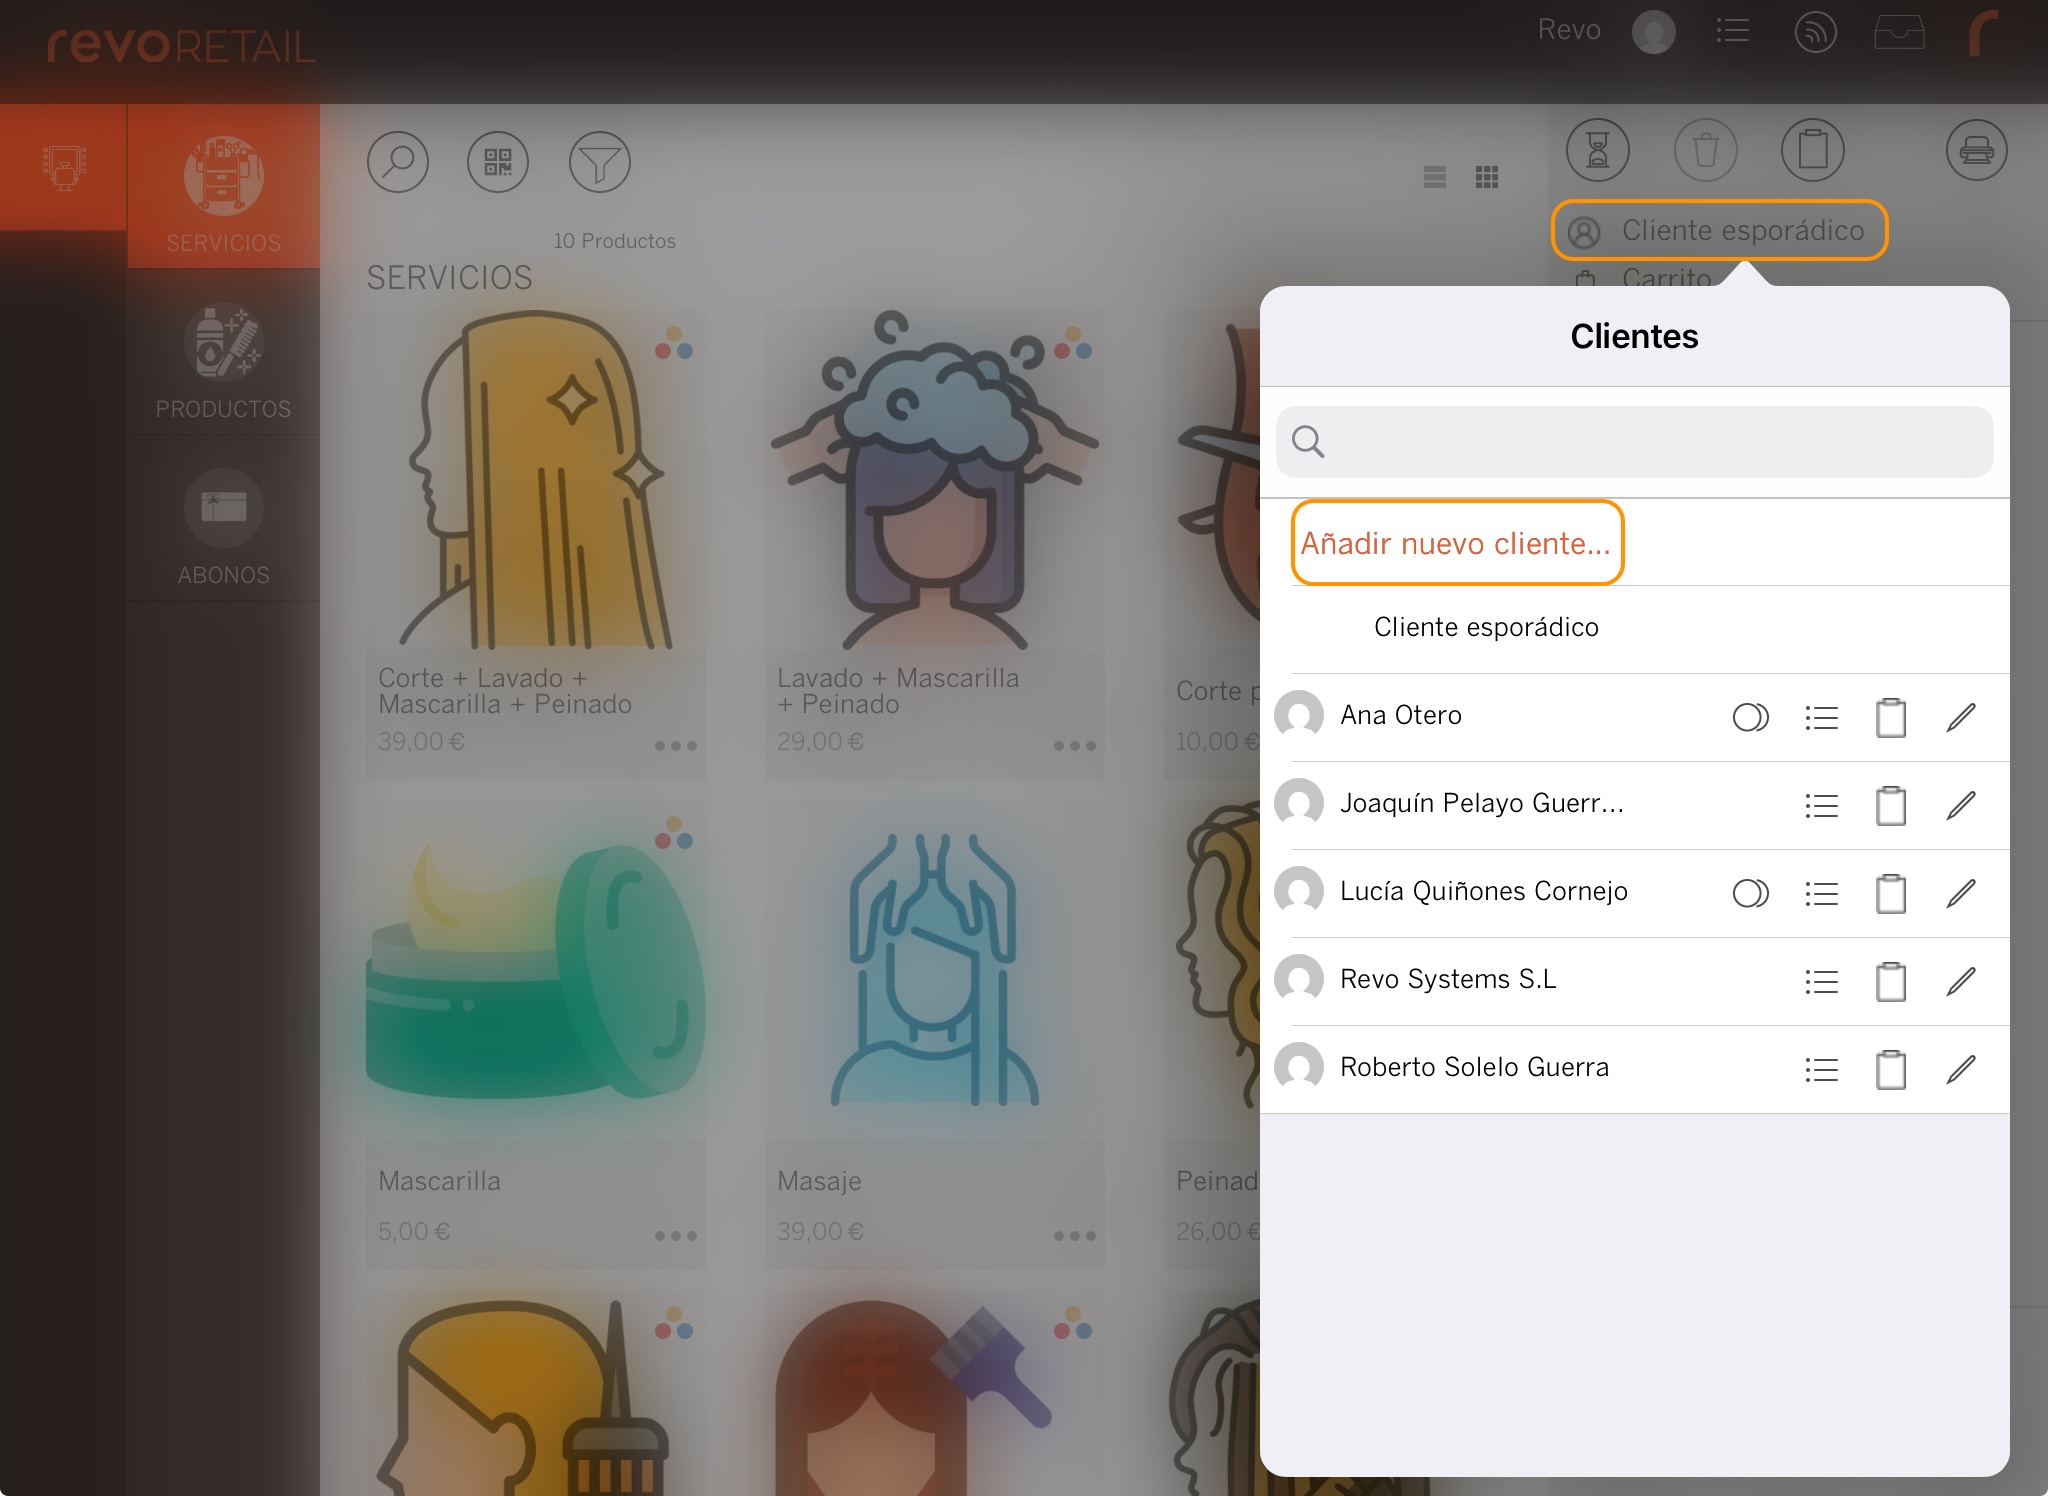
2. Fill in the customer details.
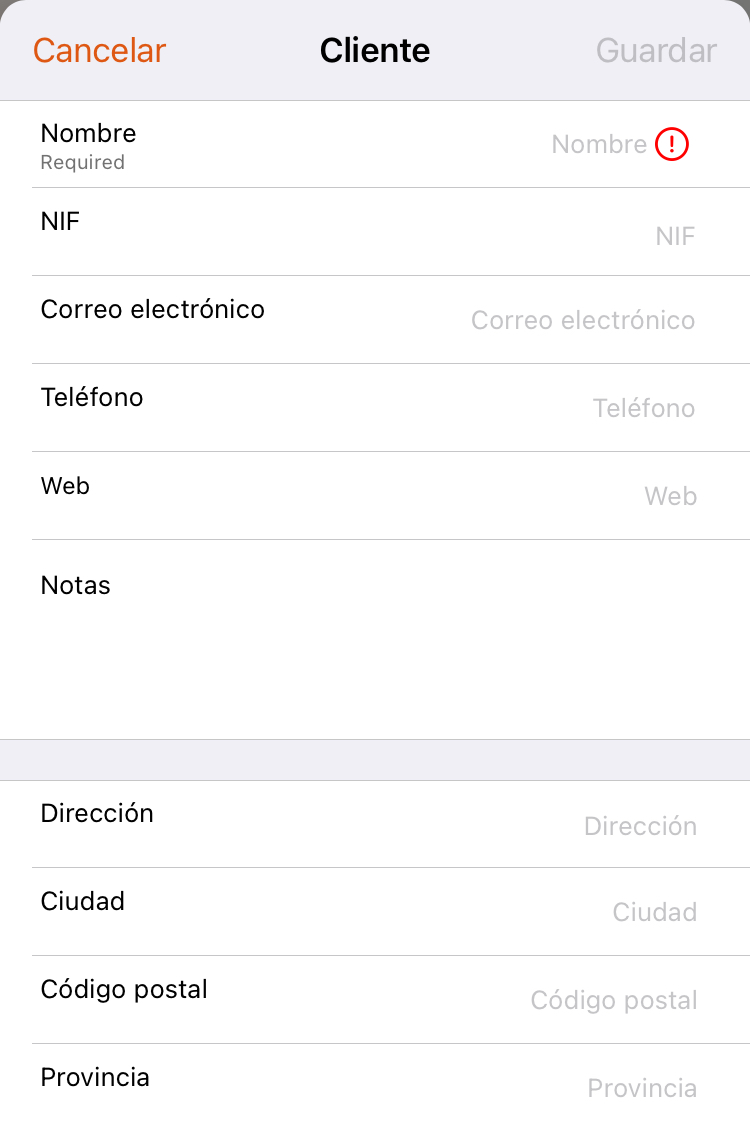
3. Click Save to confirm.
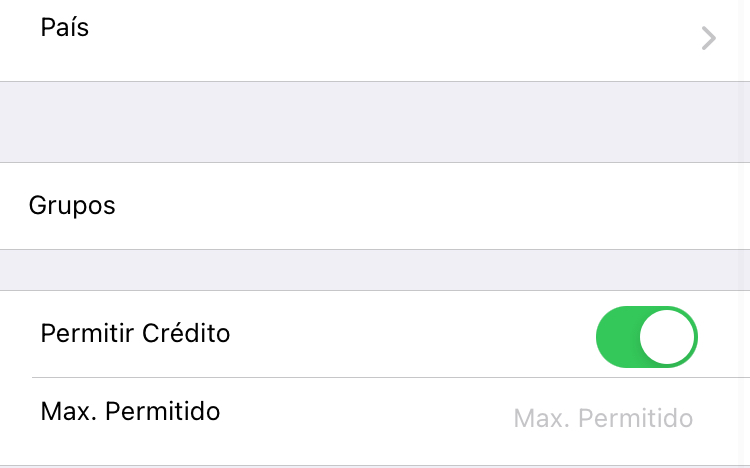
3. PAY ON CREDIT
If you want a customer to pay on credit, fill in:
- Allow credit: Enable this option to activate it.
- Maximum credit: Specify the maximum amount.
How does it work?
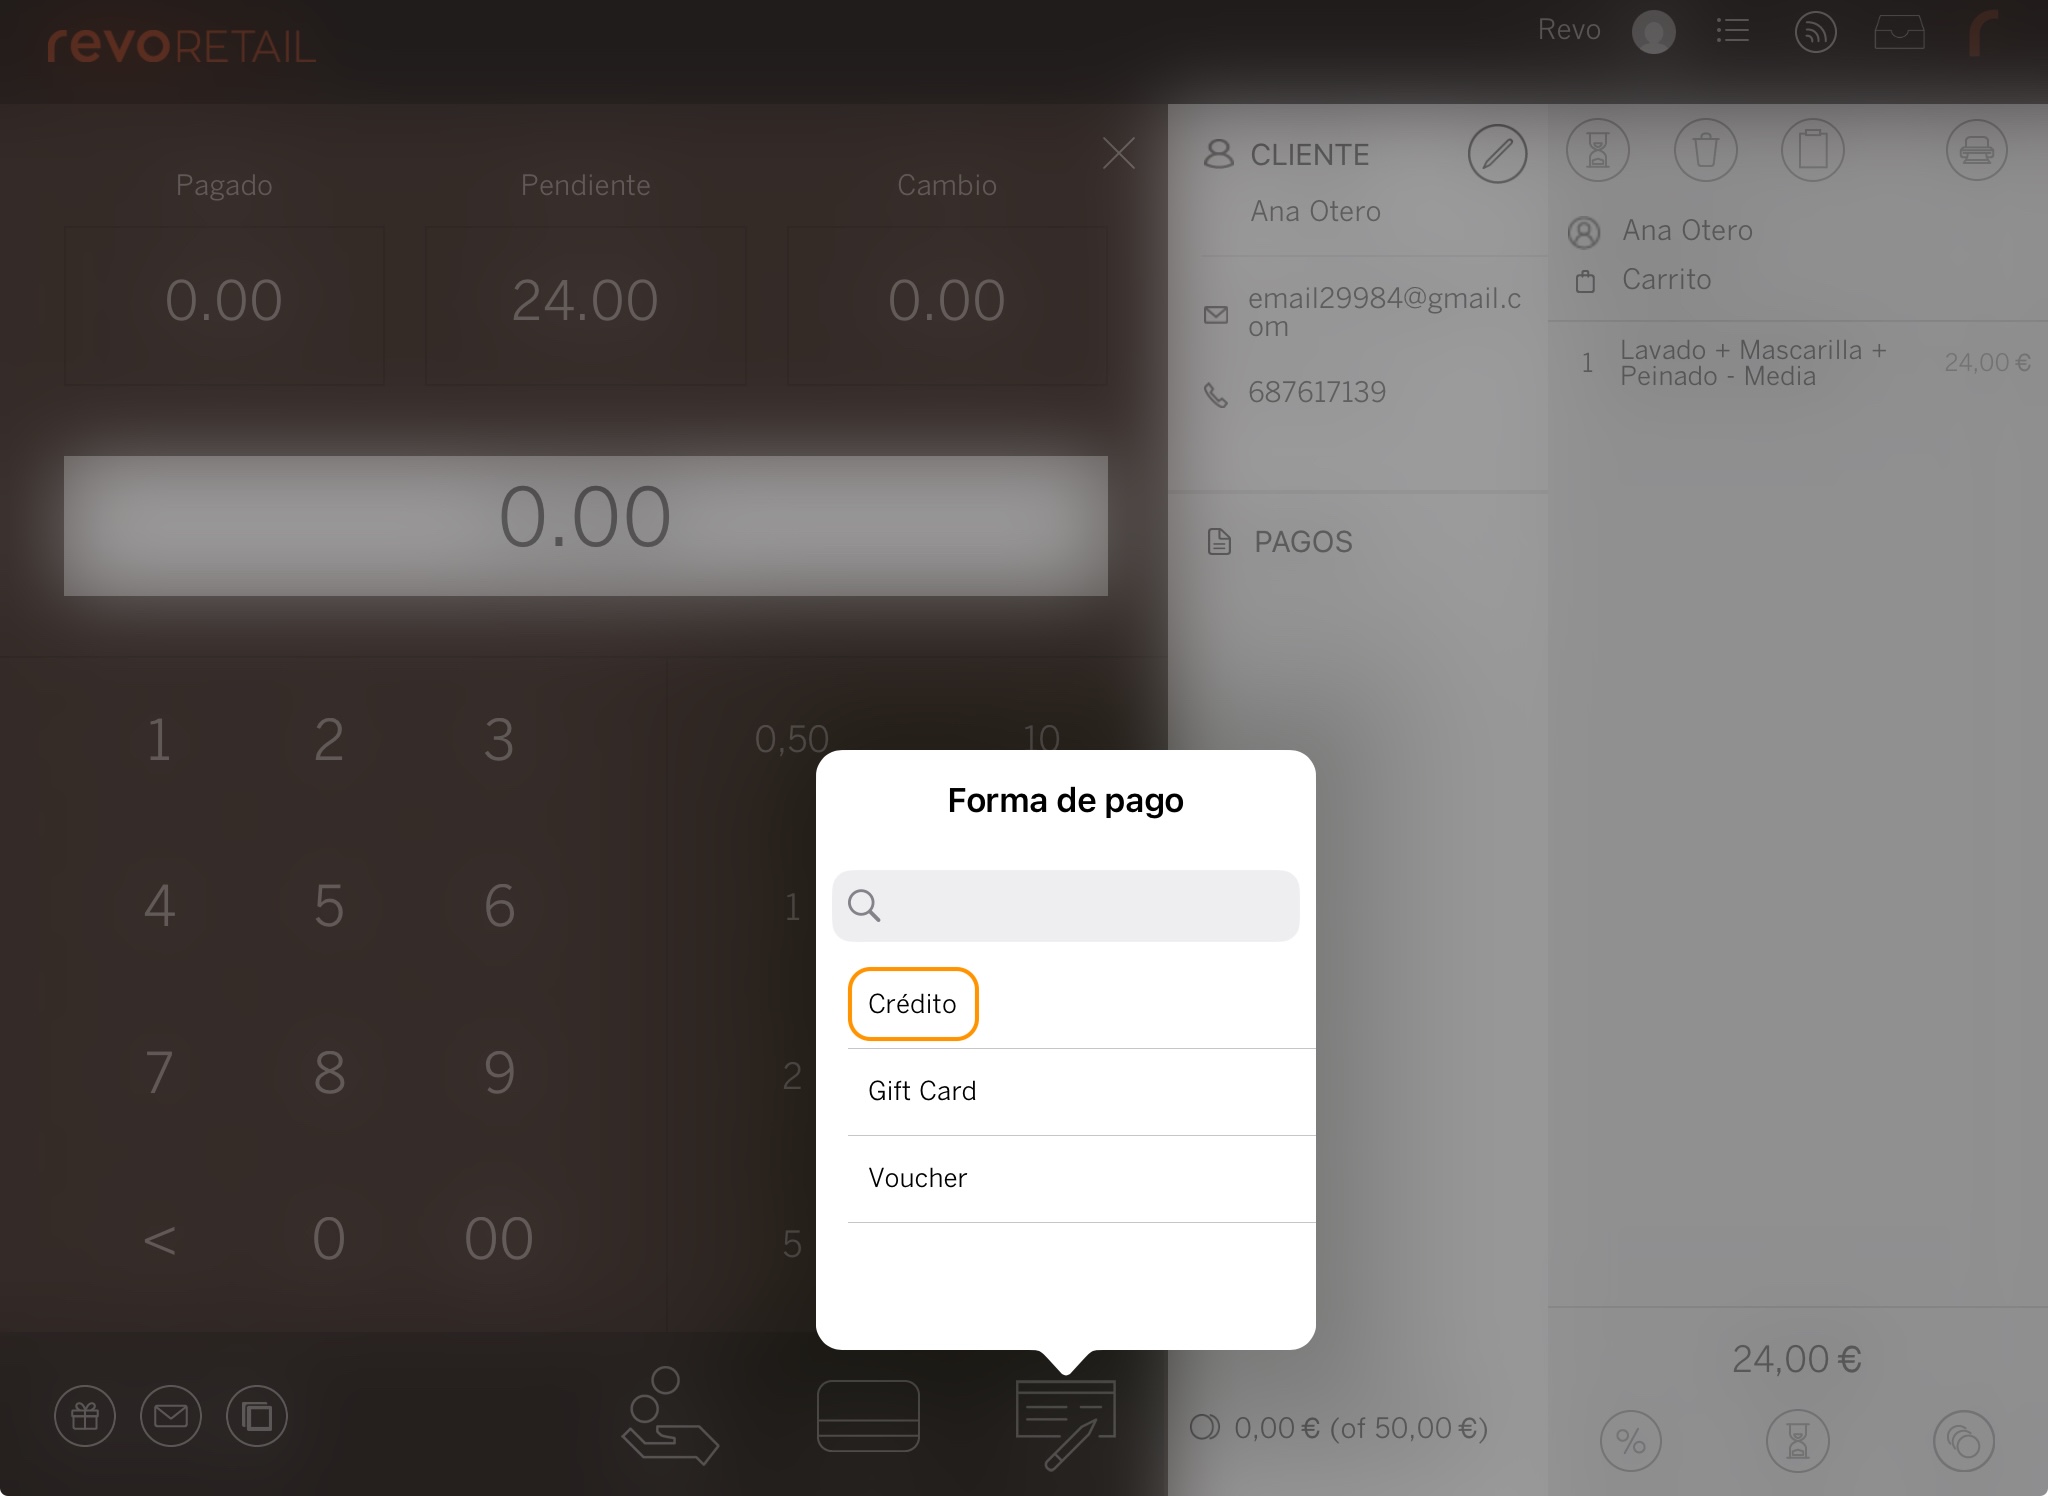
1. Add products, click on Occasional customer, and select the customer.
2. Click the coins to charge, go to Other payment methods, and choose Credit.
You will only see this option if the customer has credit allowed.
To charge:
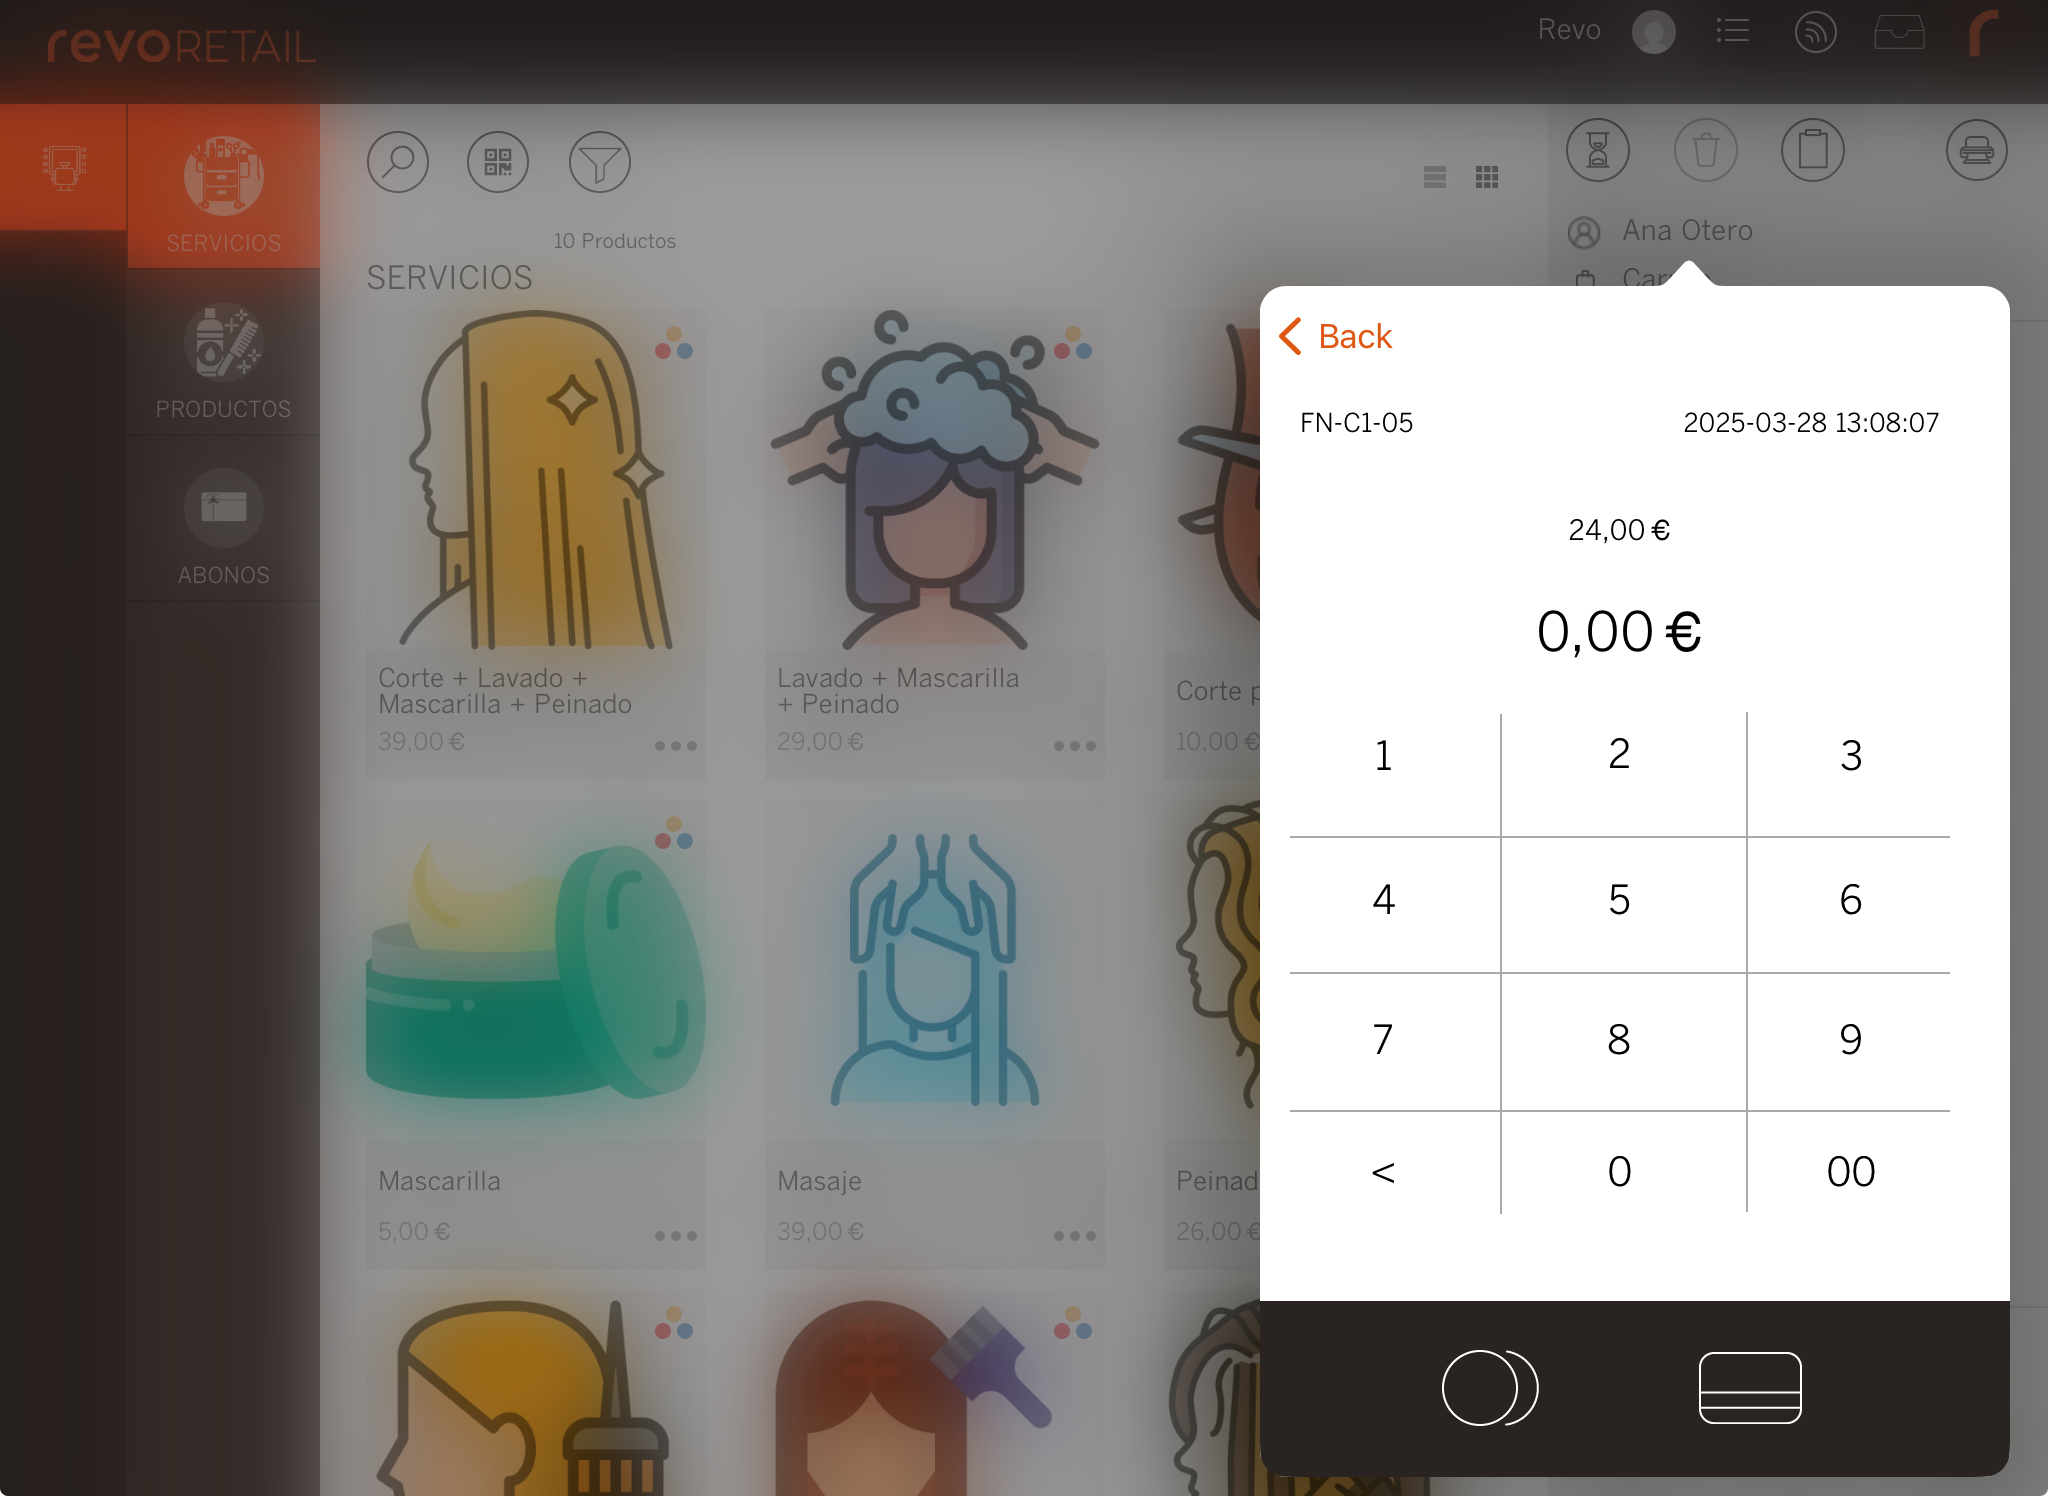
1. Click Occasional customer, then the coins.
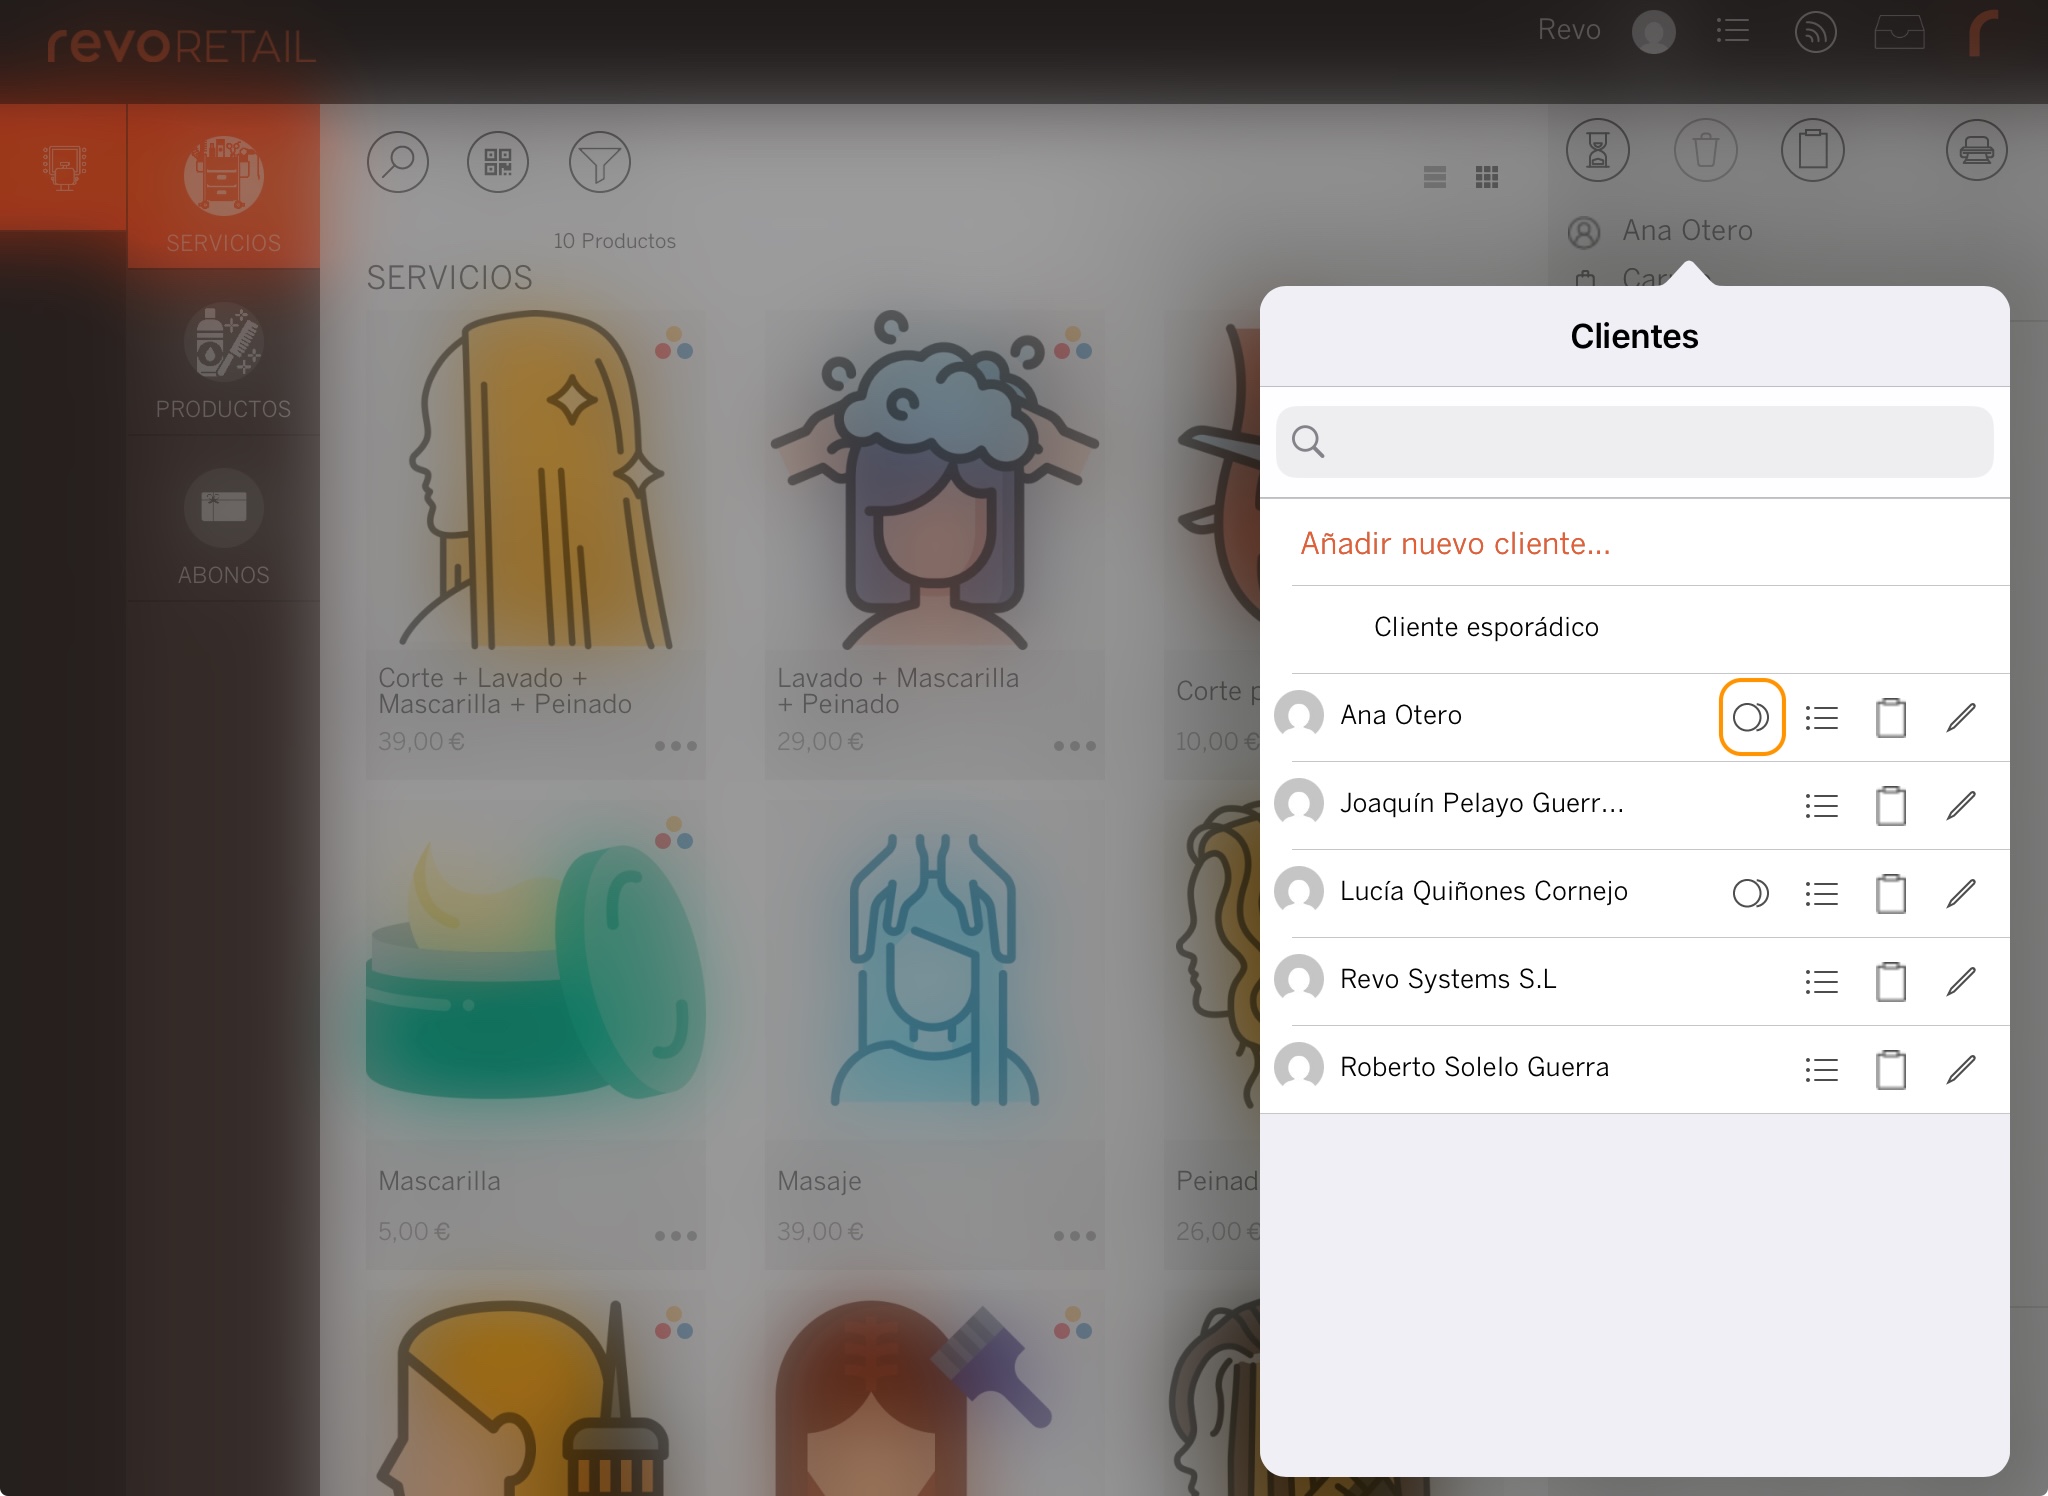
2. You will see pending invoices. Click the 3 dots to select one.

3. Charge as usual (cash or card), and the window will close.
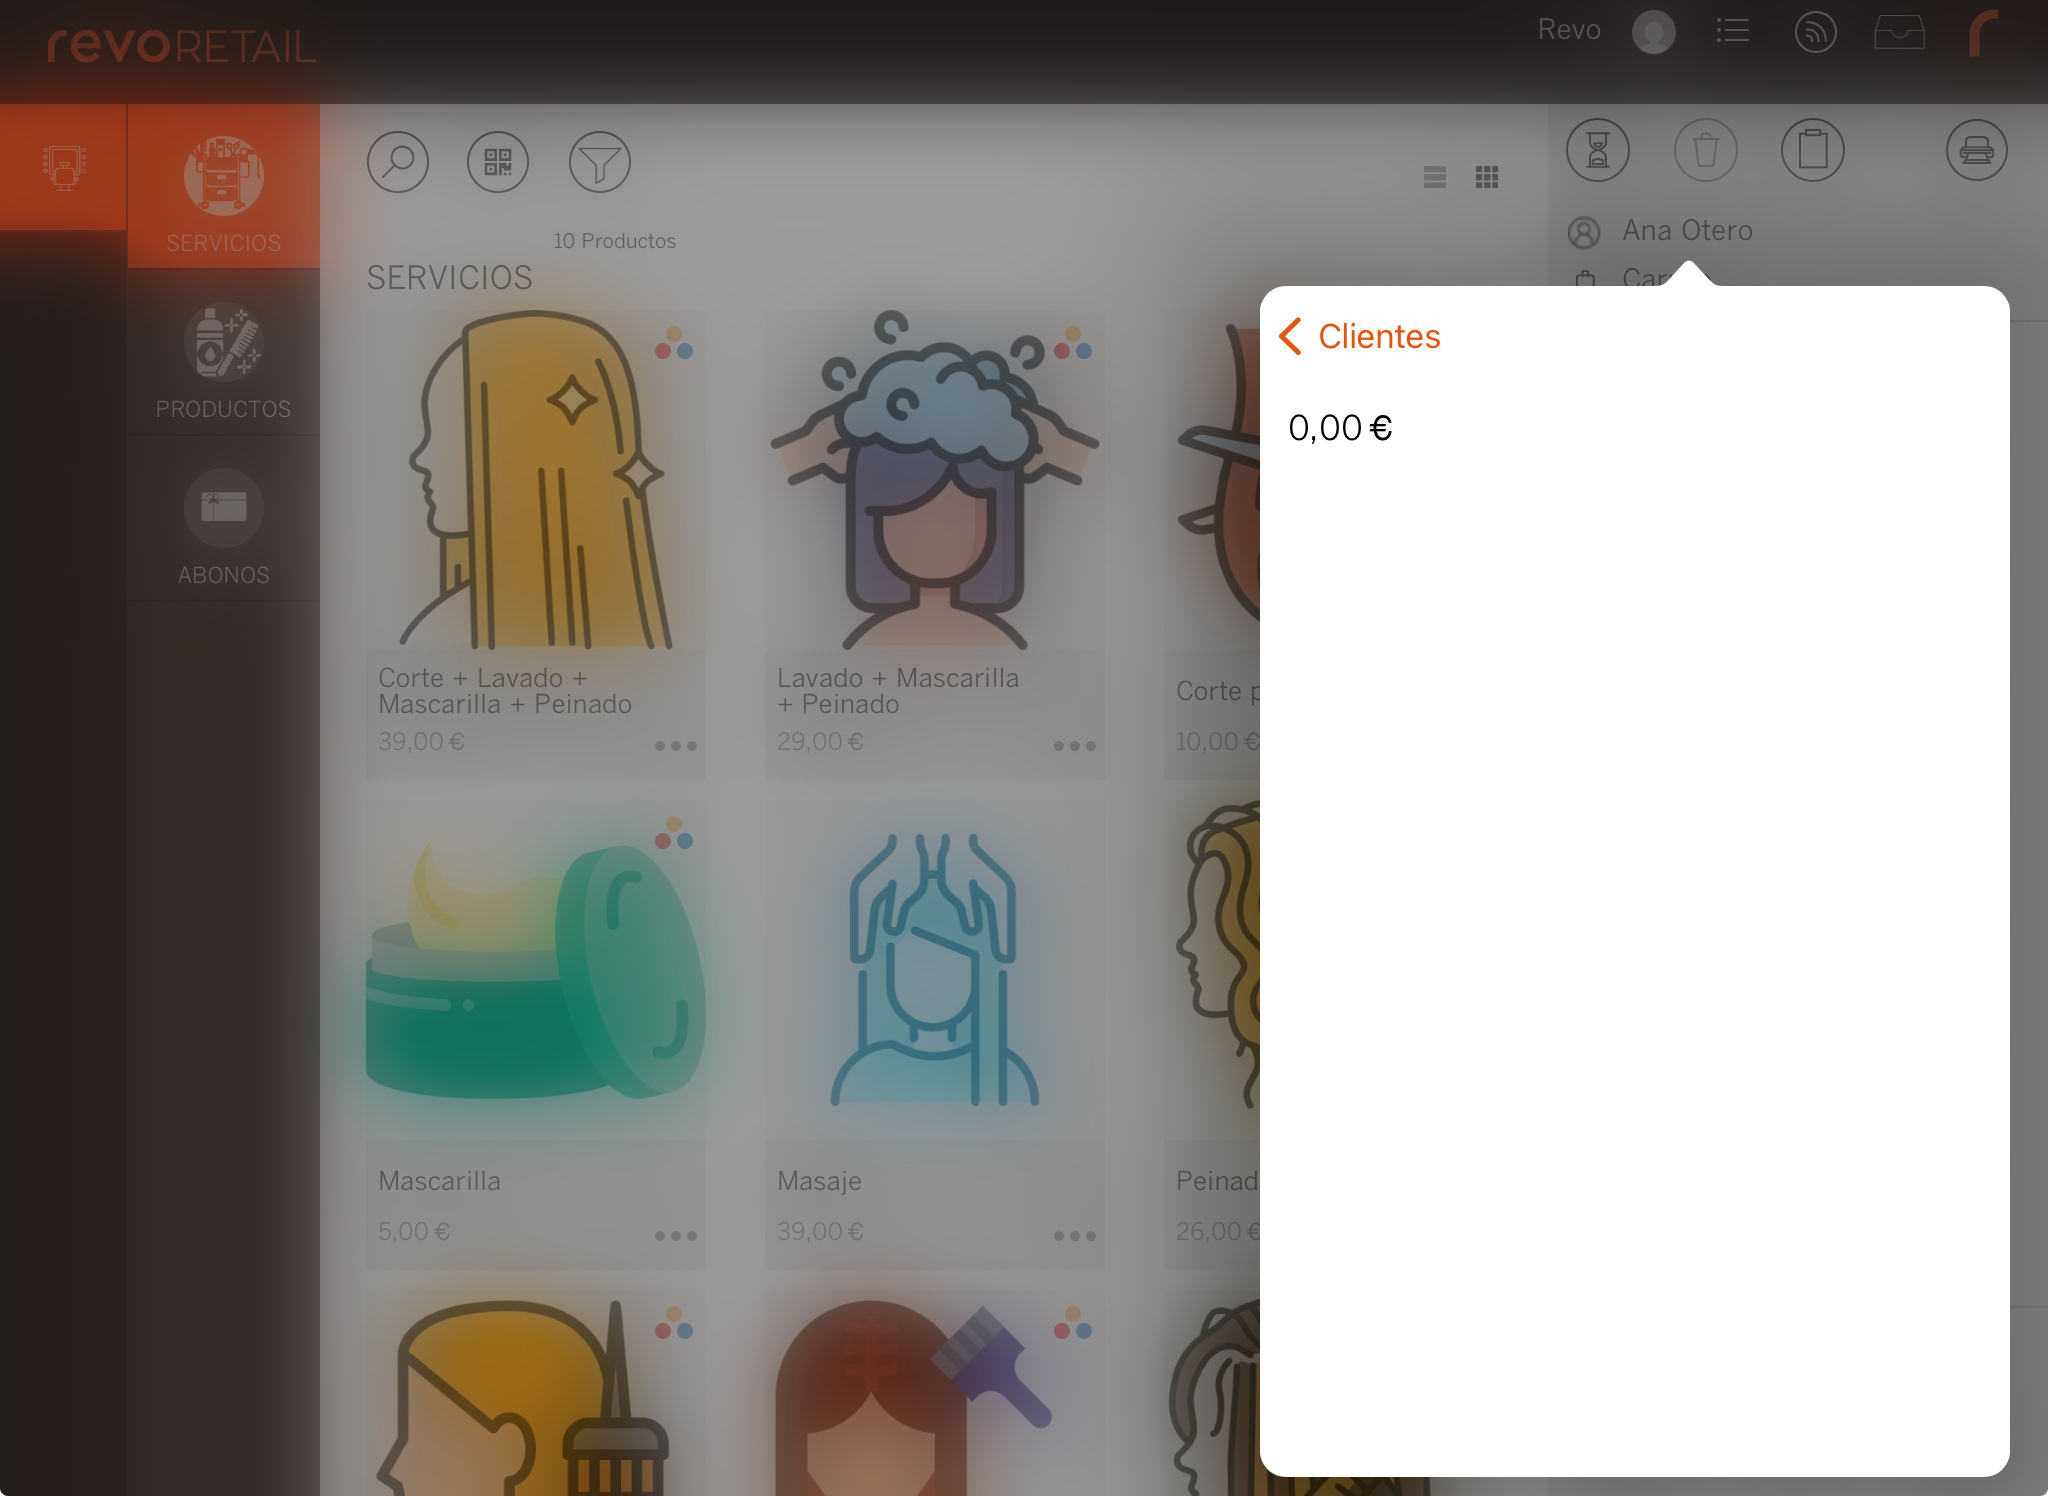
To check if there are pending invoices, repeat the first two steps. If there are none, the screen will appear empty:
4. CUSTOMER LIST
1. Go to back-office.
2. Go to Lists / CUSTOMERS.
3. You will see this information:
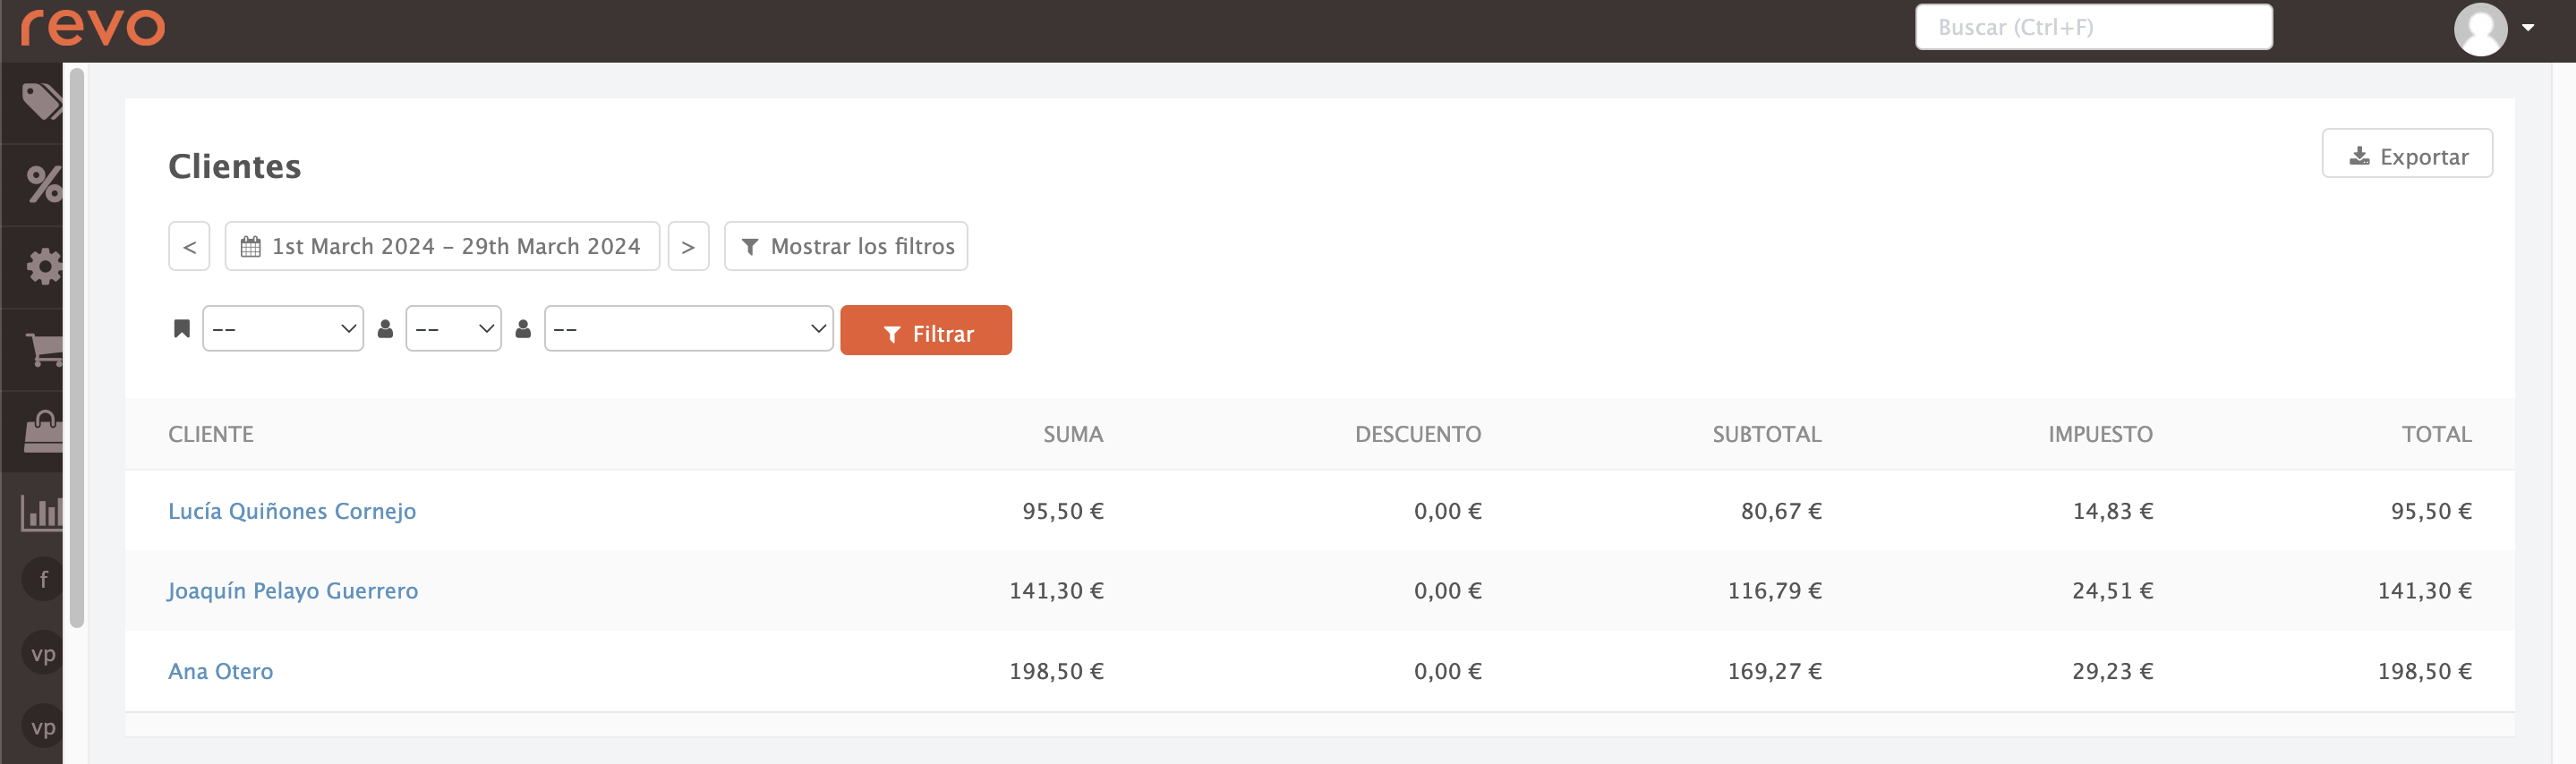
-
Calendar: Select dates to search.
-
Filters:
- Filter by invoice status .
- Filter by employee .
- Filter by customer .
-
Export: Save the report as a document.
-
Customer: Displays the customers.
-
Total: Total amount with taxes.
-
Discount: Discount amount.
-
Subtotal: Amount without taxes.
-
Taxes: Tax amount.
-
Total: Final total with taxes and discounts applied.