Revo FLOW is a simple and effective solution for managing your bookings, whatever your type of venue.
With the Revo FLOW app, you can move around freely and manage bookings quickly and easily.
You can use it on its own or alongside Revo XEF (hospitality) or Revo RETAIL (services).
We'll now take you on a tour of the version designed for hospitality.
HEADER:
This section is always visible in the app.

-
r: This is the main menu of Revo FLOW. From here, you can:
-
Sync: Update changes made in the back office.
-
Sync bookings: Update bookings from other devices (this is done automatically every 30 seconds).
Older reservations must be checked from the backoffice. The app only syncs reservations from the last 7 days to ensure optimal performance and avoid overload.
-
-
: Search for bookings by customer or number.
-
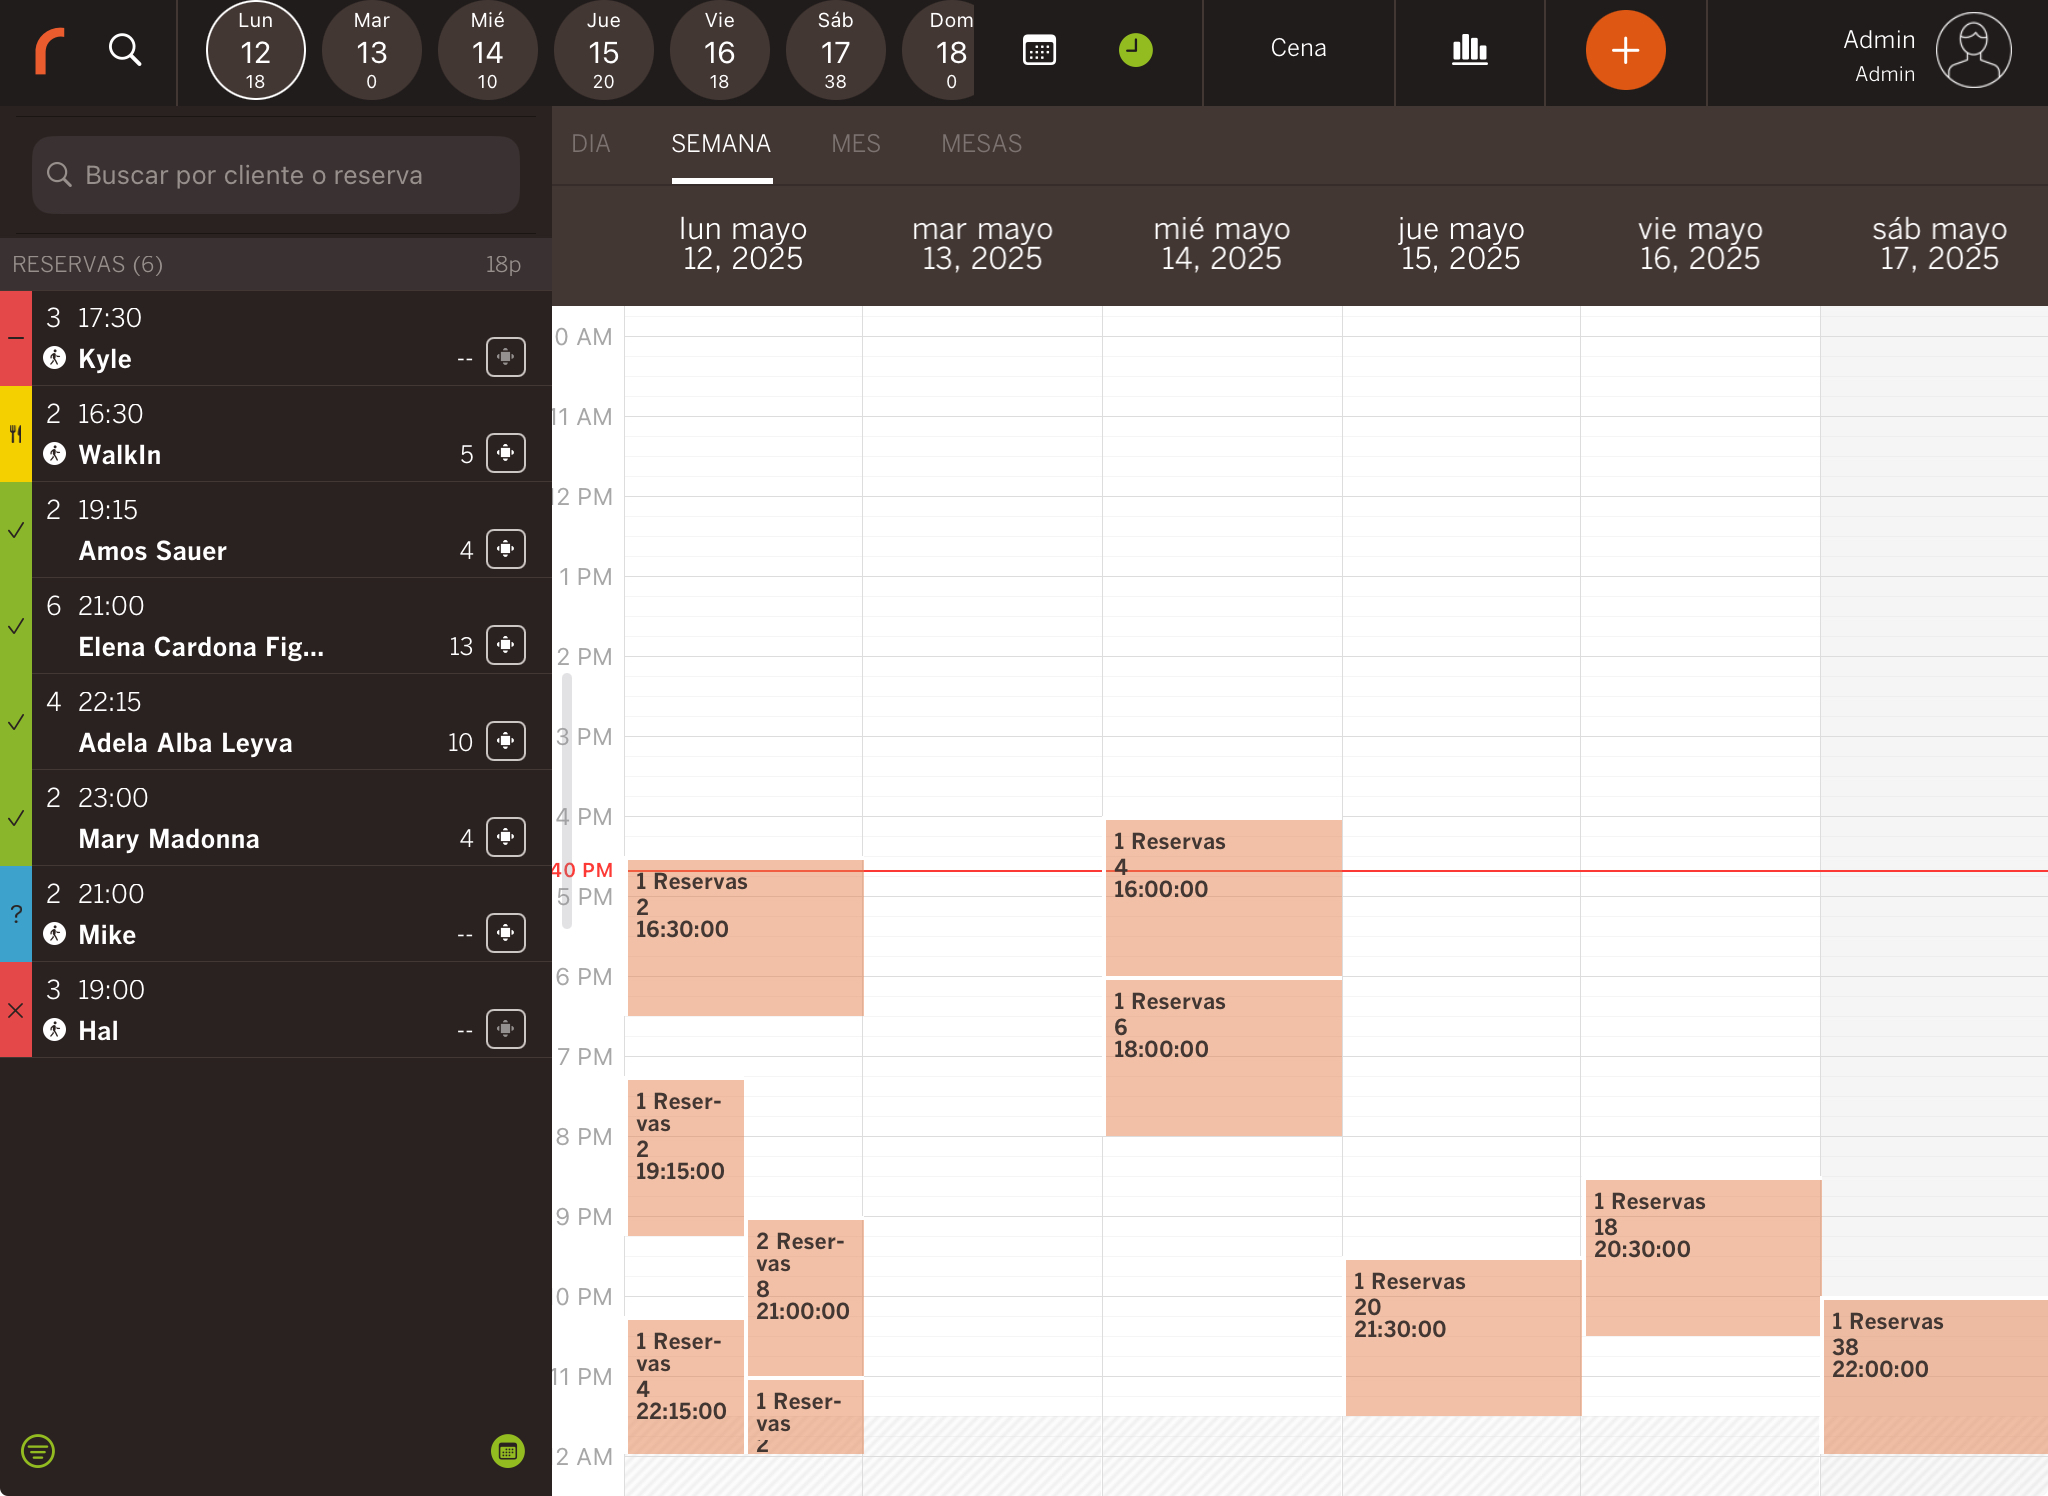
Week: Displays today and the next six days, along with the number of covers.
Swipe left or right to change the week.
-
: Choose a day, month or year.
-
: Return to the current day and shift.
-
Shifts: Choose a shift and view its bookings.
-
: View the shift’s statistics.
-
: Create a new booking.
-
: View or change the active employee.
You can set the PIN screen to appear after a delay. Enable it from the back office.
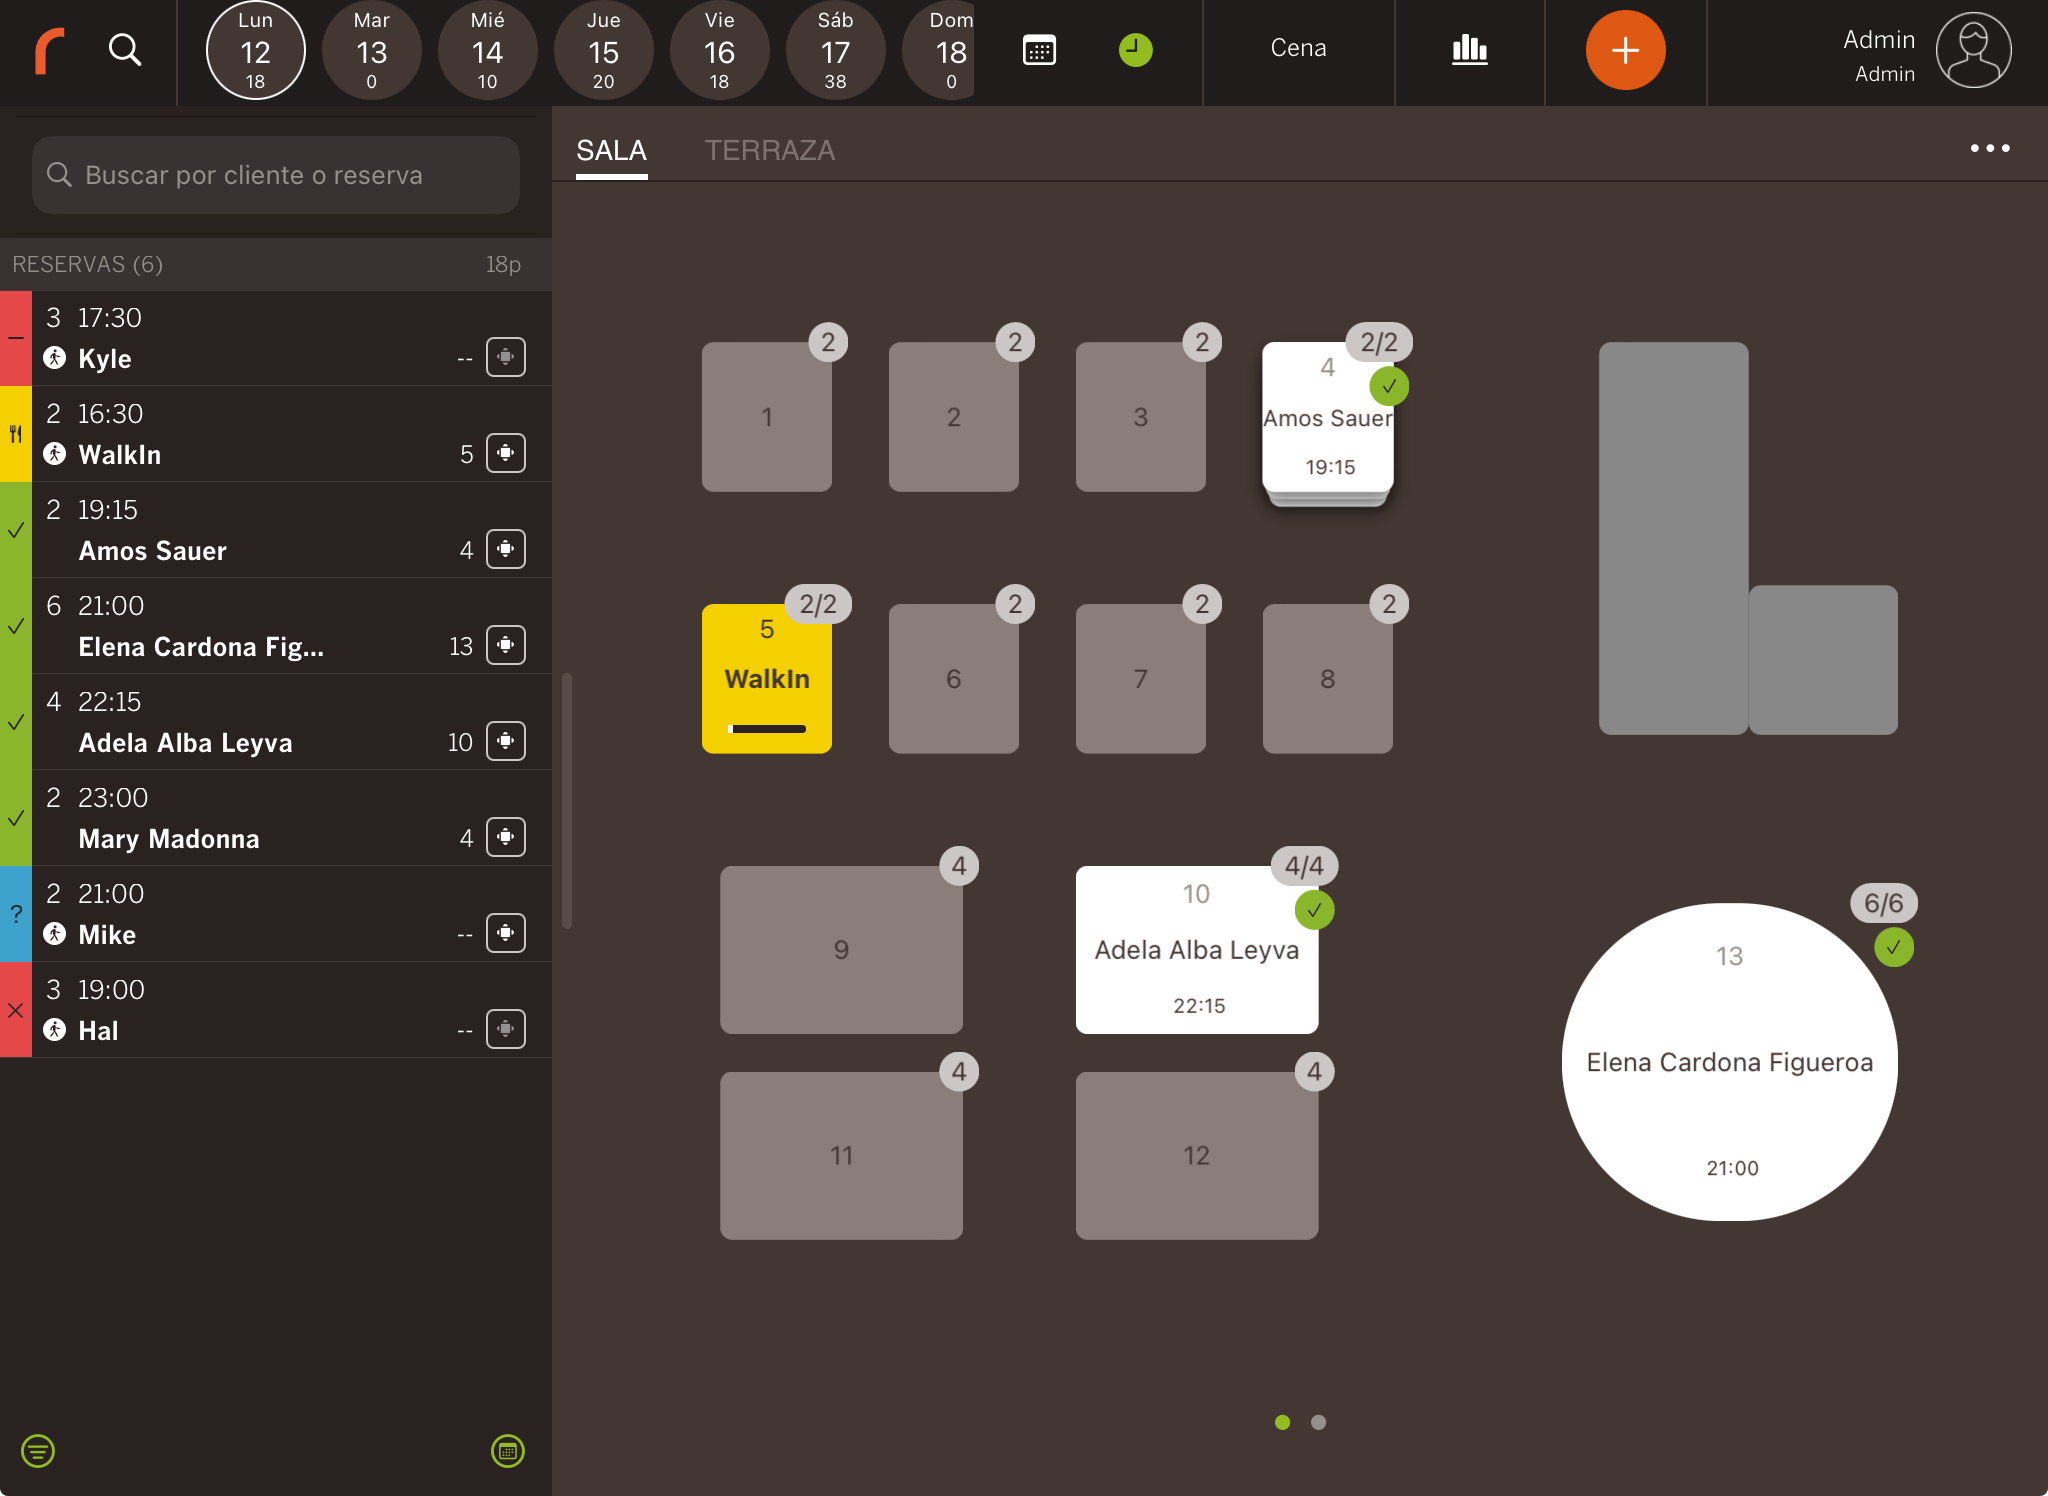
OVERVIEW:
This is the main screen in Revo FLOW. Here you see the table layout for your venue. Tables can be created in the back office or imported from Revo XEF. More info here.
On the left, you'll find the magnifying glass and the list of bookings for the day and shift.
1. Areas
Swipe or tap the name to switch between areas.
2. Edit tables
You can edit tables to join or split them for better booking management. For example, if you have six guests and no large table, you can combine a four-top with a two-top.
From the back office, you can prevent small tables from being assigned to large parties.
You can also cancel or reset changes.
Changes are applied per day, area and shift.
3. Tables
Set the name and capacity of tables from the back office.
Table colours indicate their status:
-
Grey: No booking.
-
White: Booked. Green icon = confirmed, blue = pending.
-
Yellow: Guests seated.
-
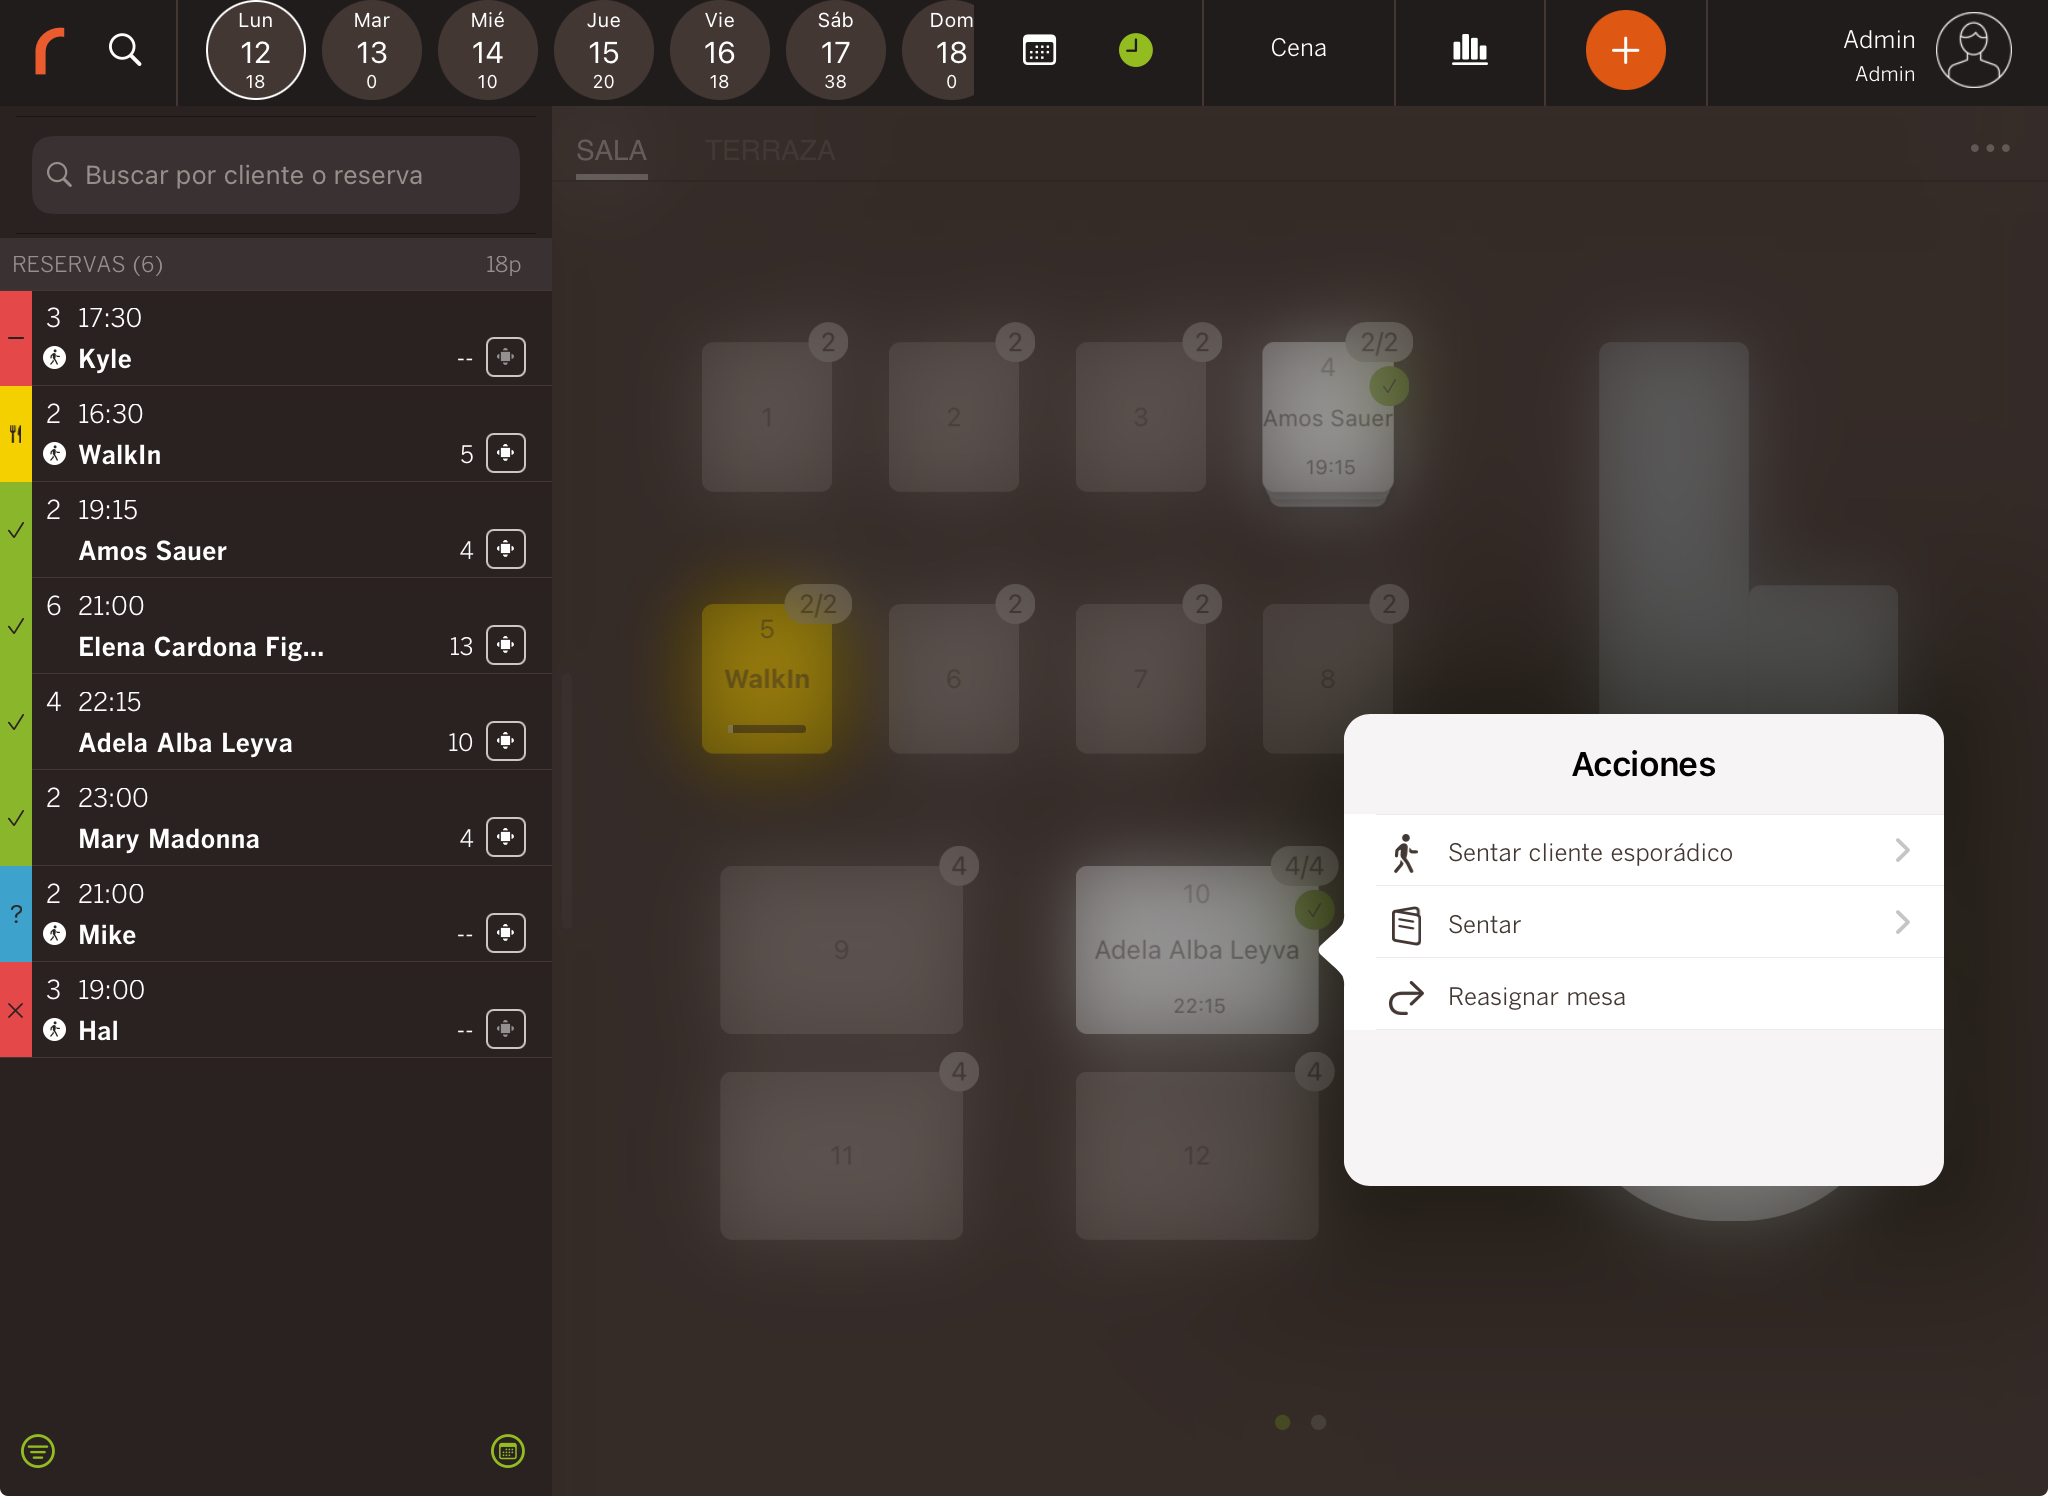
Actions available:
-
Swipe a table with a booking to see:
-
Walk-in: Seat a guest without a booking.
-
Seat: Mark the table as occupied.
If using Revo XEF, the table will show as occupied in XEF and you can take the order.
-
Edit tables: Allows switching tables between bookings.
-
View photo: Add a photo to the table. Useful for venues with a stage to show the view from certain tables.
-
Swipe a table without a booking to see:
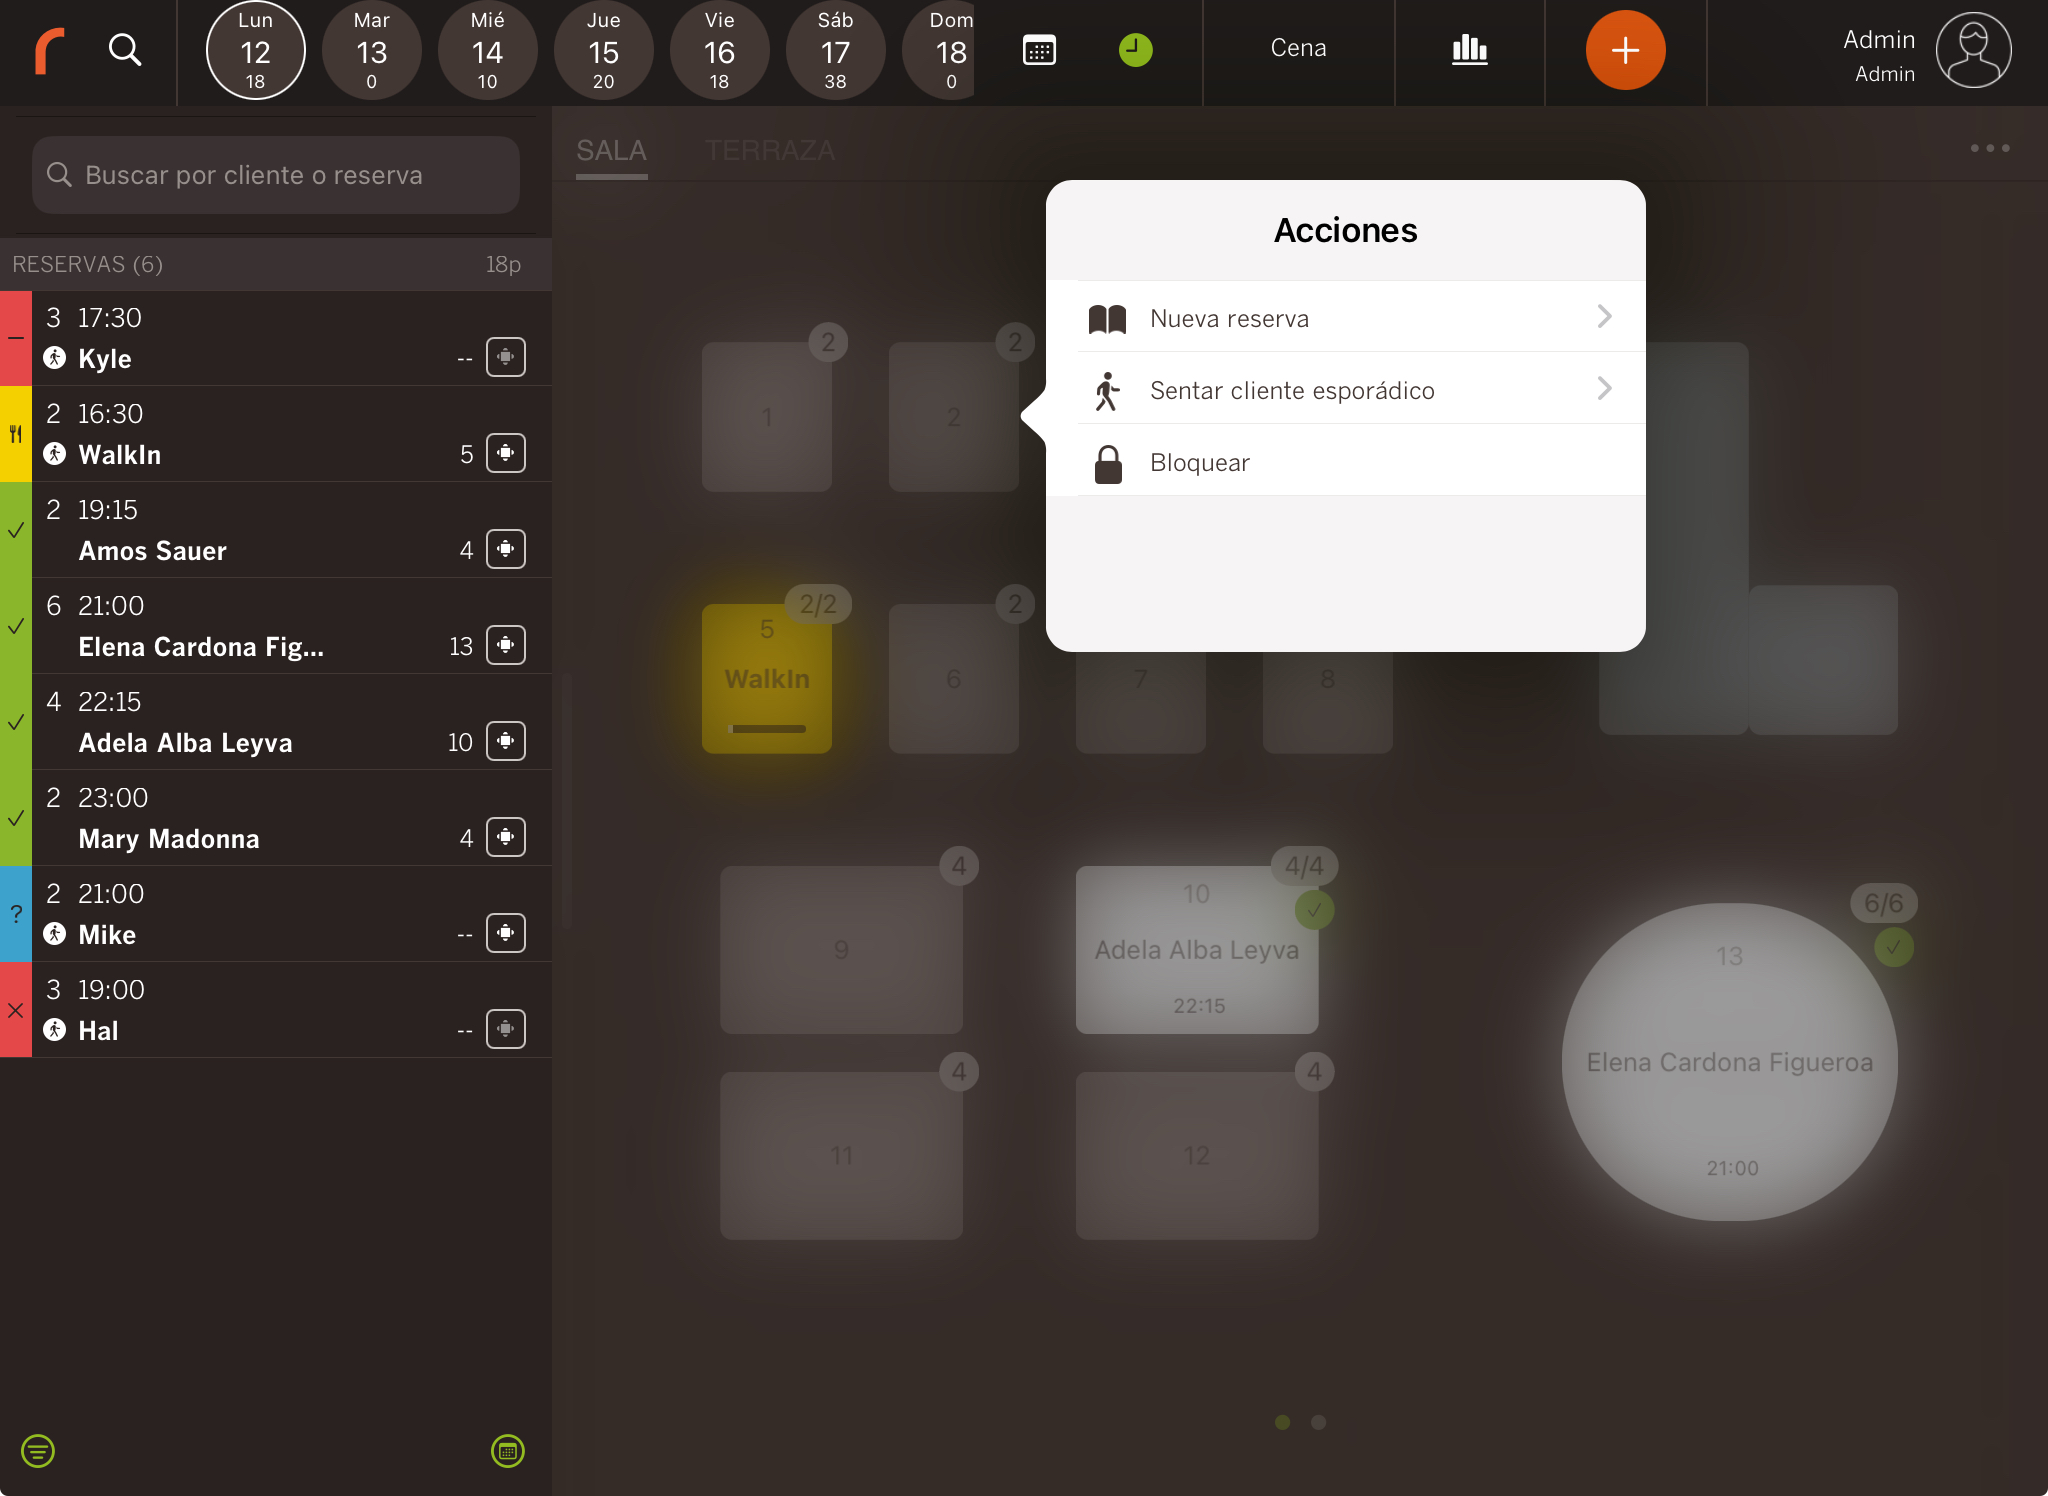
- New booking: Create a booking from this table.
- Walk-in: Seat a guest without a booking.
- Block: Block this table.
-
View photo: Show the photo linked to the table.
-
4. Bookings
This shows all bookings for the day, by area and shift. Each booking can be:
- Pending: Waiting to be confirmed.
- Confirmed: Booking confirmed.
- Seated: Guests are at the table.
- Cancelled: Booking cancelled.
- Closed: Booking closed.
- No show: The guest didn’t arrive.
You’ll also see the number of covers, time, guest name and assigned table.
5. Filters: Bottom left, filter by status, employee or area.
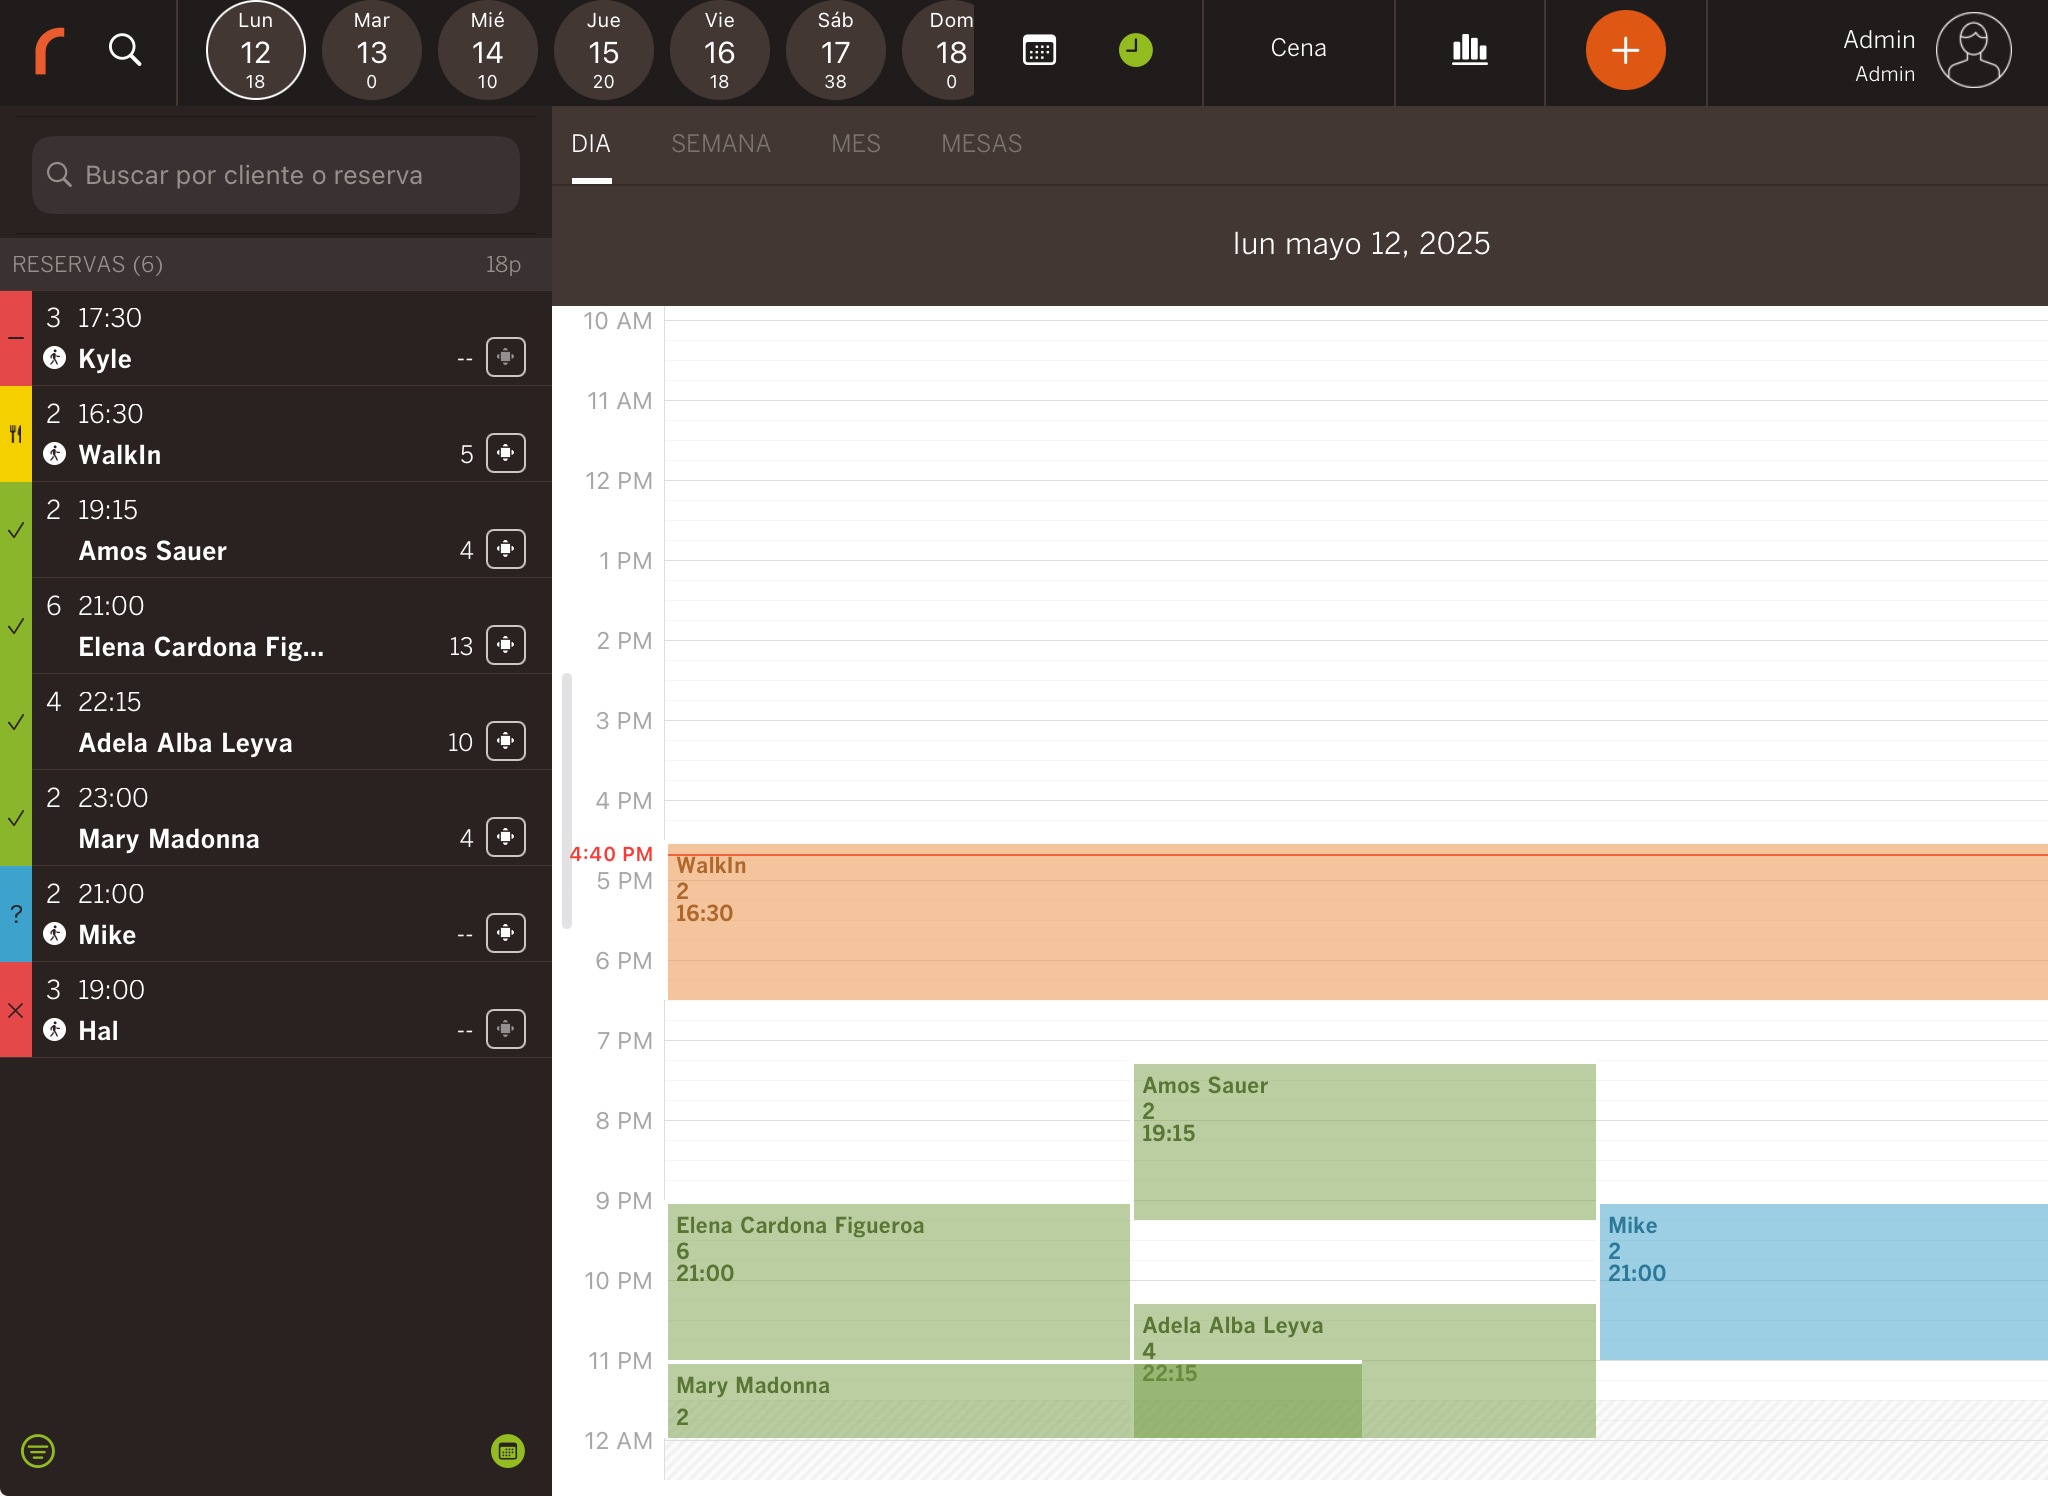
6. Change view: Switch display between:
-
Day view: Bookings for the day, organised by time slots.
-
Week view: Weekly overview. Tap a booking to see details like name, status, time, table, and covers.
-
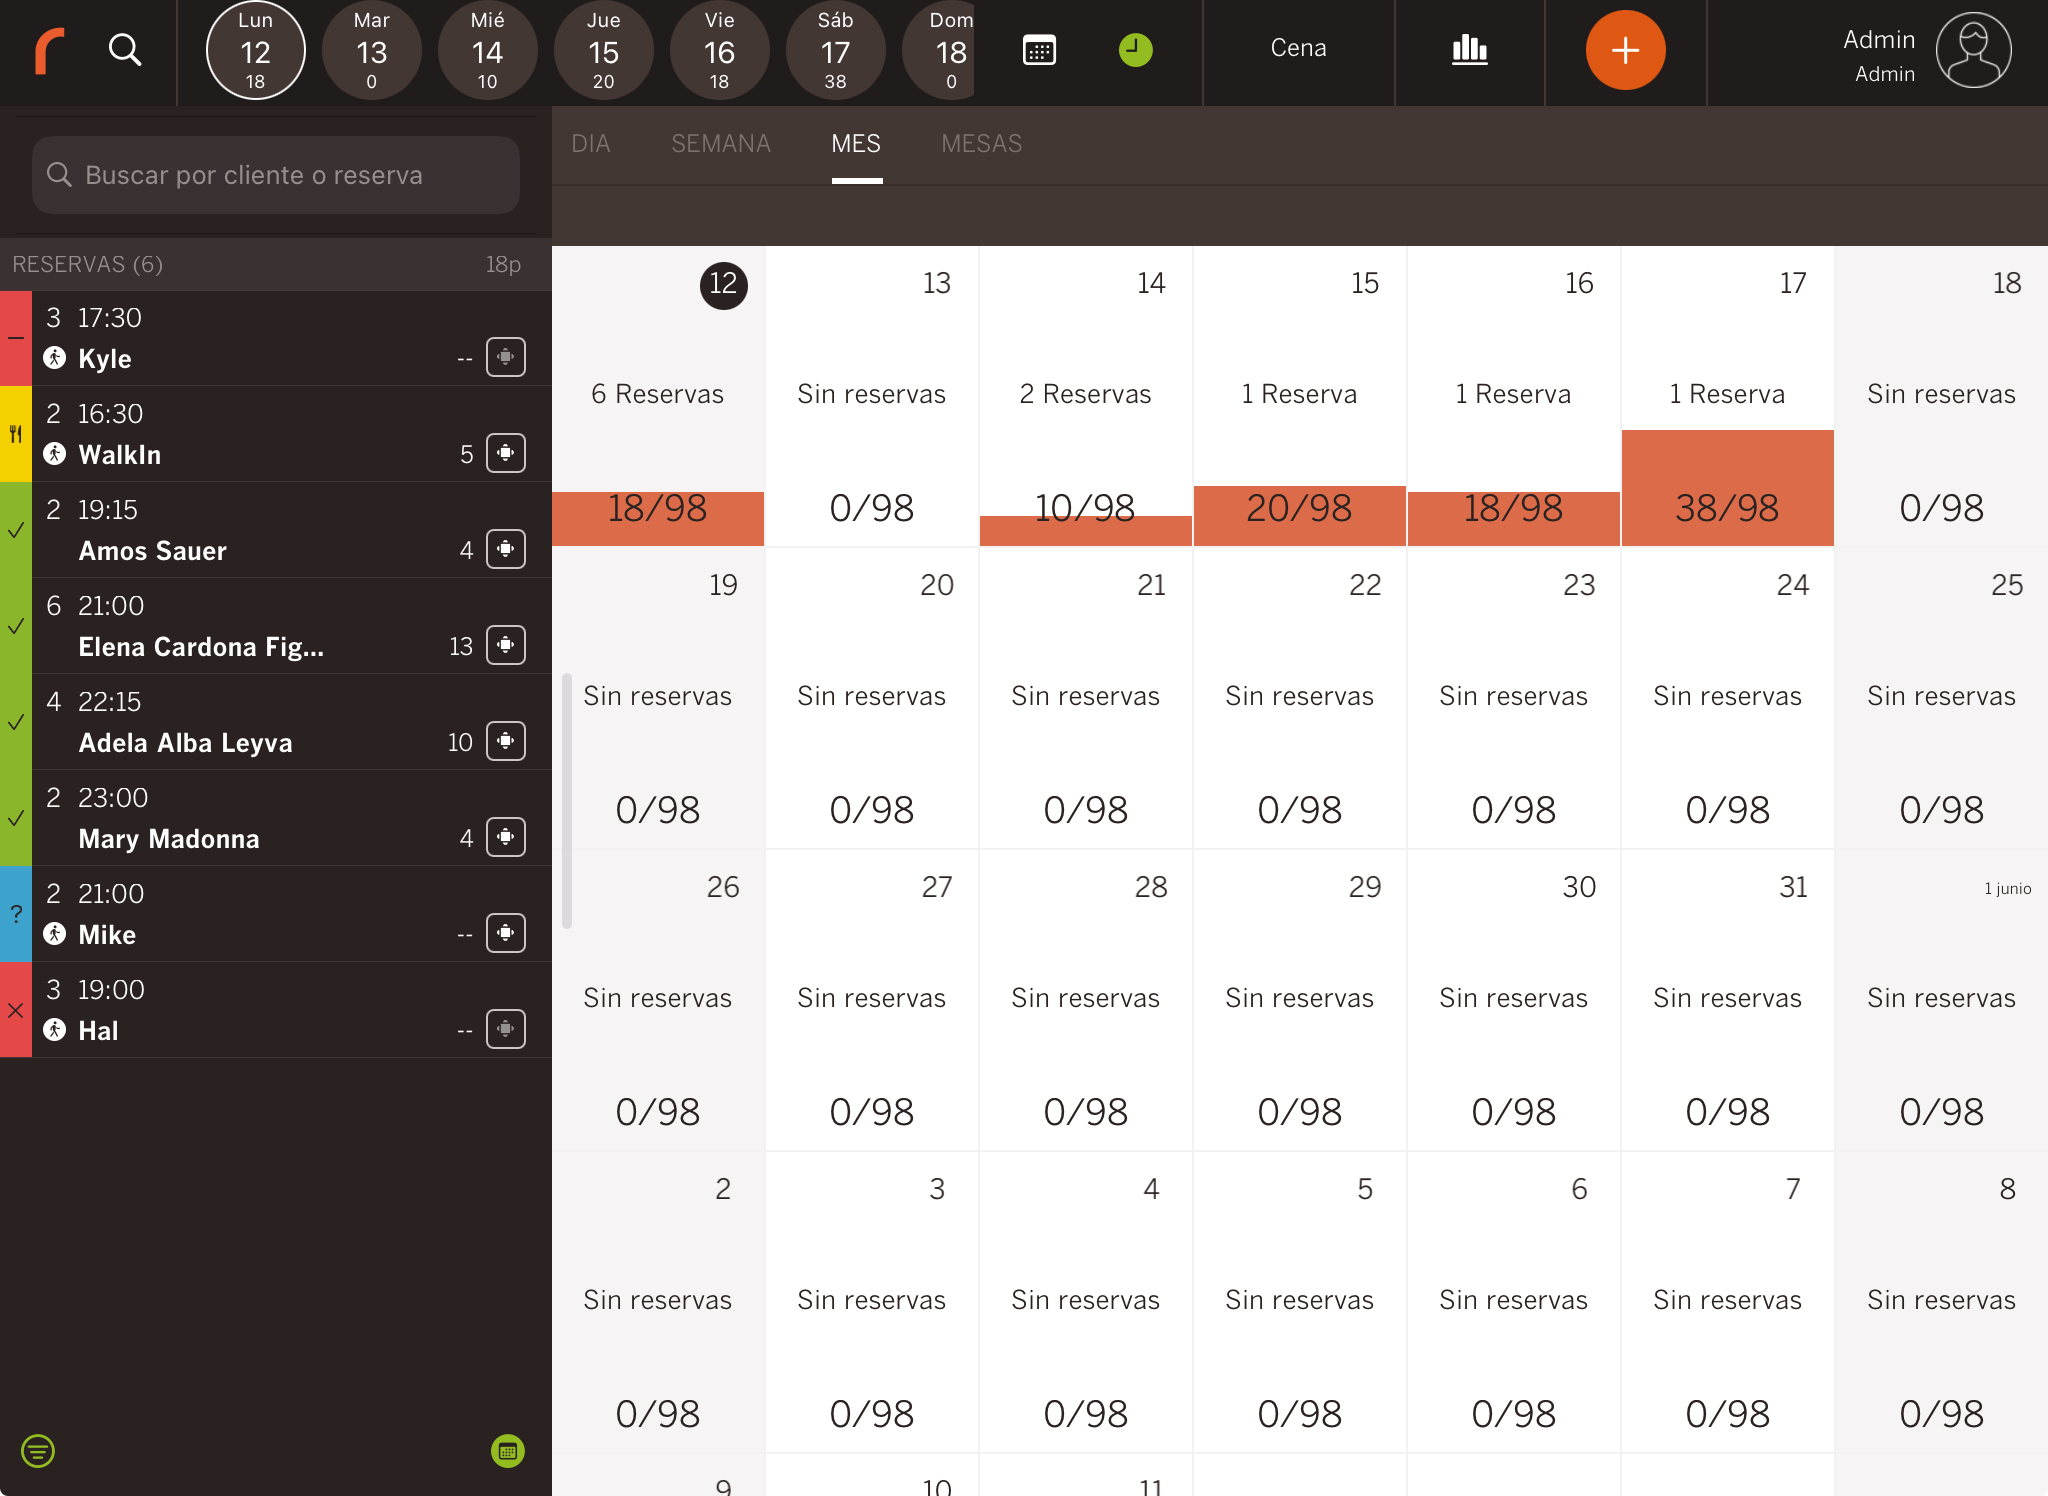
Month view: General monthly overview. Tap a day to enter day view.
-
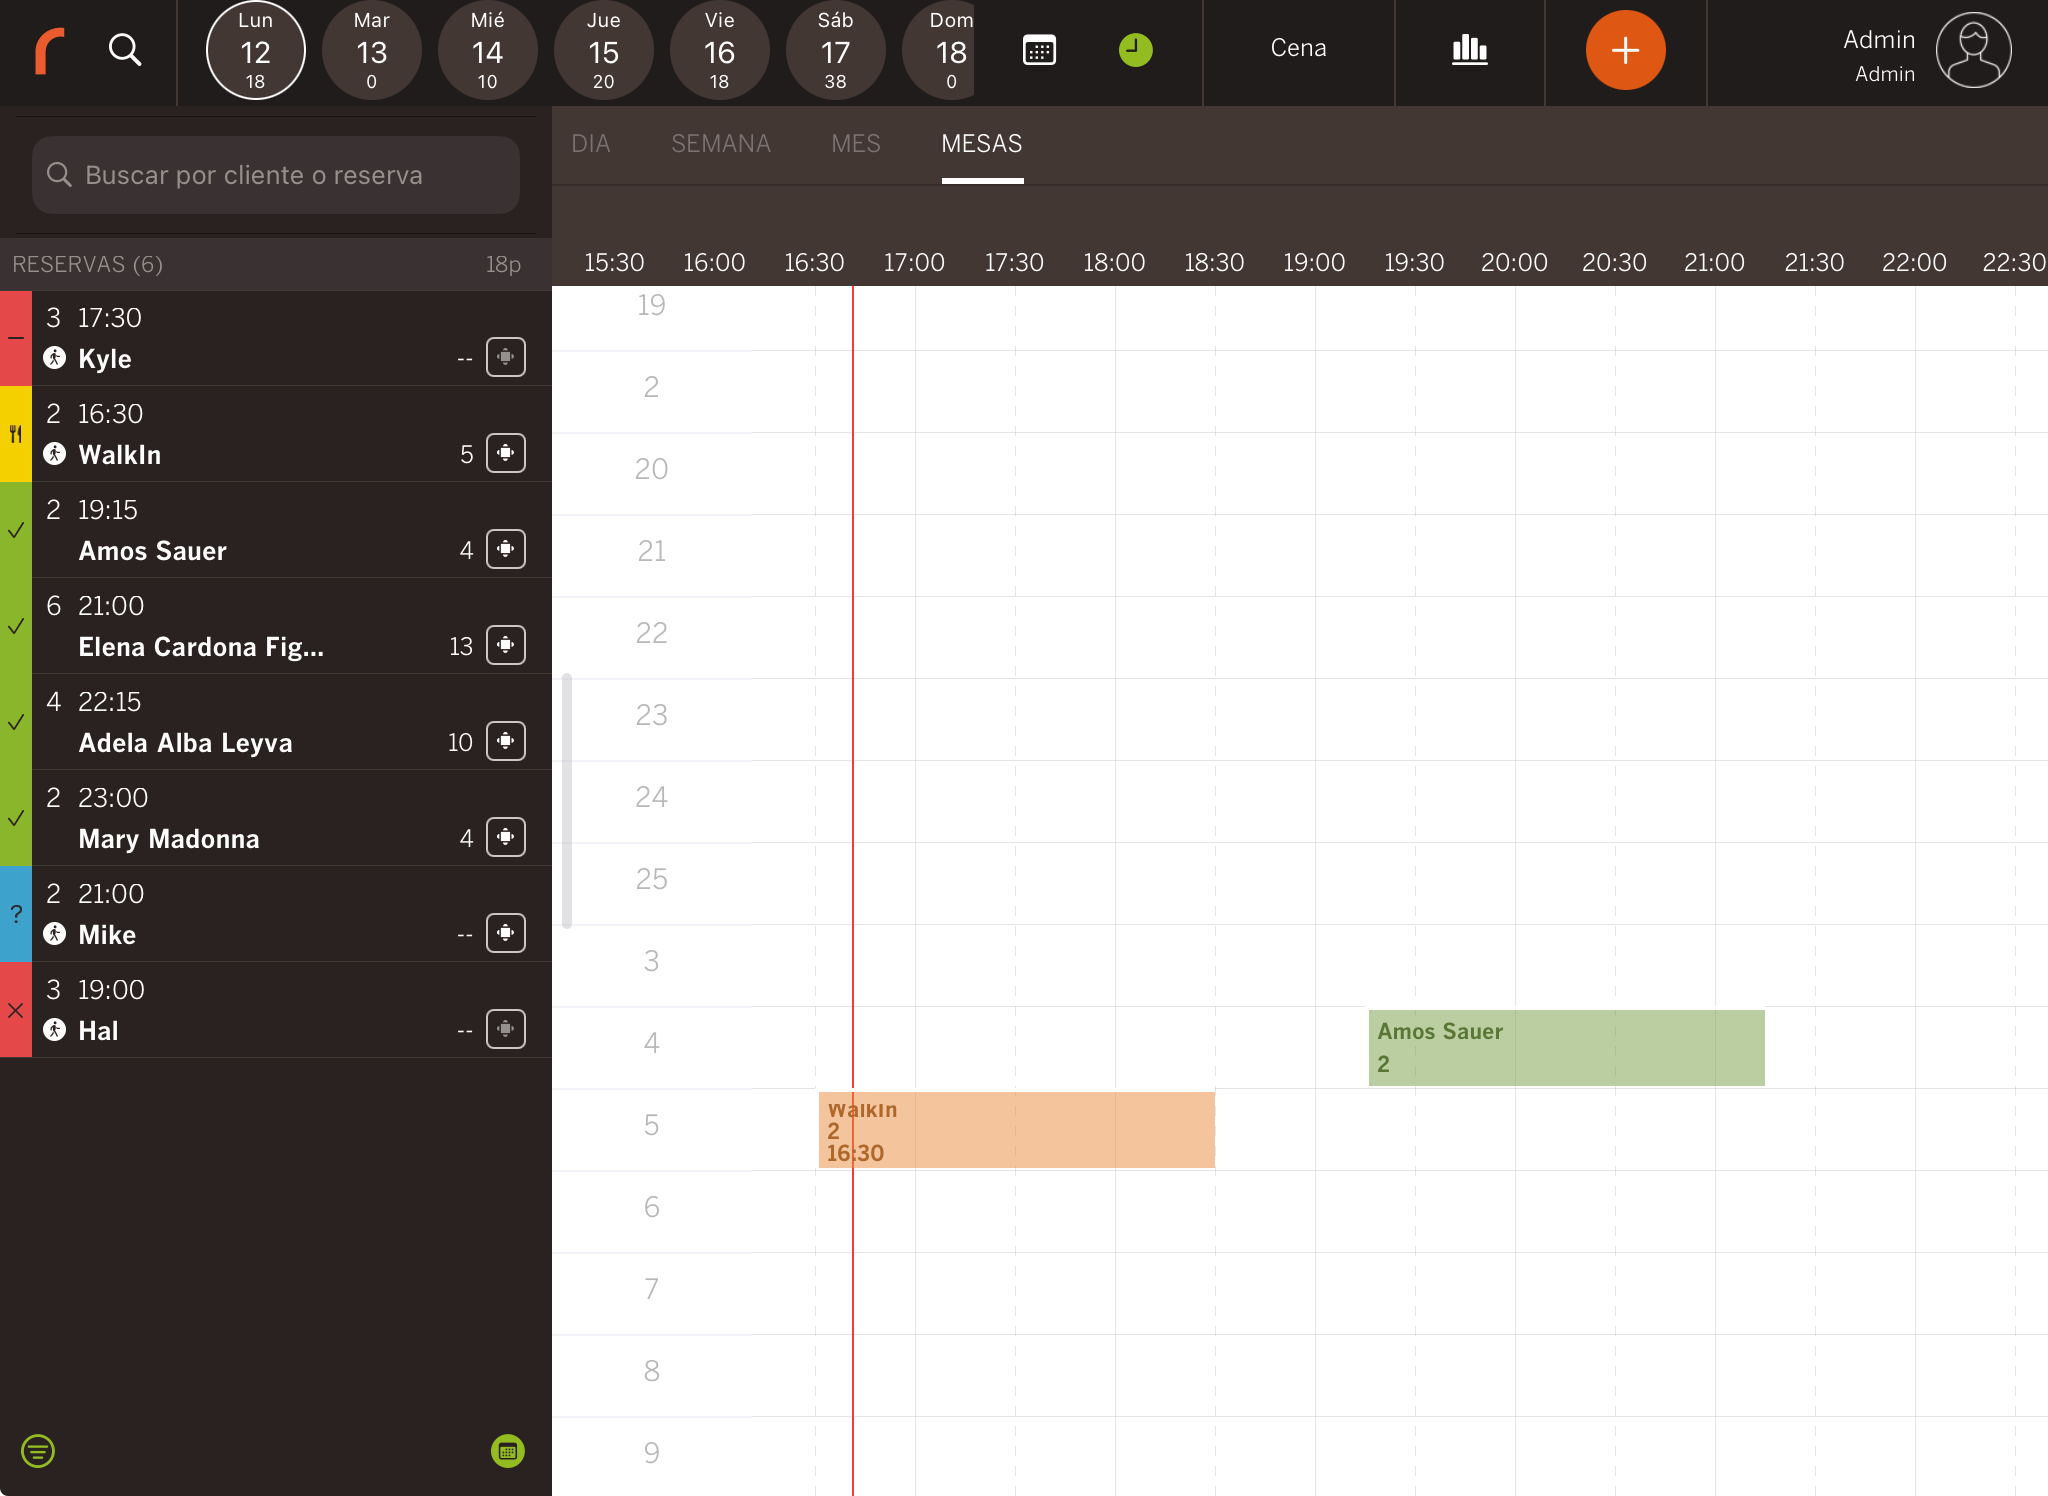
Table view: Bookings grouped by table. Displays name, number of covers and time.
7. Selected booking: Tap a booking to view all the following details:
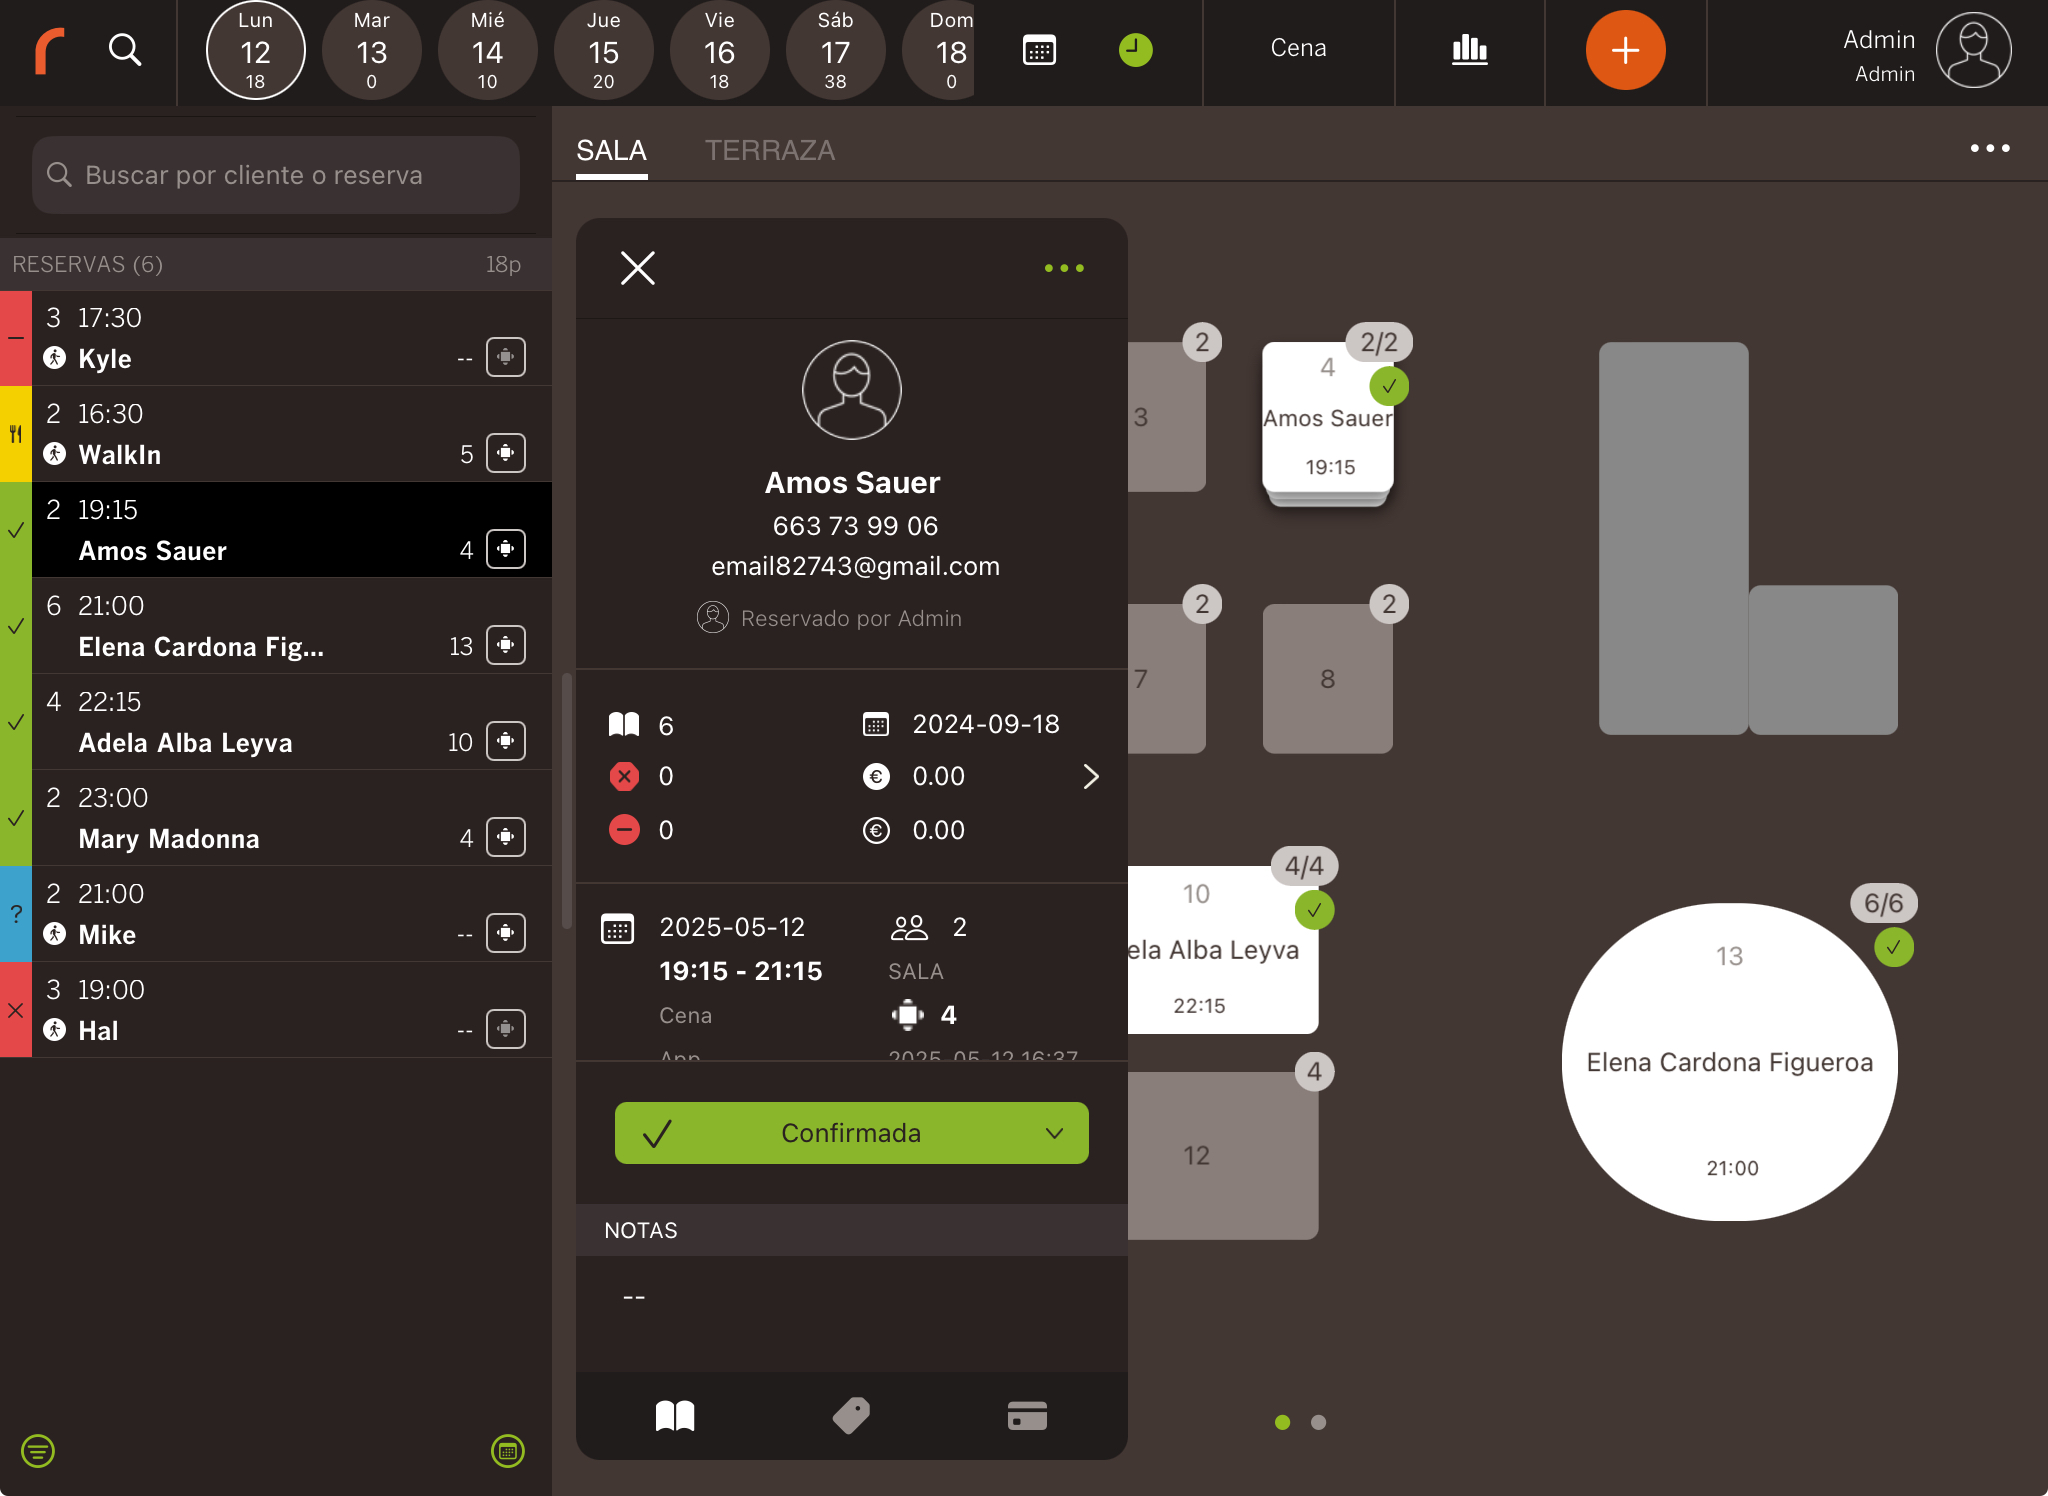
- Customer: Customer information.
- Employee: Employee who created the booking.
- History: Customer history. E.g. bookings, cancellations, orders, etc.
- Date and time: Of the booking.
- Shift: Assigned shift.
- Source: How the booking was made (app, widget, etc.).
- Covers: Total number.
- Area / Table: Assigned.
- Creation date and time: When the booking was made.
- Status: Current status.
- Notes: Details (e.g. birthday cake).
- Tags: Booking tags.
- Products: Associated items (like a cake).
- Prepayments: Add a payment when creating the booking.