1. ACTIONS TO BE TAKEN ON THE MASTER ACCOUNT 2. ACTIONS TO BE TAKEN ON INDIVIDUAL ACCOUNTS 3. AVAILABLE OPERATIONS ON THE MASTER ACCOUNT
Shared warehouses are used to manage inventory from a master account to individual accounts.
1. ACTIONS TO BE TAKEN ON THE MASTER ACCOUNT
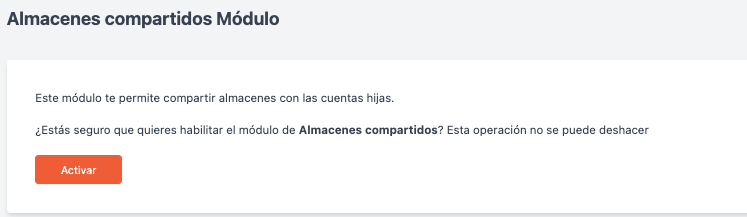
How to activate shared warehouses?
1. Access the back-office of Revo XEF from the master account.
2. Click on Configuration / WAREHOUSES.
3. Activate the Shared Warehouses Module
4. On the master account, depending on your needs, you can create one or several central warehouses.
How to configure the stock of products in the central warehouse?
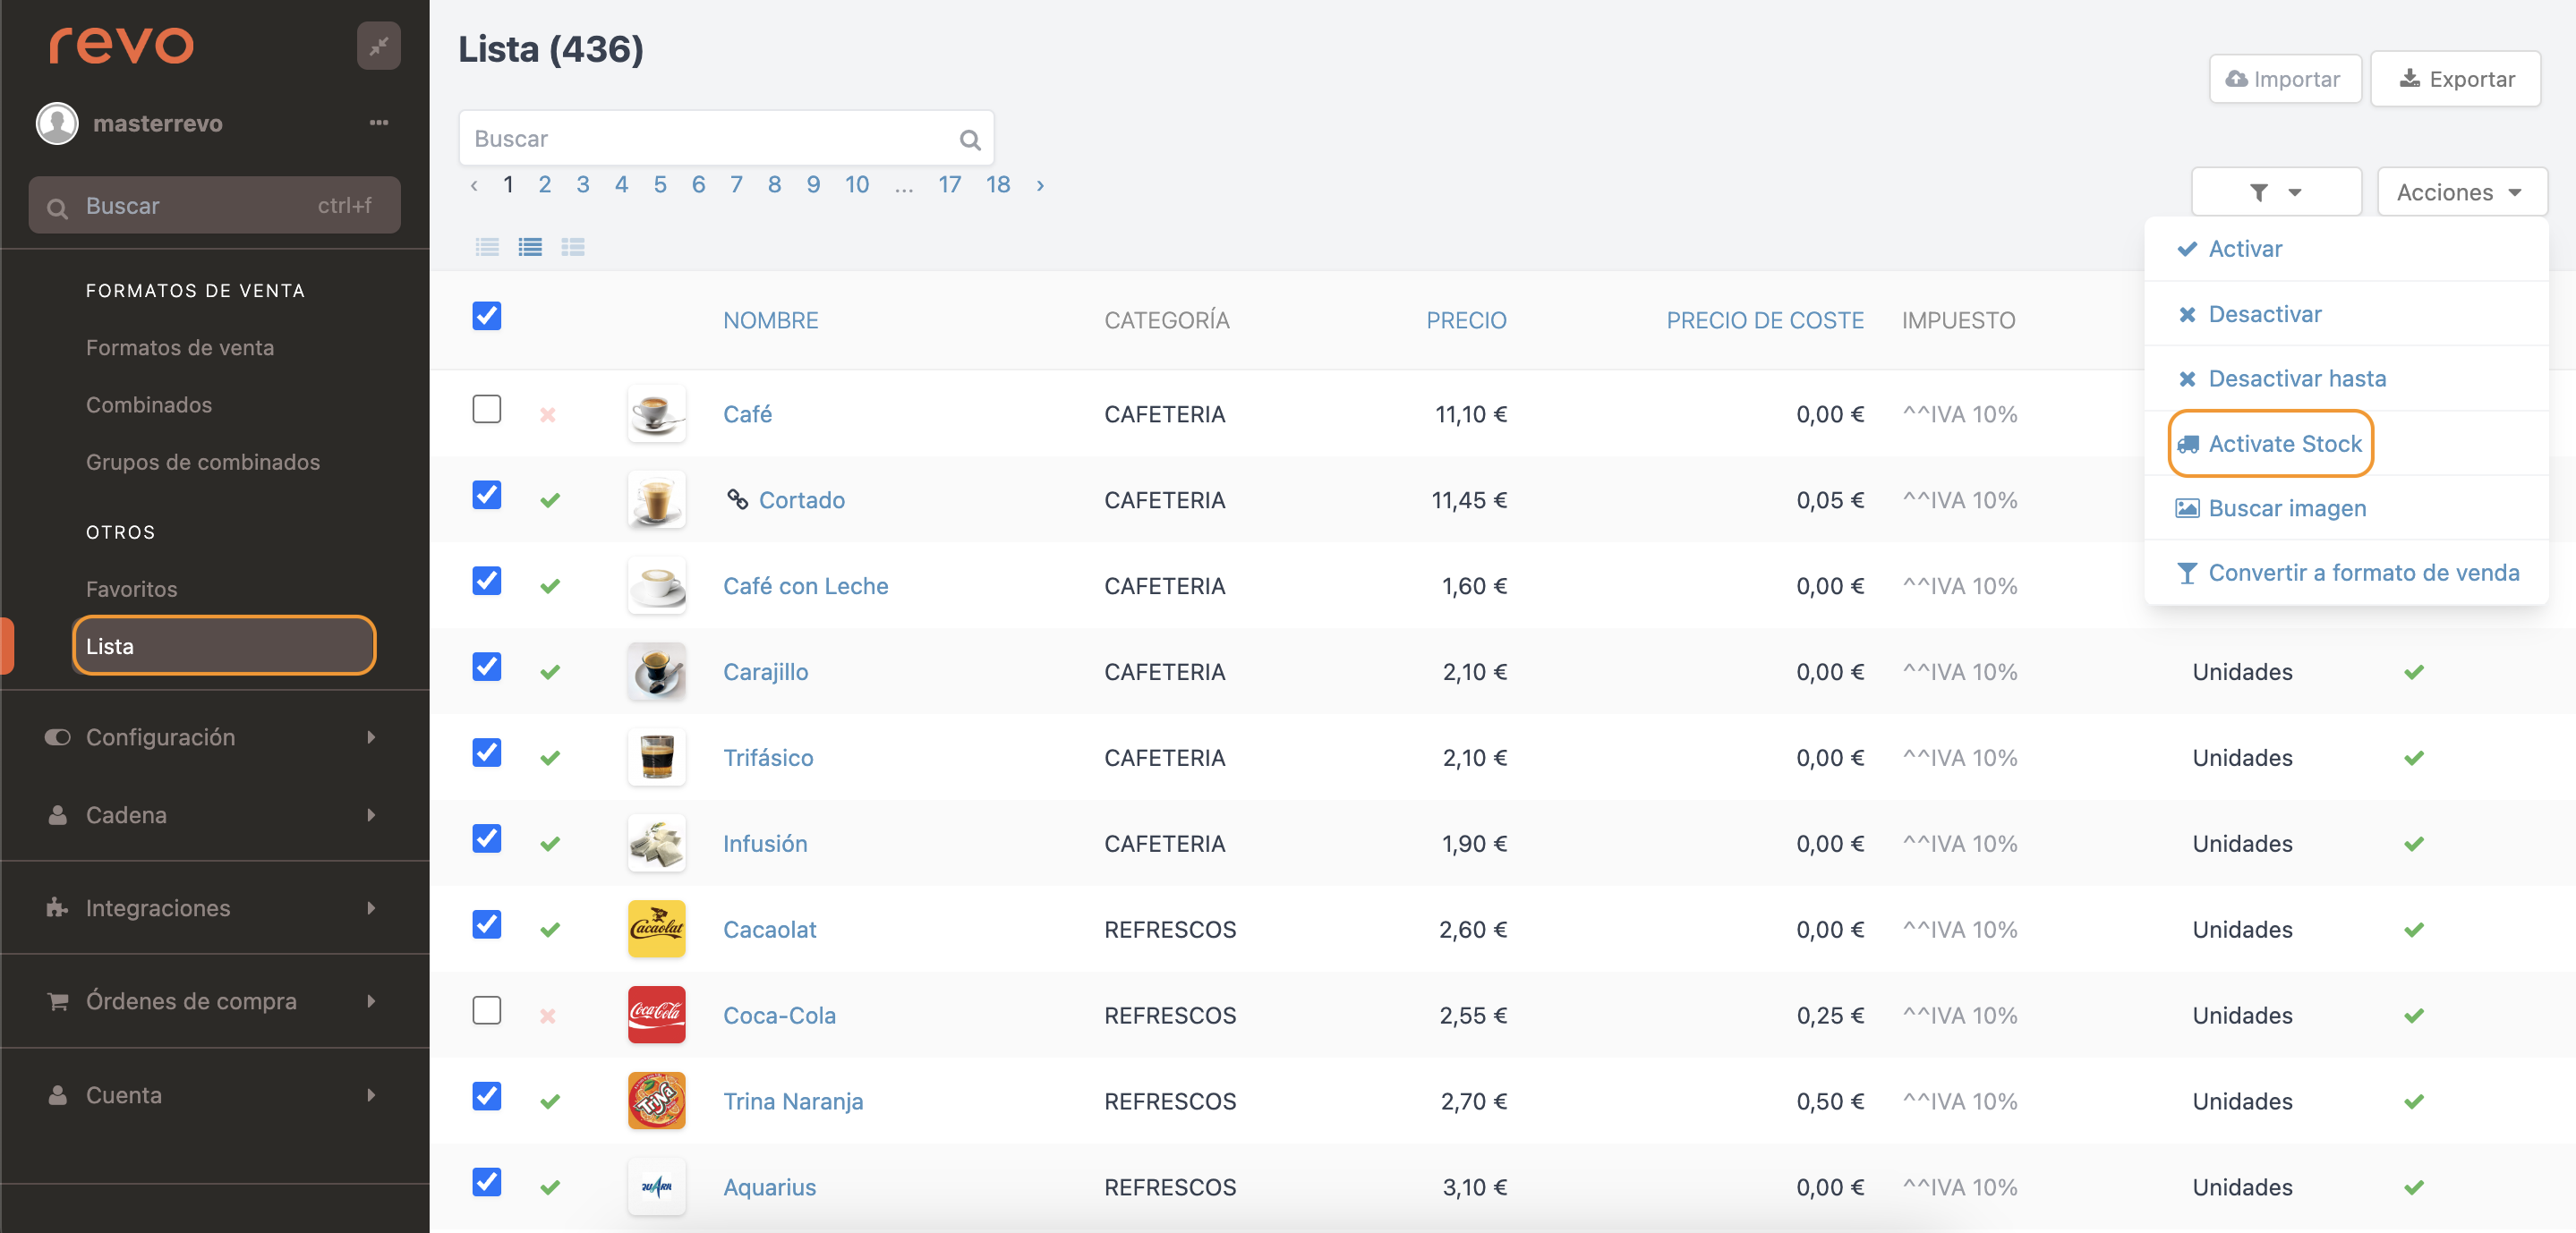
1. Click on Catalogue / LIST.
2. Select the different products you want to activate in stock. And in actions, select Activate Stock
3. The next step is to update the inventory of the necessary products. This can be done with the inventory set template found at https://revoxef.works/tools/import. The necessary fields are:
- item_id: Product ID.
- quantity: Quantity.
- warehouse_id: Warehouse ID.
- defaultQuantity: Default value.
- alert: Inventory alert.
2. ACTIONS TO BE TAKEN ON INDIVIDUAL ACCOUNTS
How to configure stock in individual accounts?
1. Create warehouses in individual accounts as explained here.
2. Activate stock for each of the warehouses in the same way as in the central warehouse.
3. Click on Catalogue / GROUPS.
4. Access the product you want to configure. Edit the product and in the Inventory tab, indicate the Default Value and Inventory Alert of the different warehouses.
3. AVAILABLE OPERATIONS ON THE MASTER ACCOUNT
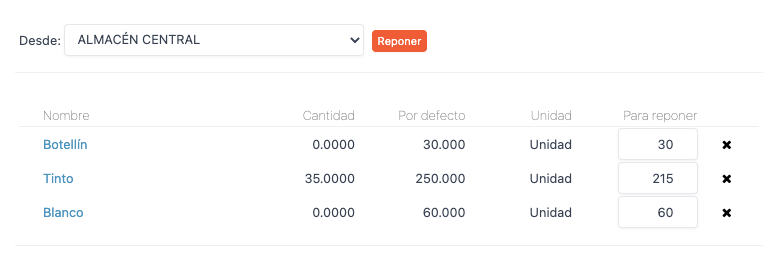
How to replenish in the different warehouses?
1. Stock must be activated and configured both on the master account and on individual accounts.
2. Click on Configuration / WAREHOUSES.
3. Click on of the warehouse you want to replenish.
4. Automatically, the system will indicate the quantities to Replenish for each of the products. And with the , you can remove products that you do not want to replenish at the moment.
5. If there is not enough stock of the products, the system will give an error message.
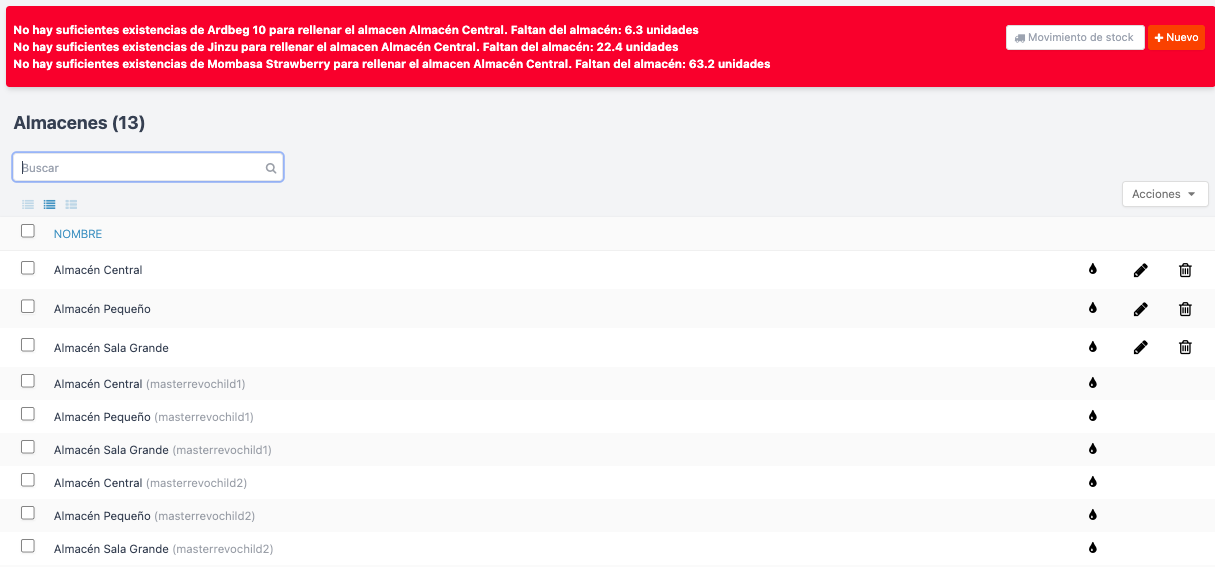
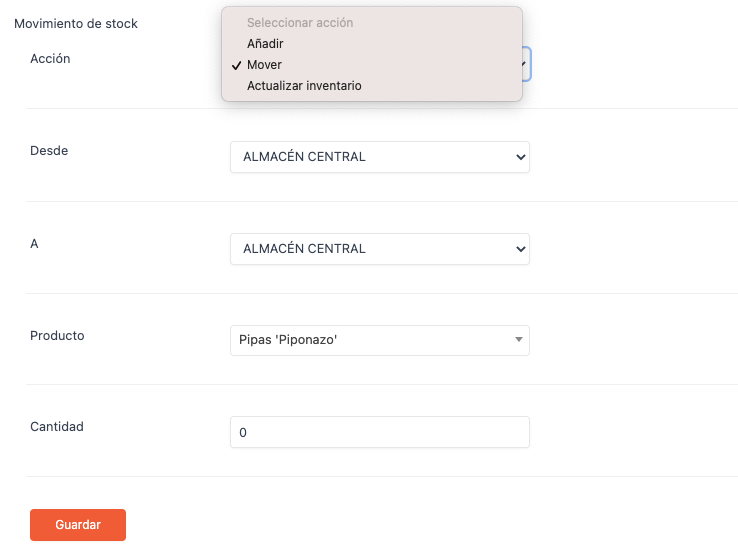
6. Stock movements (Move, Add, or Update inventory) can also be performed from the warehouses of individual accounts to the central warehouse and vice versa.
How to place purchase orders?
Create vendors as indicated here.
New purchase order
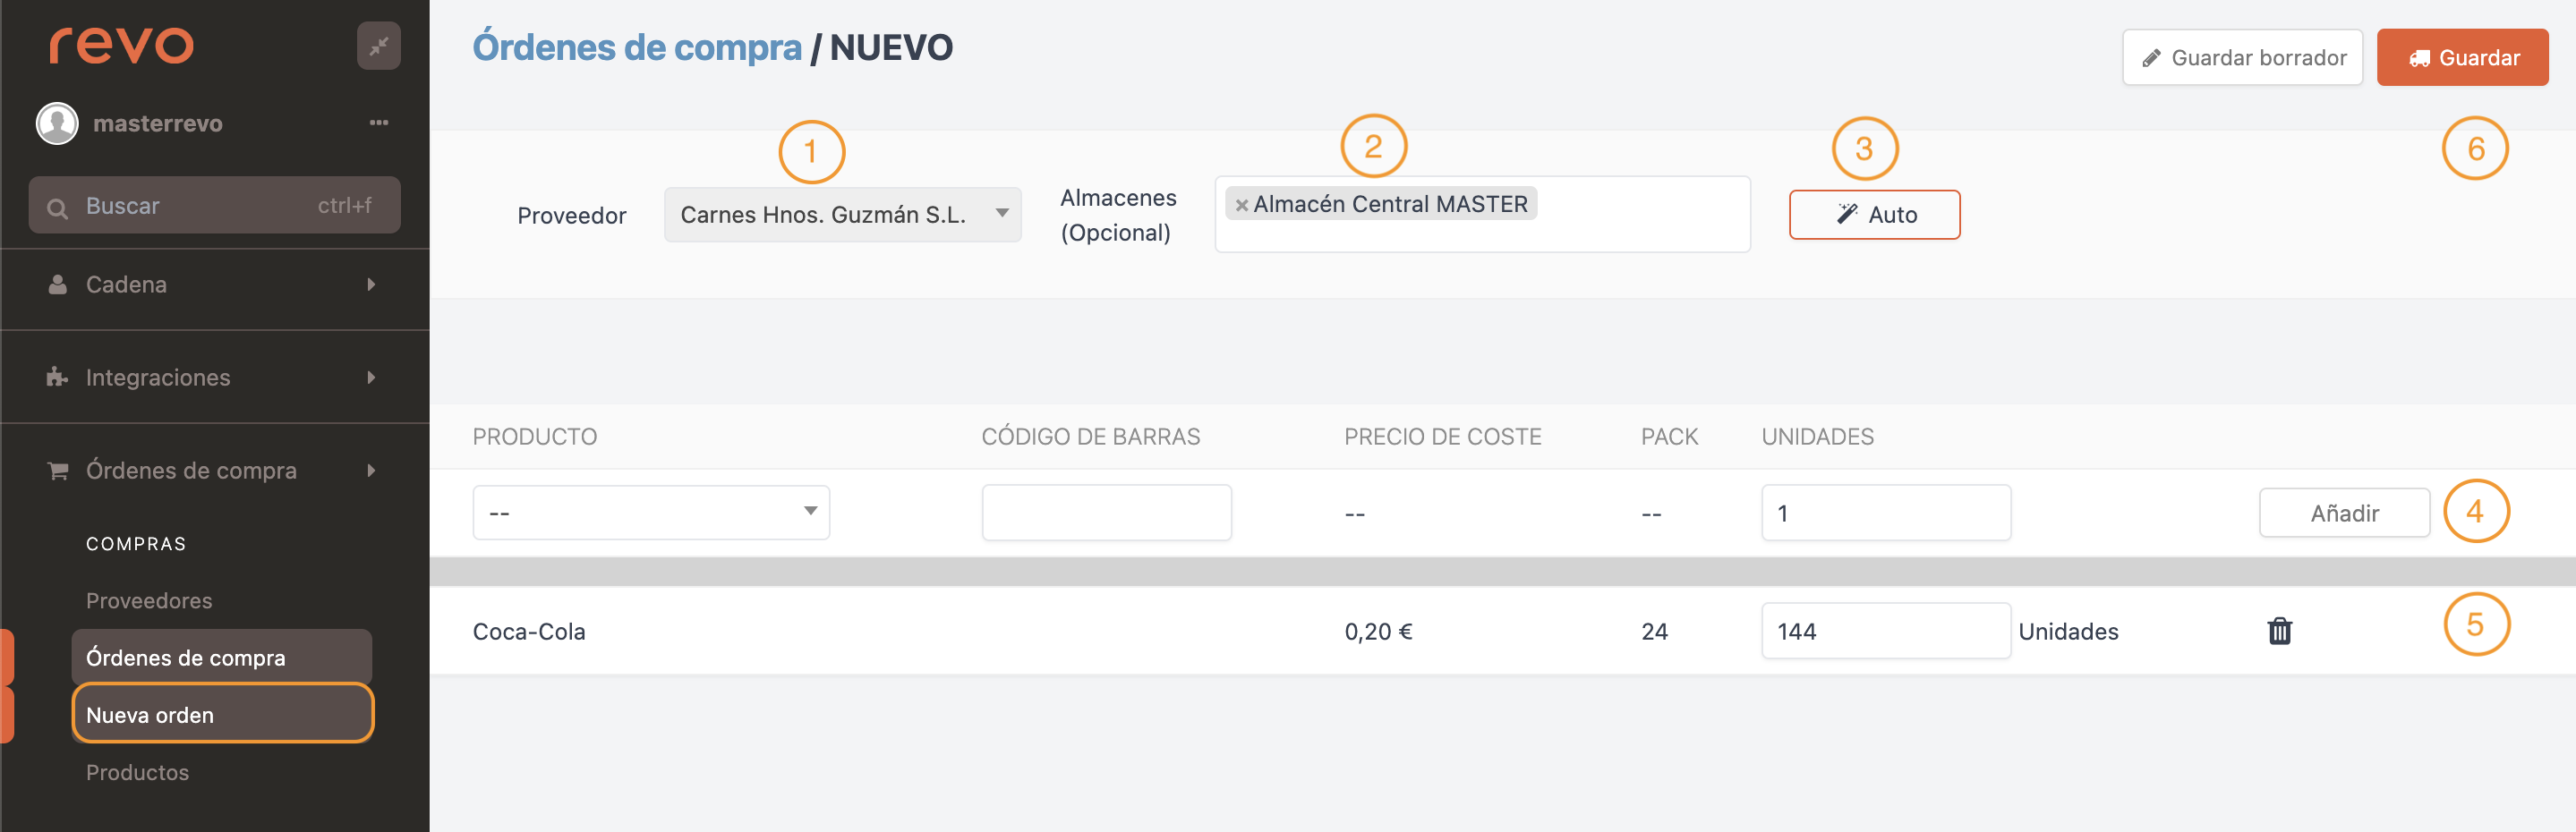
Click on Purchases / NEW ORDER.
1. Select Vendor.
2. Select Warehouse.
3. With the Auto button, you can quickly and easily complete an order, provided that the products have the default field configured correctly. For example, Coca-cola product, where the real stock is 40, and we want to have 100 by default. If you press the Auto button, it will add the product to the purchase order with 60 units, which is the result of comparing the real stock and the stock we want to have by default. See more information in the inventory control article.
4. Add the product to the order.
Note: In case of having a configured pack, it will be multiplied by the units added. In the previous example of 24-boxes, if you indicate 6 at the time of creating the order, 144 units will be added.
5. List of products in the purchase order.
6. Options:
-
Save draft: Save the purchase order as a draft to be able to edit and save later.
-
Save: Create the purchase order.
Receive orders
Once you have created vendors, associated products, and generated purchase orders, there are several actions that can be performed on them, including receiving a purchase order, once the products have been received. That is, your vendor delivers the requested products, and you enter them into your stock.
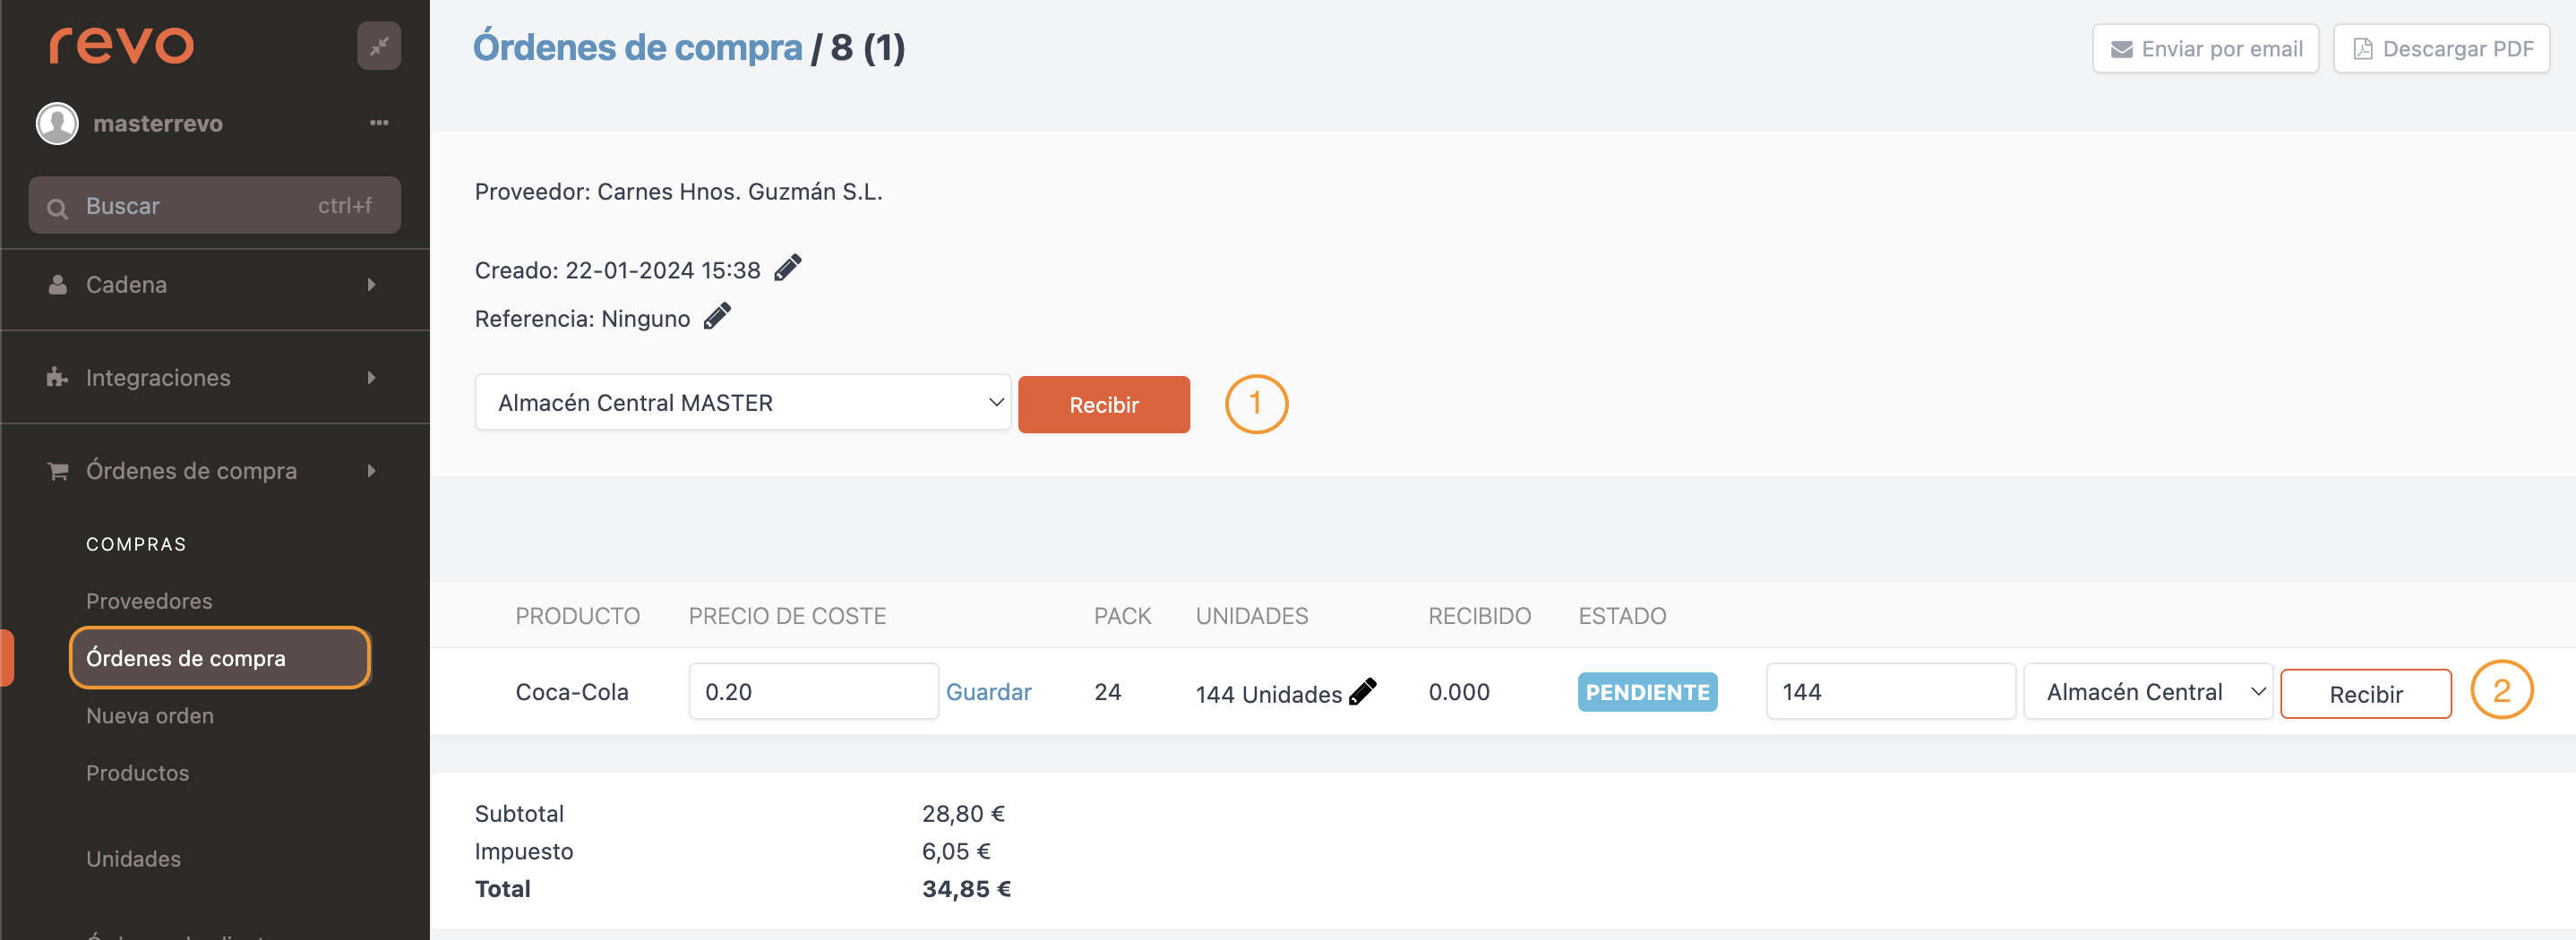
1. If you click on the Receive button, you will receive the total purchase order, and all the products will be added to your inventory. Before that, you need to select in which warehouse you will add the stock.
2. In some cases, for different reasons, it may happen that the vendor does not deliver the total quantity of the requested products. In this case, instead of using the previous button to receive the entire order, go line by line and receive the correct units.