1. PRODUCTS 2. MODIFIERS 3. COMBINATIONS 4. COMBINATION GROUPS 5. TRANSLATIONS
From the Catalogue module, you can access all the products, modifiers, combinations, and combination groups configured in the Revo XEF back office.
To synchronise the catalogue, follow these steps:
1. Access the back office of Revo XEF.
2. Go to INTEGRATIONS.
3. Click on in the previously configured Revo SOLO integration.
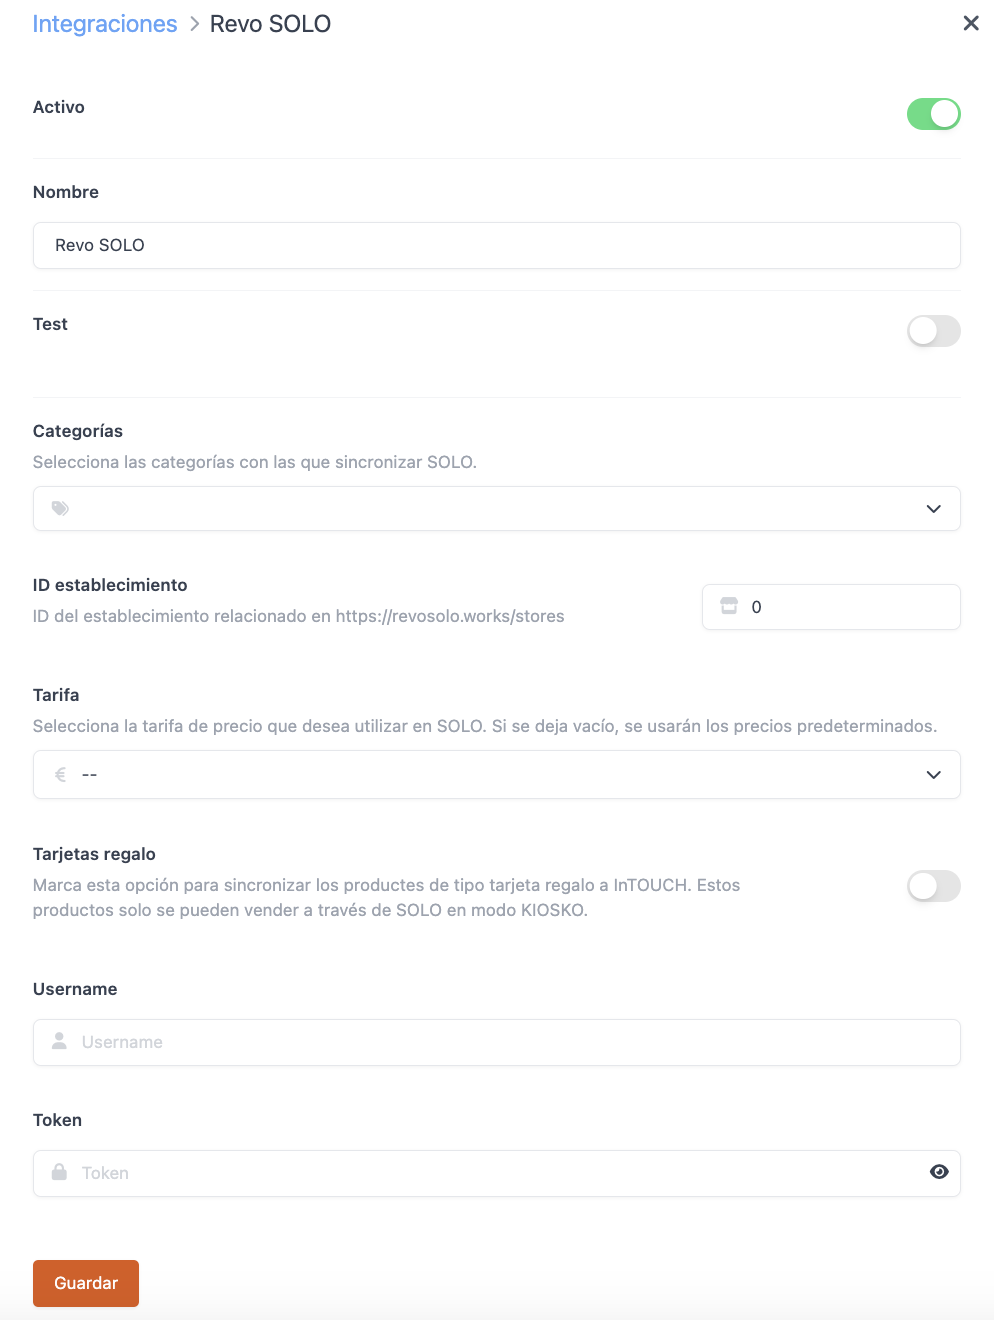
-
Categories: Select all the categories you want to synchronise with Revo SOLO.
-
Click Save.
4. Click on and select Update catalogue.

5. As this is the first time you're updating the catalogue, select all options and click Update:
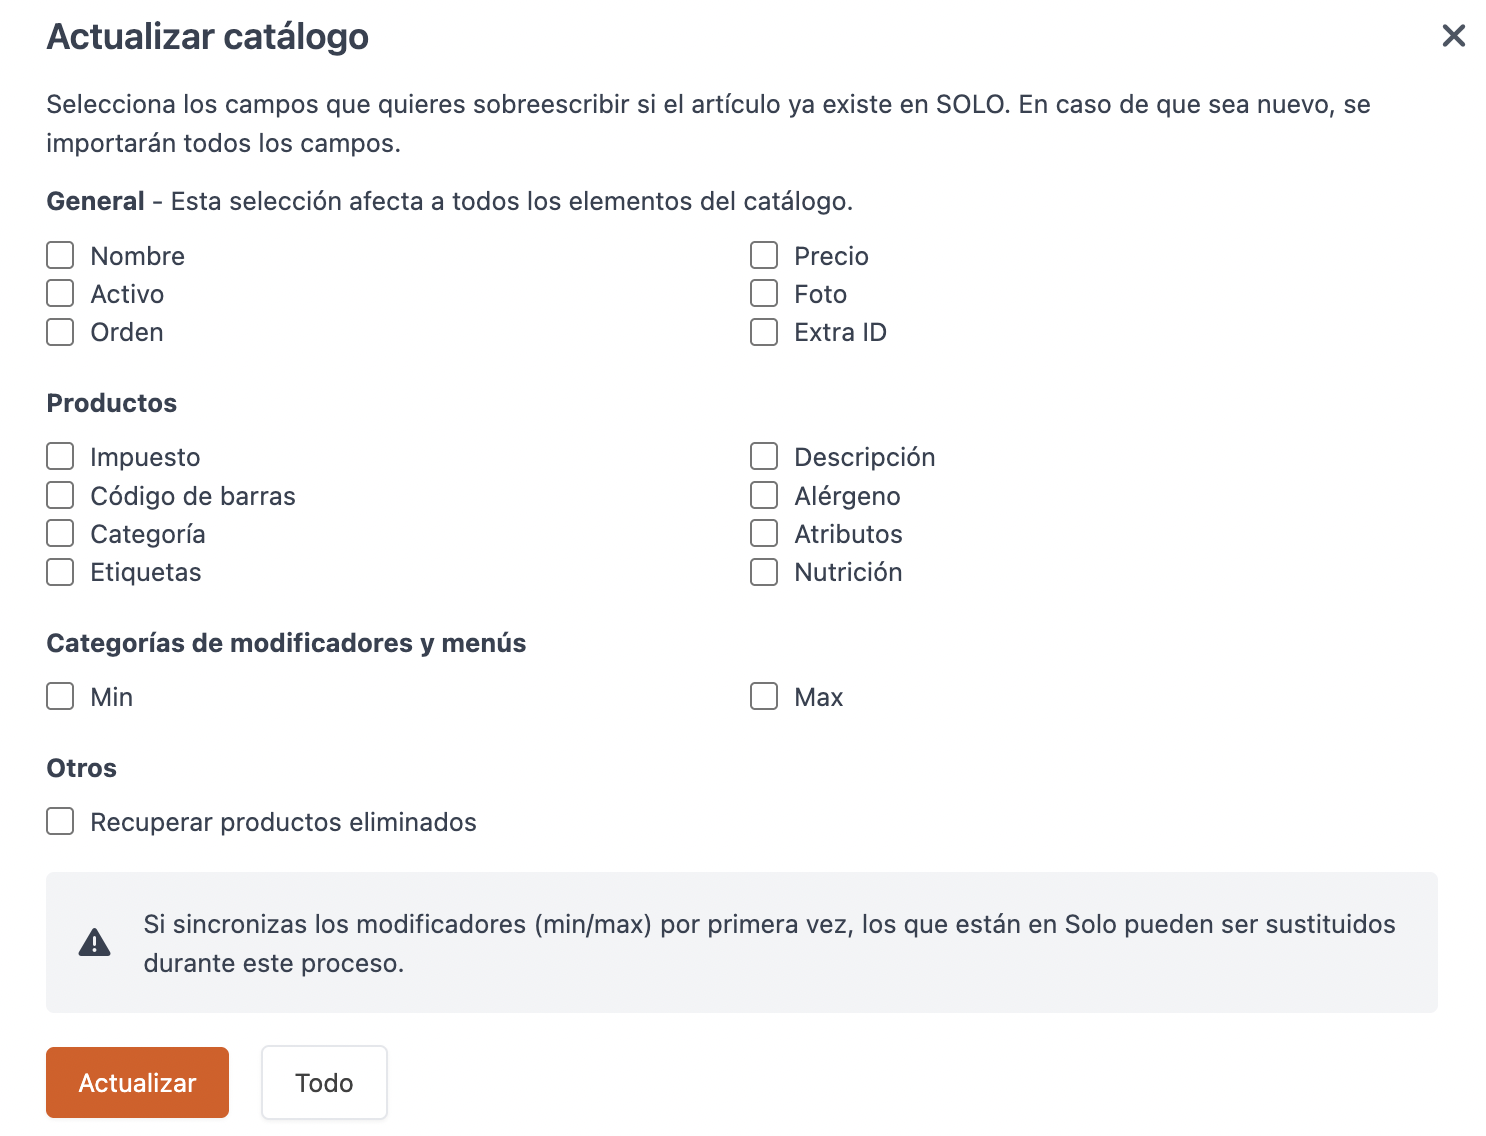
When synchronising the catalogue, part of the product configuration will be complete, including:
- Name, Price, Barcode, VAT, Image, Allergens, Product Description, Modifiers, and Combinations.
The configuration transferred via the integration will NOT include:
- Name translations, description translations, points, and necessary points.
1. PRODUCTS
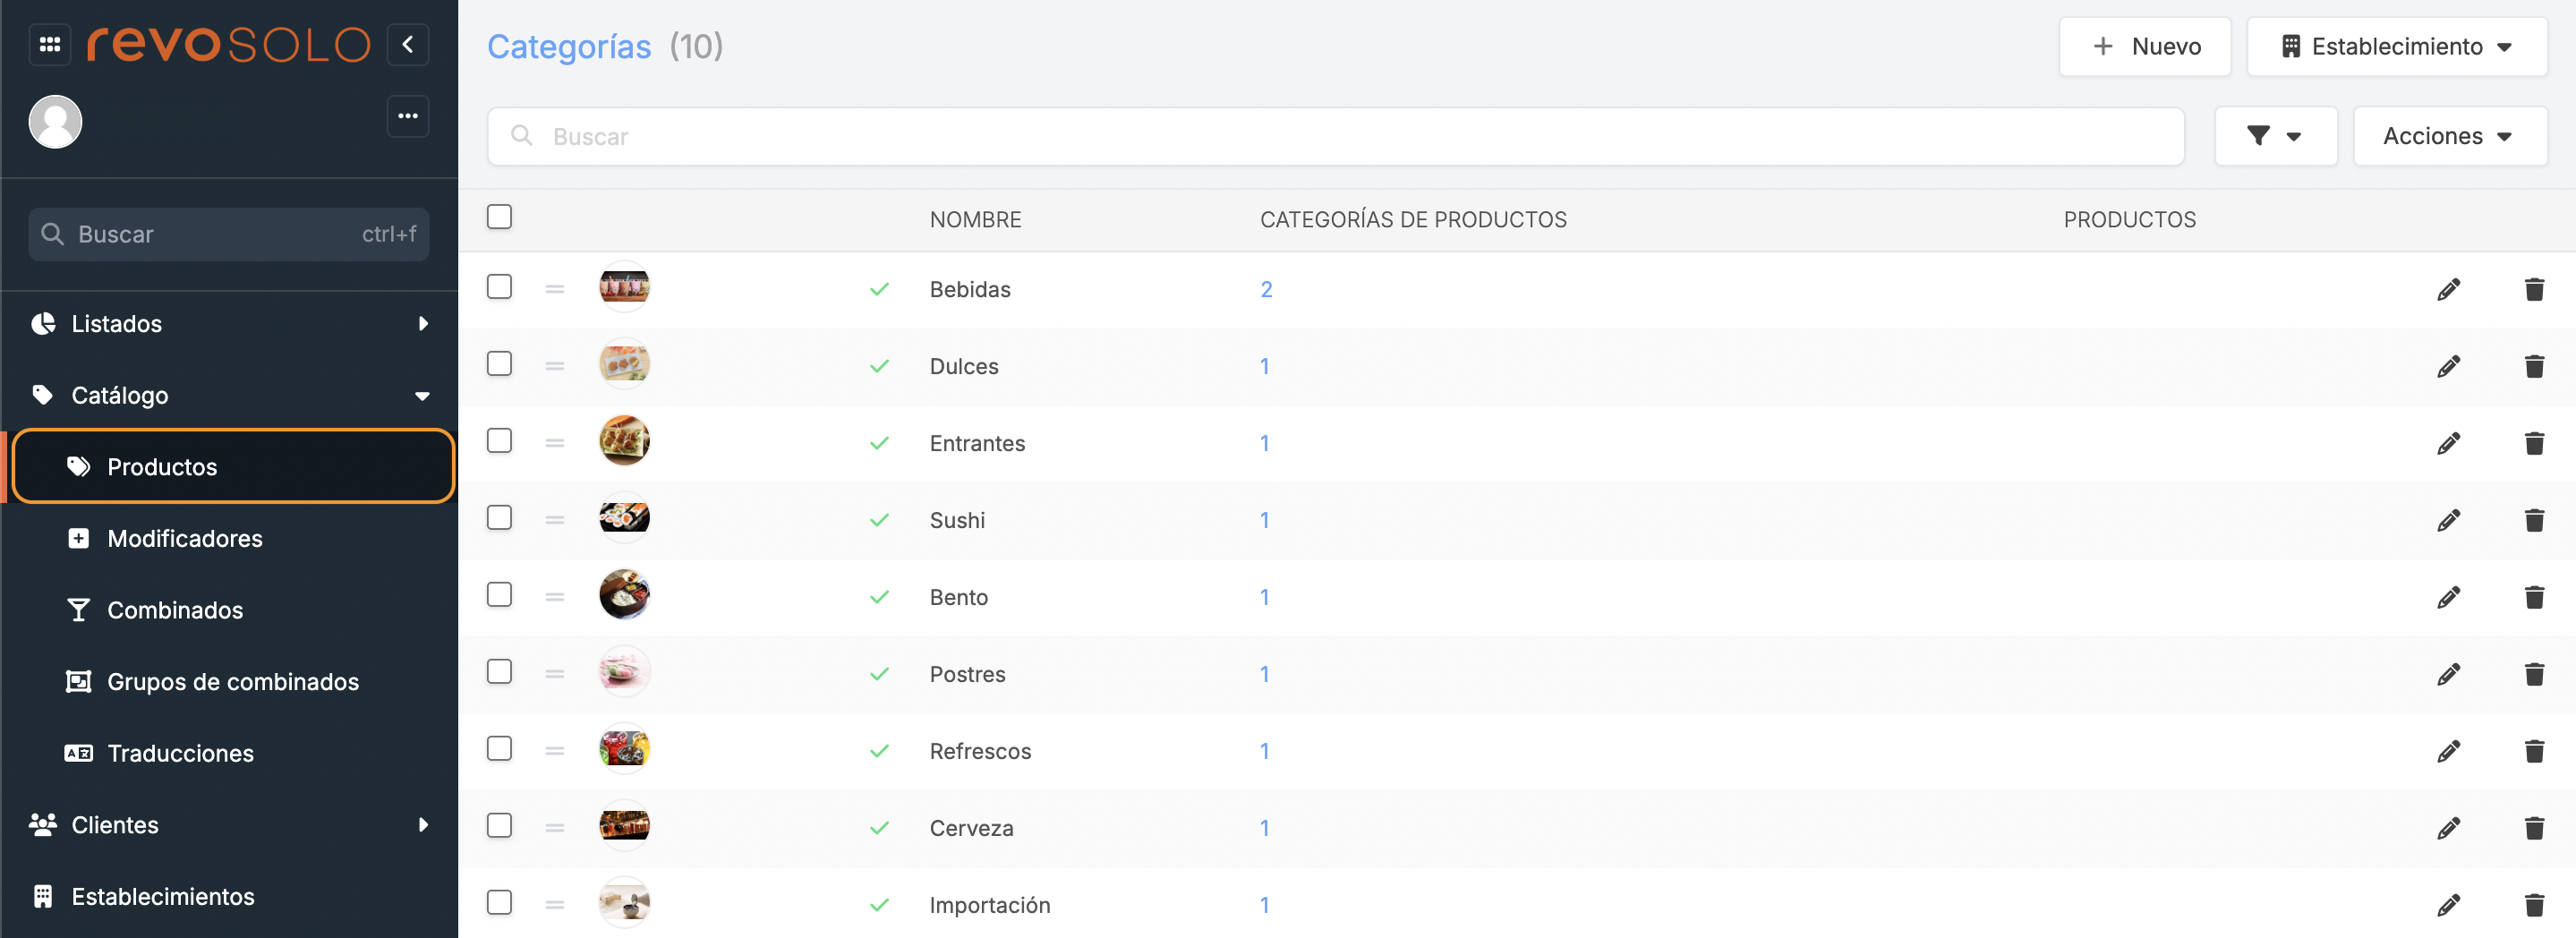
- + New: Create a new category.
- Establishment: Select the establishment from the dropdown to access its catalogue.
- : Search for categories.
- : Choose how many pages to display.
- Actions: Change the category of selected products or other categories.
- : Select one or more categories.
- : Drag the category to a position.
- : Add an image to the category.
- : Deactivate the category. To activate it, press .
- Name: Name of the category.
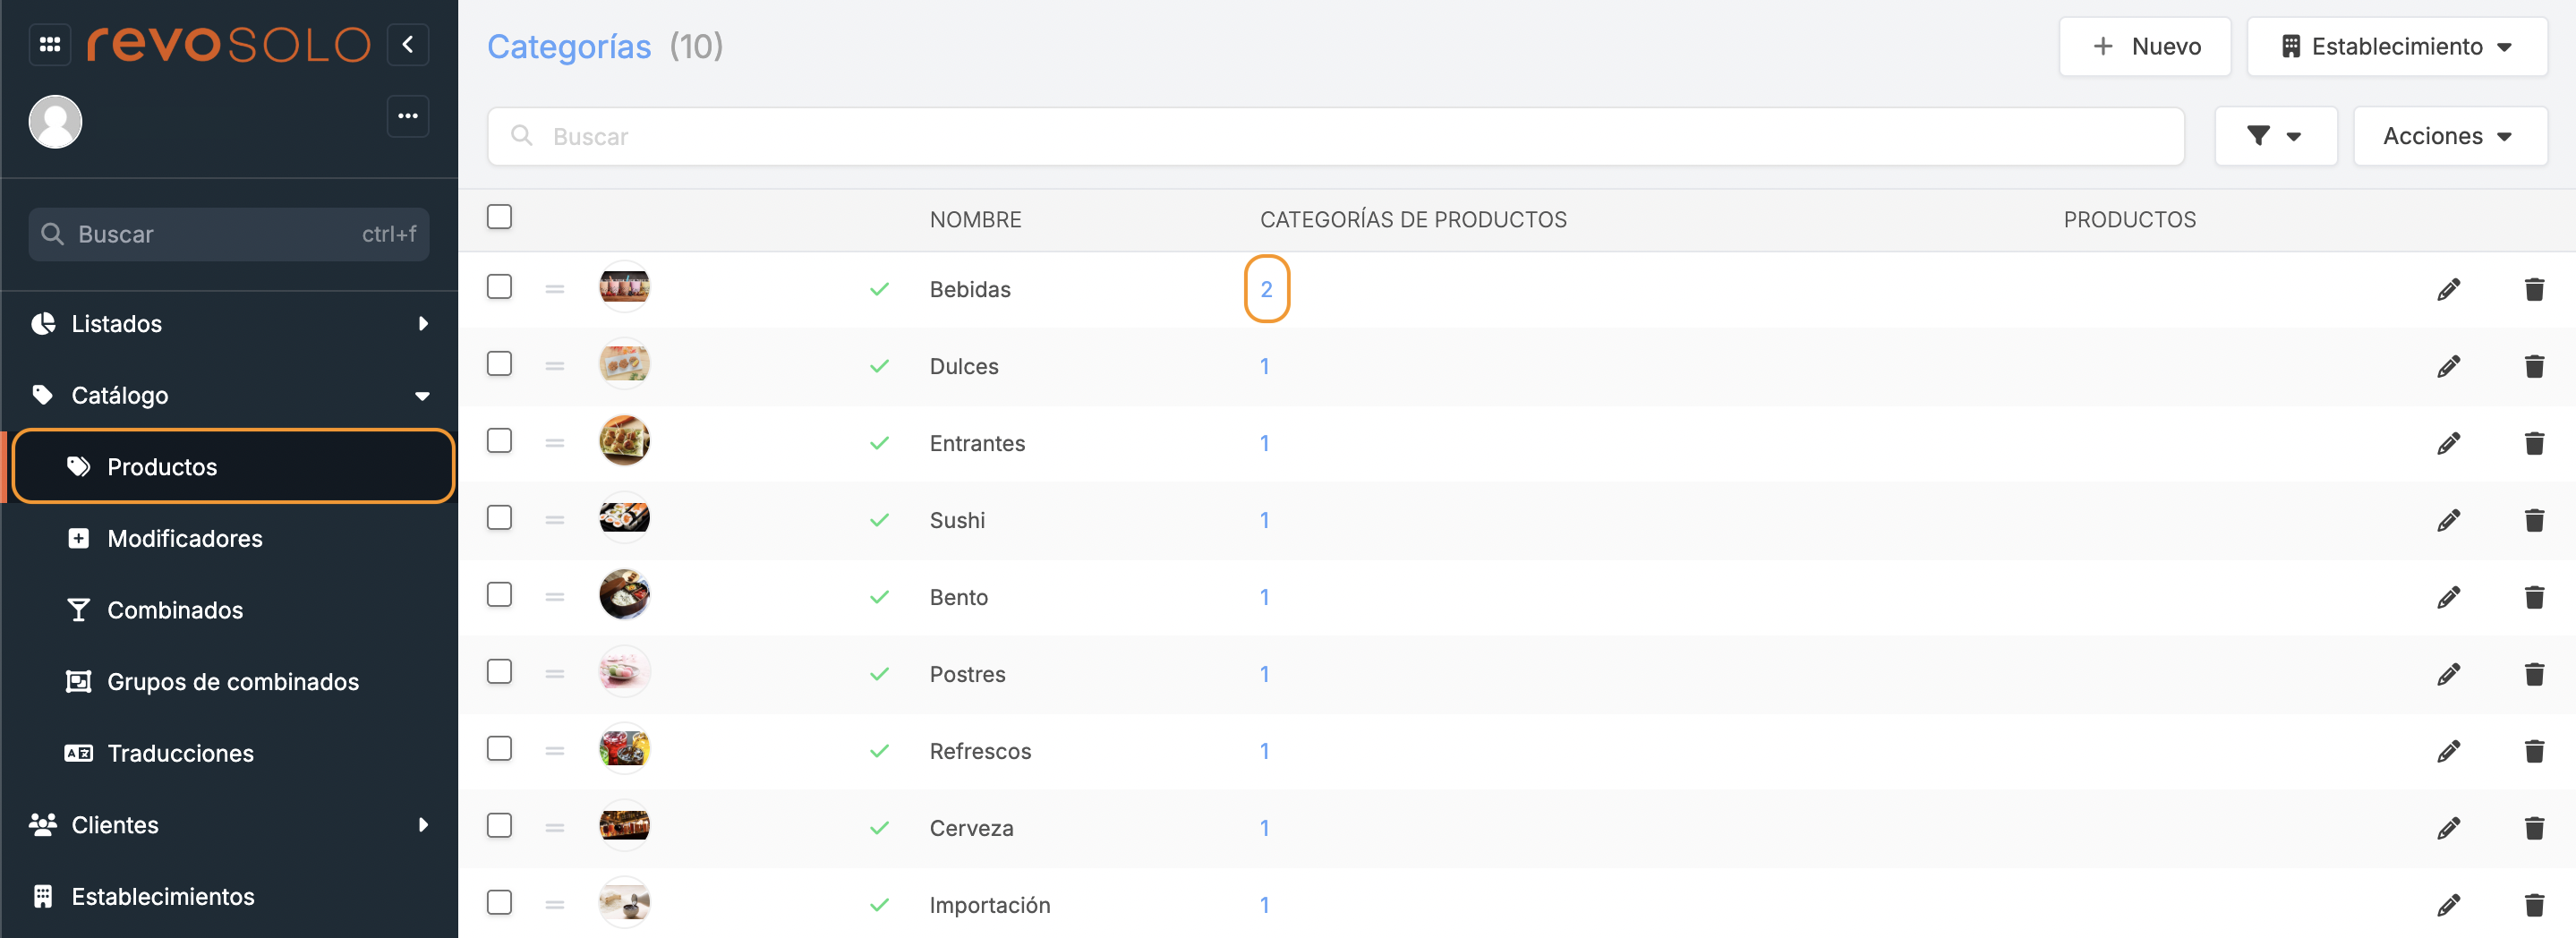
- Product Categories: Access the subcategories.
- Products: Access the products.
- : Edit the category.
- : Delete the category.
CATEGORIES
When exporting the catalogue from Revo XEF, categories and products are already transferred. If you want a different organisation, you can create new categories and/or move existing ones. To do so:
1. Click on + New and complete the information.
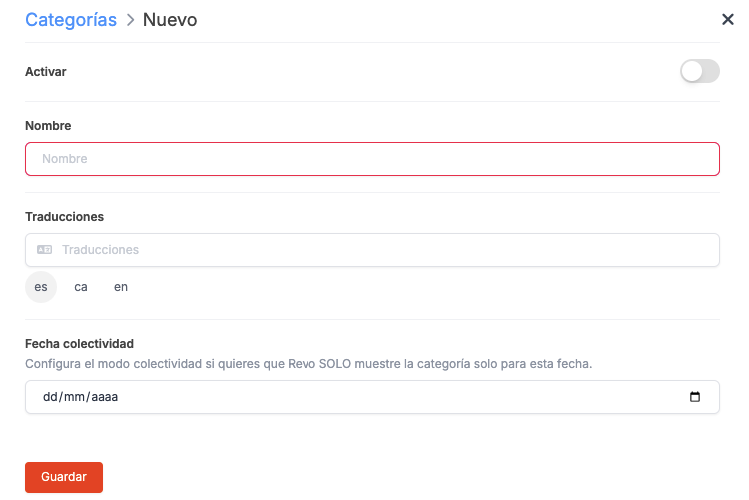
- Activate:
- Name: Name of the category.
- Translations: Translation for each configured language.
-
Collective Date: Configure so that Revo SOLO only shows the category on this date.
2. Click on Save.
3. Create a product subcategory by clicking on Product Categories (0).
If you have activated in APPEARANCES that images of buttons appear in categories, you must create at least one subcategory, as when importing products from XEF, they are not created automatically.
-
Click on + New and complete the information.
-
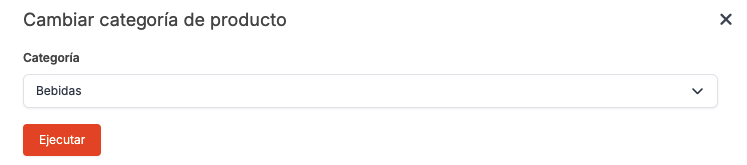
Once the subcategory is created, select the existing category you want to move, click on quick actions and select Change product category.

-
Select the target category and click on Execute.
-
You will see how it has moved to the new destination.

PRODUCTS
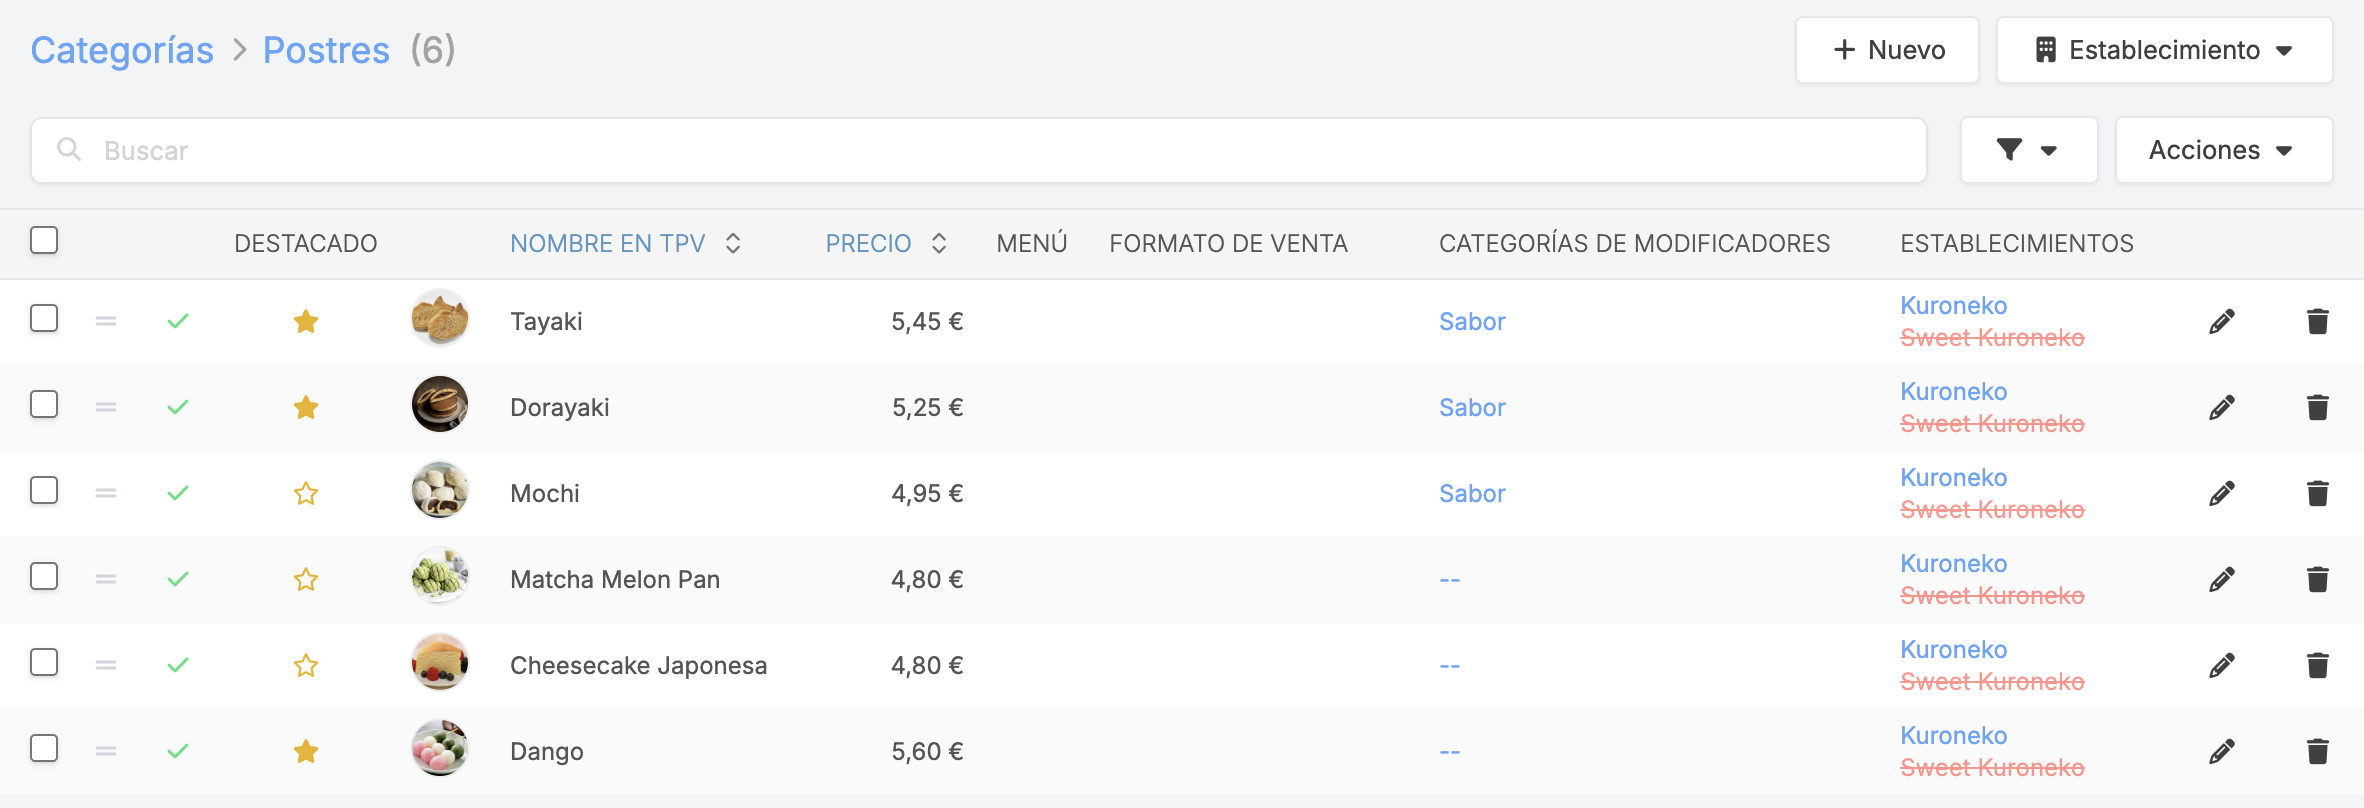
To access the products, click on Products (0).
-
: Save the order of products after organising them.
-
+ New: You can search for and add existing products in Revo XEF without exporting the catalogue.
-
: Search for products.
-
: Choose how many pages to display.
-
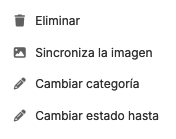
Actions: Different actions to perform with selected products.
-
: Select one or more products.
-
: Drag the product to a new position.
-
: Deactivate the product. To activate it, press .
-
Featured: Select the product to add it to the new featured products' category. Learn how to customise this category here.
-
: Add an image to the product.
-
Name in POS: Name imported from Revo XEF.
-
Price: Price of the product.
-
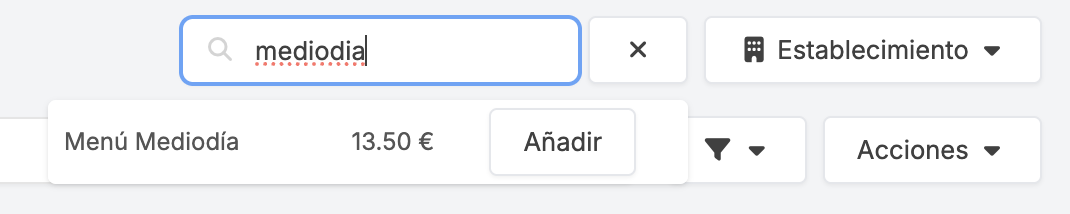
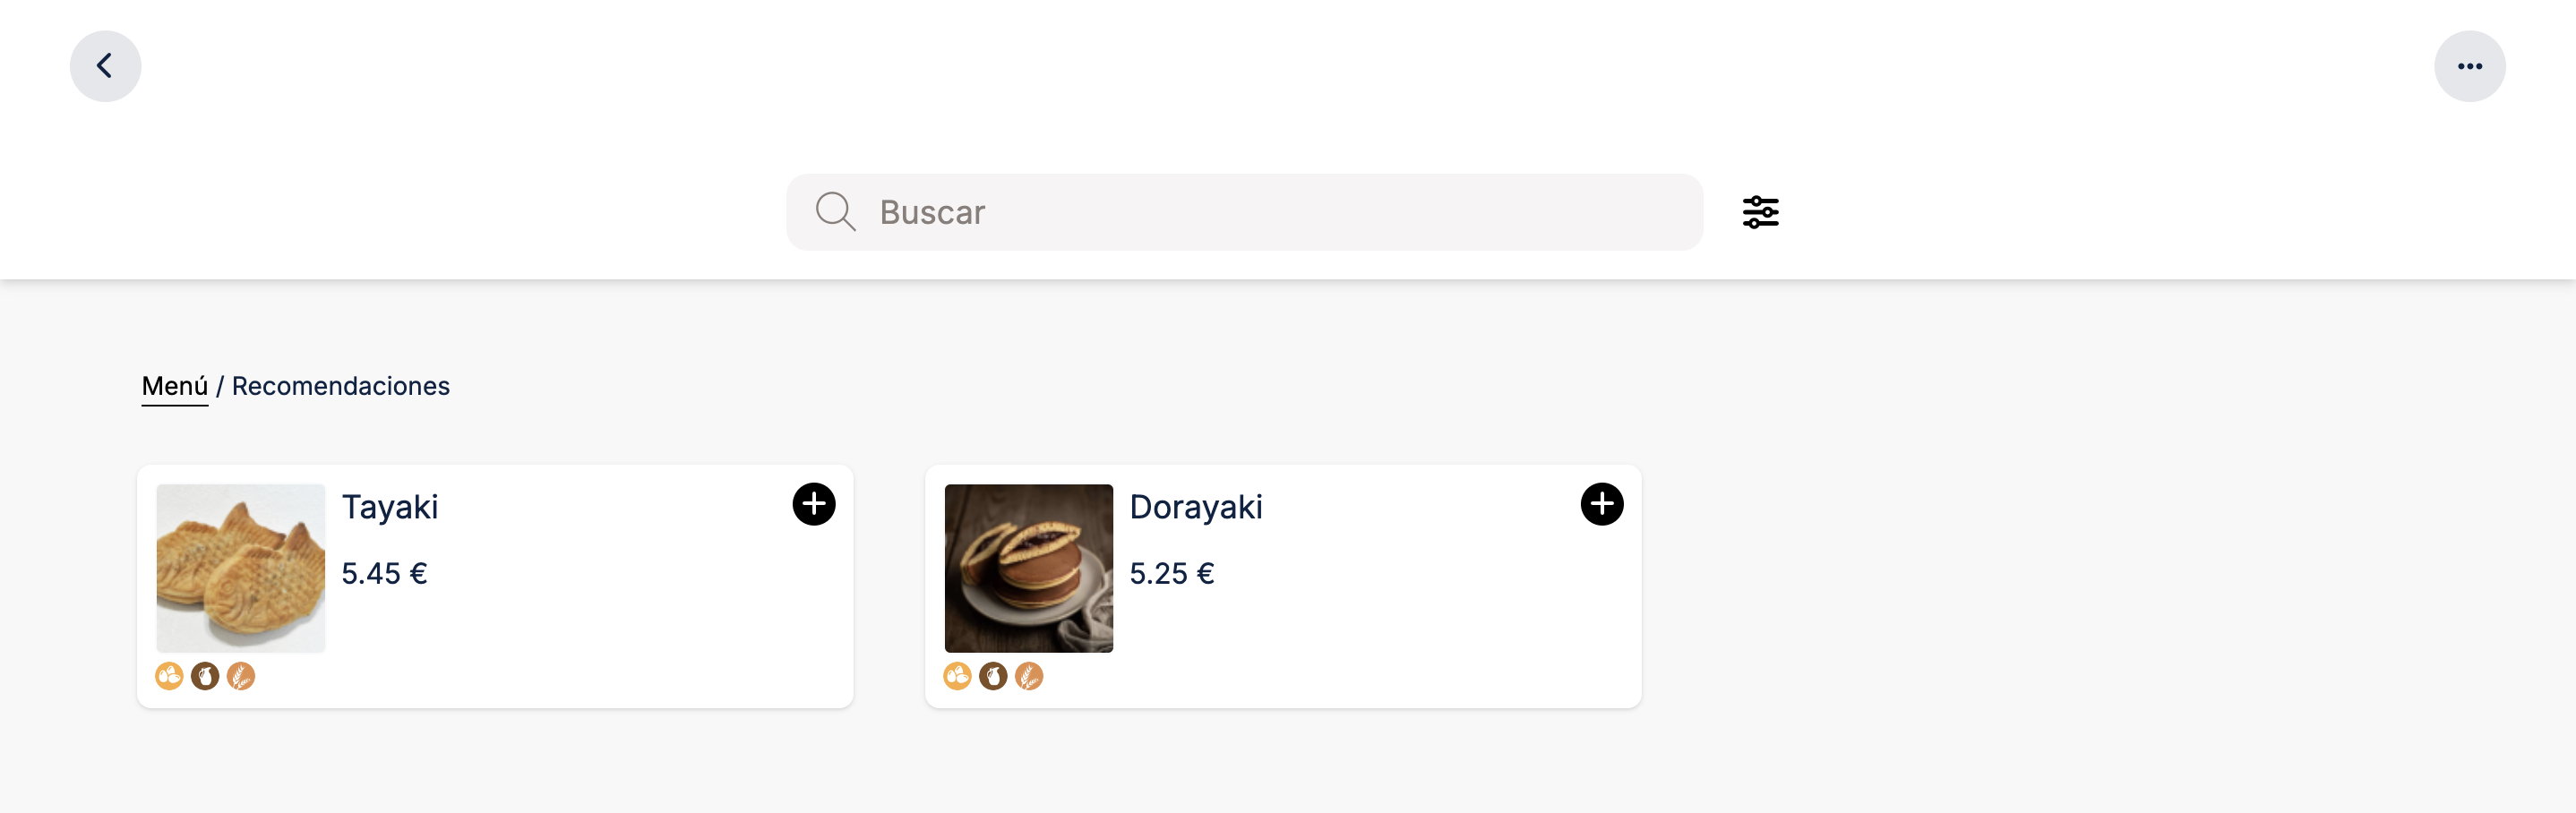
Menu: When you export a menu, it is displayed like this:

By clicking on the menu categories, you can edit them:

-
Name: Change the name of the menu category.
-
Translations: Add the translation in each language.
-
Min and Max: Define the available options and whether they are mandatory or optional.
Example:
- Min: 1 and Max: 1: Mandatory, only one is selected.
- Min: 1 and Max: 2: Mandatory, up to 2 options can be selected.
-
Min: 0 and Max: 2: Optional, not necessary, but up to 2 can be selected.
-
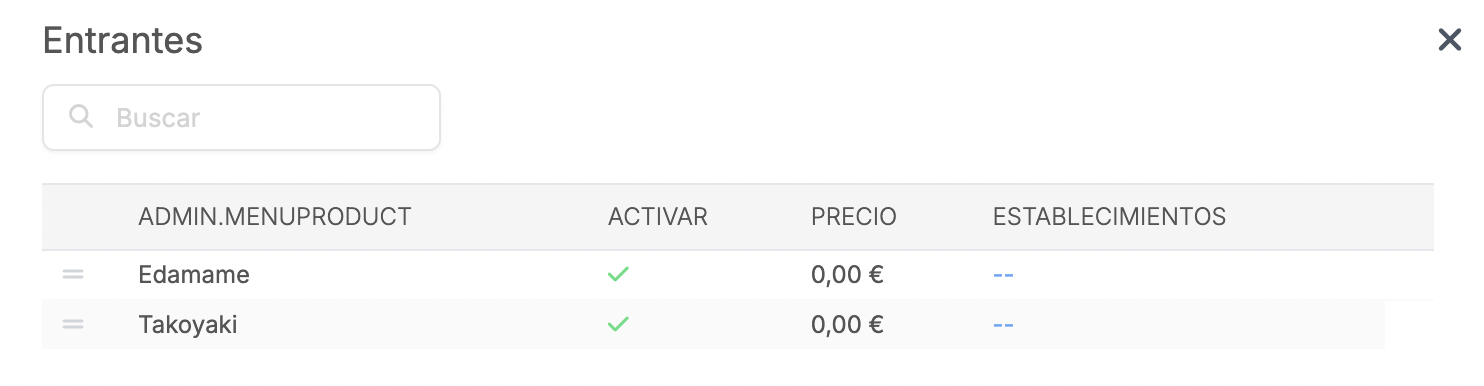
Menu Products: Products cannot be edited here; do so from Revo XEF and update the catalogue. You can deactivate them and select the establishment.
-
-
Sales Format: When exporting products with a sales format, you can edit them from here.

-
Modifier Categories: If you have configured modifiers, you will see them here. By clicking on them, you can remove or add new ones.
-
Establishments: If you have multiple locations, click on -- to activate it in locations and set the price.
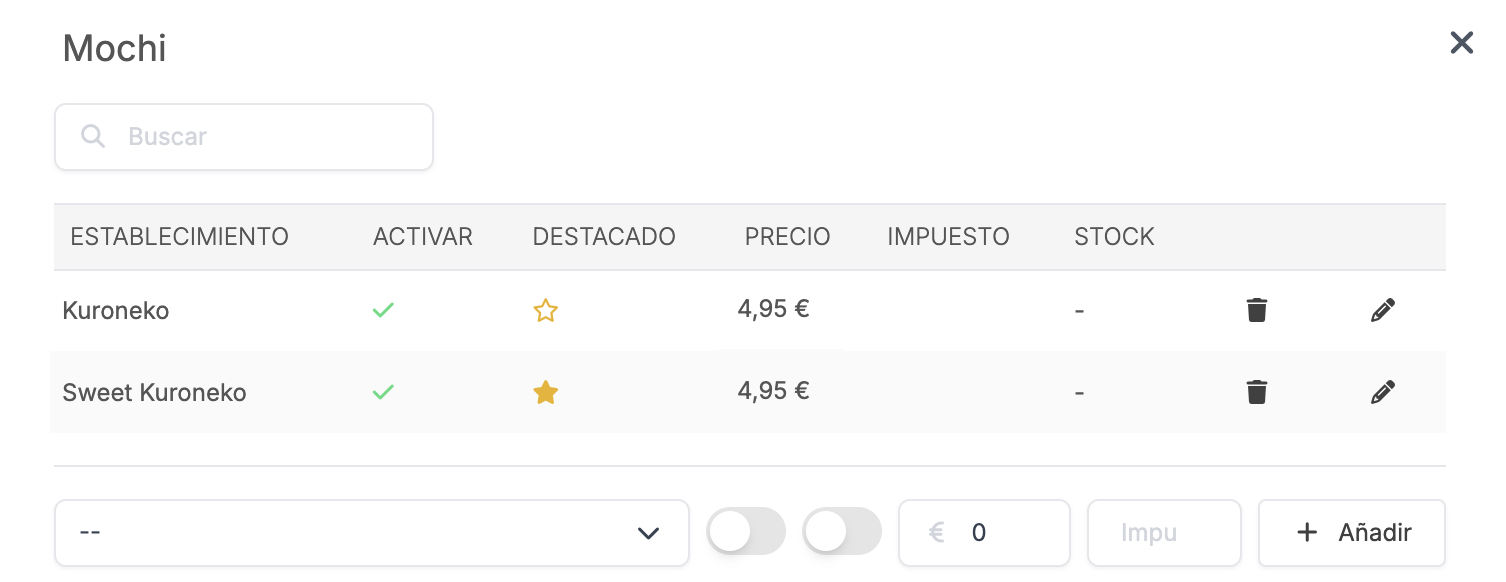
- Establishment: Select the establishment from the dropdown. It must have been previously created in the Establishments module. More information here.
- Enable: Enable the product in a specific establishment.
- Featured: Enable to feature the product in a specific establishment.
- Price: Enter the price.
-
Tax: Enter the tax.
-
: Edit the product.
-
: Delete the product.
-
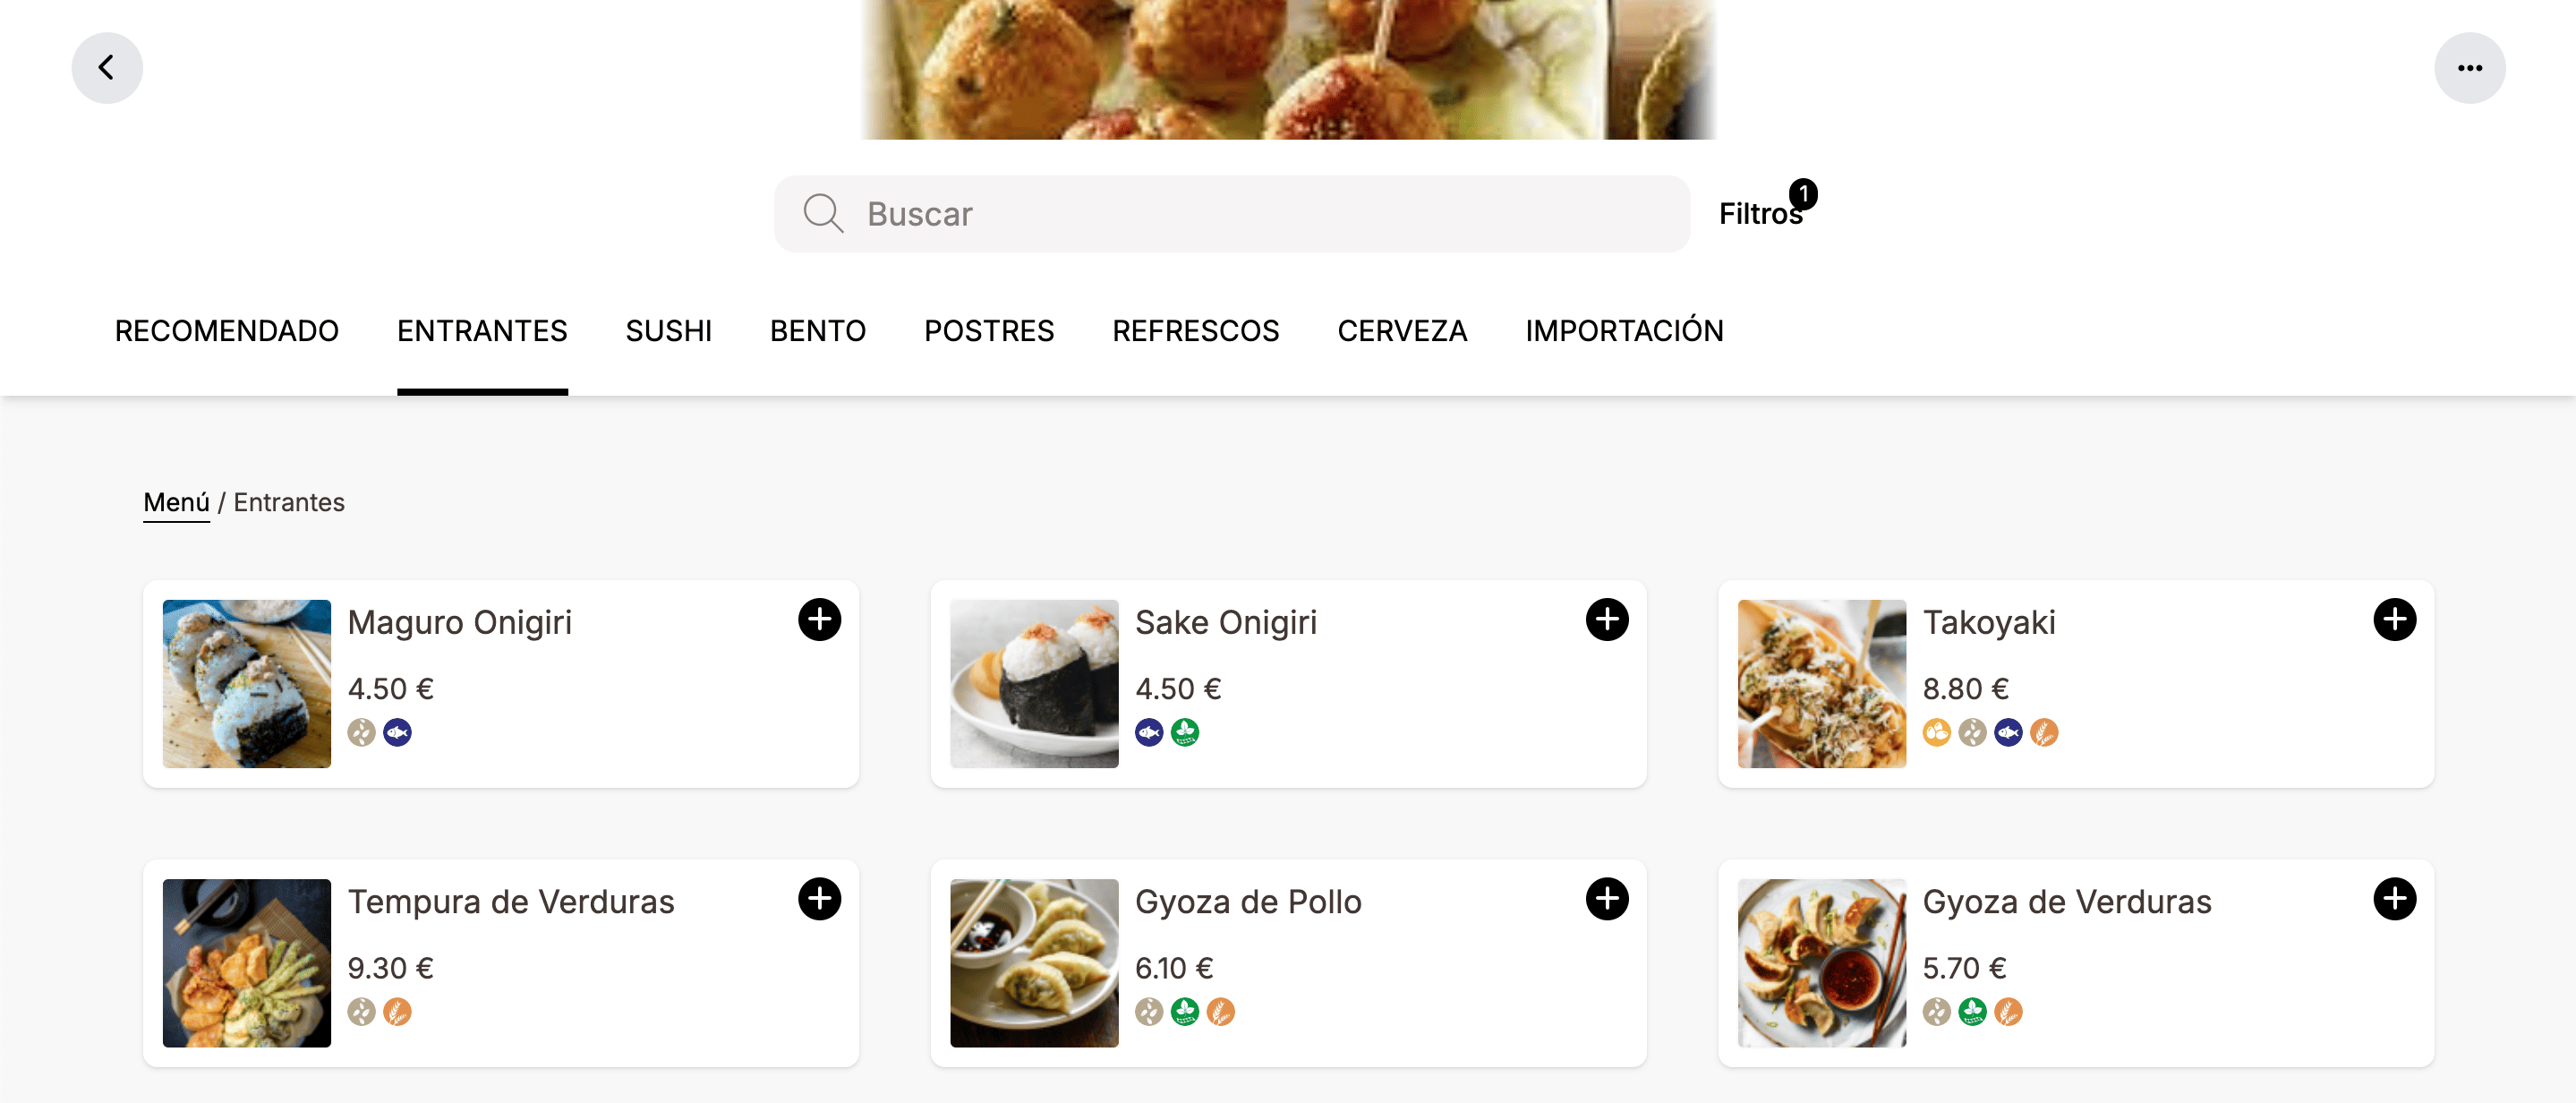
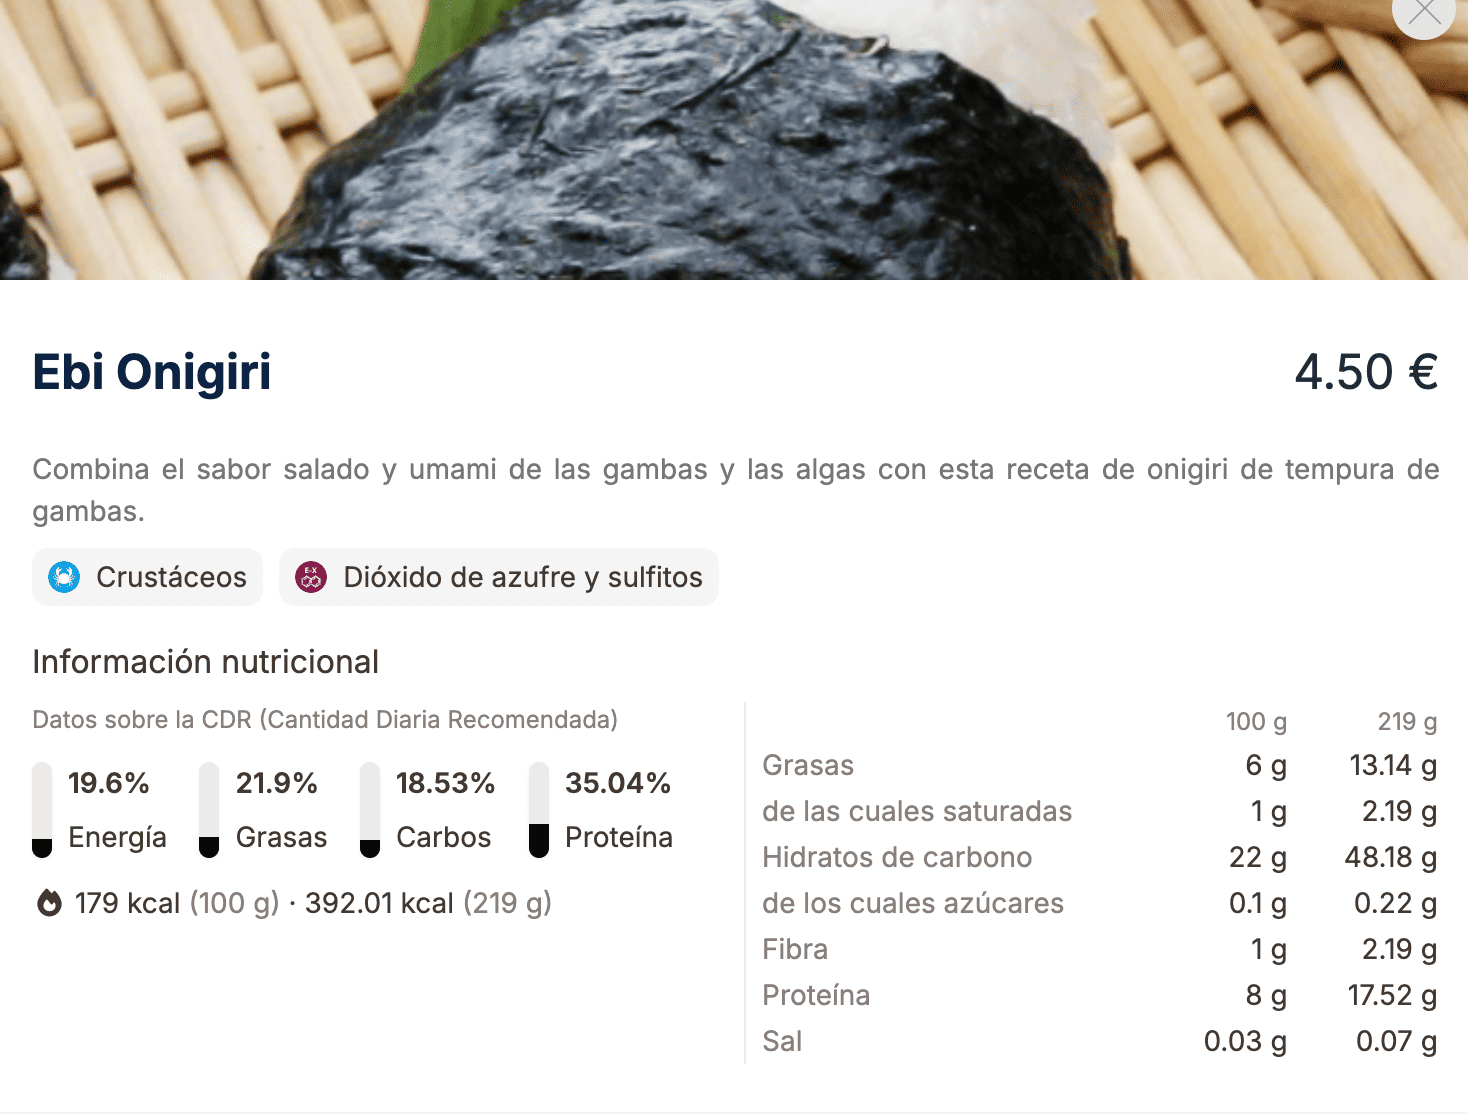
Allergens: If you configure allergens, your customers will be able to filter them when ordering.
Example: The product Ebi Onigiri contains the following allergens:

Select "Crustaceans" in the filter:
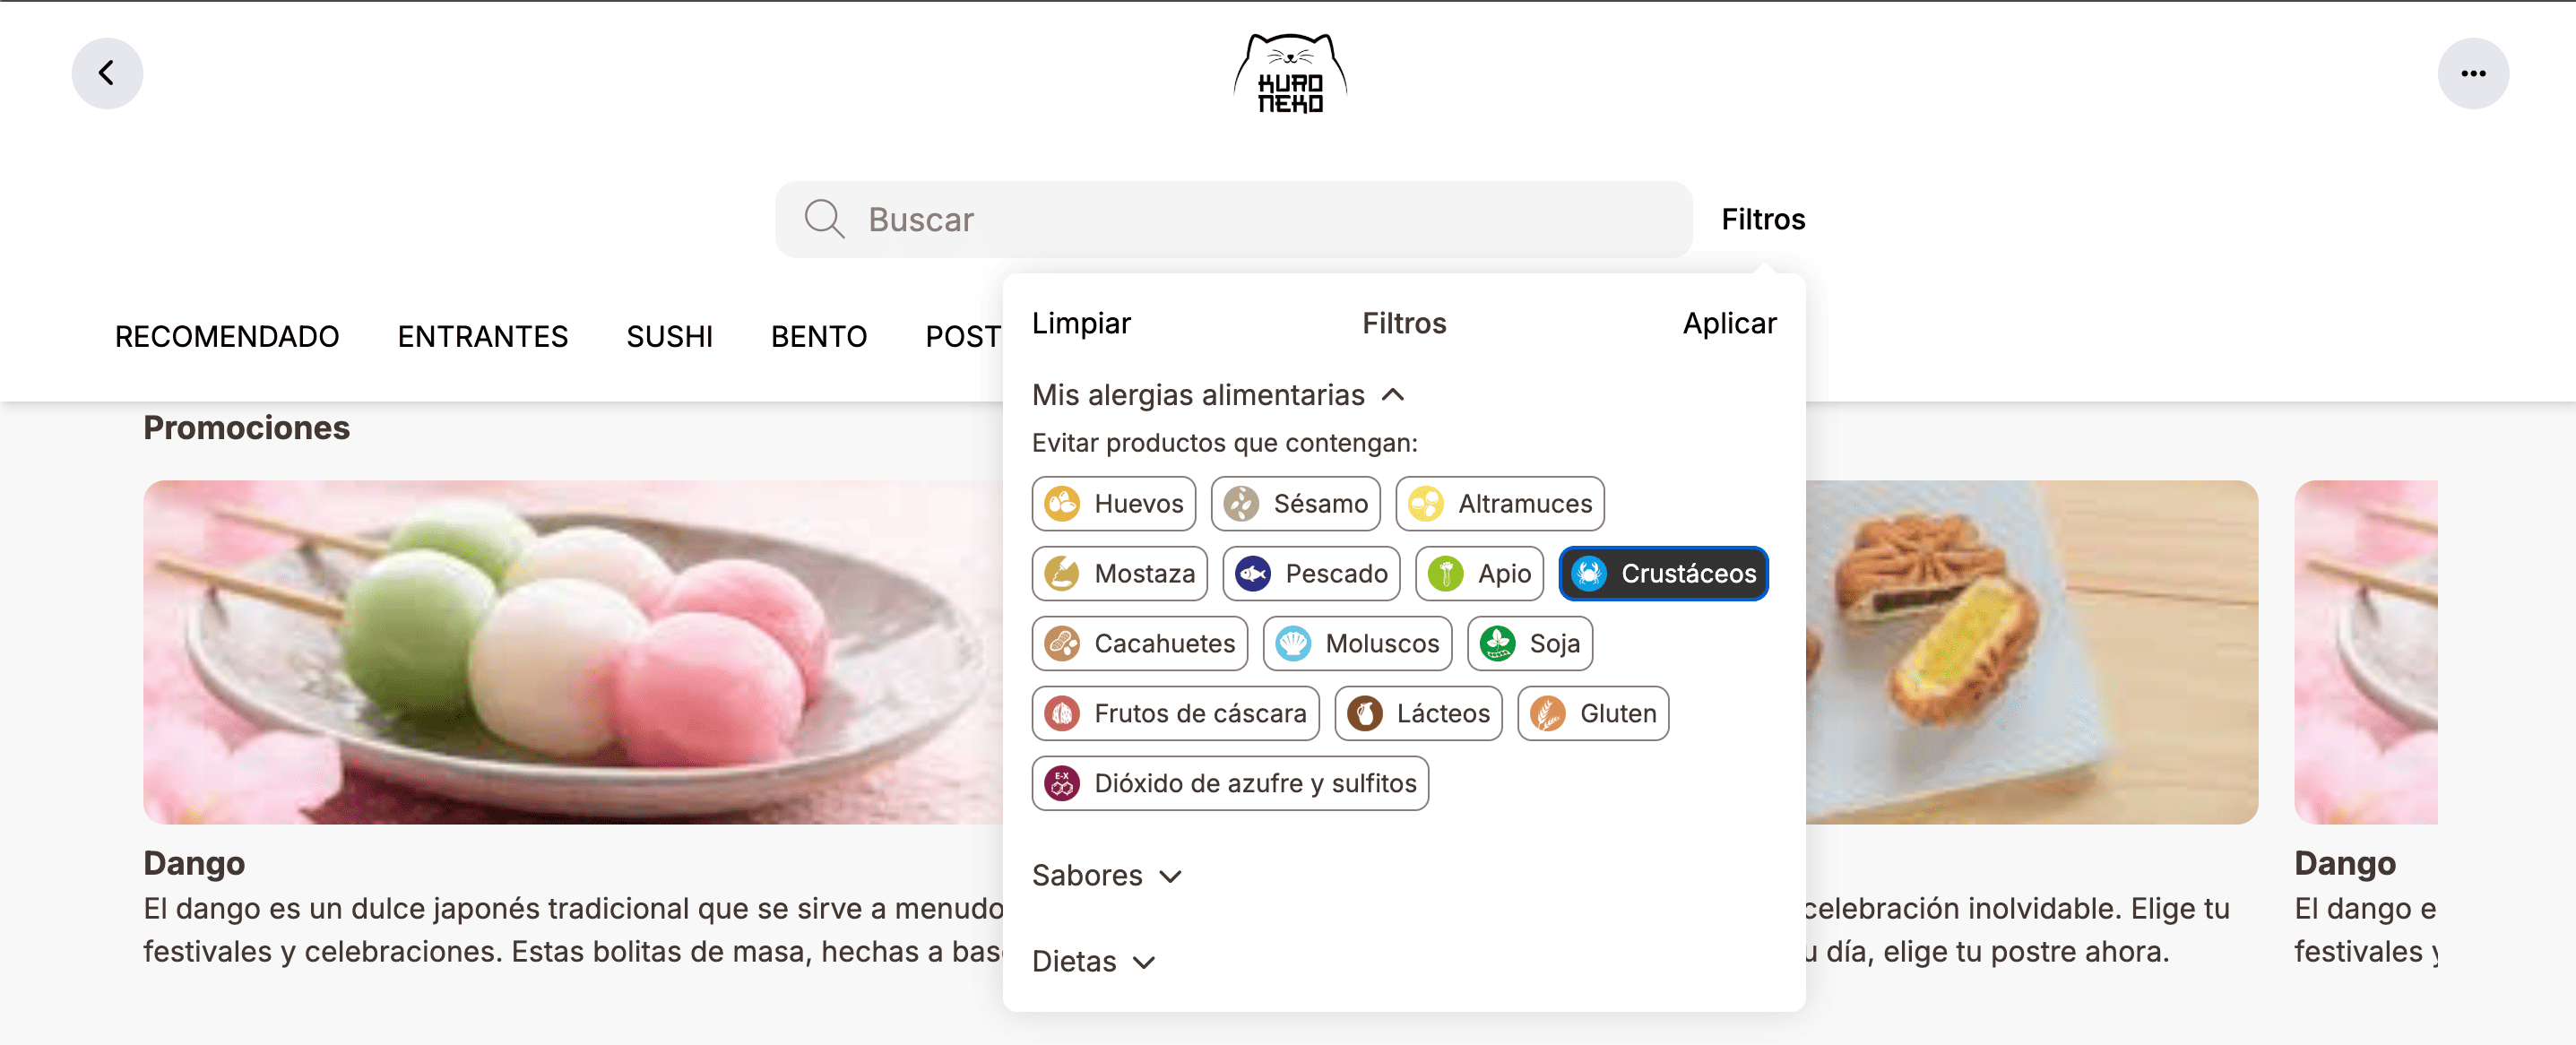
The product no longer appears:
-
Diets: If you set up diets in the Revo XEF back-office and synchronise the catalogue, your customers will be able to filter them when placing an order.
Example: The product Vegetable Tempura has the following diets:
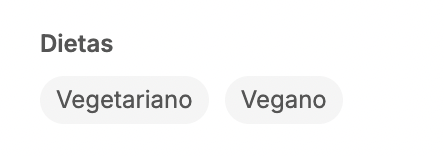
Select "Vegetarian" in the filter:
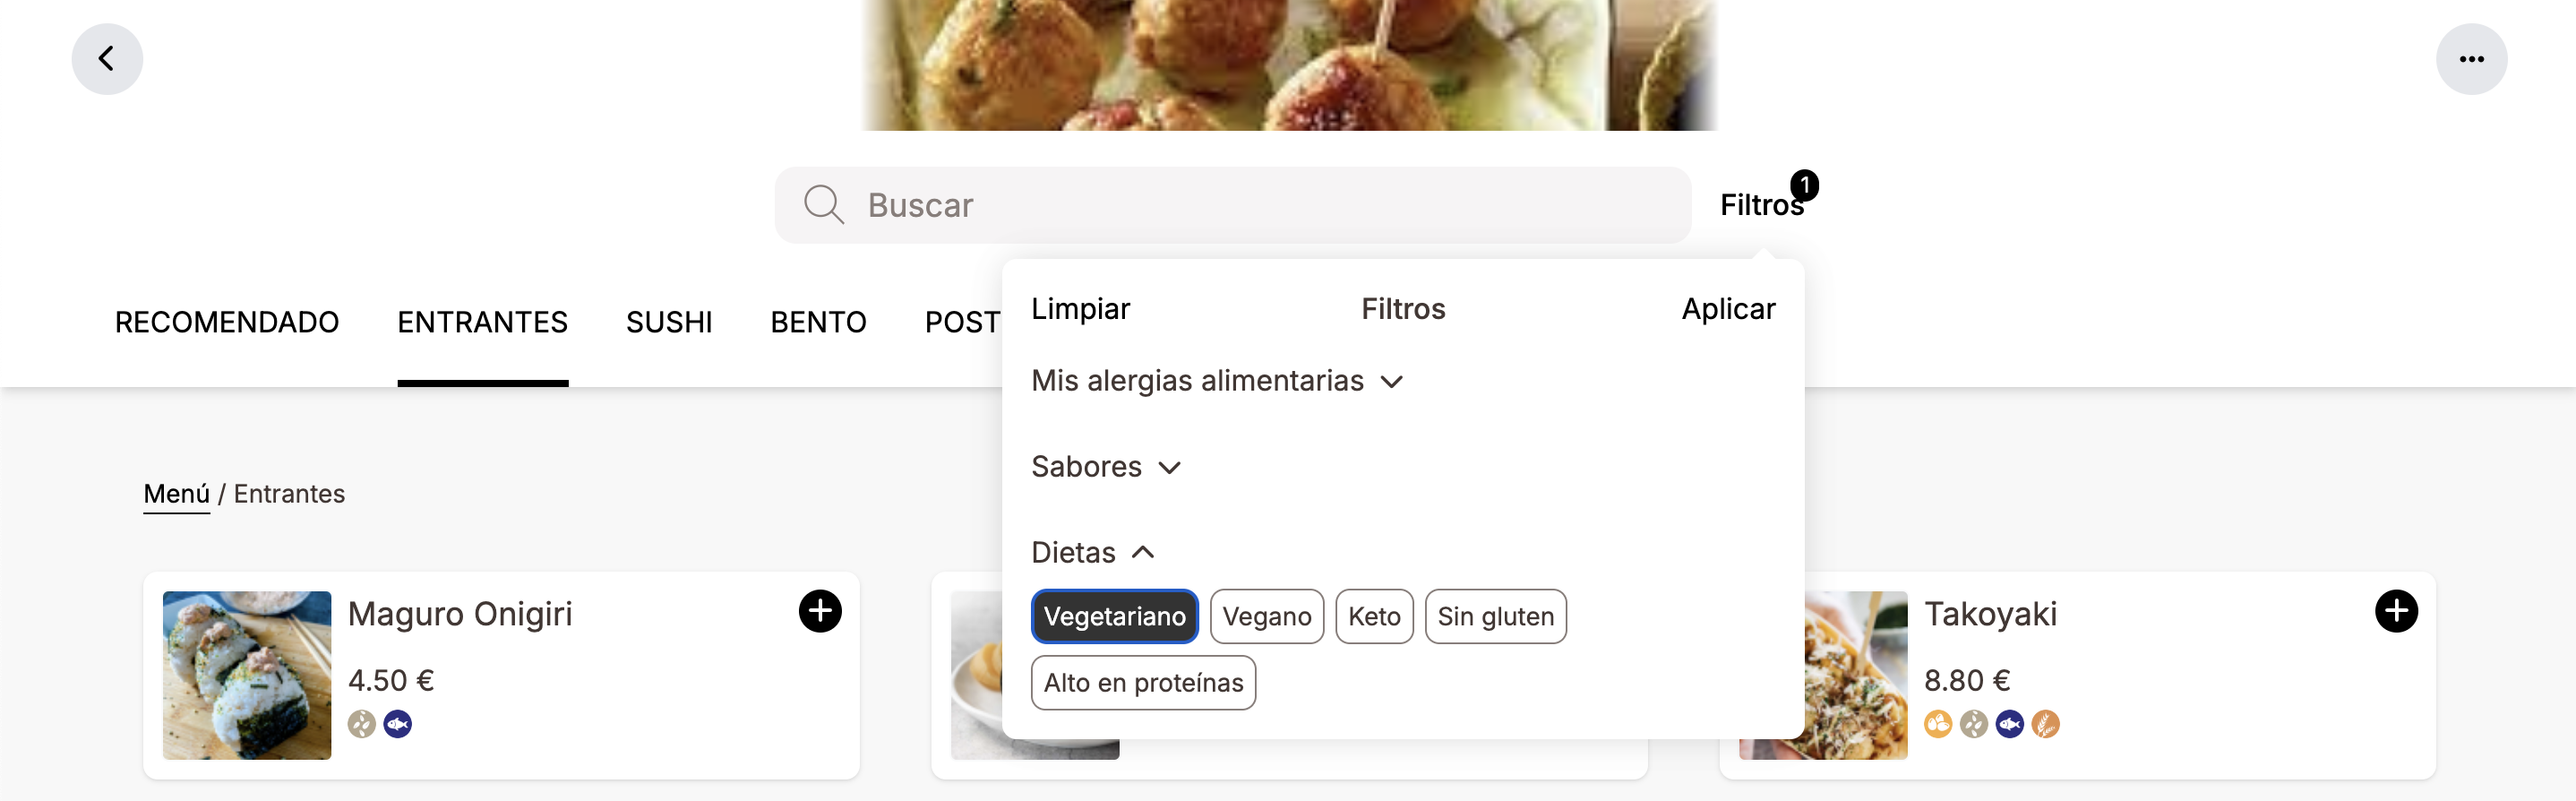
Only vegetarian products appear:
-
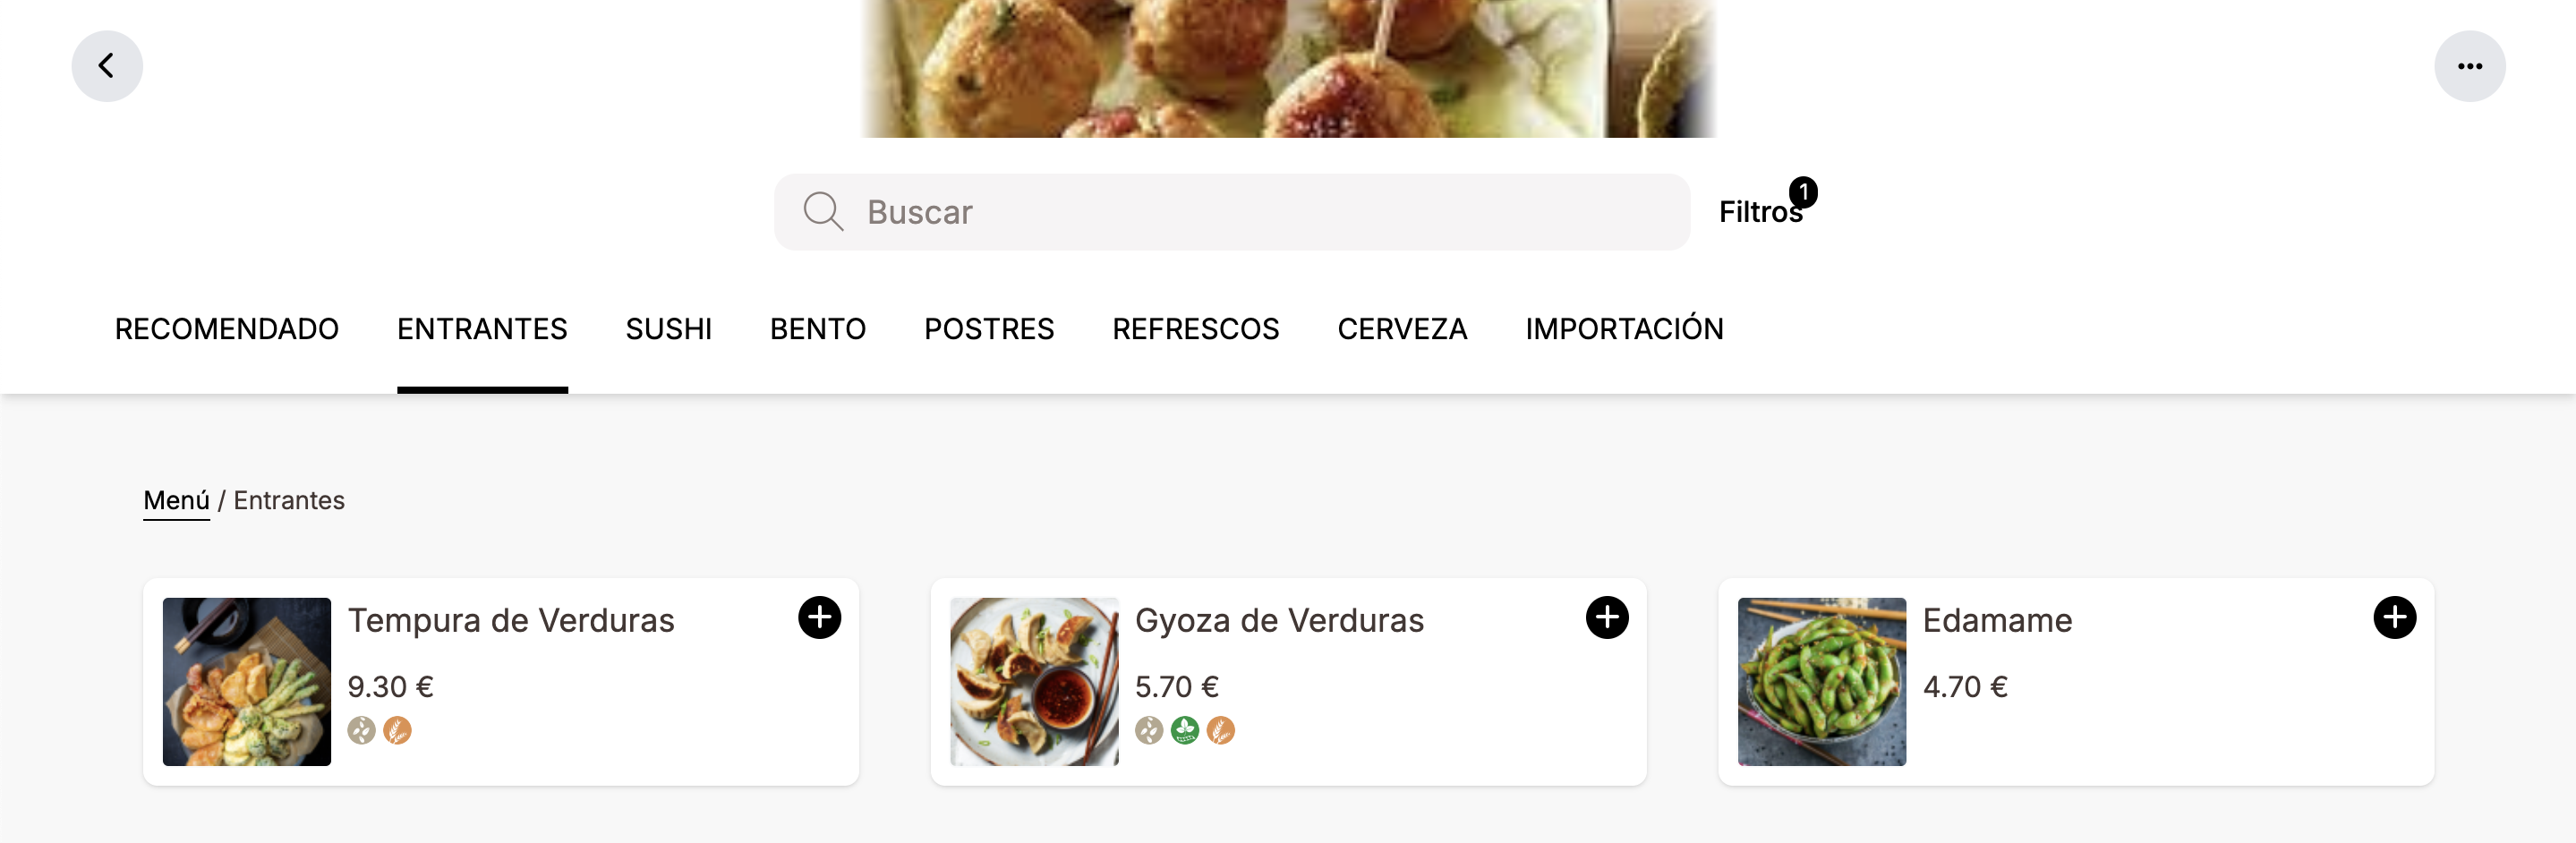
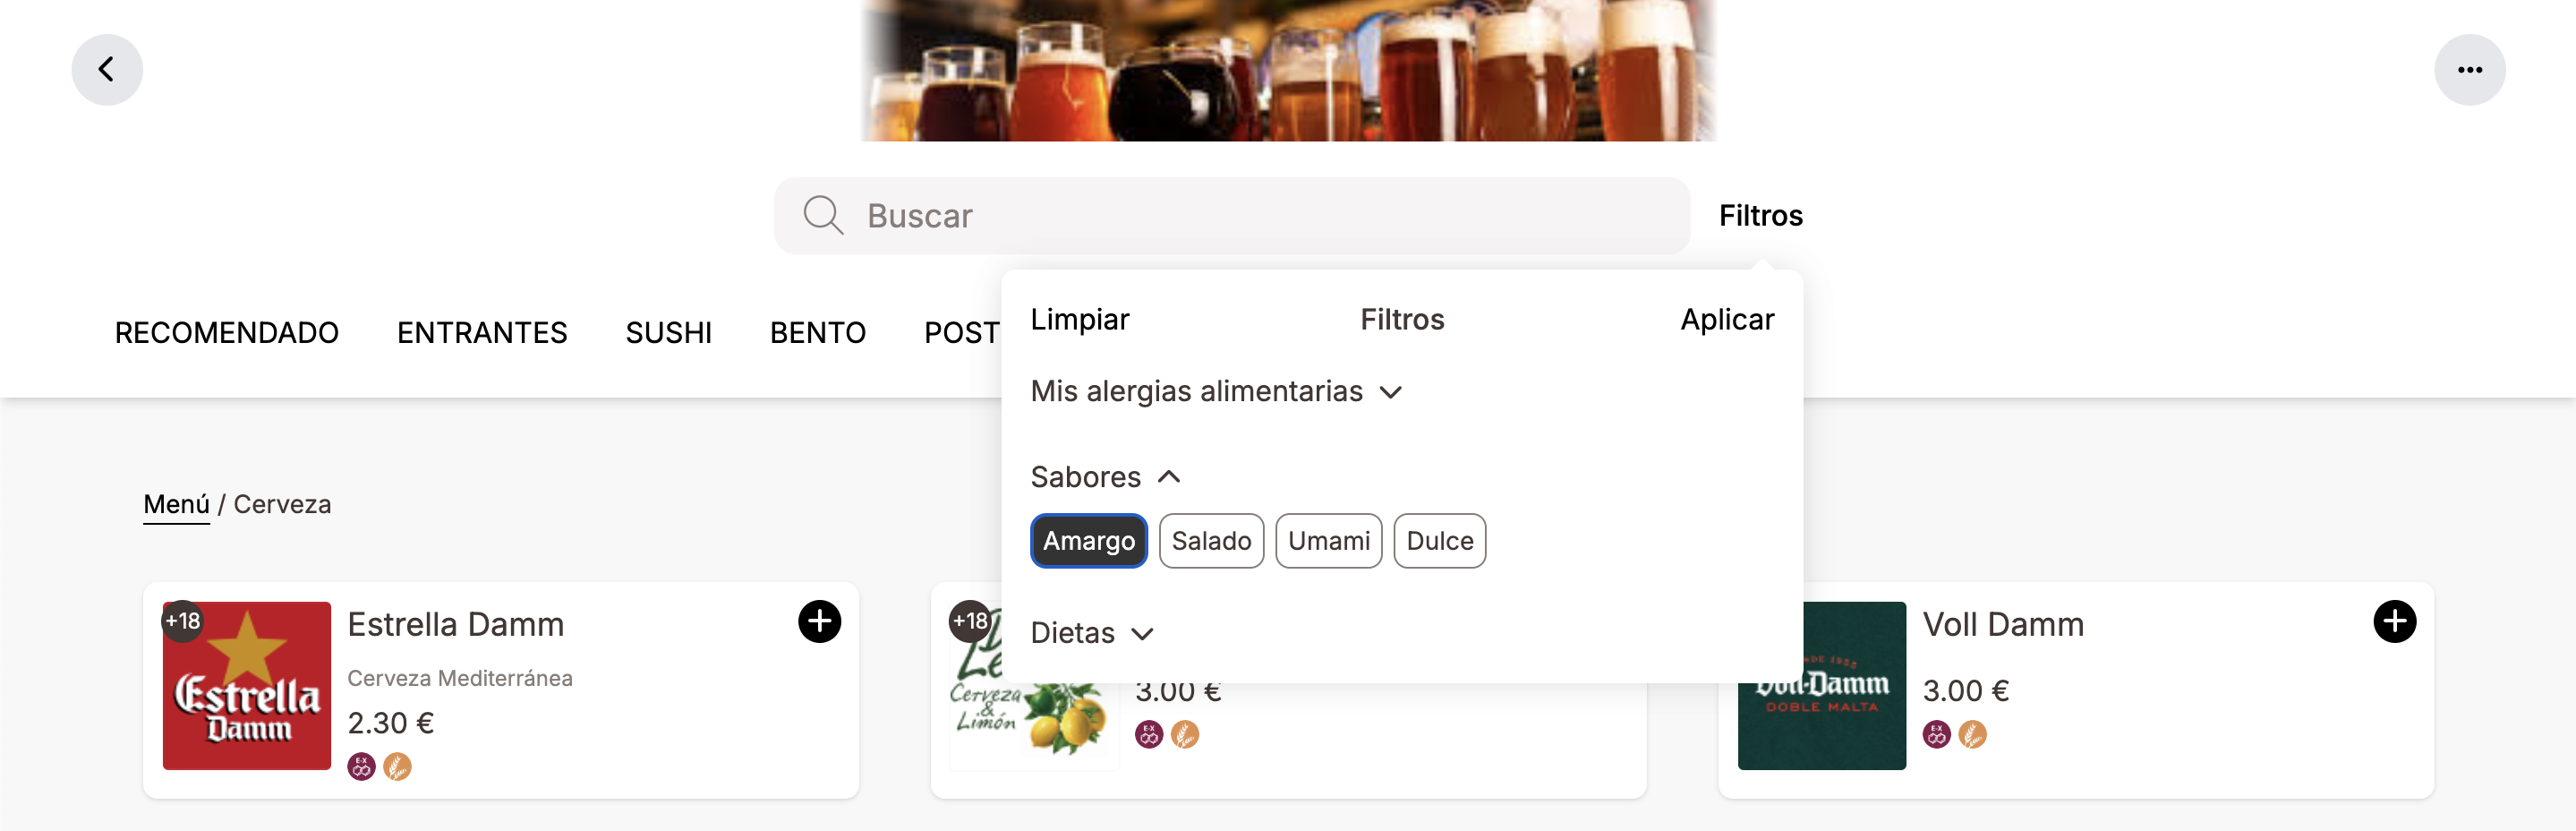
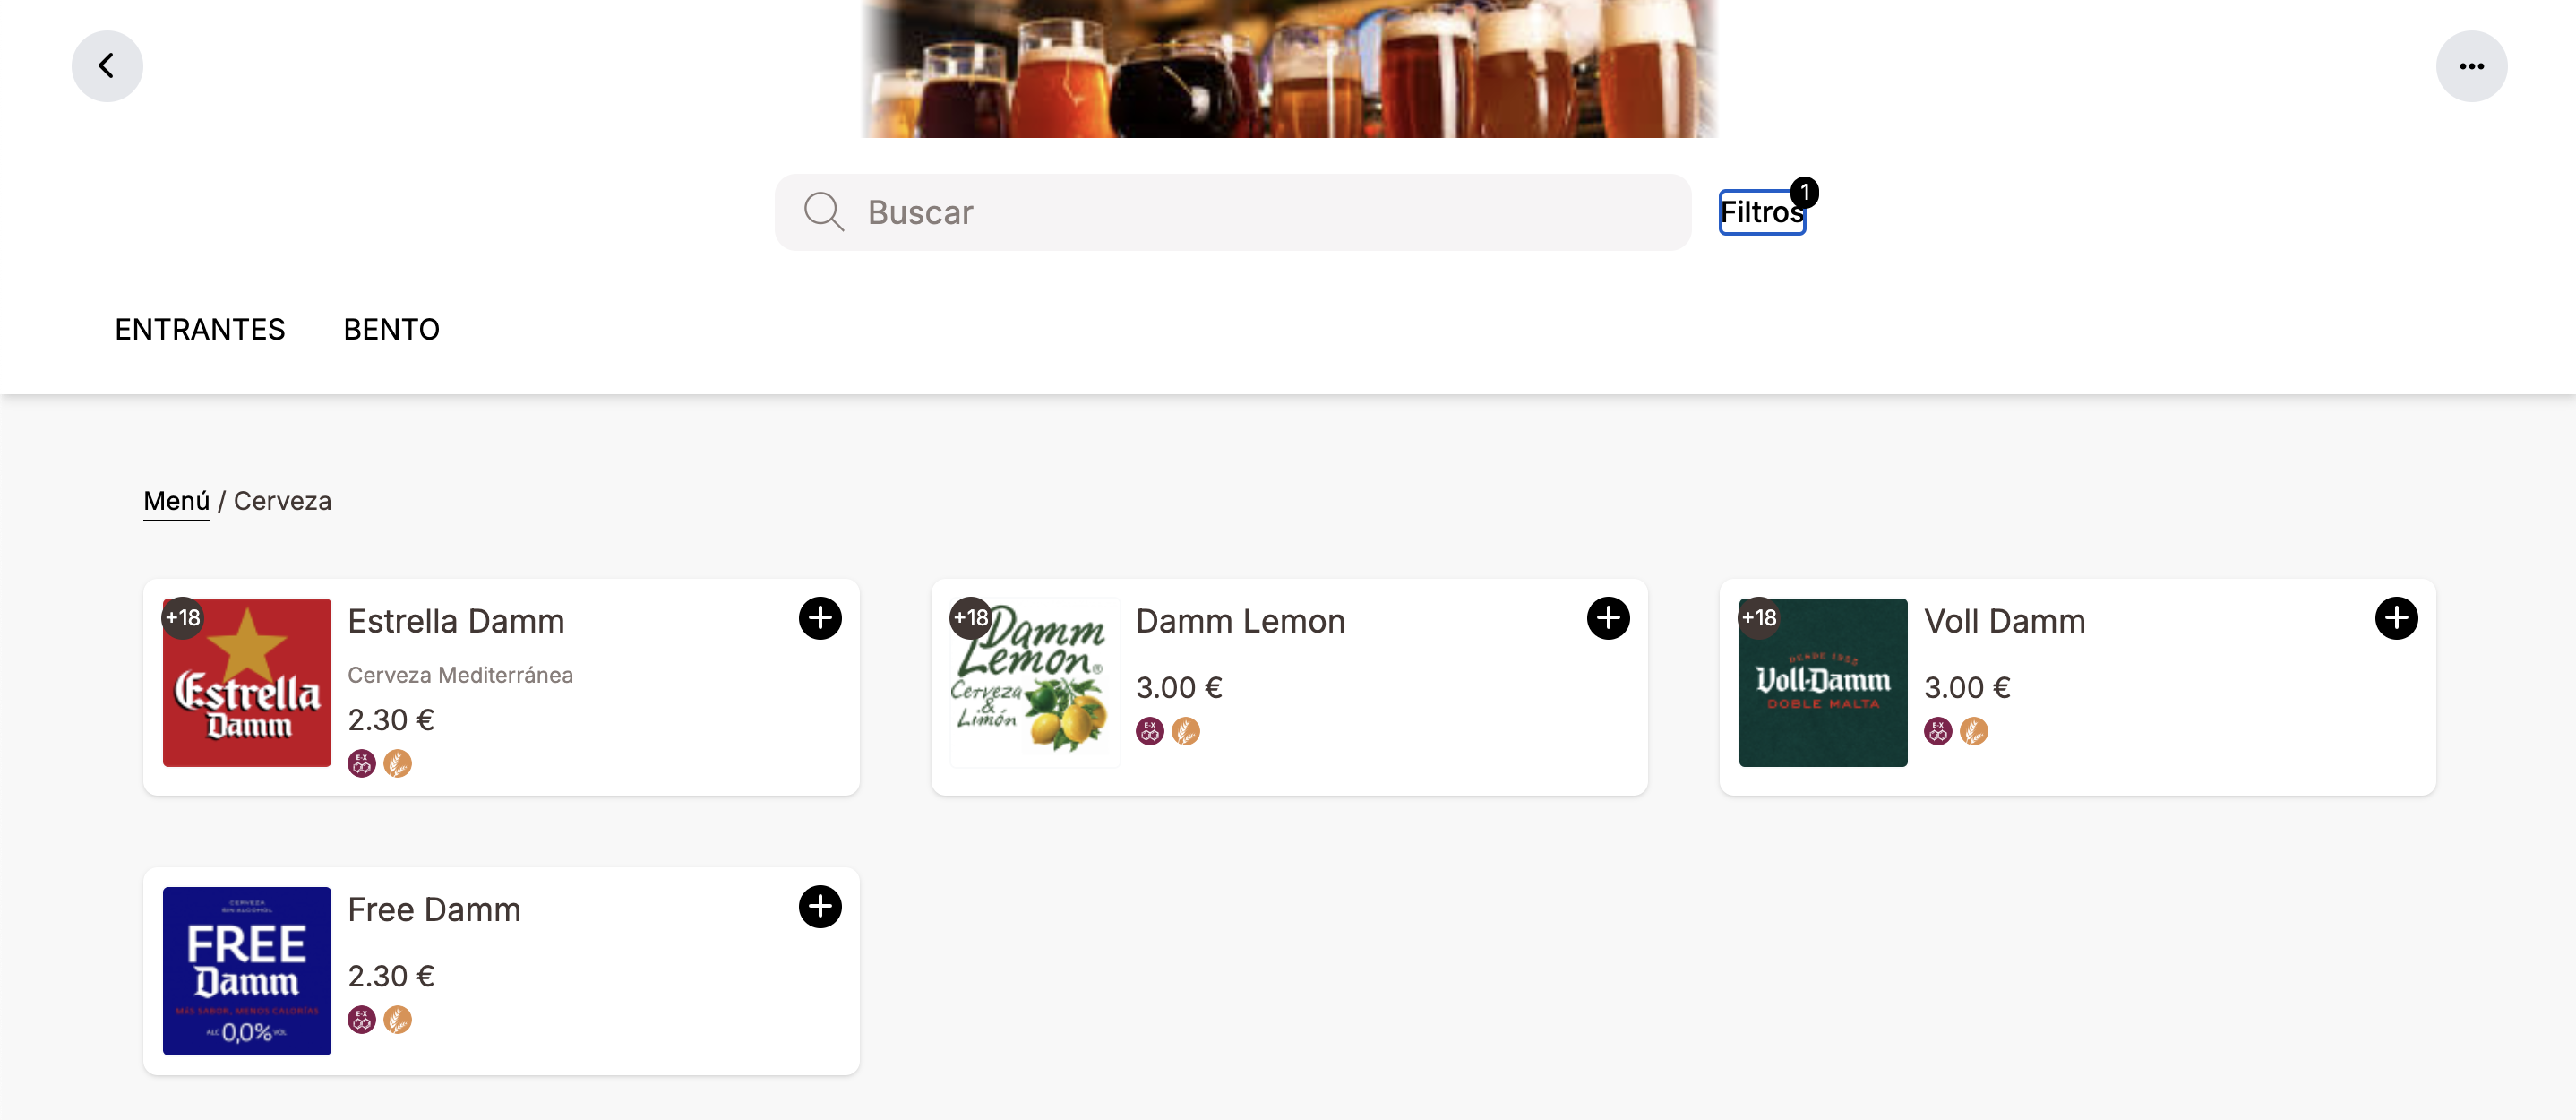
Flavours: If you set up flavours in the Revo XEF back-office and synchronise the catalogue, your customers will be able to filter them when placing an order.
Example: The product Estrella Damm has the following flavour:
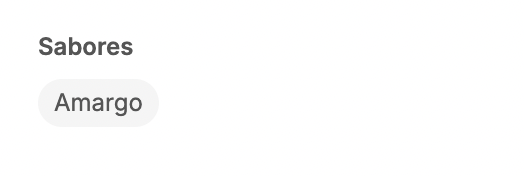
Select "Bitter" in the filter:
Only bitter products appear:
-
Nutritional Information: If you add nutritional information to your products, customers will be able to view it by clicking on the product.
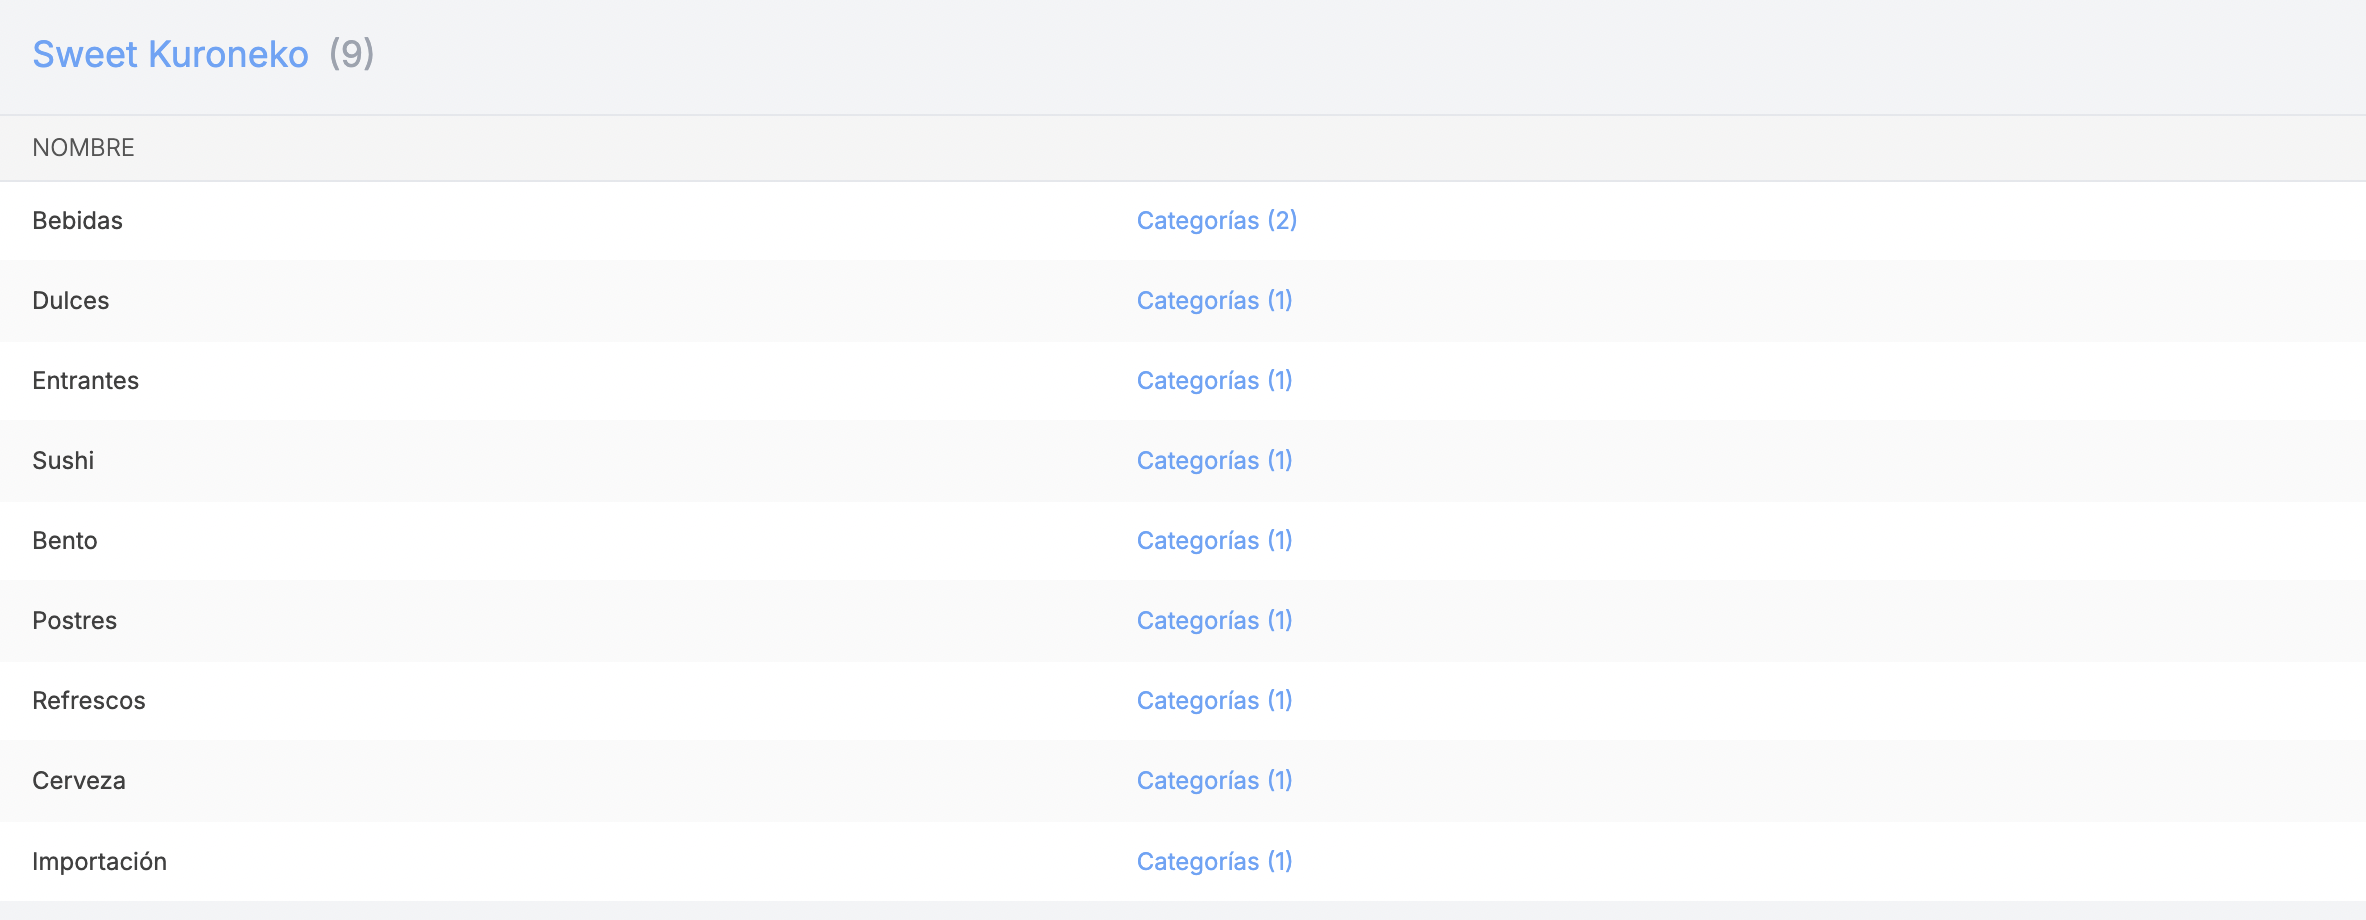
HOW TO MANAGE THE CATALOGUE BY ESTABLISHMENT
If you have multiple establishments with different catalogues, you can manage them easily.
1. Click on Establishment and select the establishment.
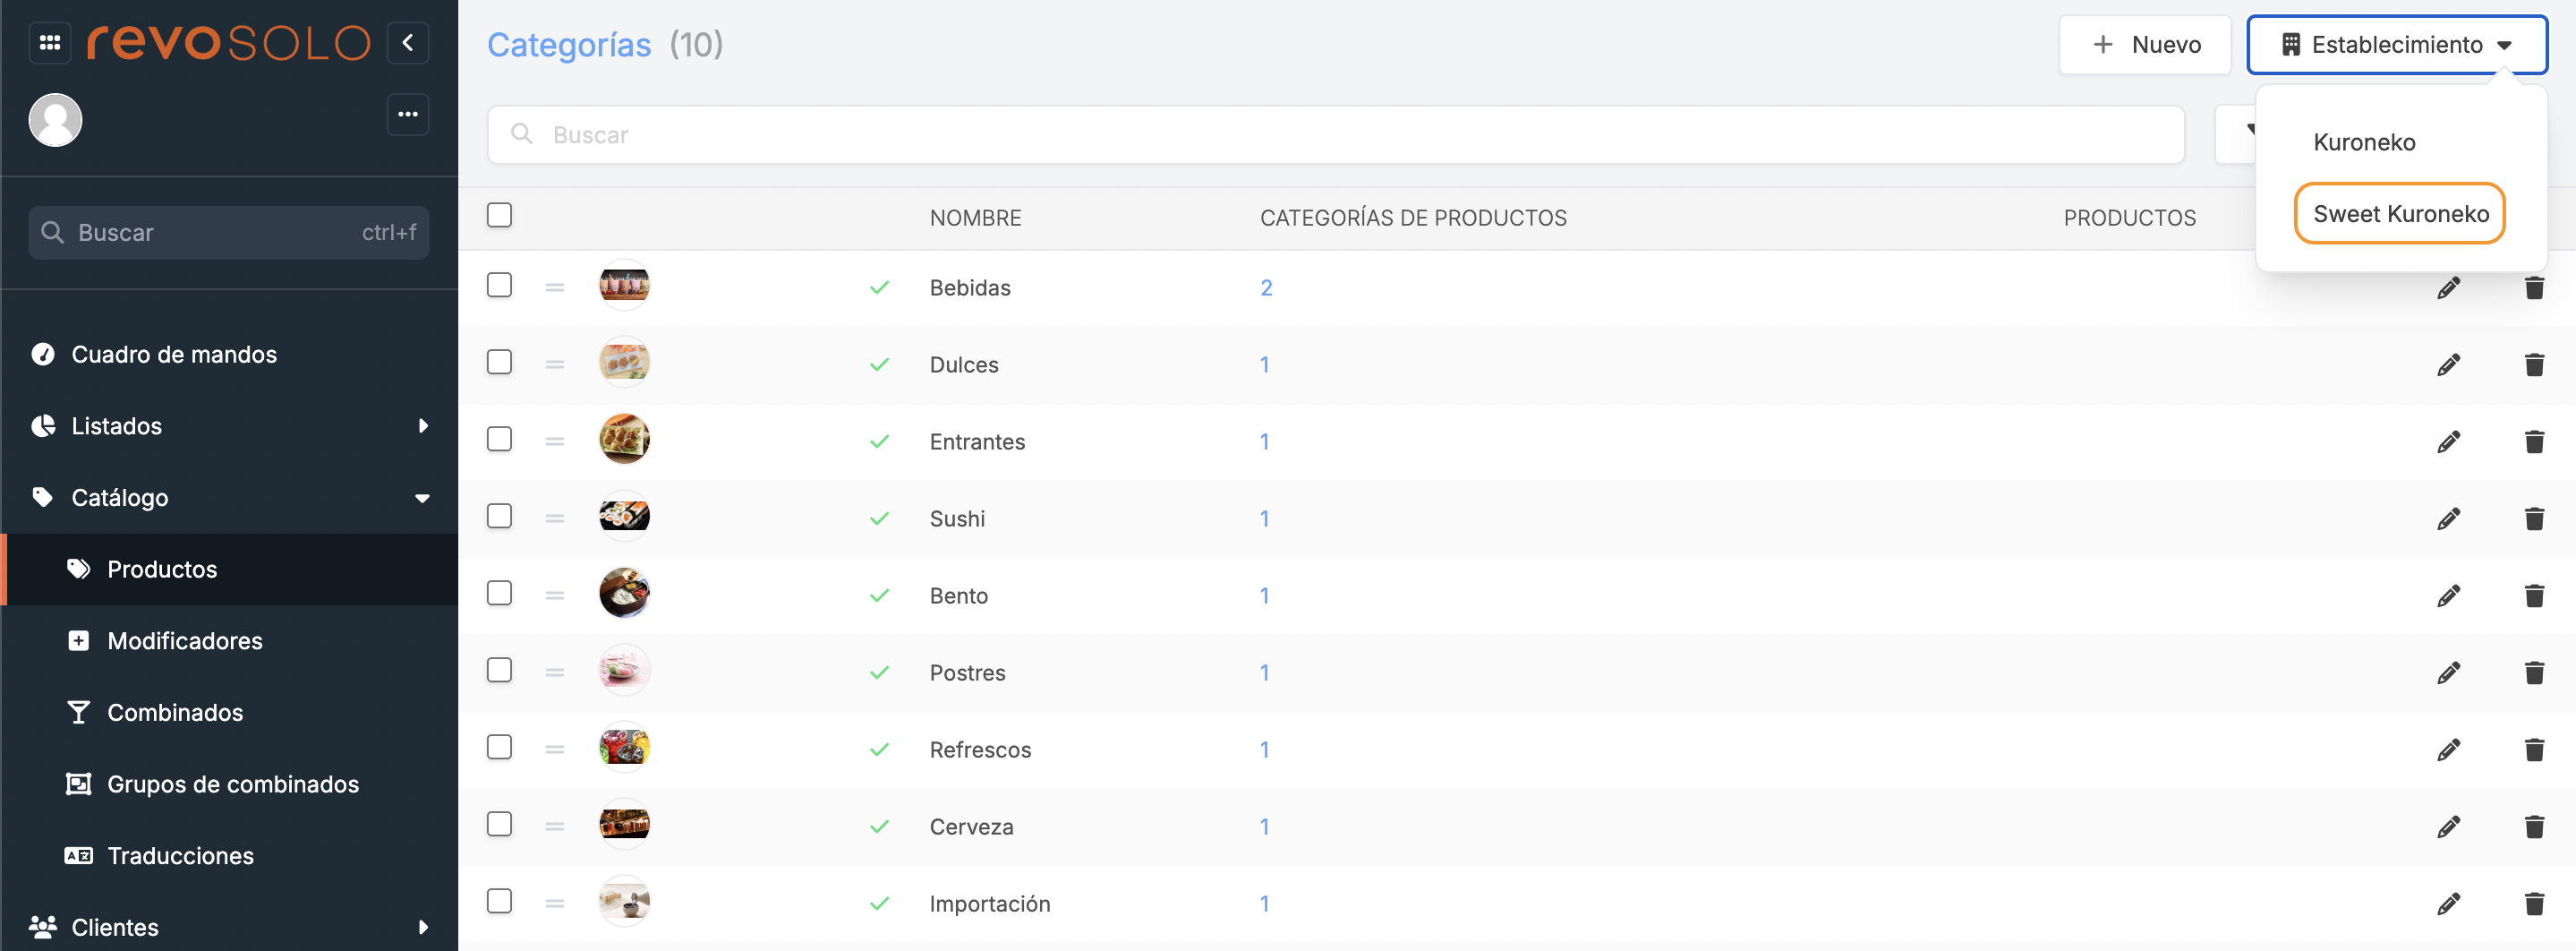
2. A list of all categories will appear.
3. Access the products and activate the product in the "Override" column.
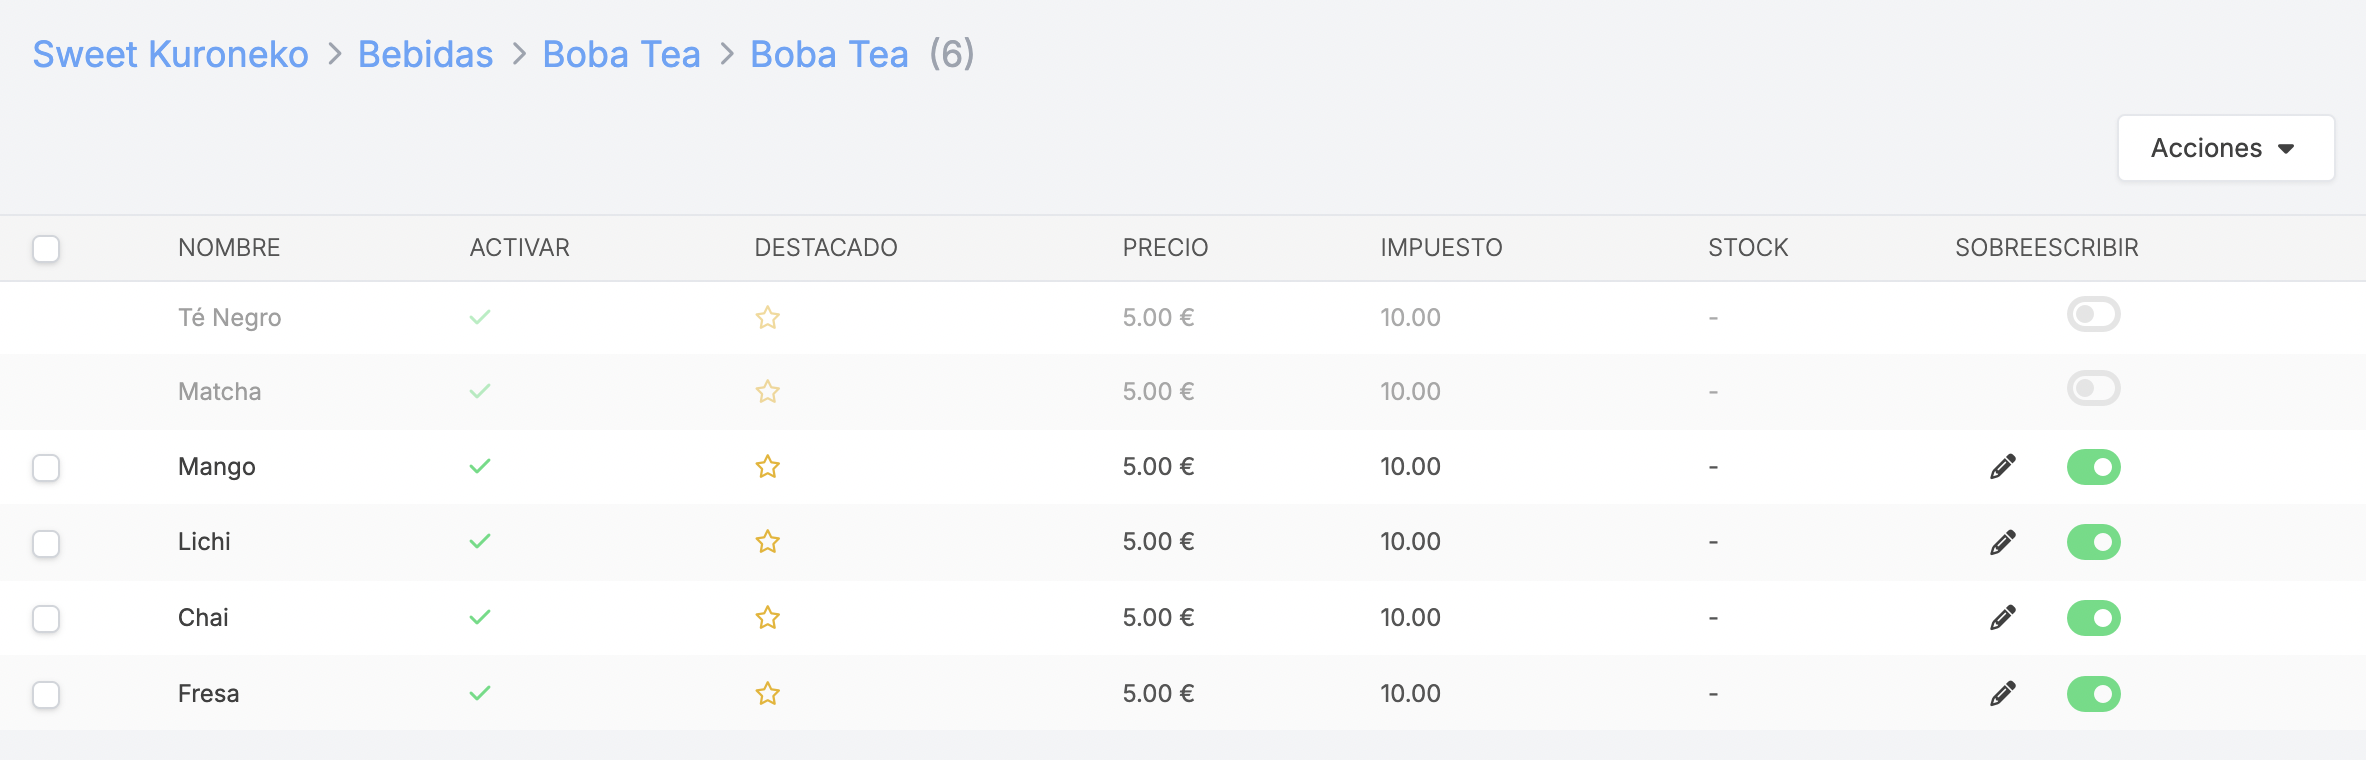
Any changes you make to the catalogue in this way will also be reflected in the general catalogue, and vice versa.
2. MODIFIERS
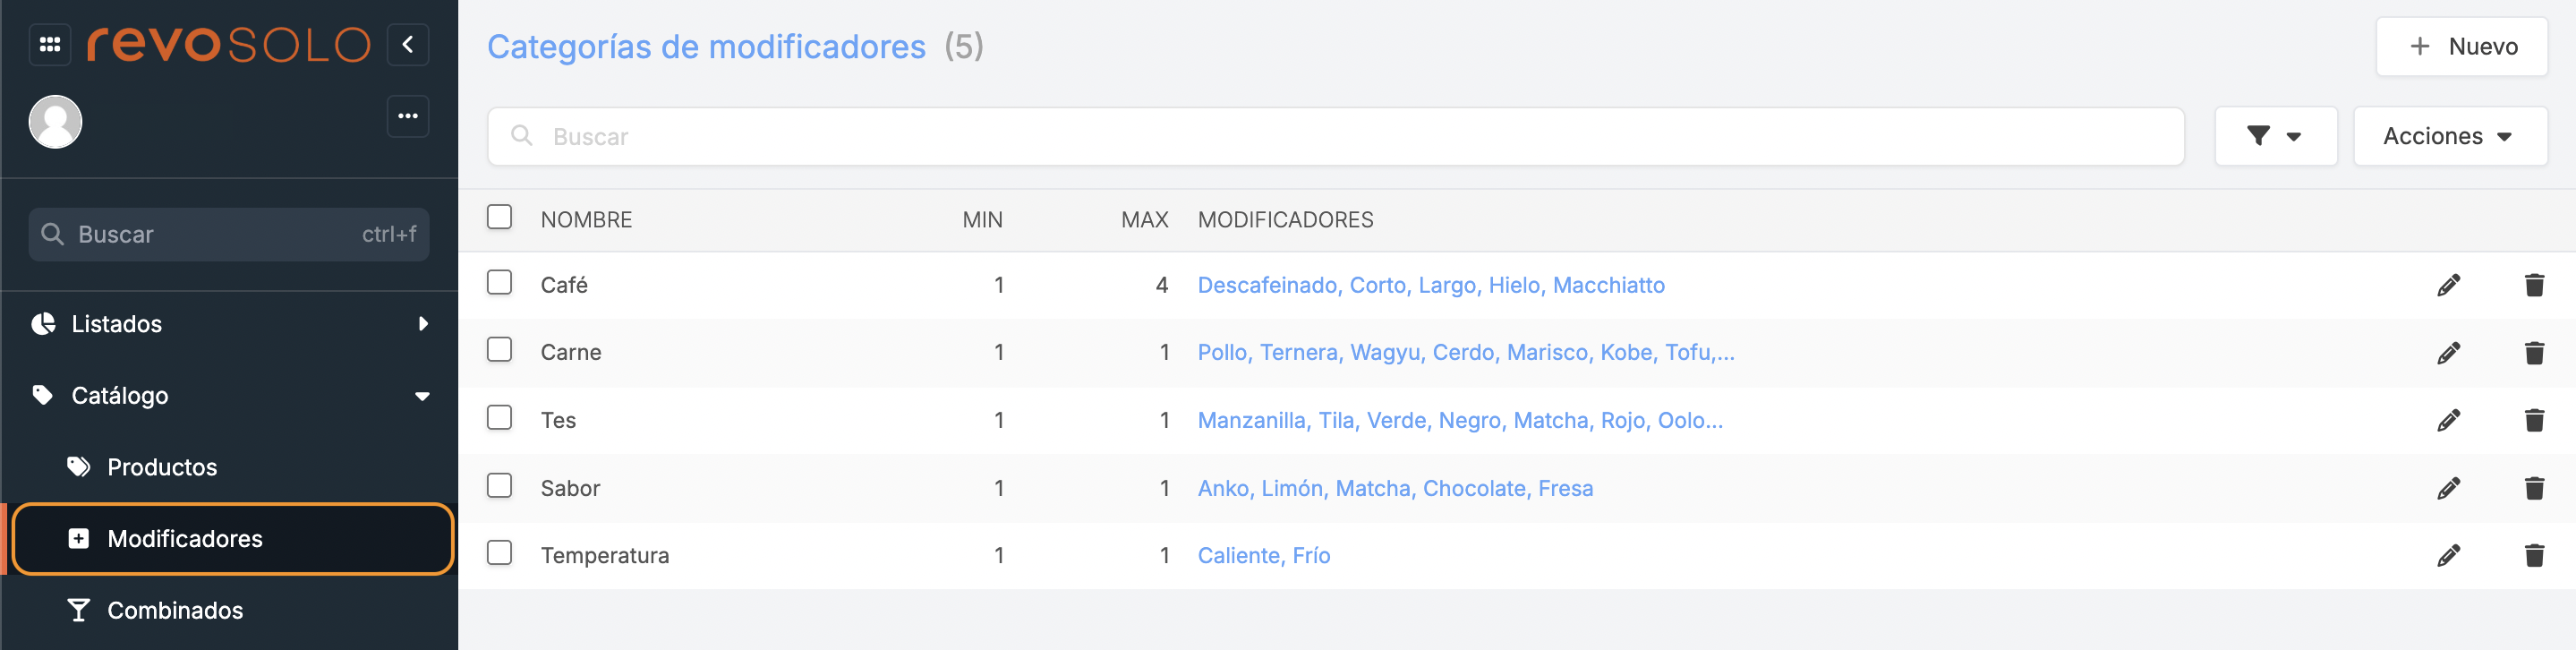
- + New: Create a new modifier.
- : Search for modifiers.
- : Choose how many pages to display.
- Actions: Delete one or more modifiers.
- : Select one or more modifiers.
- Name: Modifier name.
- Min: Indicates whether it is mandatory or optional.
- Max: Indicates the available options.
- Modifiers: Modifier options.
- : Edit the modifier.
- : Delete the modifier.
NEW MODIFIER
1. Click on + New and complete the information.
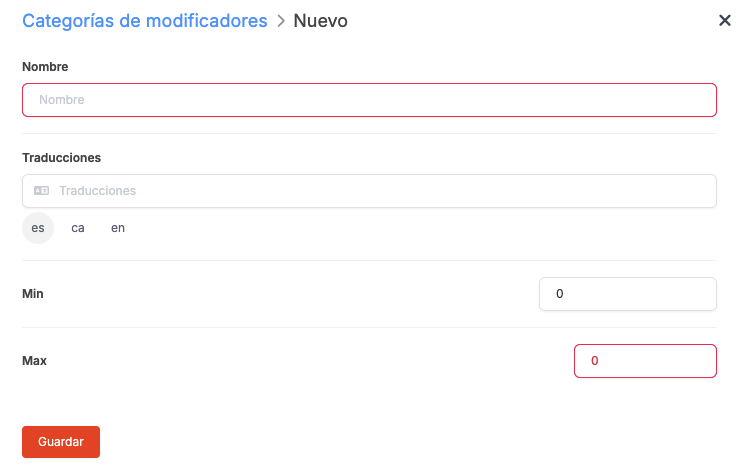
-
Name: Enter the modifier name.
-
Translations: Select the language and enter the translation.
-
Min and Max: Indicate the available options. Determine whether you can choose several options or just one, and whether it is mandatory or optional.
Example:
- Min: 1 and Max: 1: Mandatory, select only one option (e.g.: Flavour: Chocolate).
- Min: 1 and Max: 2: Mandatory, you can select up to 2 options (e.g.: Ice Cream).
- Min: 0 and Max: 2: Optional, not necessary, but you can select up to 2 options (e.g.: Drinks: plain, with ice, with ice and lemon).
2. Click Save to confirm.
3. After creating it, click on -- to add options.
4. Click on + New and create an option.
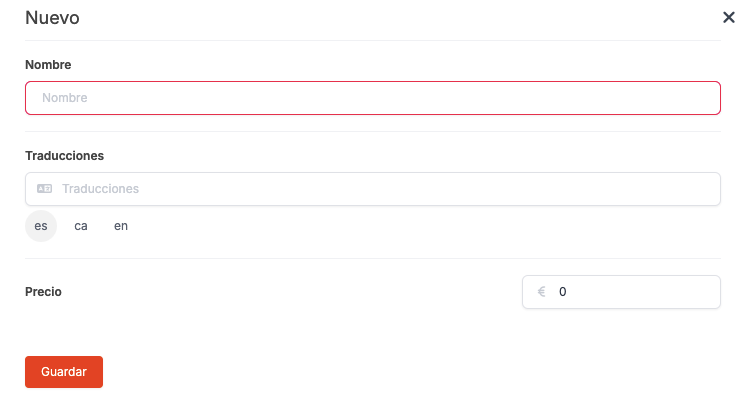
- Name: Enter the name.
- Translations: Select the language and add the translation.
- Price: Indicate if there is a surcharge; leave it at 0 if there is none.
5. Click Save to confirm.
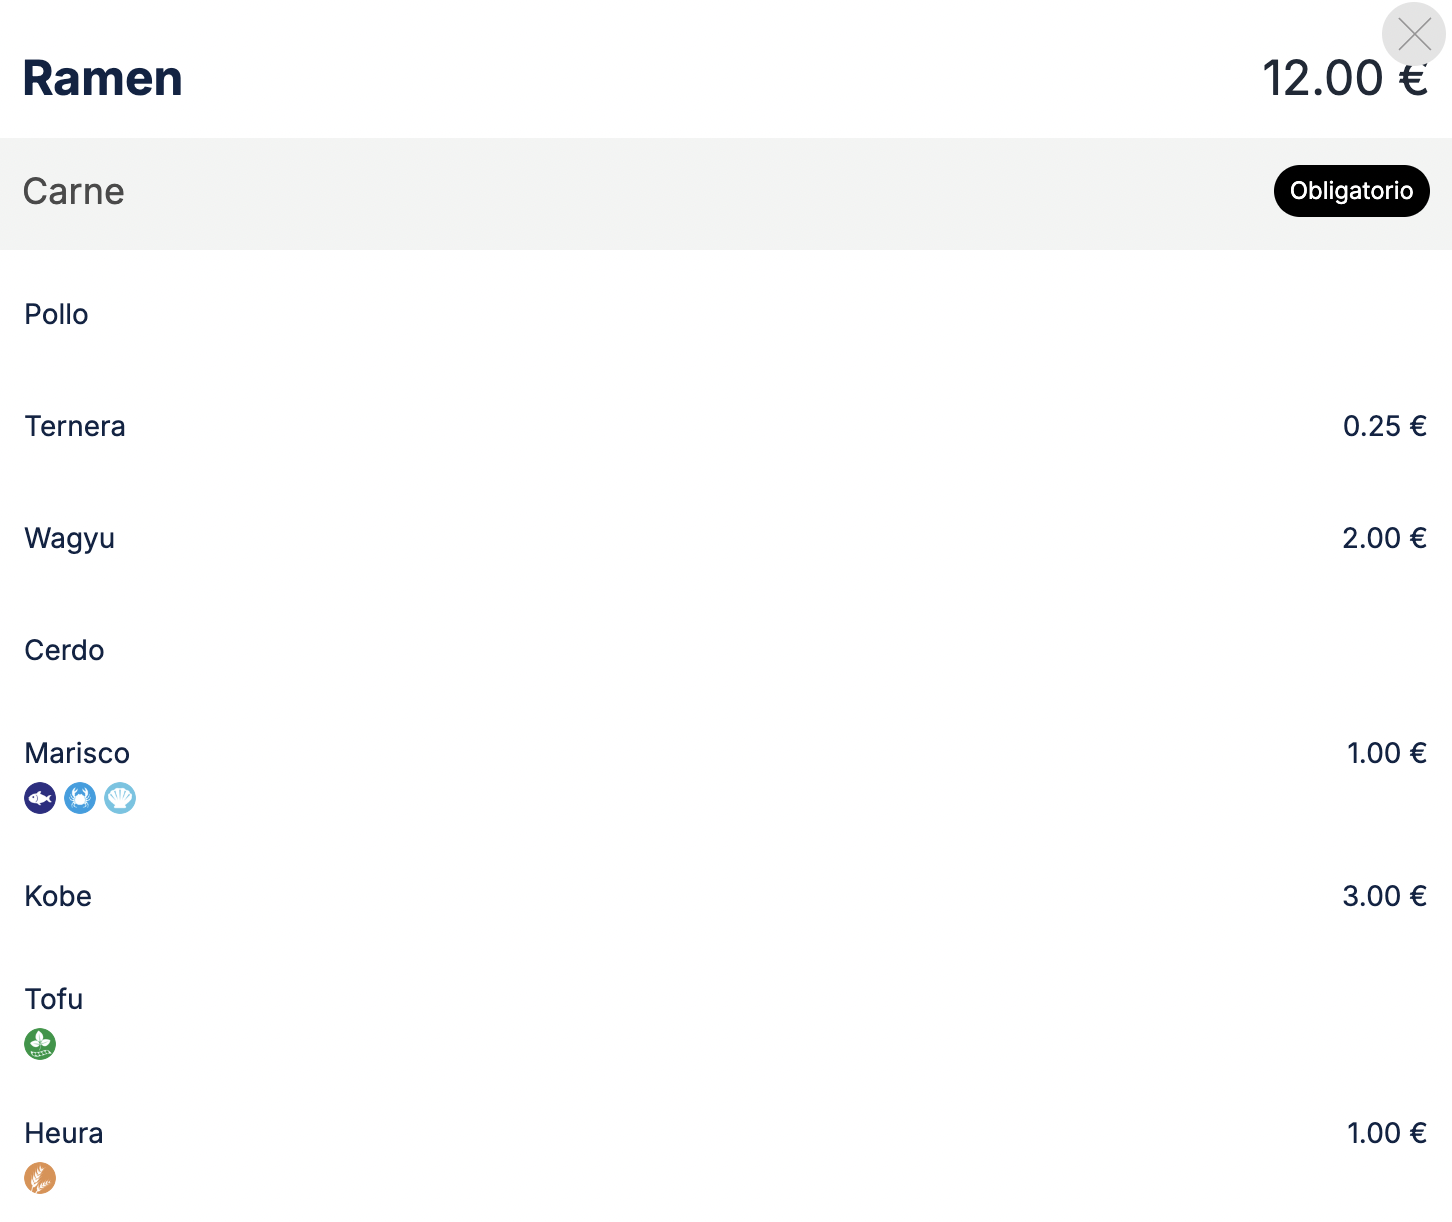
6. Assign the modifier to a category or product. If you assign it to the category, all products will have the modifier.
If in Revo XEF we have allergens added in the modifiers, these will appear on the SOLO website:
3. COMBINATIONS
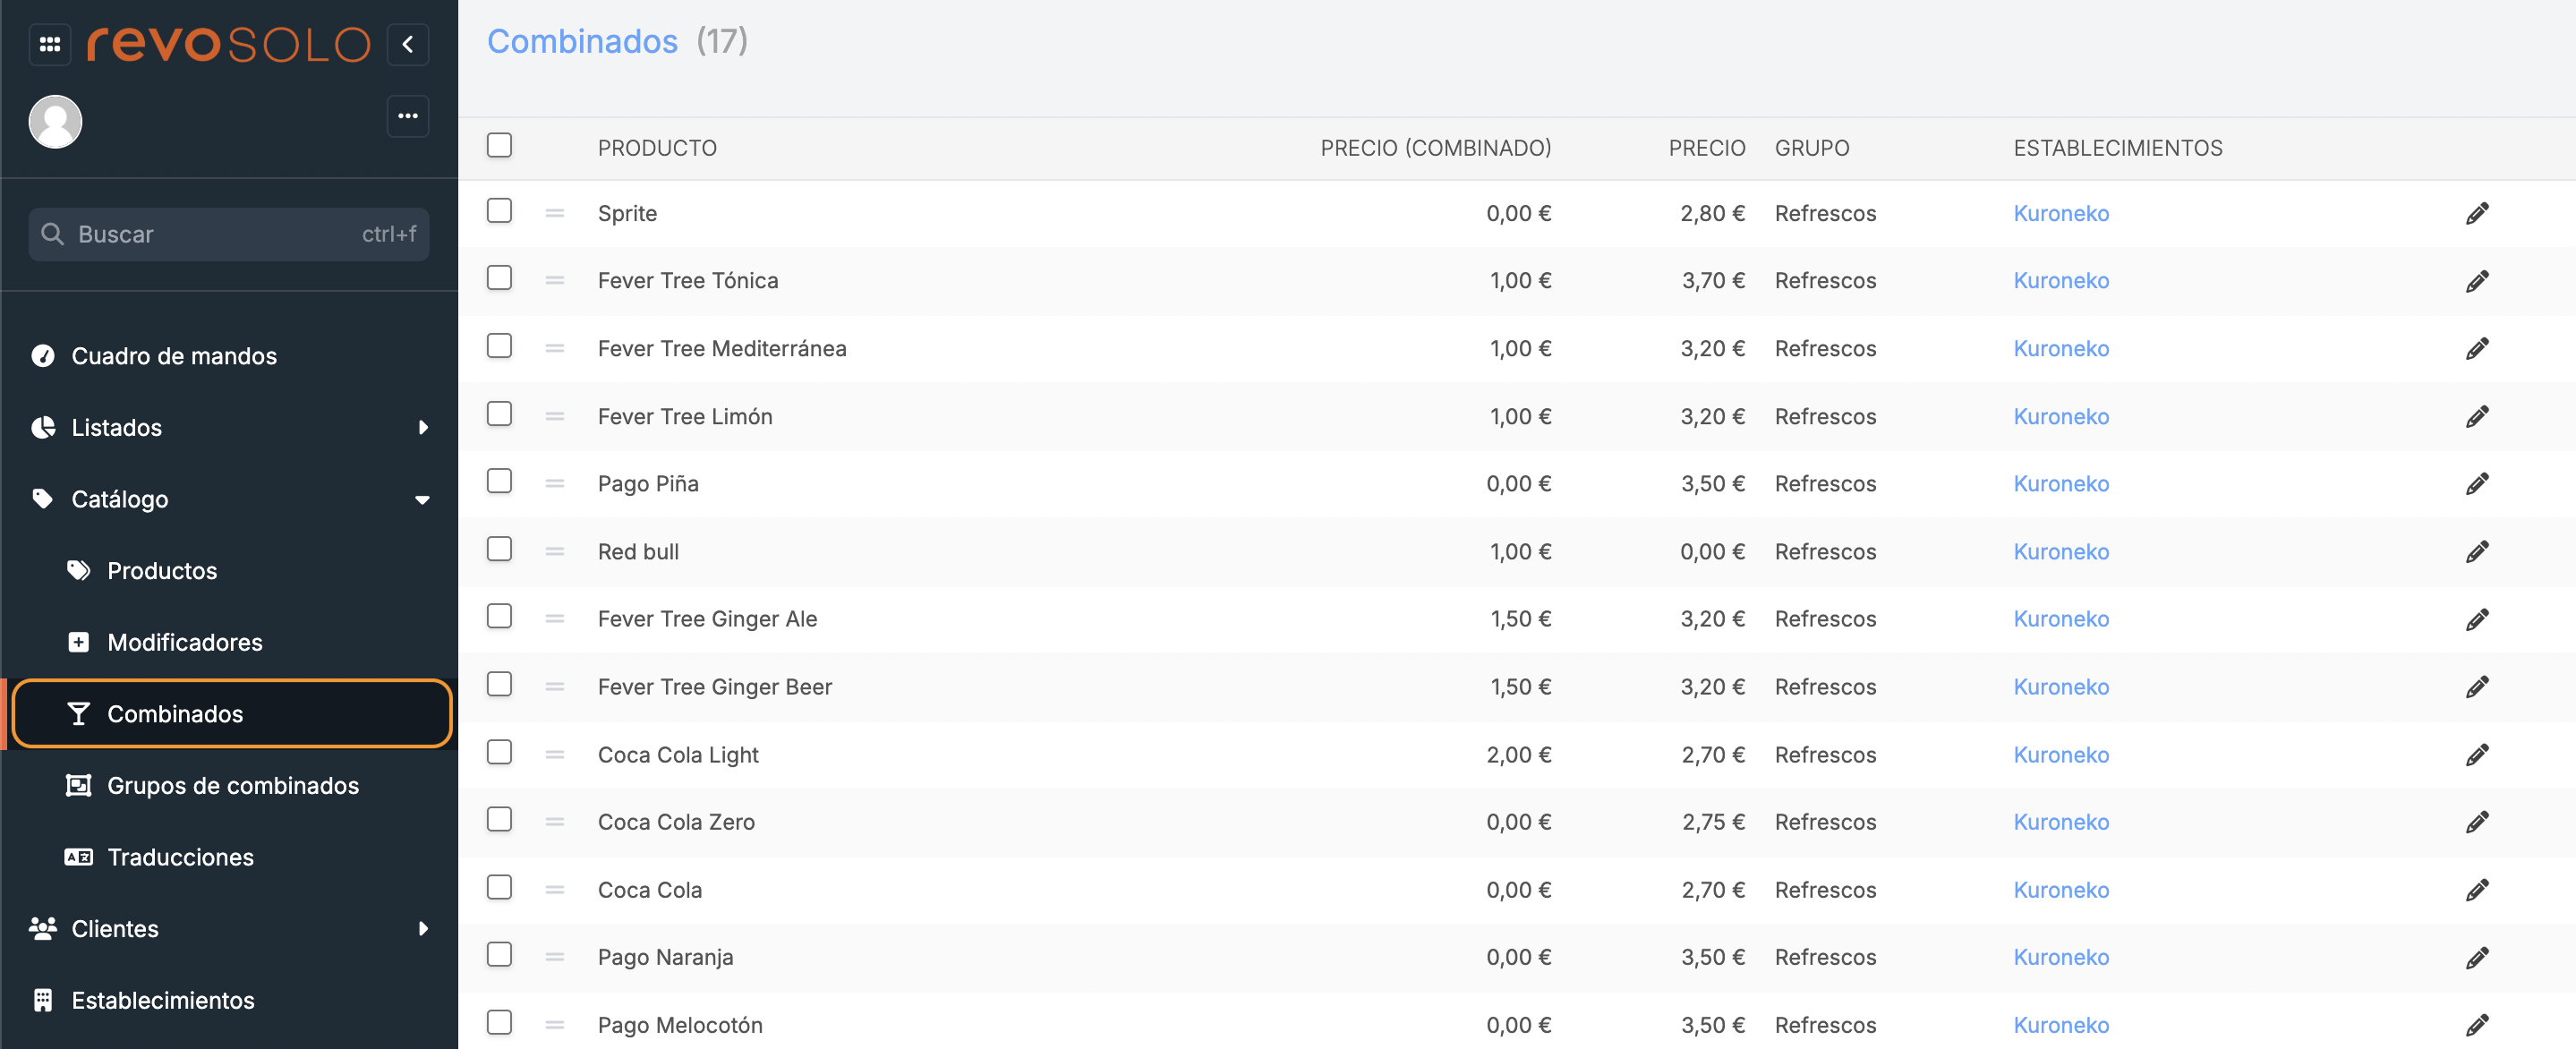
-
: Drag the product to a different position.
-
Product: Product name.
-
Price (combination): Indicate the price surcharge.
-
Price: Product price.
-
Group: Combination group to which the product belongs.
-
Establishments: If you have several establishments, clicking on -- allows you to activate it in different locations and change its price.
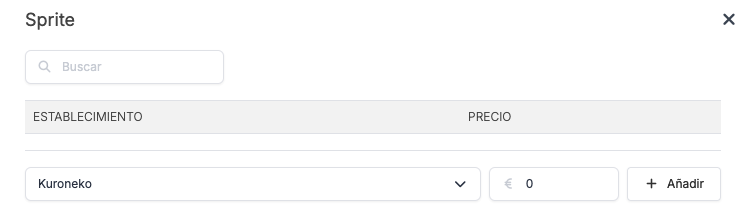
- Establishment: Select the establishment from the dropdown menu. It must have been previously created in the Establishments module.
-
Price: Enter the price, either the same value or a different one.
-
: Edit the combination price.
If you want to add or remove these products, do so from Revo XEF and update the catalogue. You can find more information on how to create combinations in Revo XEF here.
4. COMBINATION GROUPS
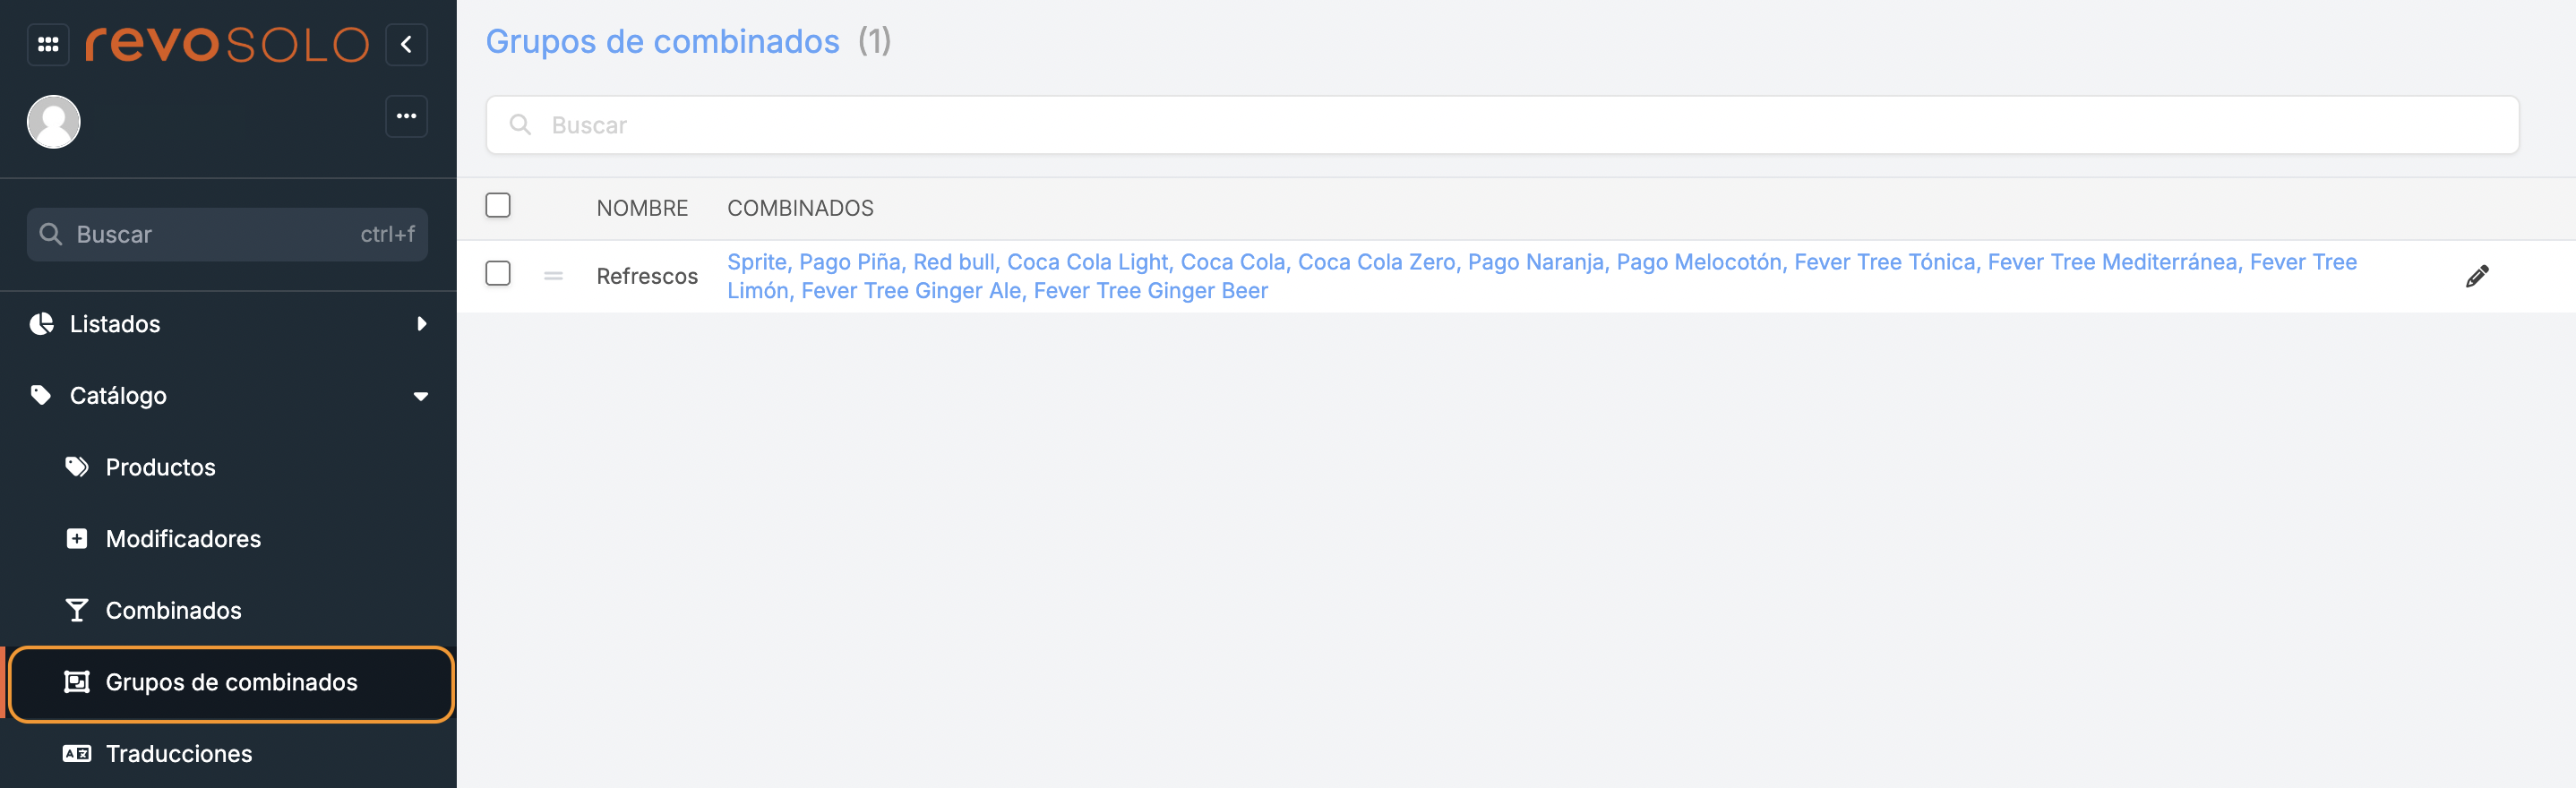
-
: Drag the combination group to a different position.
-
Name: Combination group name.
-
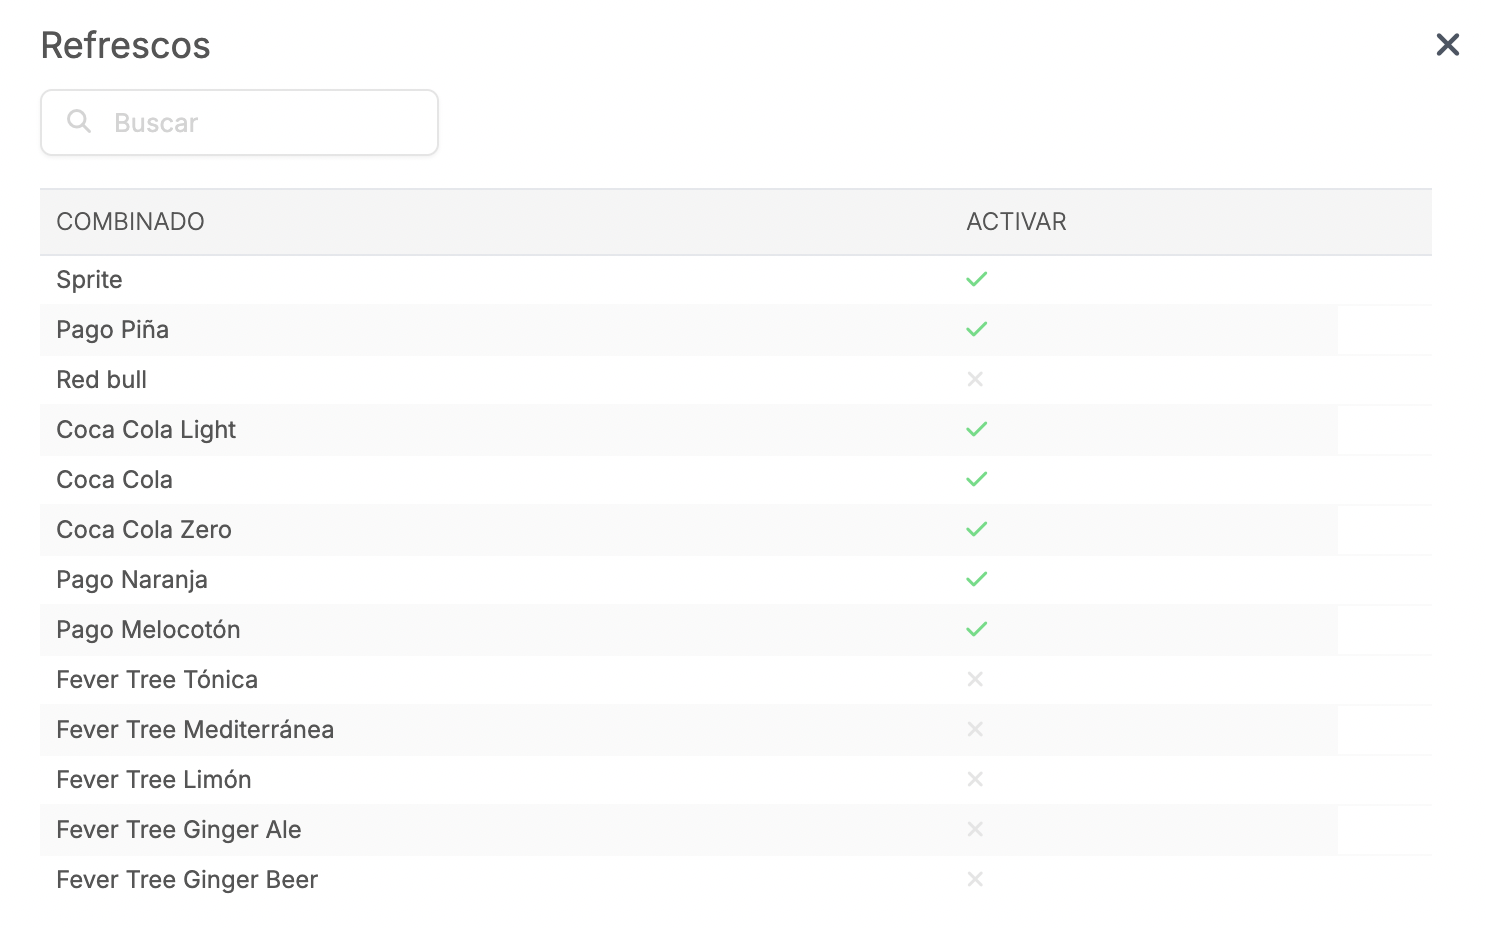
Combinations: Products in the combination. Click on Combinations (--) to activate or deactivate the different products.
-
: Edit the combination group.
If you want to add or remove these combination groups, you must do so from Revo XEF and update the catalogue.
5. TRANSLATIONS
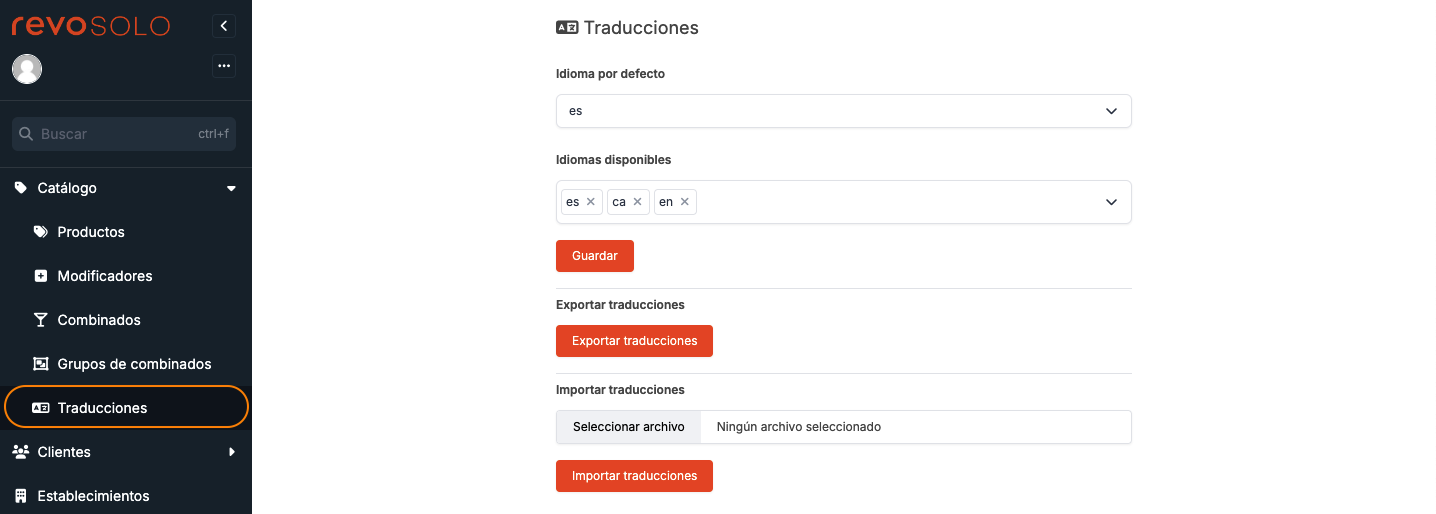
1. From this section, you can configure different languages to be available on the website.
- Default language: Choose the default language of the website. It is used only if the user’s browser language is different from those configured under "Available languages".
- Available languages: Choose as many languages as you need from the dropdown.
2. Click Save to confirm the changes.
-
Export translations: Allows you to export the entire list of products and proceed with their translations. This way, you won’t need to enter each product file to edit the translations of the product name and description.
-
Import translations: Once the translations are done, you can import the file with the completed translations. The import must be done with a CSV file.
In order to be able to overwrite the translations when importing them, it is necessary to add a column with the title: admin.imported.
