1. HOW TO CREATE SUPPLIERS 2. HOW TO LINK PRODUCTS TO SUPPLIERS 3. HOW TO CREATE A NEW PURCHASE ORDER 4. HOW TO RECEIVE PURCHASE ORDERS 5. LISTS IN THE BACK OFFICE
With Revo RETAIL, you can manage your purchases and complete the stock cycle: you place an order, receive it, it enters stock, and then you sell the product.
All purchase orders are created and managed from the back office.
1. HOW TO CREATE SUPPLIERS
Start by creating your suppliers:
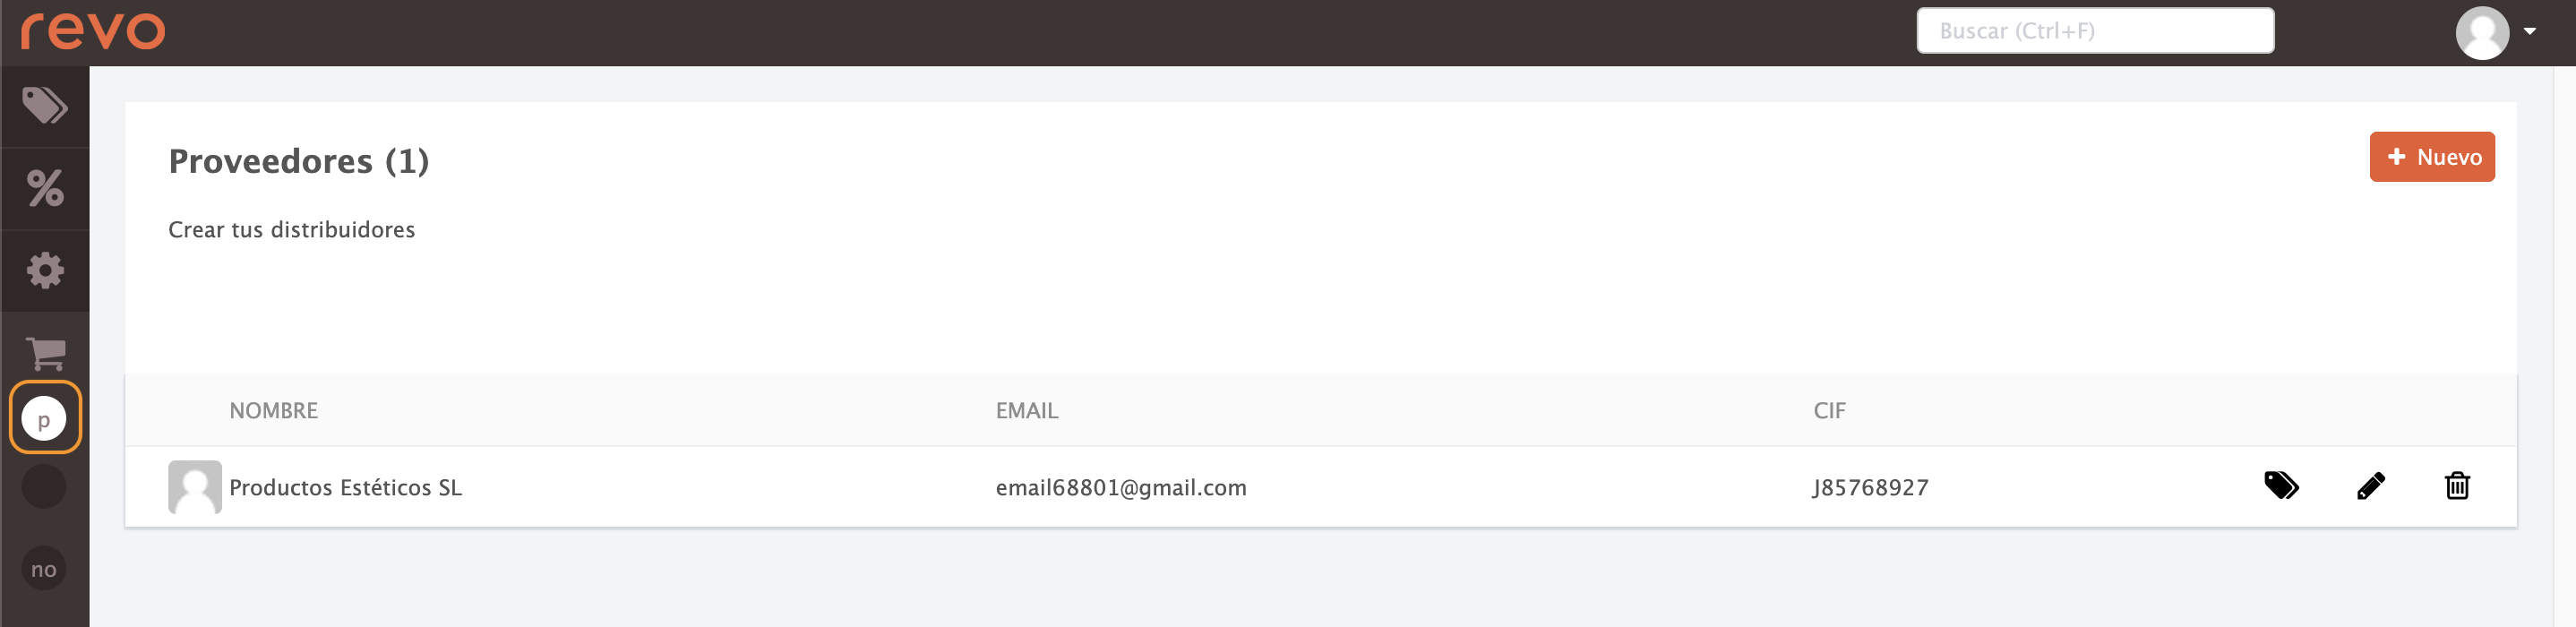
1. Log into the Revo RETAIL back office.
2. Go to Purchases / SUPPLIERS.
3. Click +New.
4. Fill in the following fields:
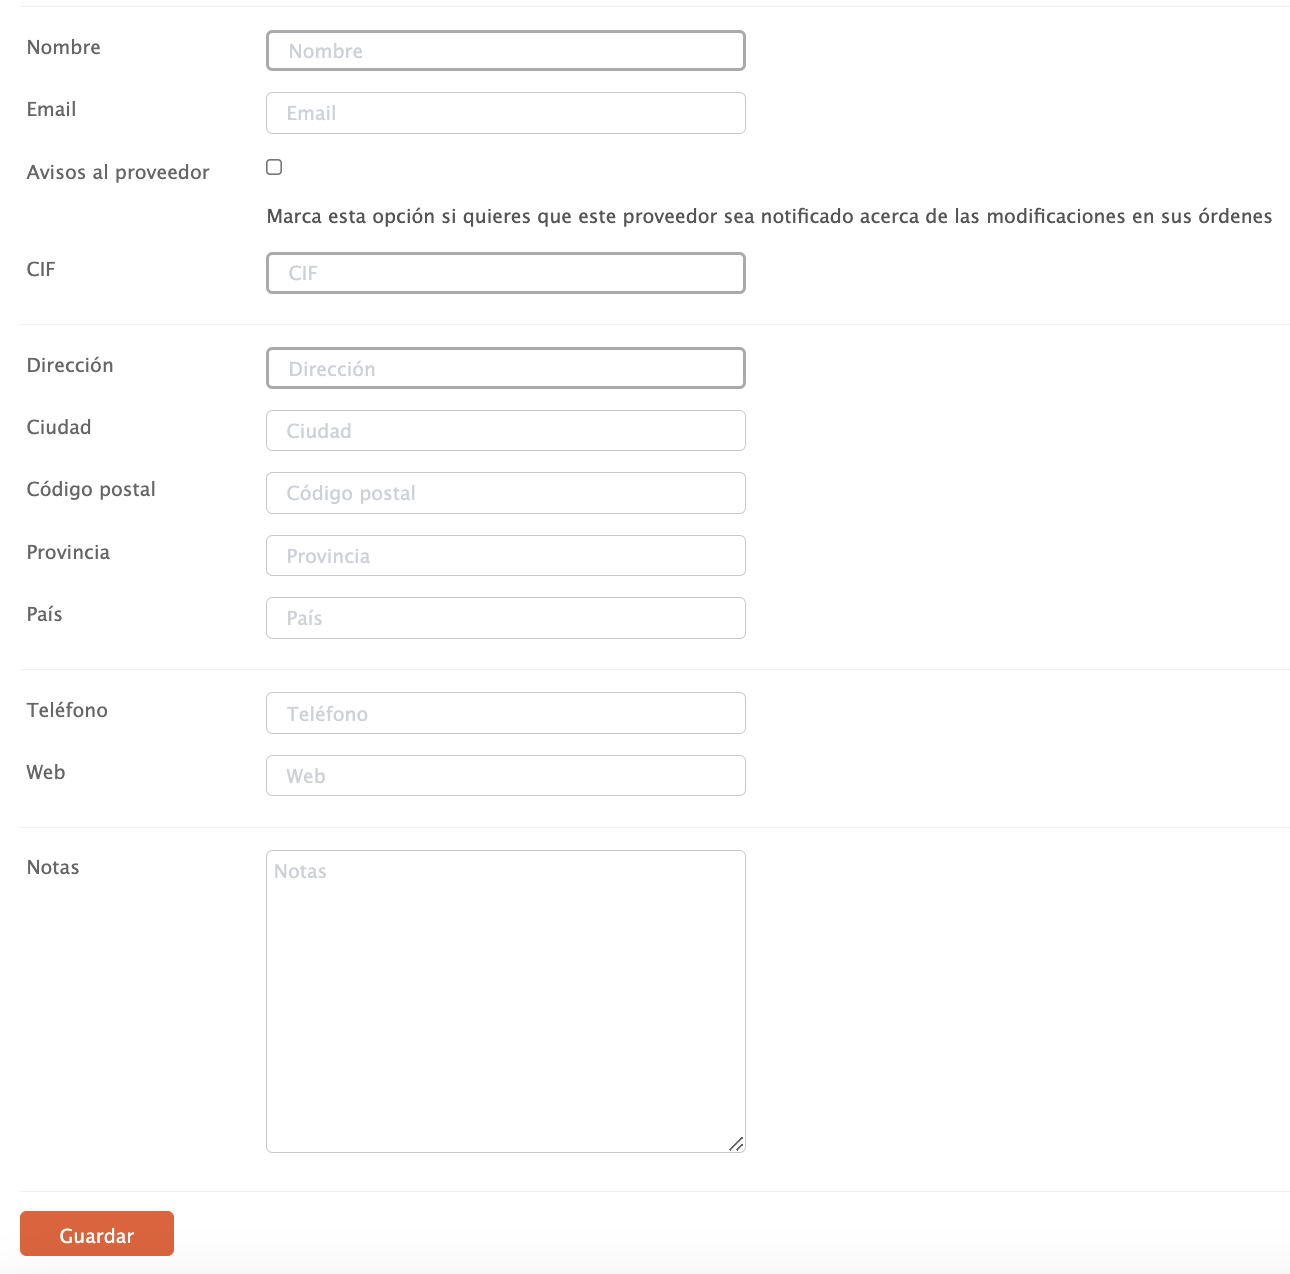
- Name: Supplier's name.
- Email: Supplier's email address.
- Notify Supplier: Enable this if you want the supplier to receive notifications.
- Tax ID, Address, City, Postcode, Province, Country, Telephone, Website: Supplier contact details.
- Notes: Add any useful extra information.
5. Click Save.
2. HOW TO LINK PRODUCTS TO SUPPLIERS
There are two ways to do this:
From the product page
1. Go to PRODUCTS and find the product within its group/category.
2. Open the Suppliers tab.
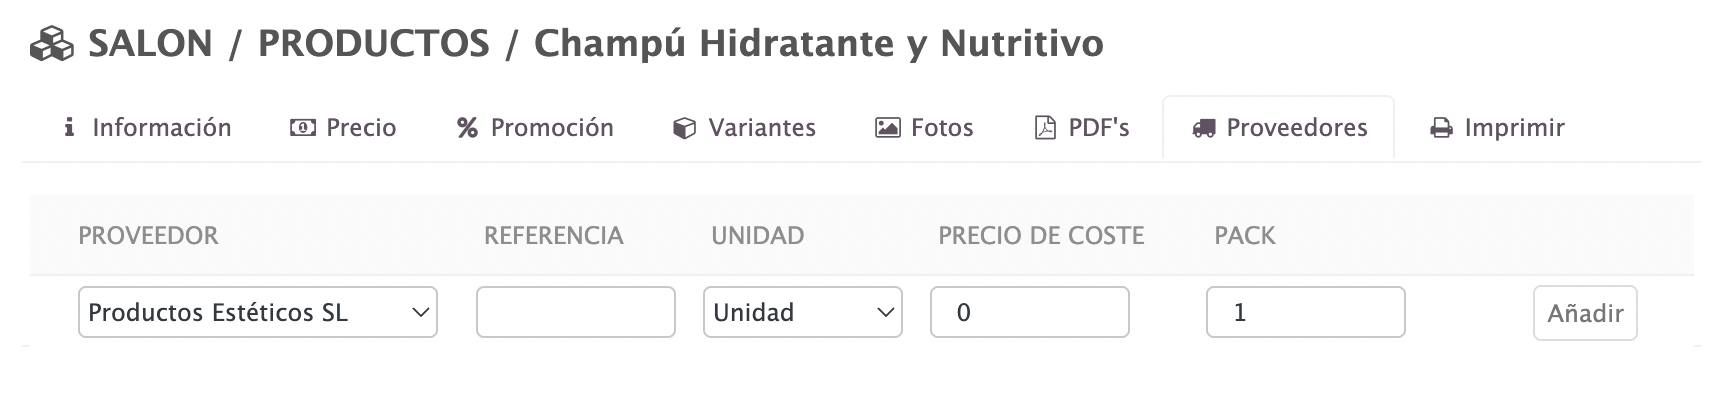
3. Fill in the following:
- Supplier: Select from the list.
- Reference: You can enter the supplier reference.
- Unit: Choose the stock unit (learn how to create one here).
- Cost Price: Purchase cost of the product.
- Package: Enter how many units are included per package, if applicable.
4. Click Add, then Save.
From the supplier profile
1. Go to Purchases / SUPPLIERS.
2. Click the icon for the supplier.
3. Add products using the dropdown menu.

4. Fill in the following:
- Supplier: Select one.
- Reference: Supplier reference.
- Unit: Choose a unit.
- Cost Price: Product cost.
- Package: Number of items per package.
- VAT: Choose the applicable tax.
5. Click Add.
3. HOW TO CREATE A NEW PURCHASE ORDER
Once suppliers and products are set up, you can generate a purchase order.
1. Go to Purchases / NEW ORDER.
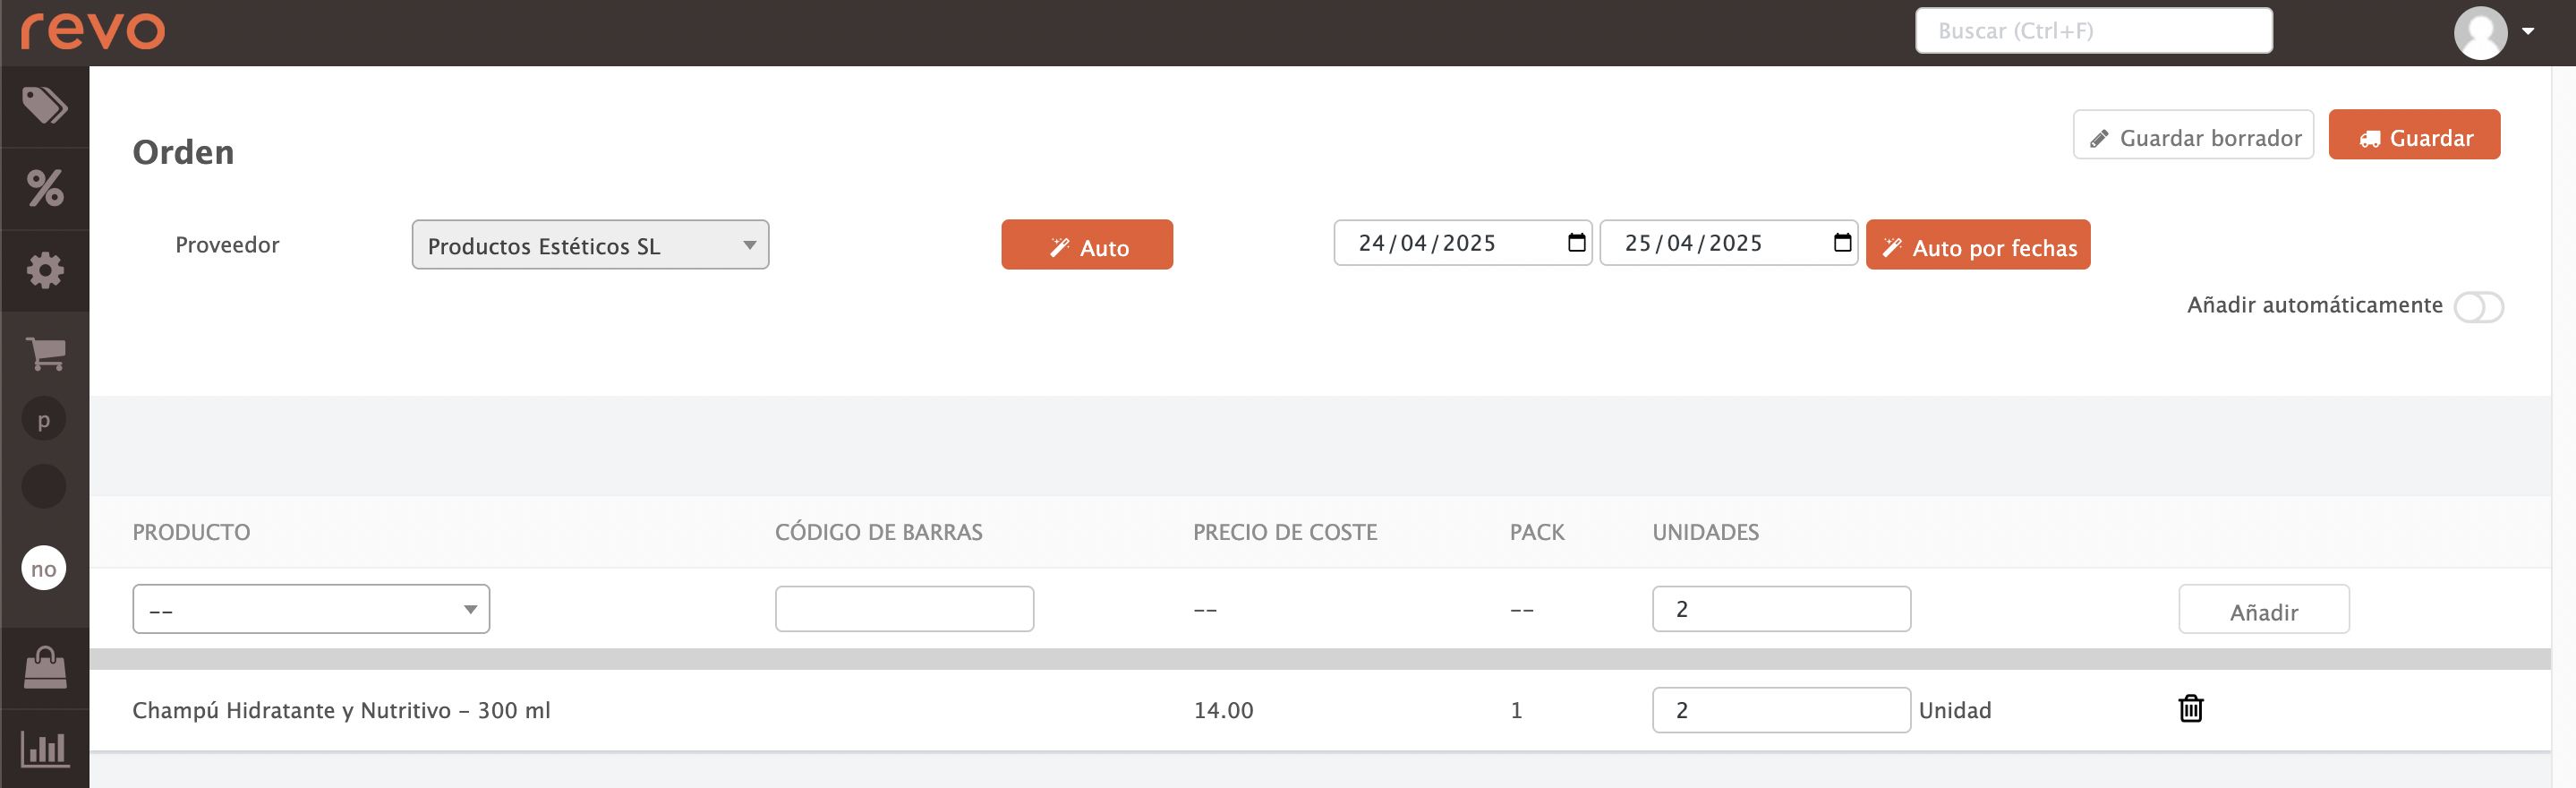
2. Fill in the following:
- Supplier: Select a supplier.
- Auto: Automatically includes products that need restocking.
- Auto by dates: Restocks based on products sold during a selected period.
3. You can also manually search for products and enter the quantity.
4. Two saving options:
- Save as draft: To edit later.
- Save: To confirm the order.
4. HOW TO RECEIVE PURCHASE ORDERS
When the products arrive, you can receive the full or partial order.
1. Go to Purchases / PURCHASE ORDERS.
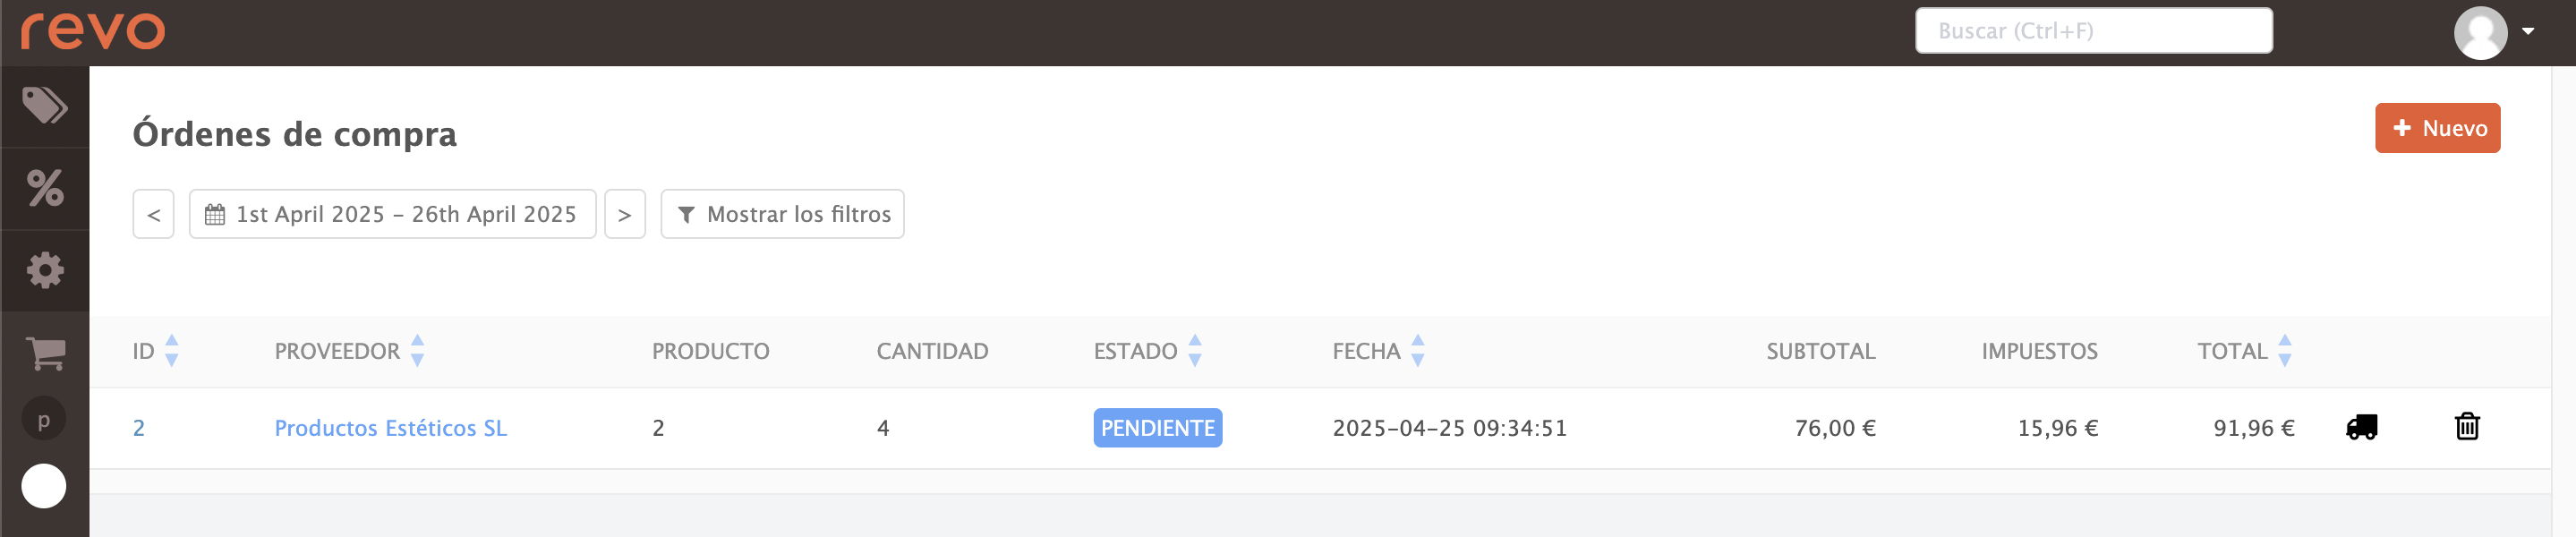
2. Click the icon for the relevant order.
3. Choose:
-
Full order:
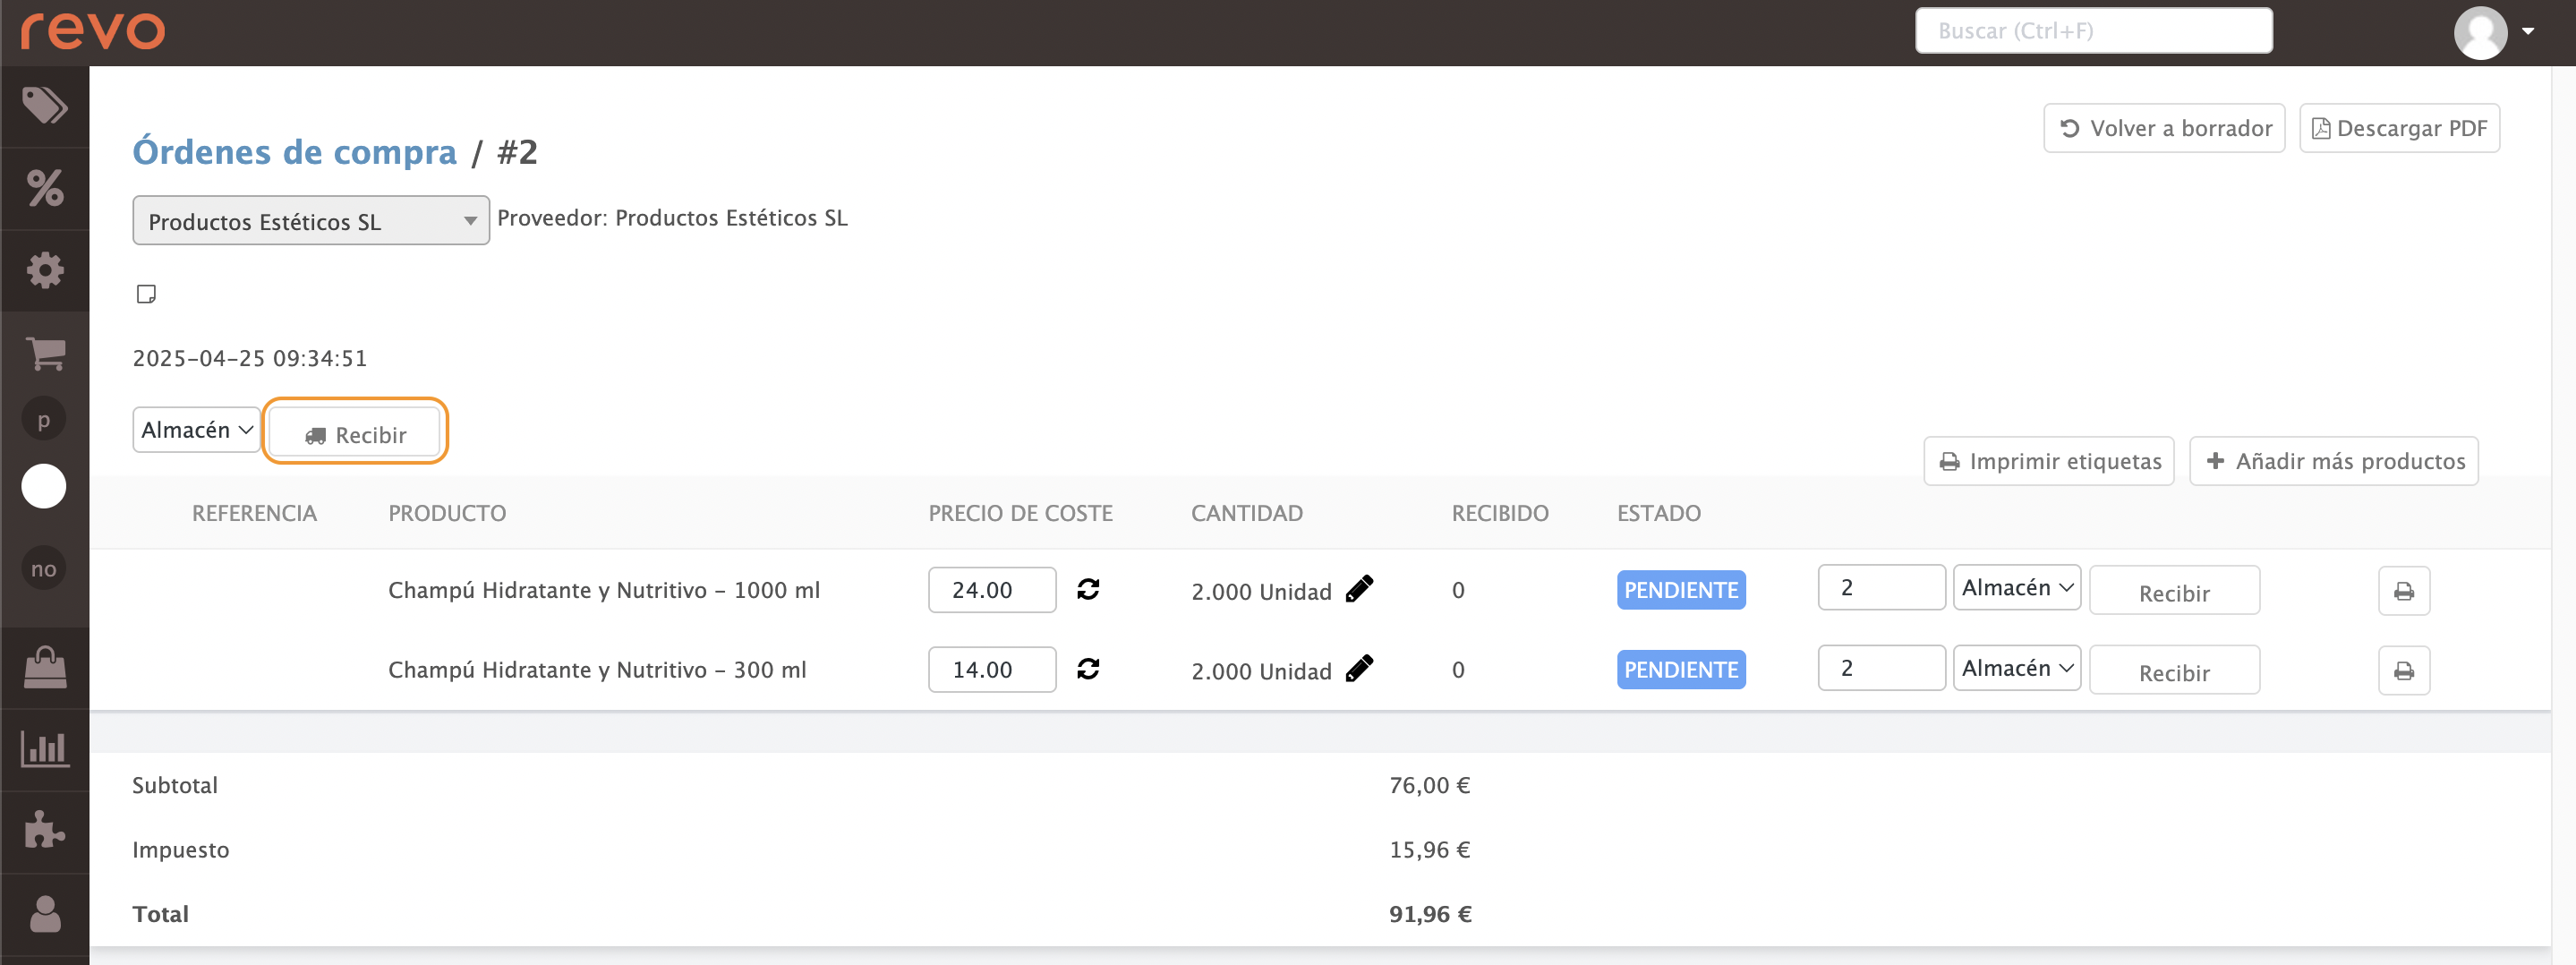
- If you have multiple warehouses, select one.
- Click Receive.
-
Partial order:
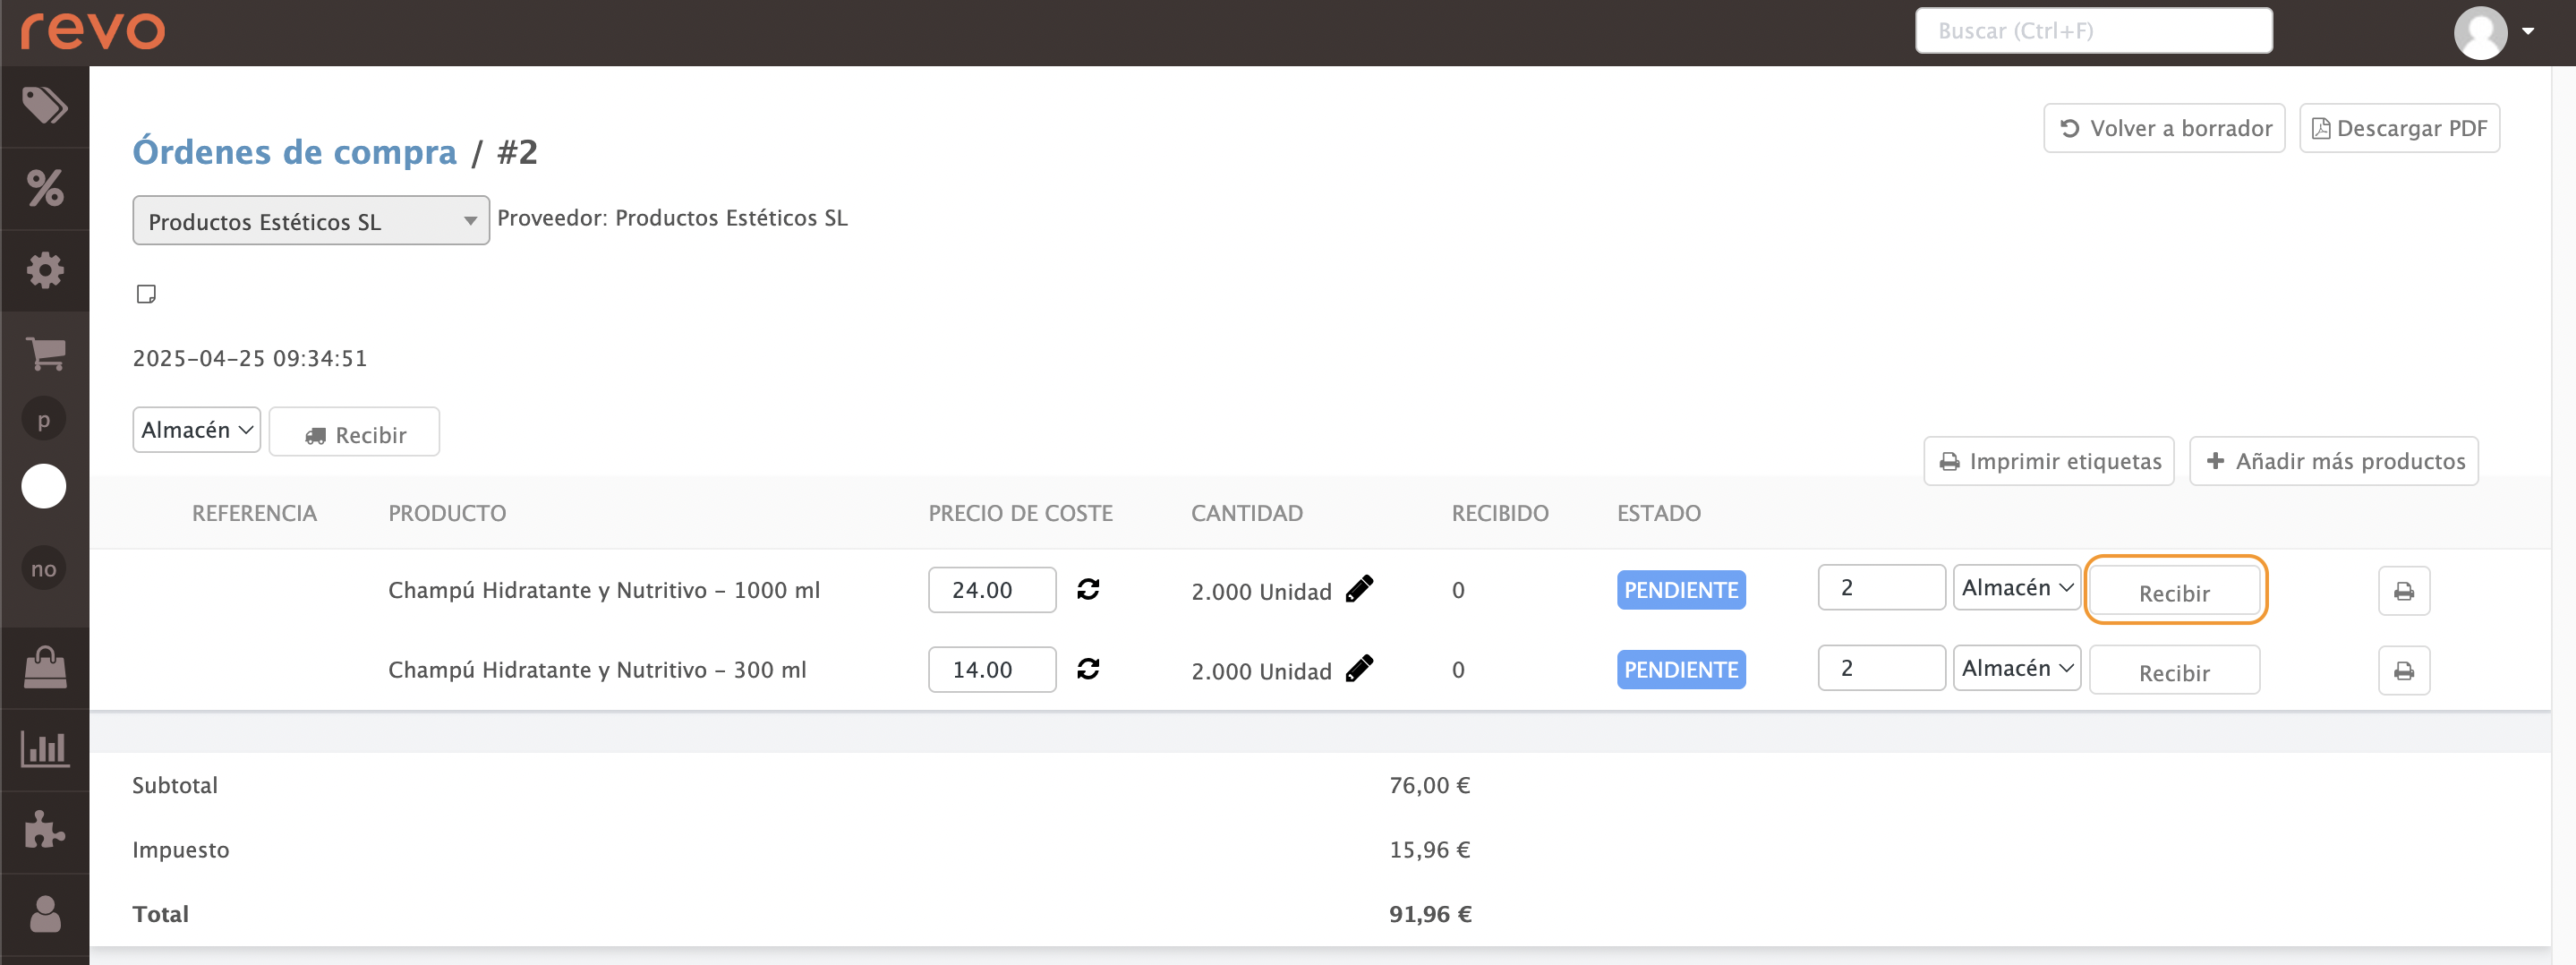
- Select the warehouse, enter the quantity received, then click Receive.
4. You can download PDF files from the top right.
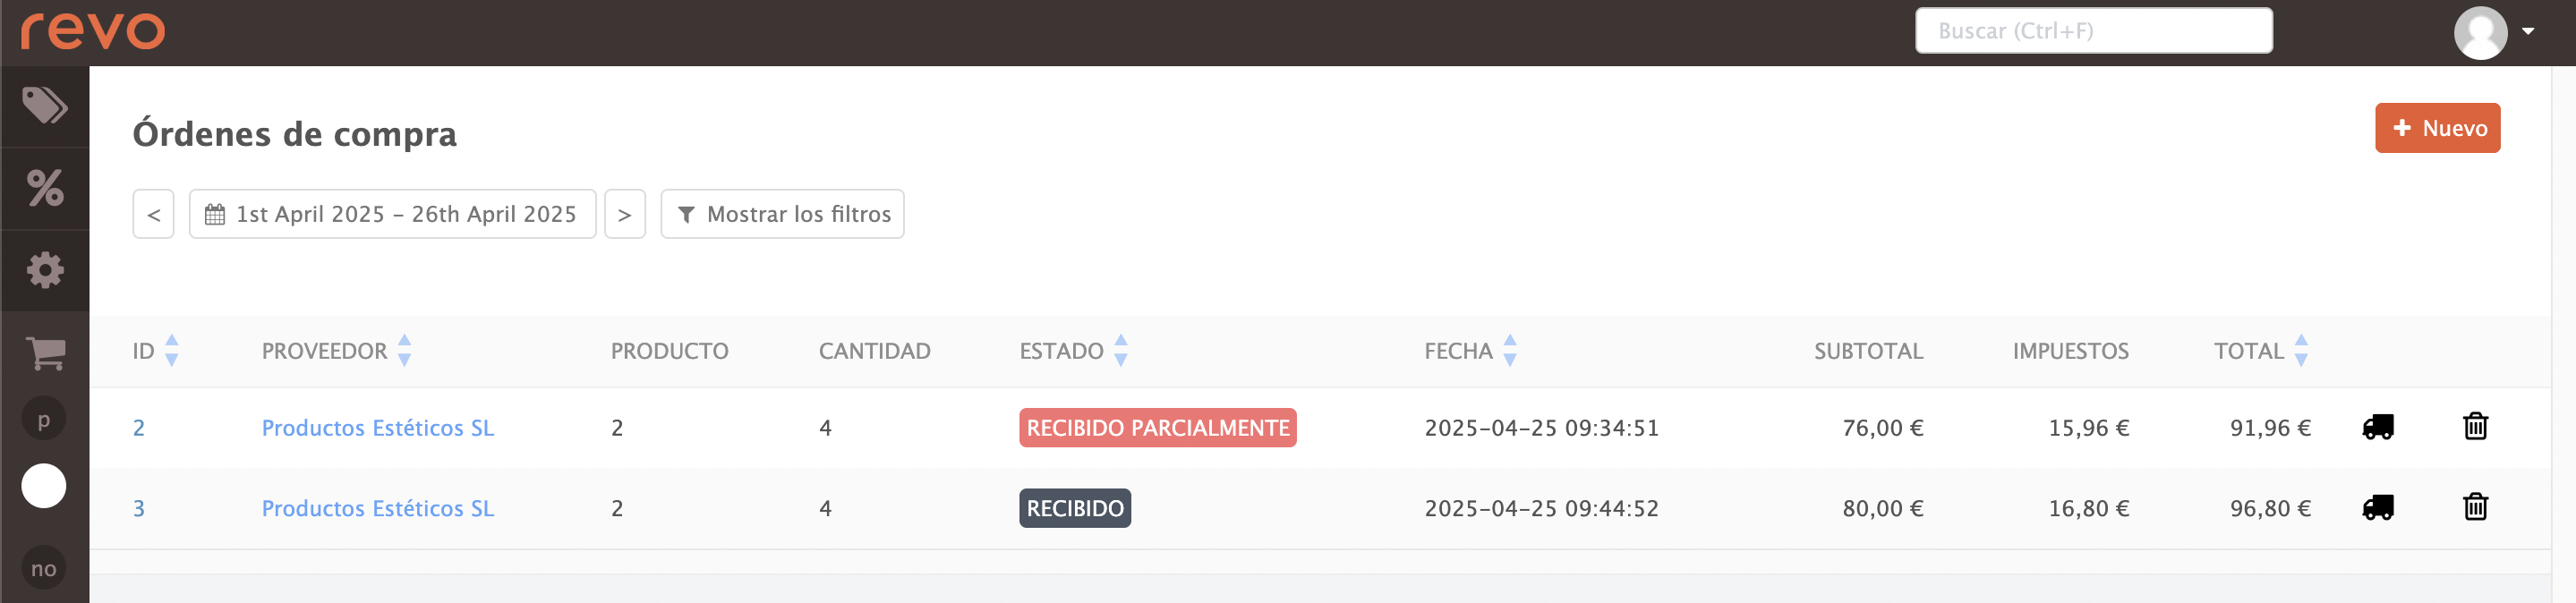
5. In PURCHASE ORDERS, the order status appears as:
- Grey: fully received.
- Red: partially received.
5. LISTS IN THE BACK OFFICE
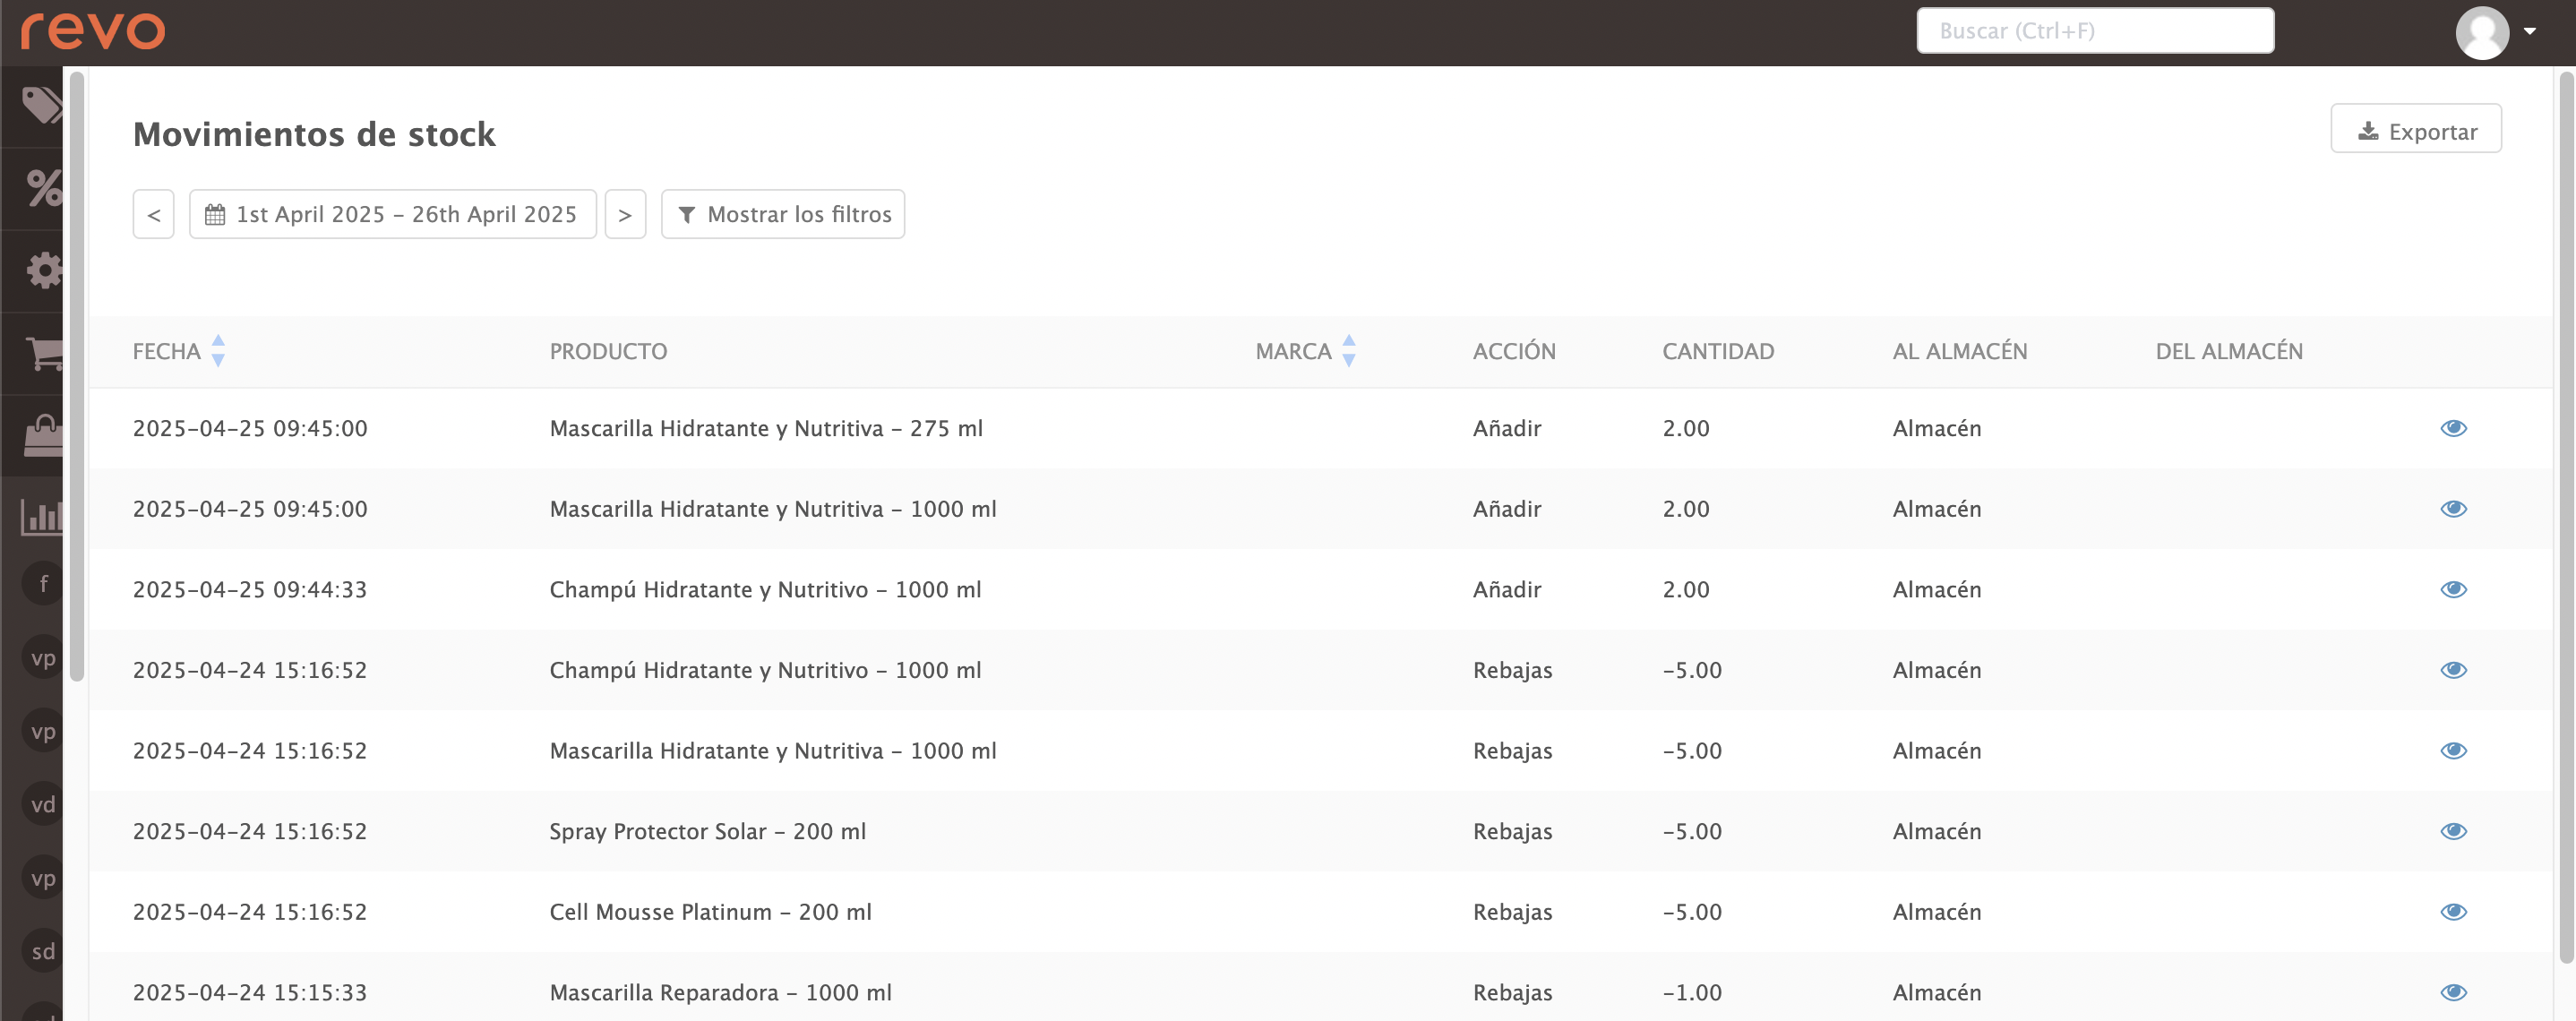
STOCK MOVEMENTS
Displays stock movements (additions, transfers between warehouses, etc.)
1. Log into the back office.
2. Go to Reports / STOCK MOVEMENTS.
3. You will see:
- Filter by date.
-
Show filters:
- By product:
- By warehouse:
And in the table:
- Date: Date and time of the entry.
- Product: Ticket number.
- Brand: Product brand.
- Action: Action performed.
- Quantity: Quantity of product.
- To warehouse: Destination warehouse.
- From warehouse: Origin warehouse.
STOCK
Shows the value of products currently in stock.
1. Log into the back office.
2. Go to Reports / STOCK.
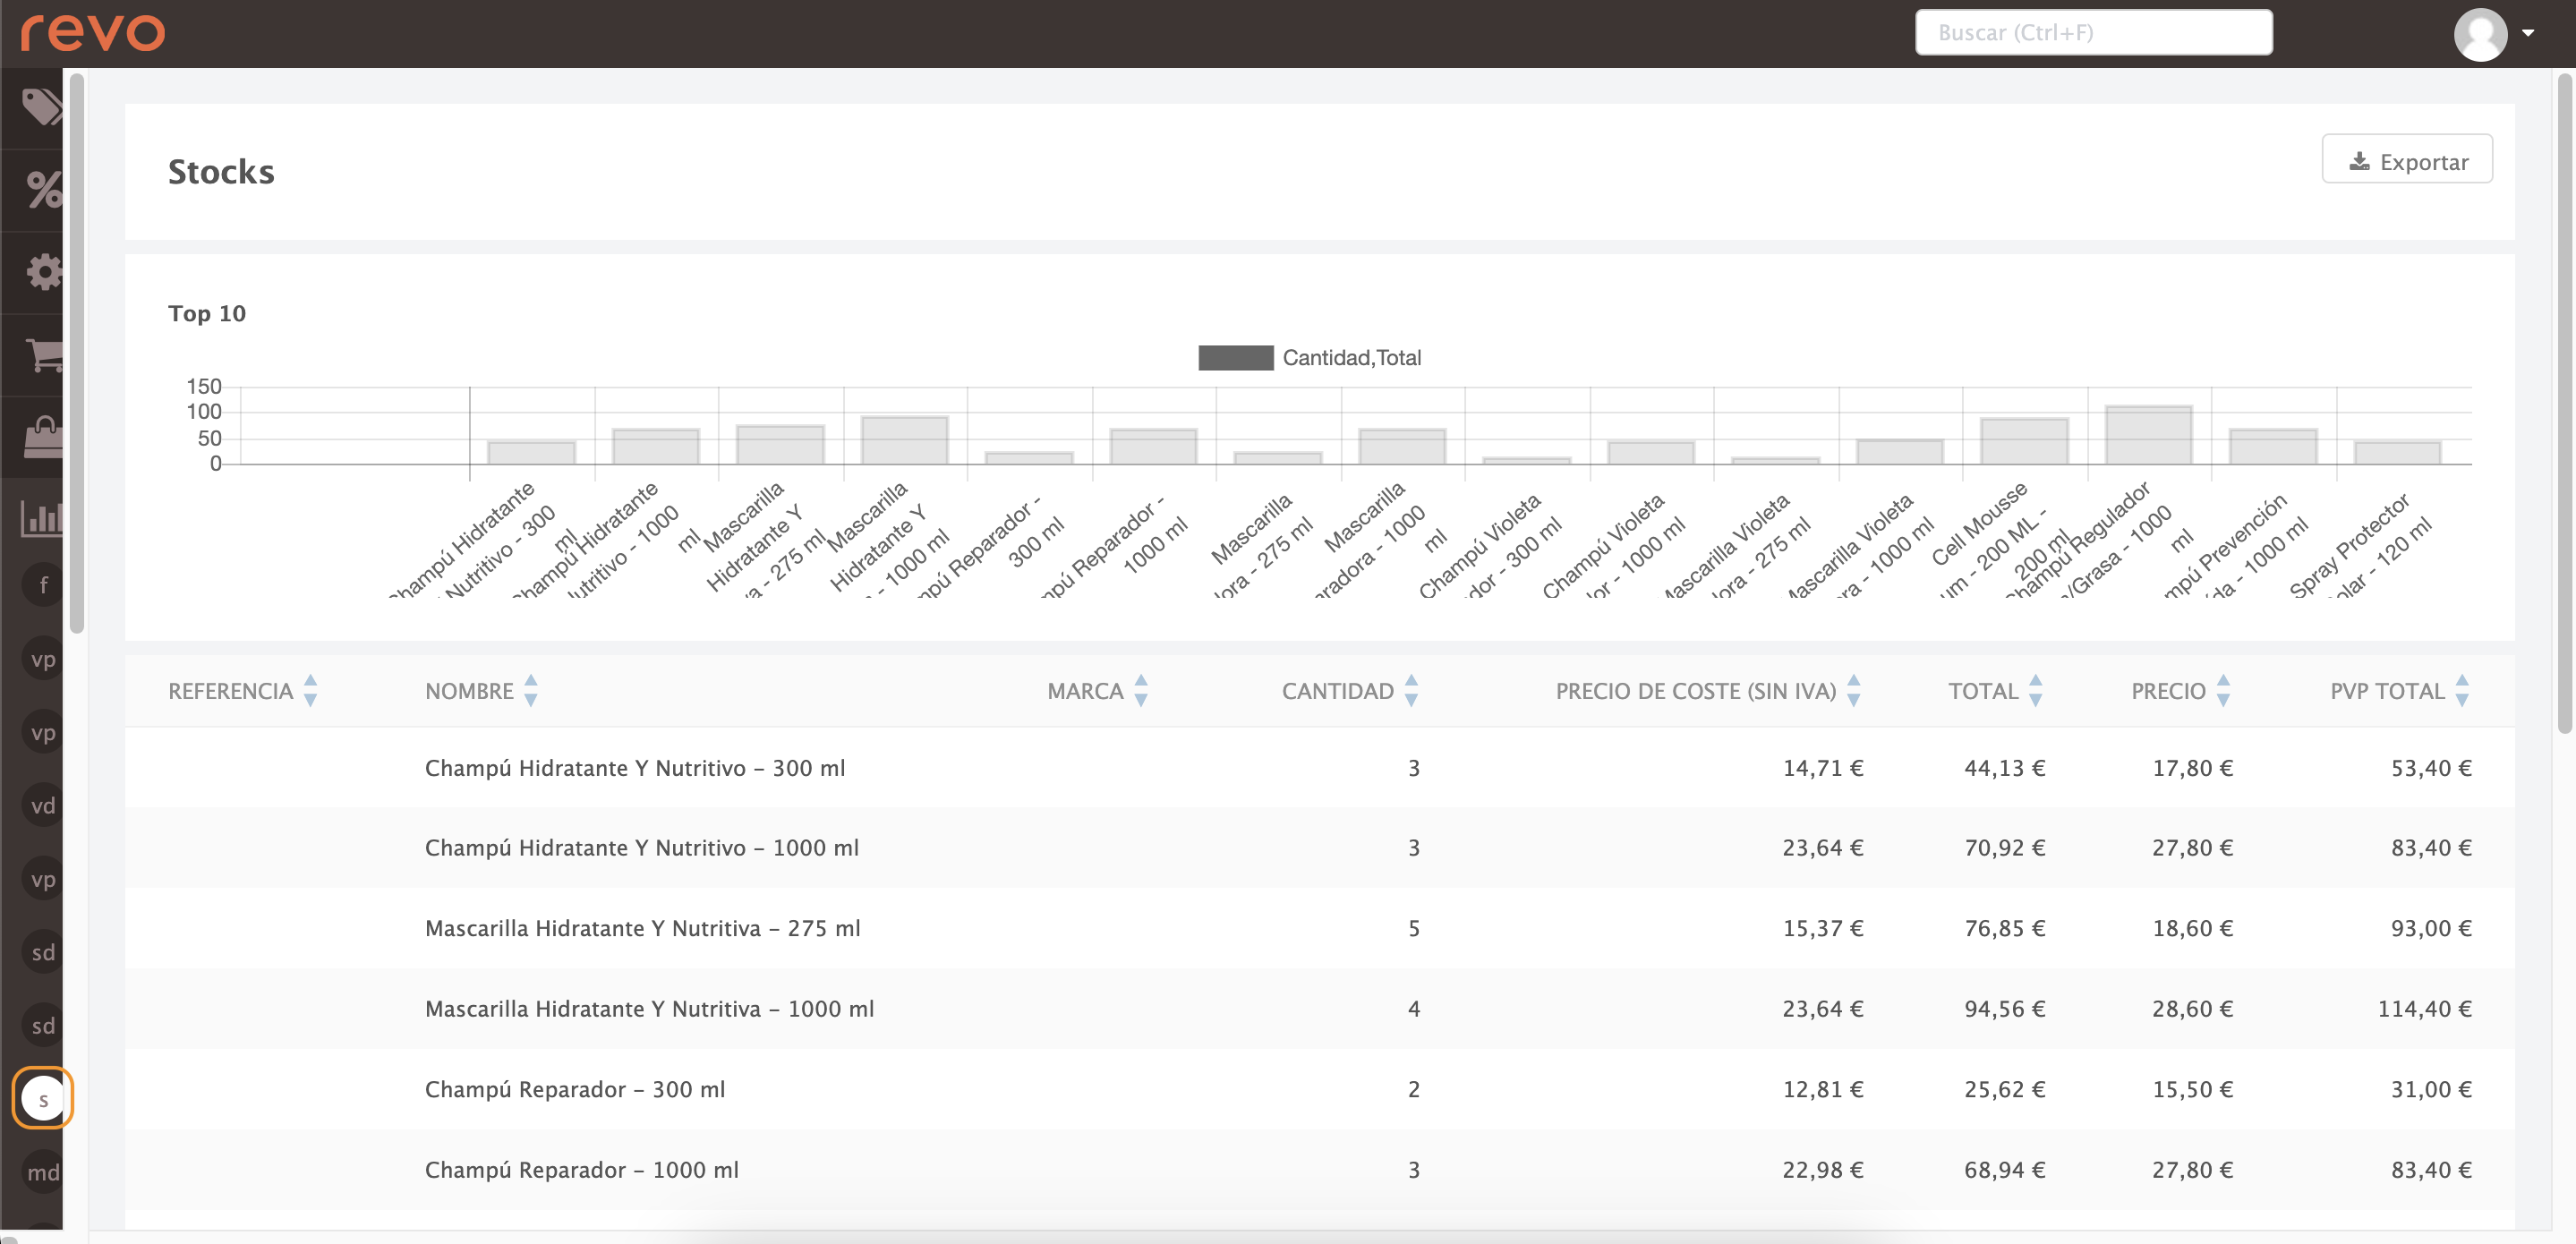
3. You will see:
- Reference: Product reference.
- Name: Product name.
- Brand: Product brand.
- Quantity: Quantity available.
- Cost Price (excl. VAT): Visible if added in the Prices tab. Learn more
- Total: Cost price x quantity.
- Price: Price including VAT.
- Total inc. VAT: Price incl. VAT x quantity.
STOCK BY CATEGORY
Stock value grouped by category.
1. Log into the back office.
2. Go to Reports / STOCK BY CATEGORY.
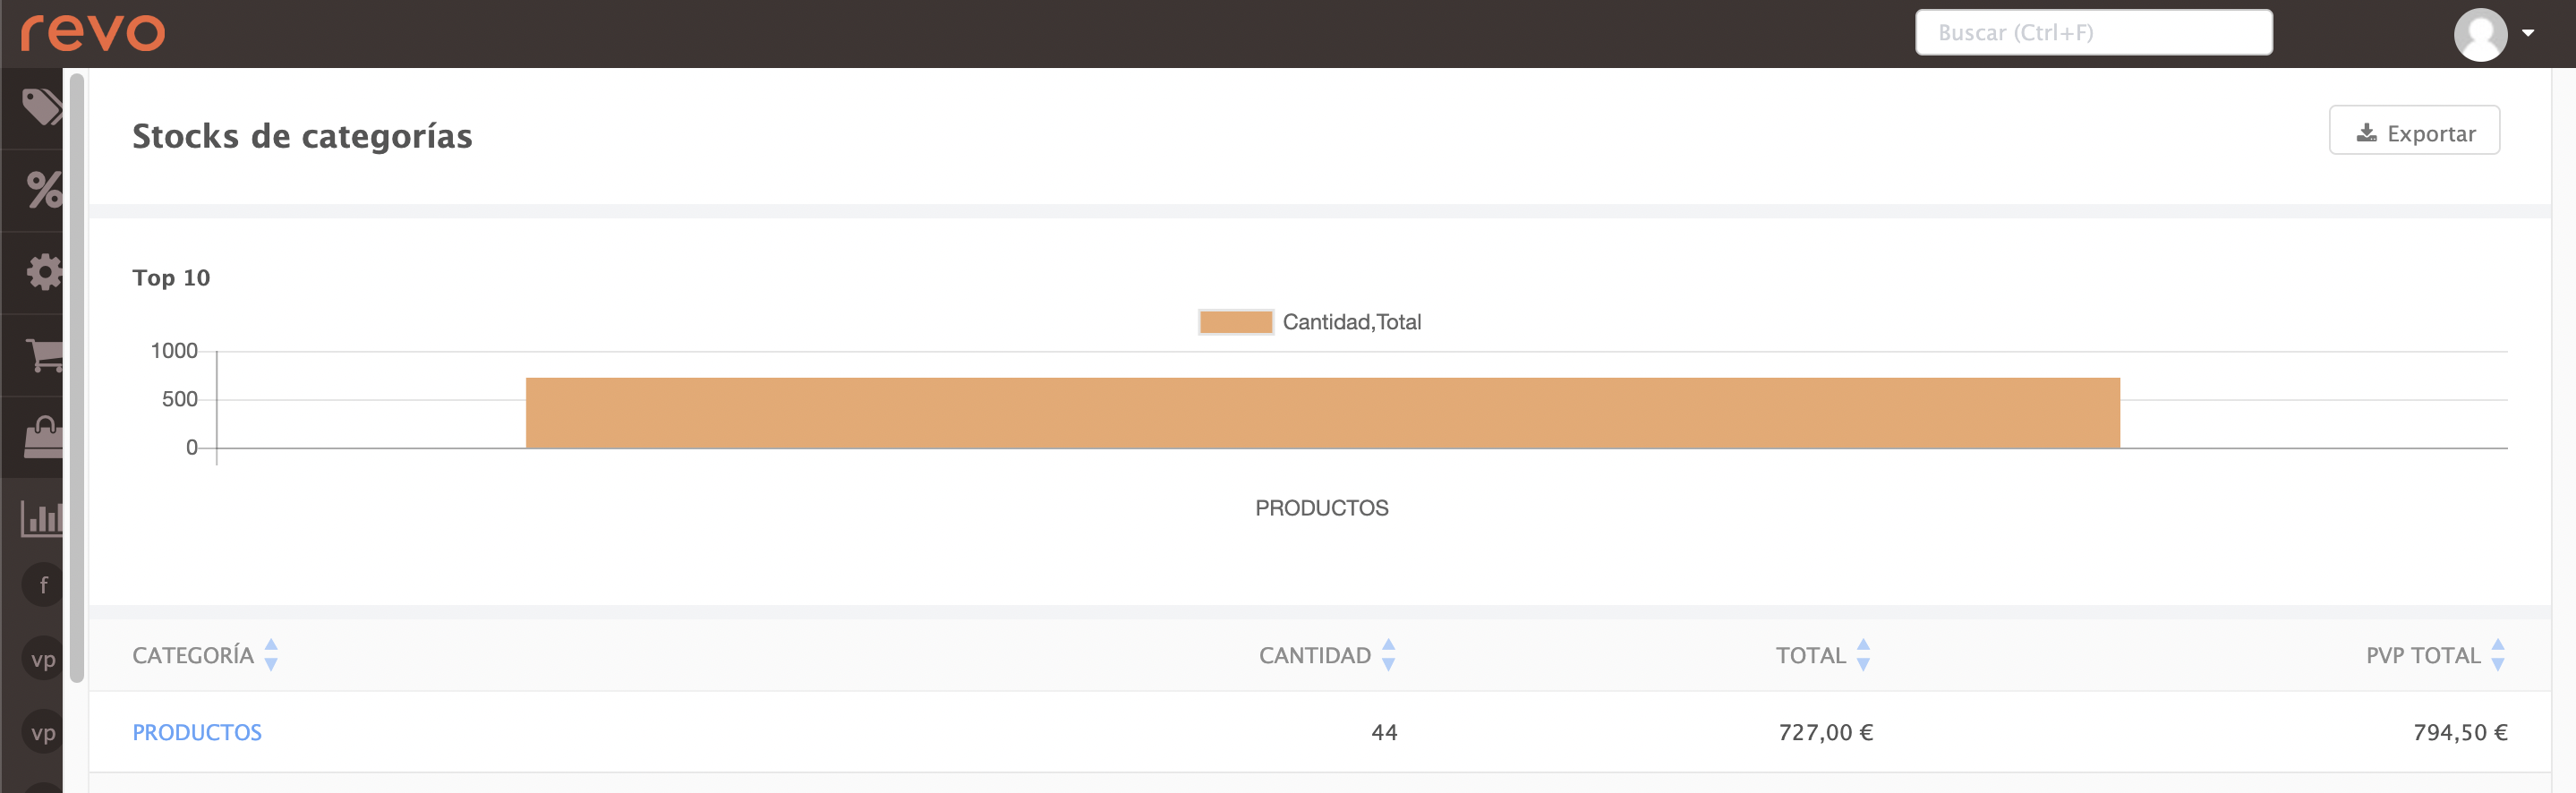
3. You will see:
- Category: Category name.
- Quantity: Quantity in stock.
- Total: Cost price x quantity.
- Total inc. VAT: Price incl. VAT x quantity.
STOCK BY GROUP
Same as above, but grouped by product group.
1. Log into the back office.
2. Go to Reports / STOCK BY GROUP.
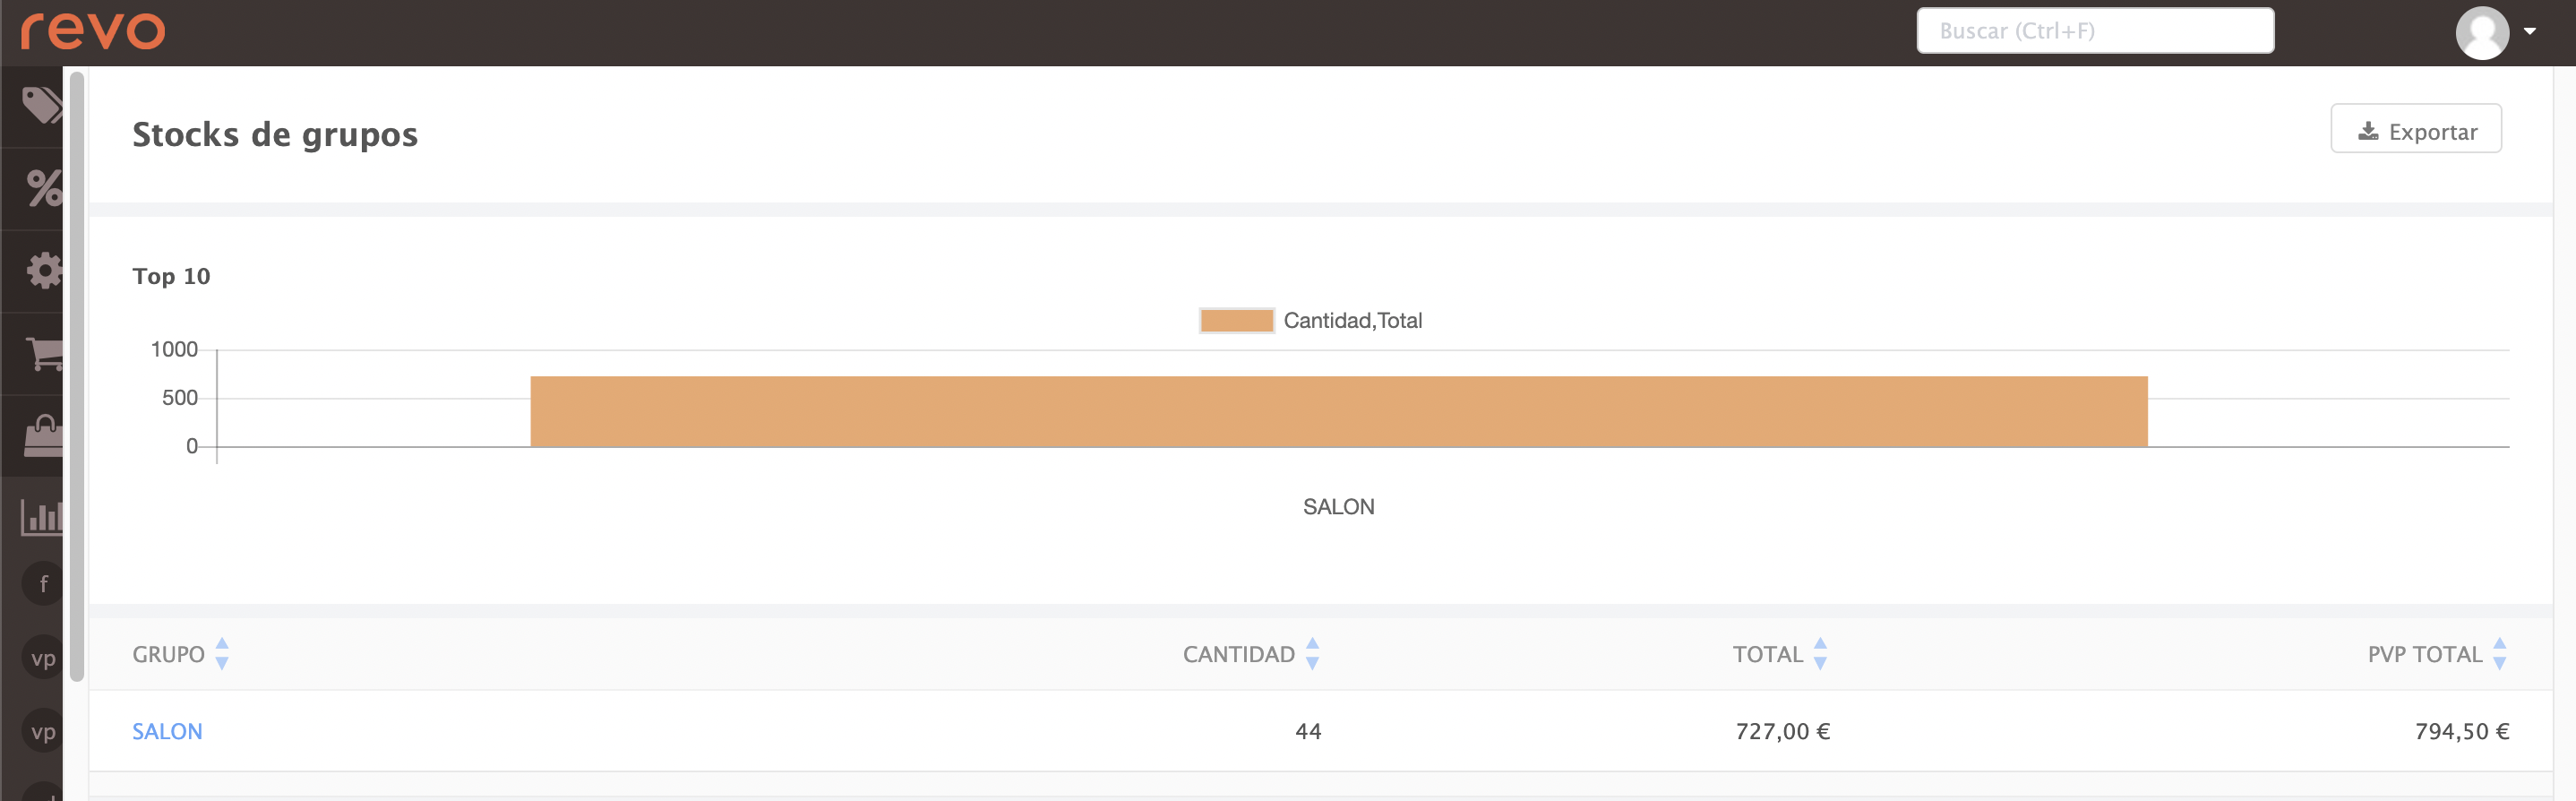
3. You will see:
- Group: Name of the group.
- Quantity: Quantity of the product in the group.
- Total: Cost price x quantity.
- Total inc. VAT: Price incl. VAT x quantity.