Creating and managing an order with Revo XEF is very simple. Whether you're working with fixed or virtual tables, the process is the same. The difference is that when you close a virtual table, it will disappear because it is temporary, while a fixed table, which always appears on the table plan, will remain available for reuse.
Procedure:
1. Tap on a table.
2. A screen will appear asking for the number of diners.
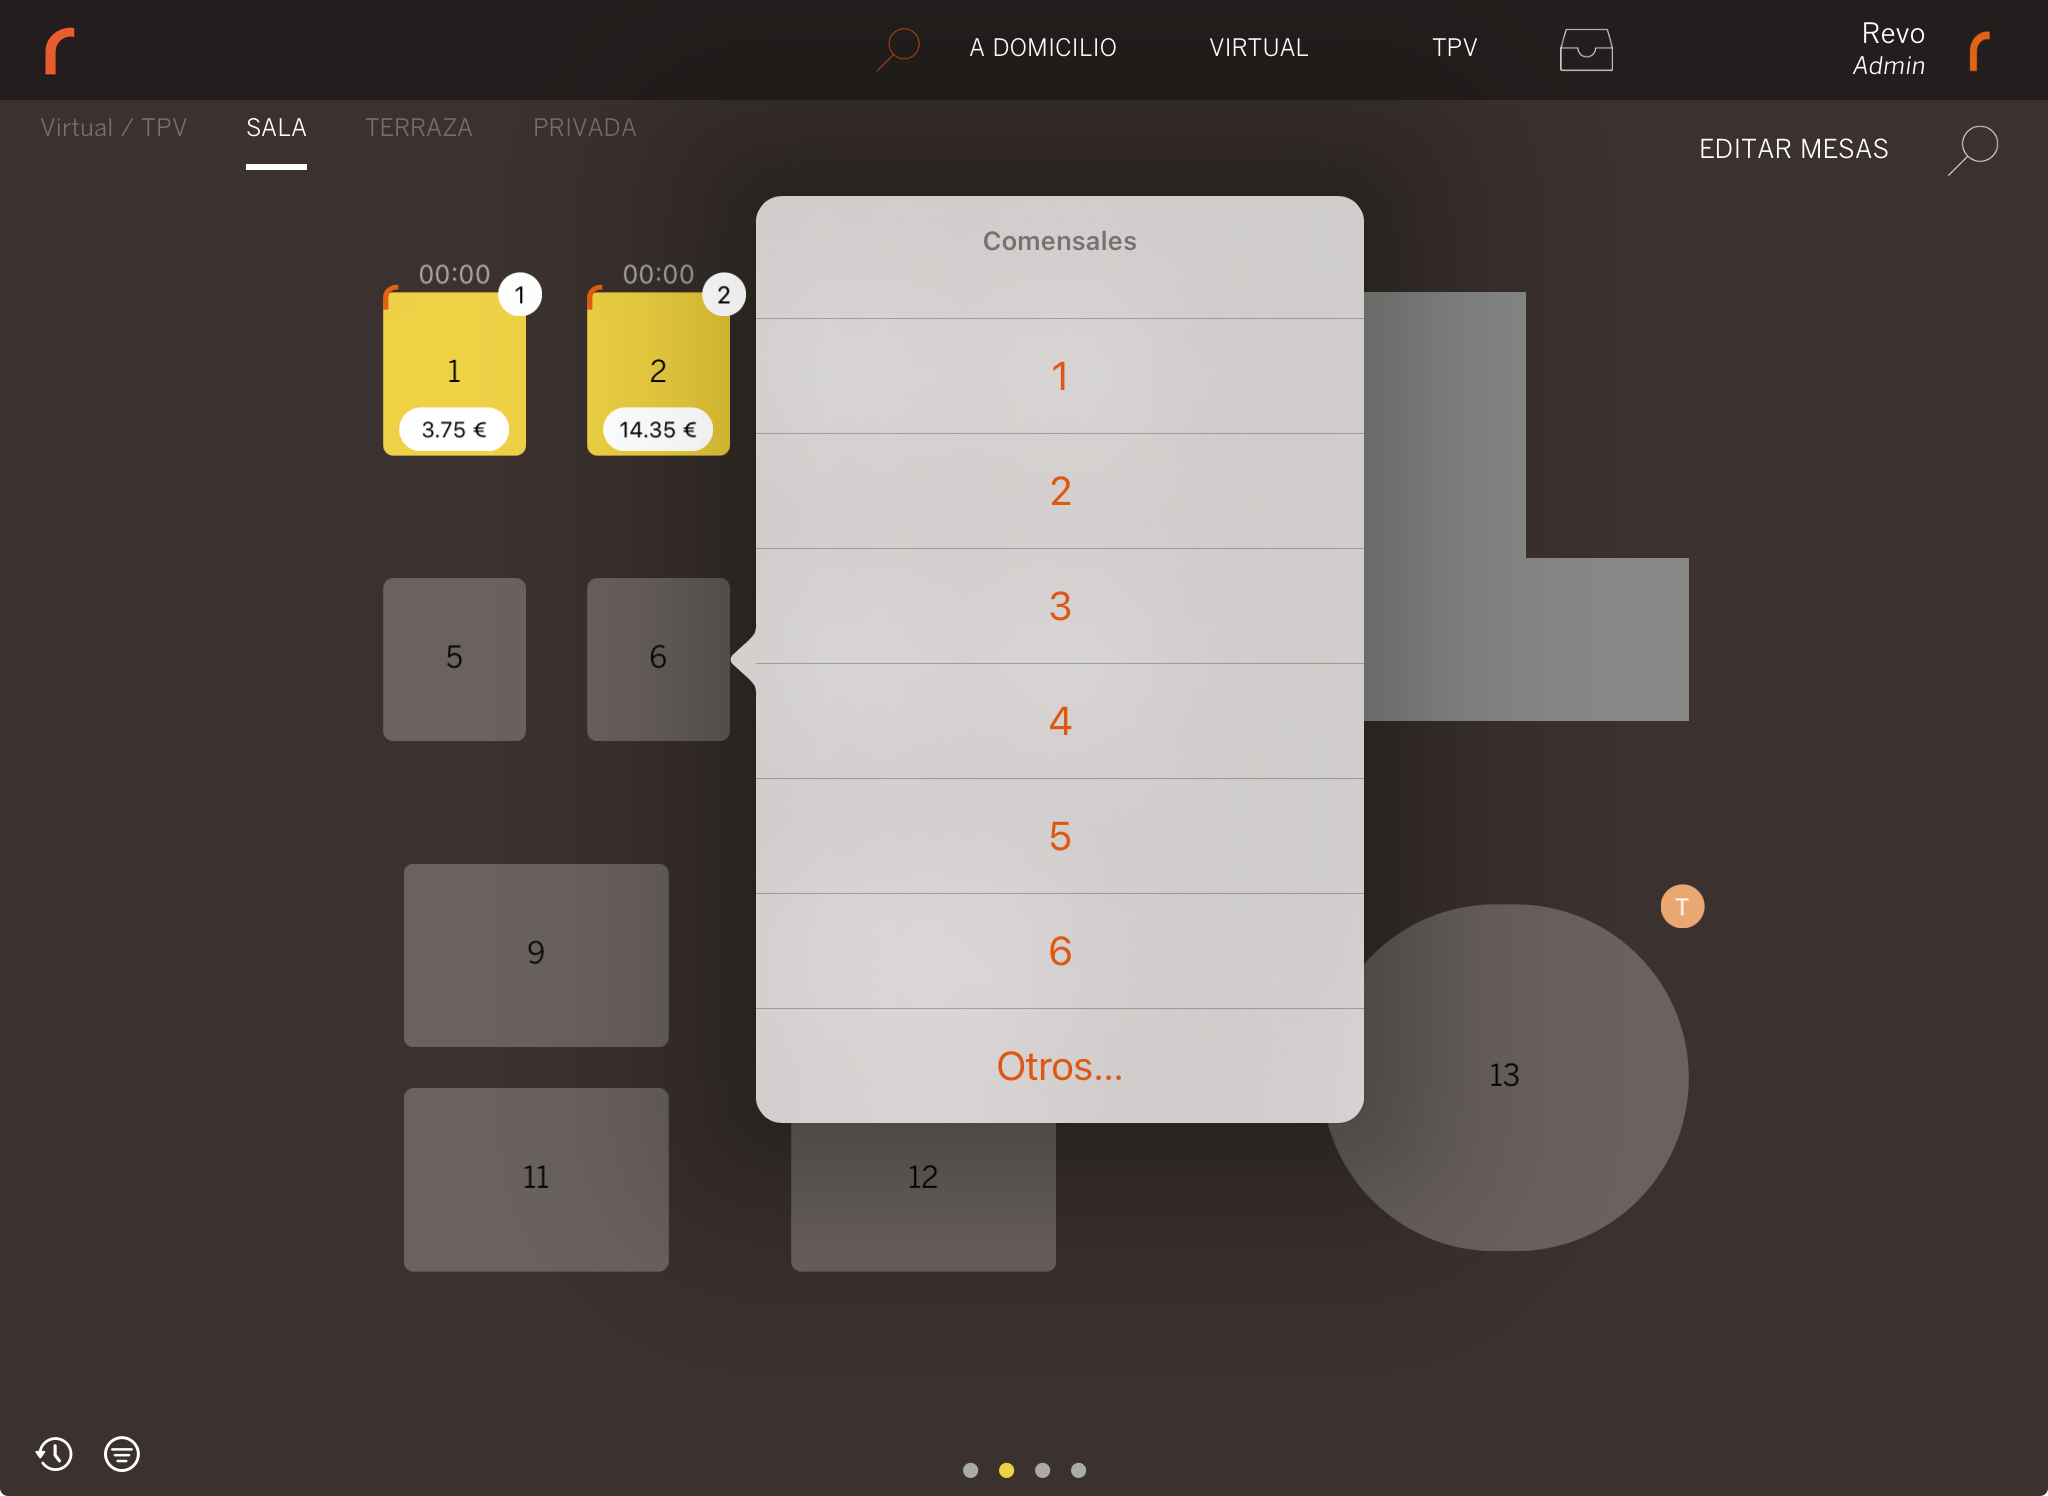
This screen is optional. If you don't need to control the number of diners, you can disable it in the Order configuration section of the back-office.
3. Once the number of diners is selected, you'll enter the order screen.
4. Use your business's dish orders to edit the order. It’s like writing down drinks and adding all the drinks, writing down starters and adding all the starters, and so on.
5. Send the order to the kitchen or save it without sending.
PRACTICAL EXAMPLE
Let’s create an order with drinks, starters, and mains.
1. Select the dish order for drinks and then the corresponding products.
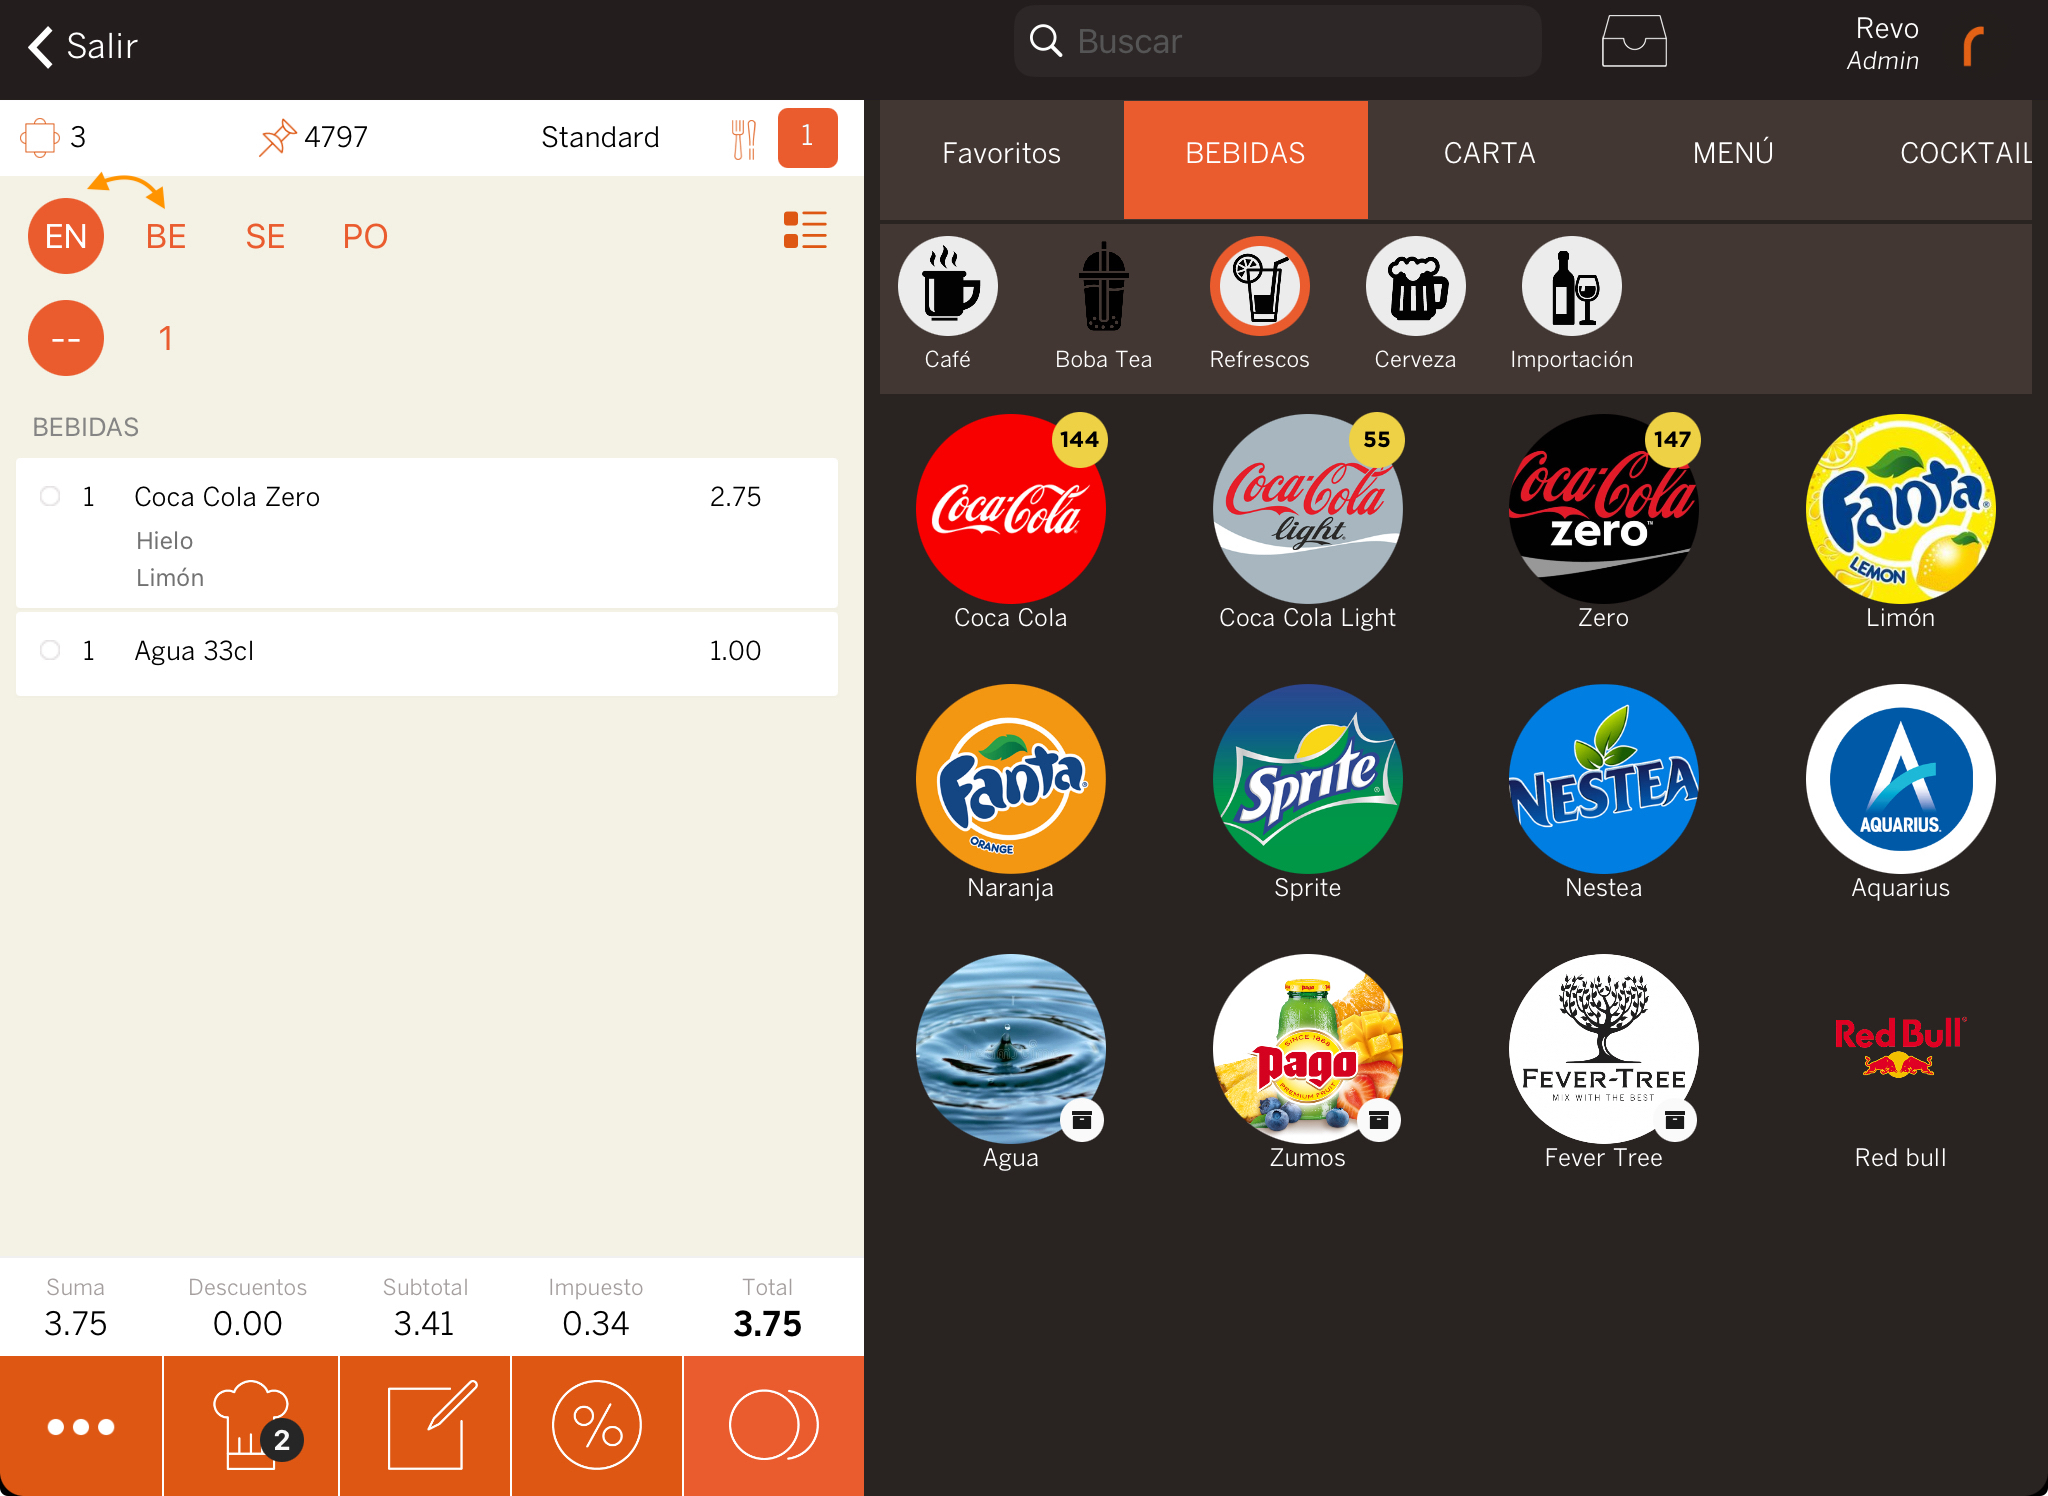
In this case, the default dish order is EN (Starters), but the drinks are still added under the Drinks dish order because the Drinks category has this set as its default dish order. This option can be configured in the categories and helps speed up order creation.
2. Next, select EN (Starters) and add the corresponding products.
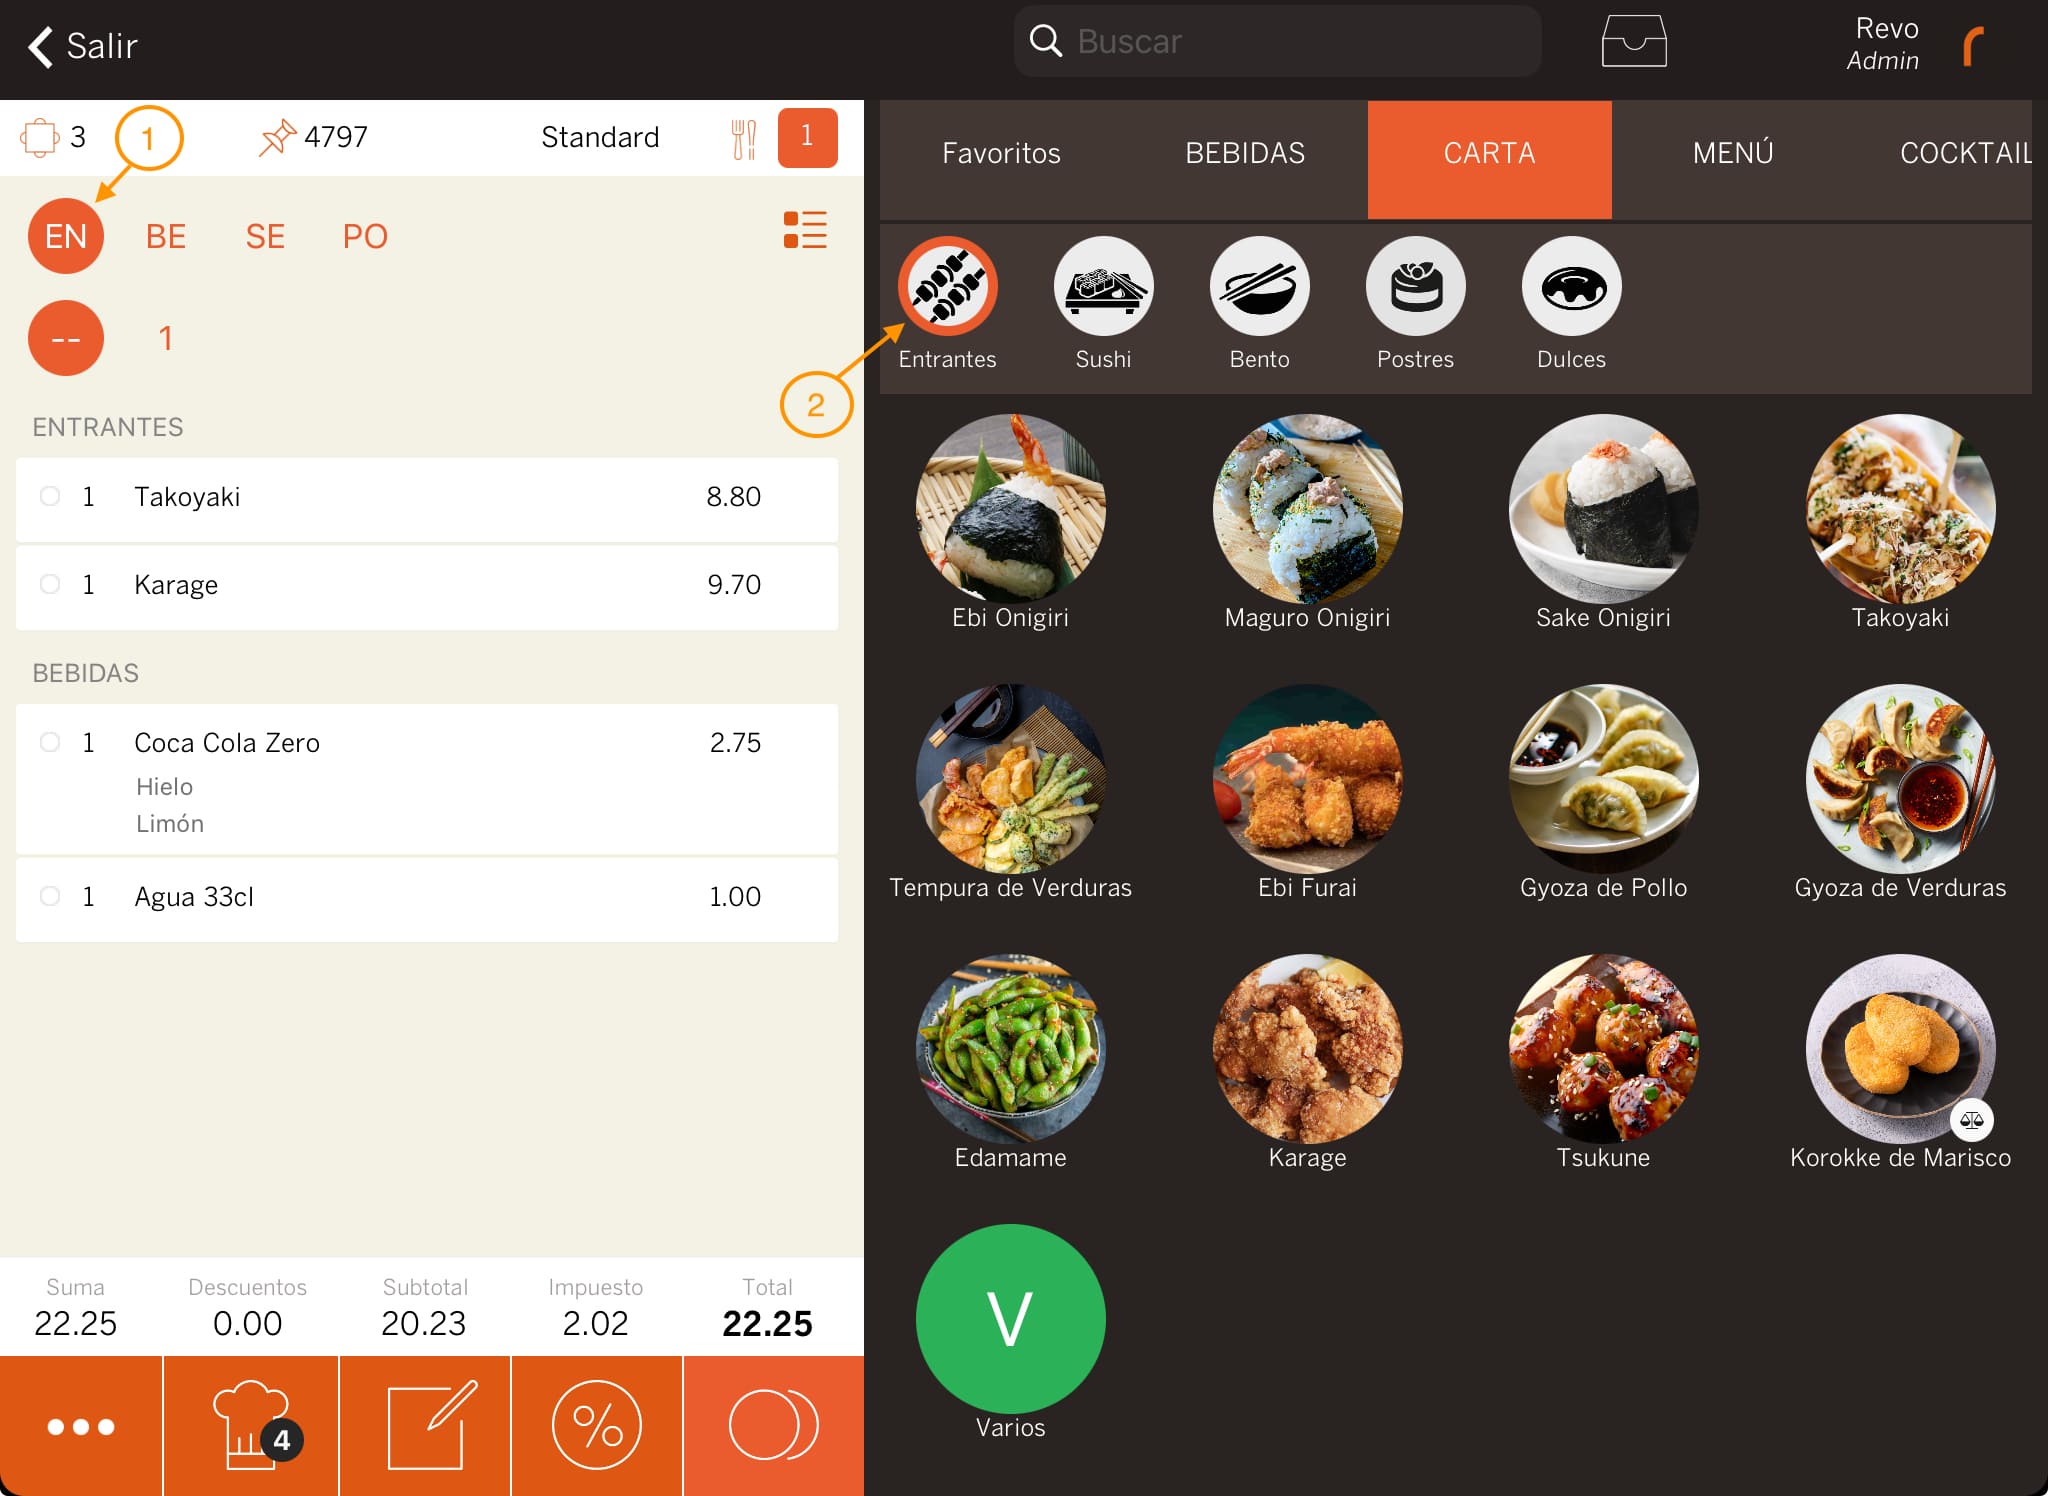
- Select the dish order.
- Add the products.
3. After that, select SE (Mains) and add the corresponding products.
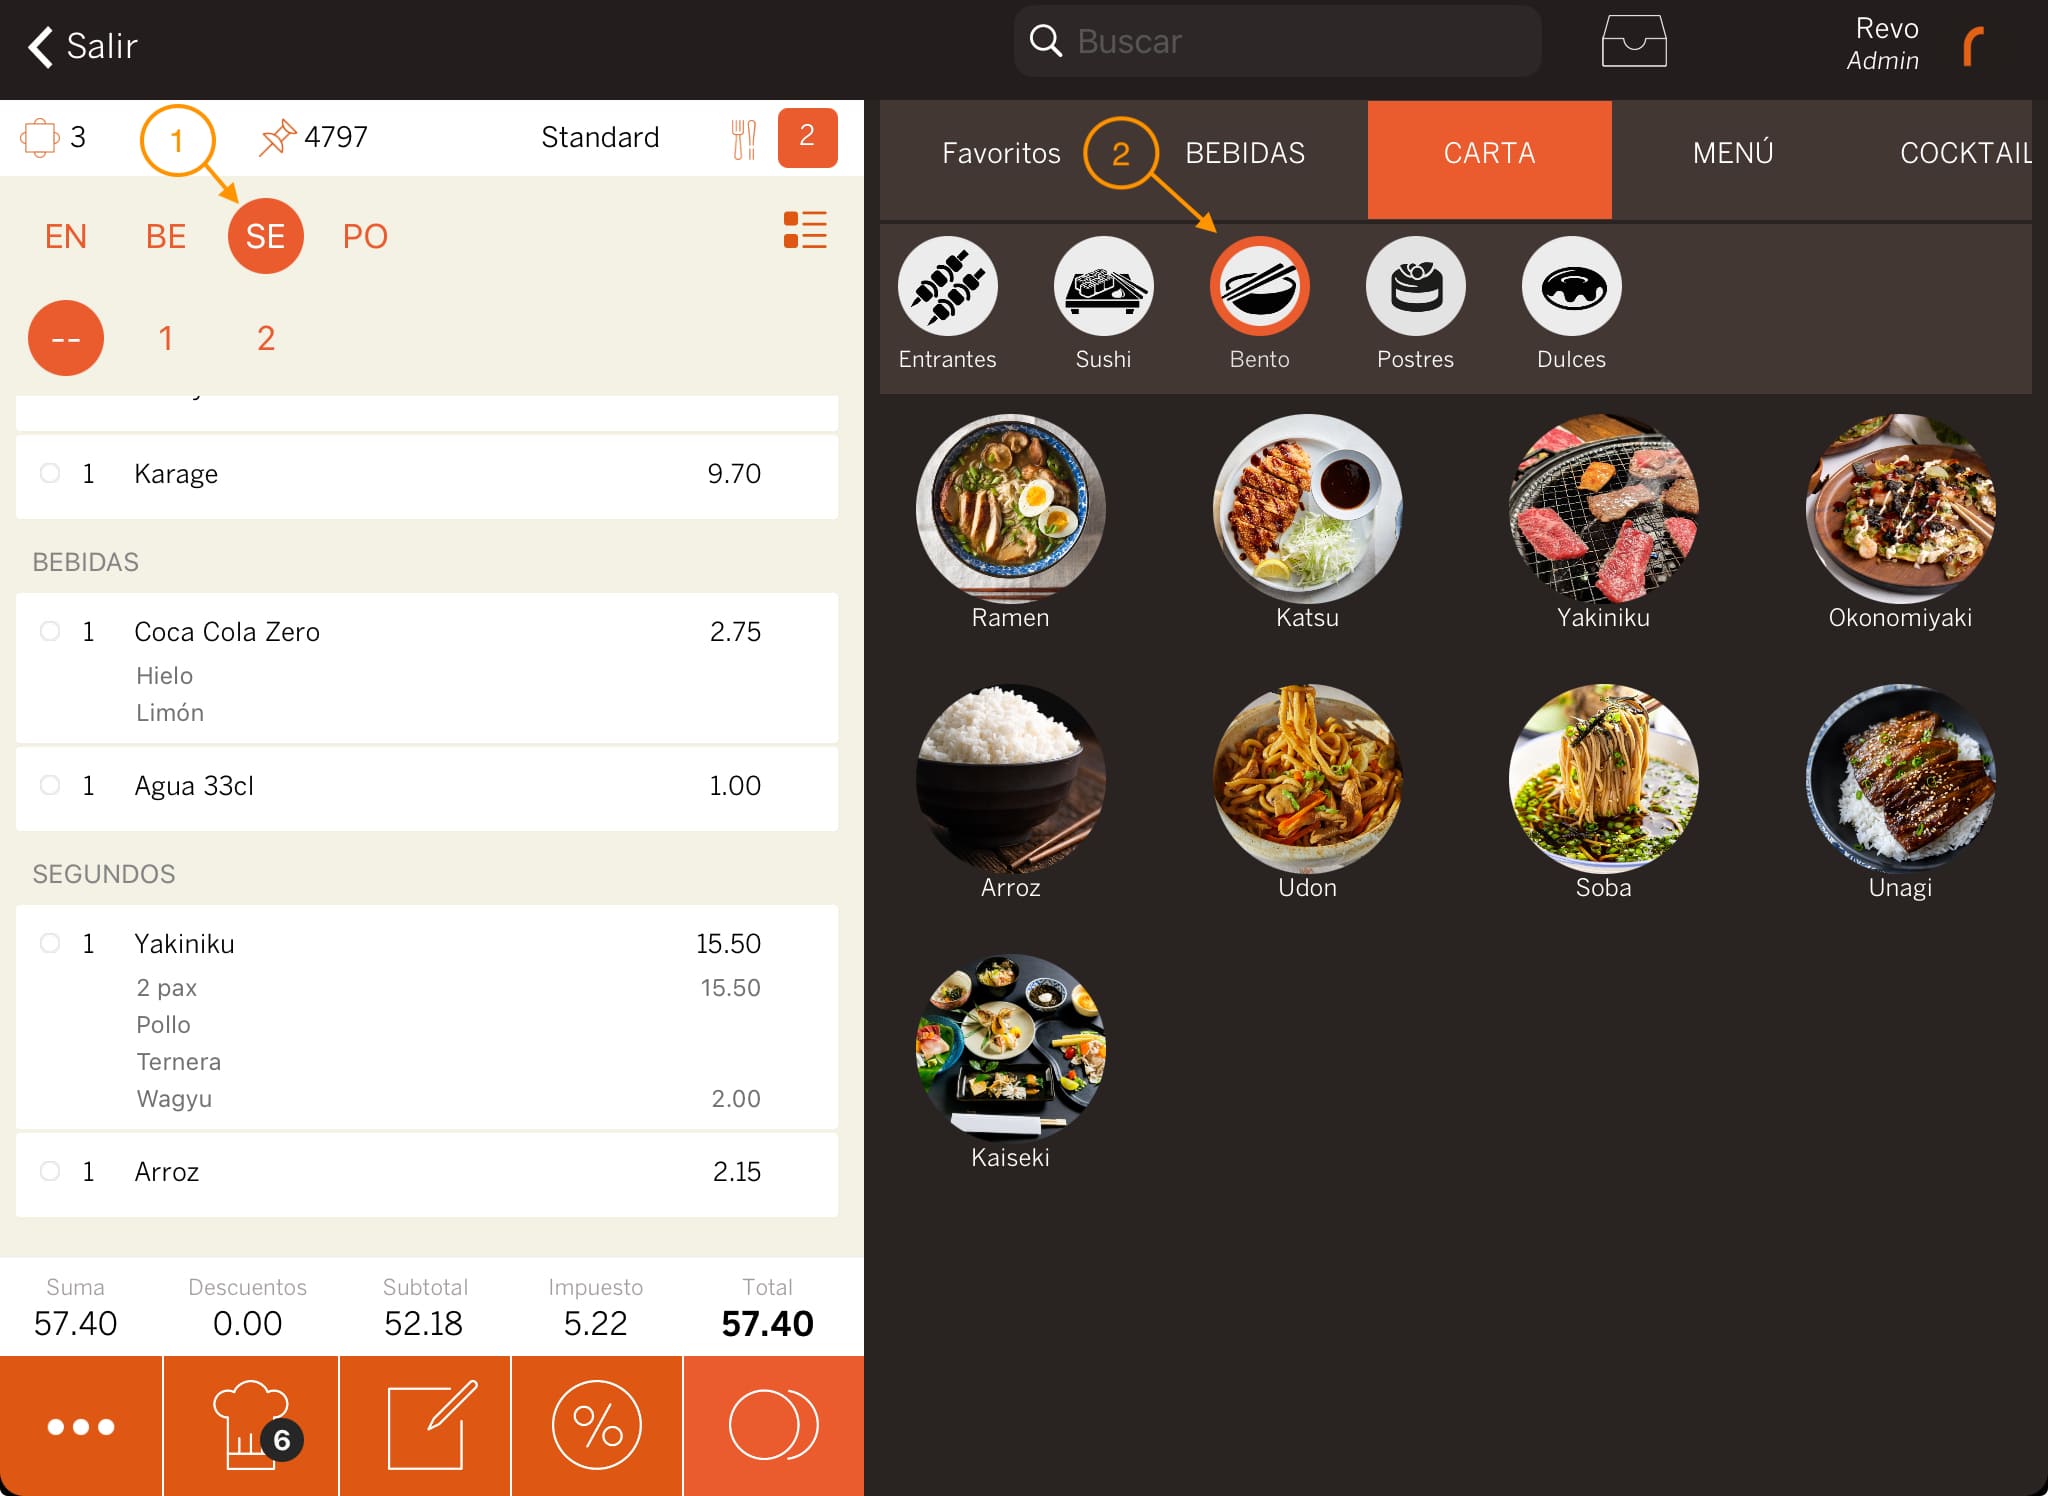
- Select the dish order.
- Add the products.
4. Finally, send the order to the kitchen or save it without sending.
-
With this button, you send the order to the kitchen to start preparing the food and serving the drinks. The number indicates how many products are pending to be sent.
-
With this button, you save the order without sending it to the kitchen. For example, you are waiting for another diner, but want to save the changes.

