1. HOW TO USE PRESENCE IN THE REVO XEF APP 2. PRESENCE REPORT 3. PRESENCE TEXTS
Presence is a tool included in Revo XEF to record the clock-in and clock-out times of your employees' work.
To do this, you need to activate presence control from COMPANY so that the option appears in the XEF app.
To record your presence, you need to have a user created in the back-office. To manage your presence, you must use your pin code.
1. HOW TO USE PRESENCE IN THE REVO XEF APP
RECORDING ENTRY
When you start your shift and arrive at work, follow these steps:
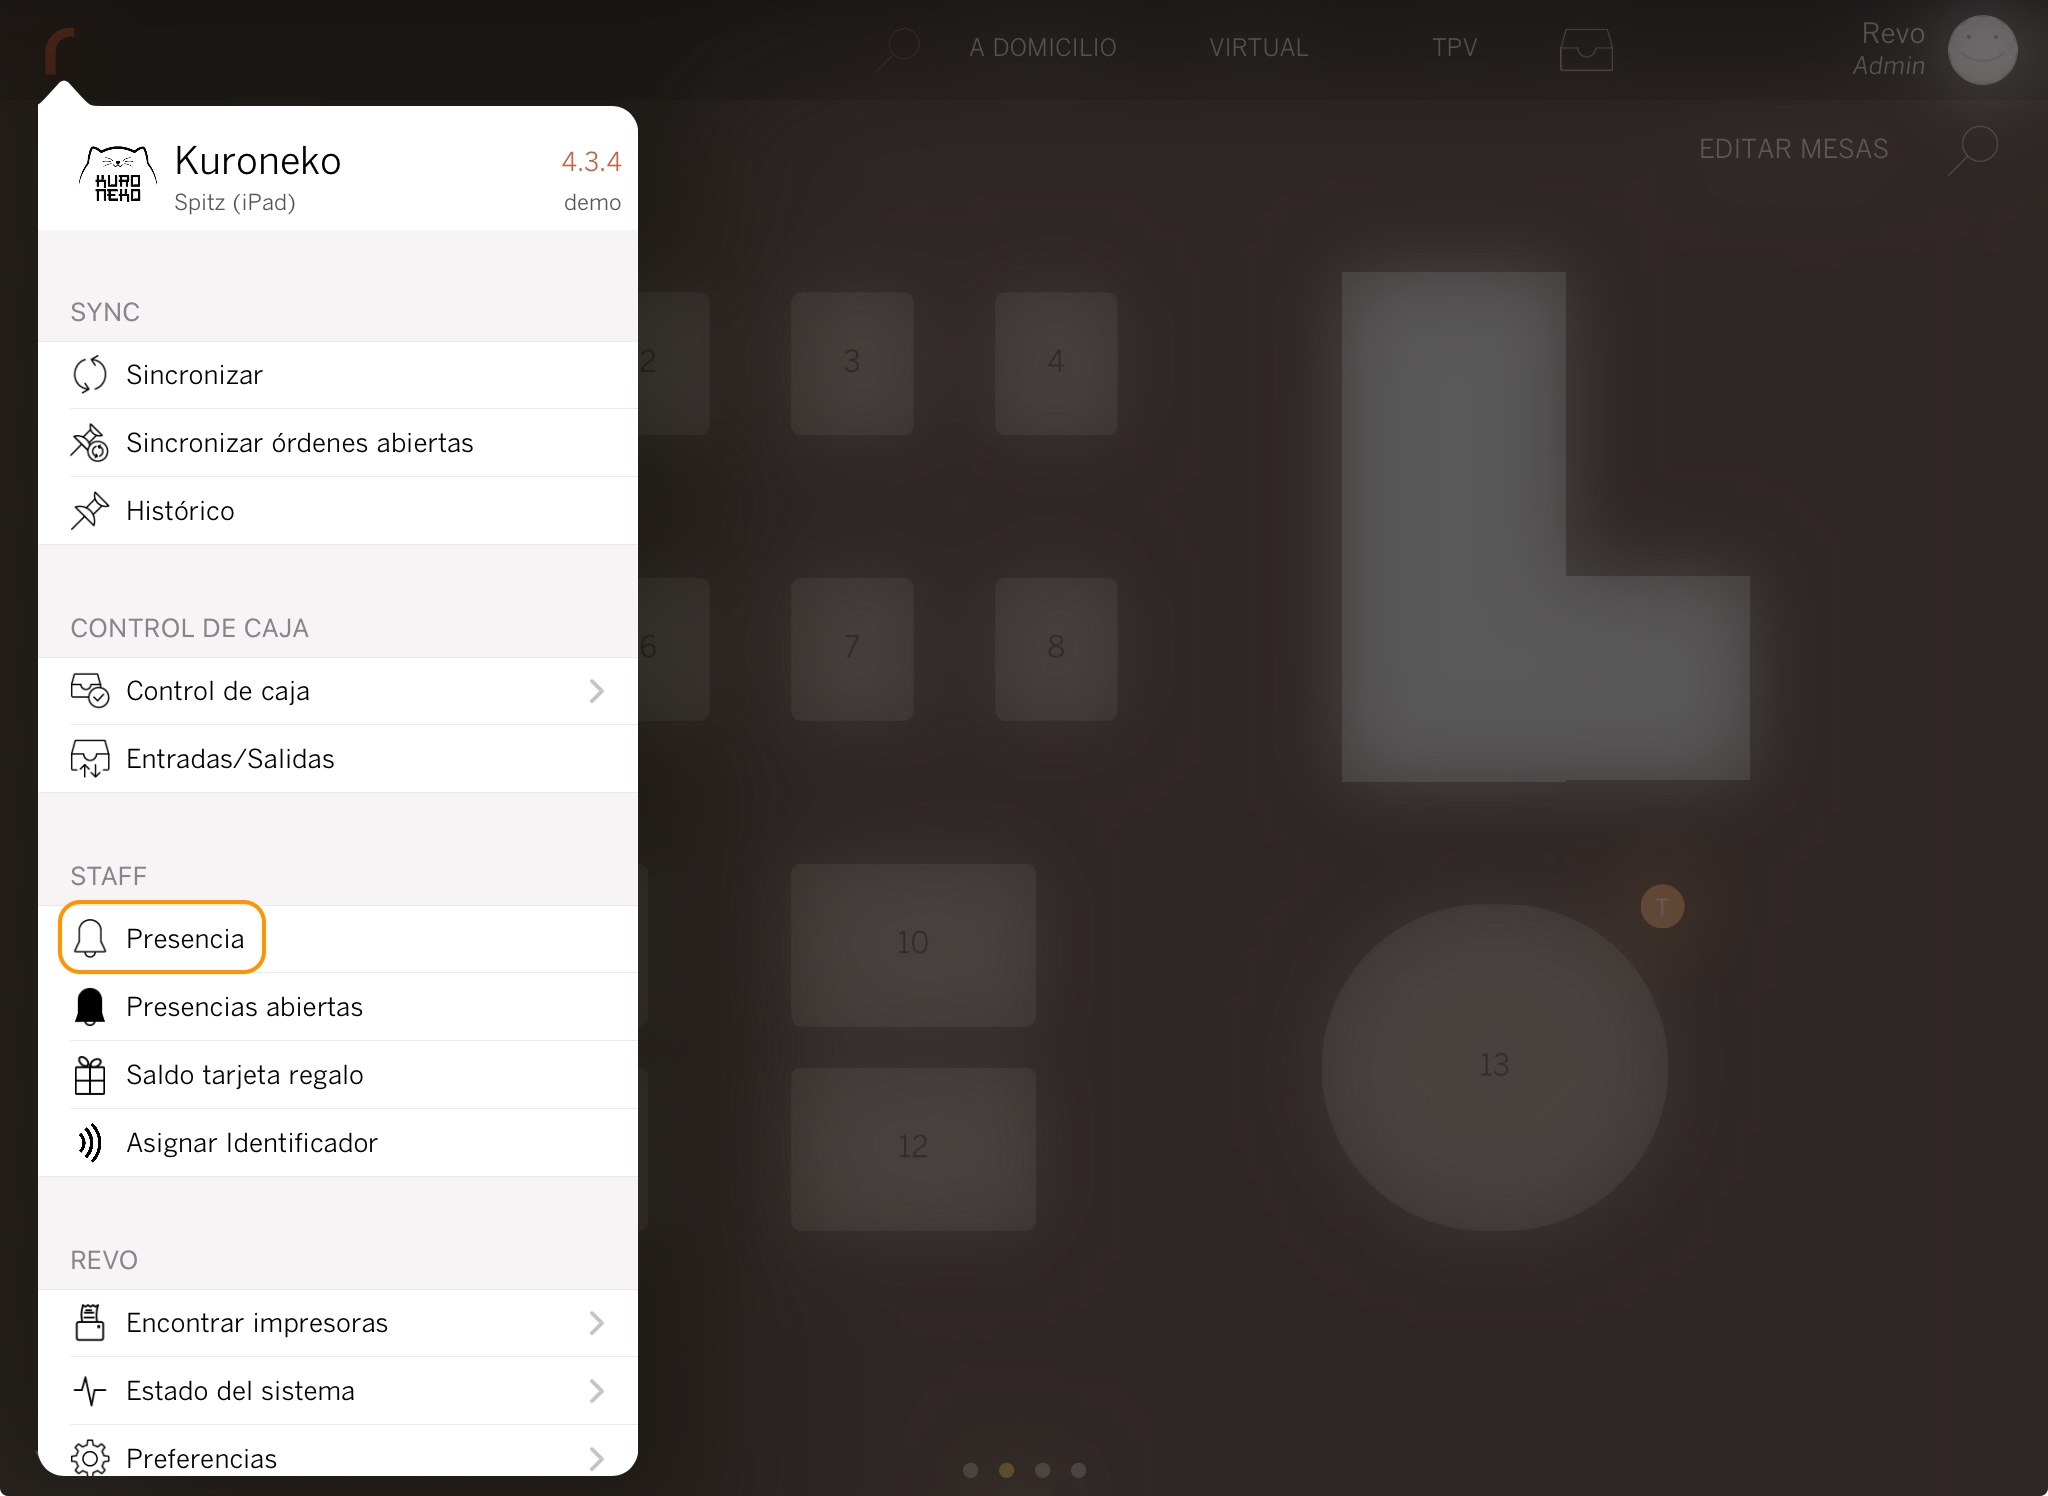
1. Open the Revo XEF app.
2. Go to the REVO menu r.
3. Select Presence.
4. Enter your pin code, and you will see the message: Welcome back, 'employee name'.
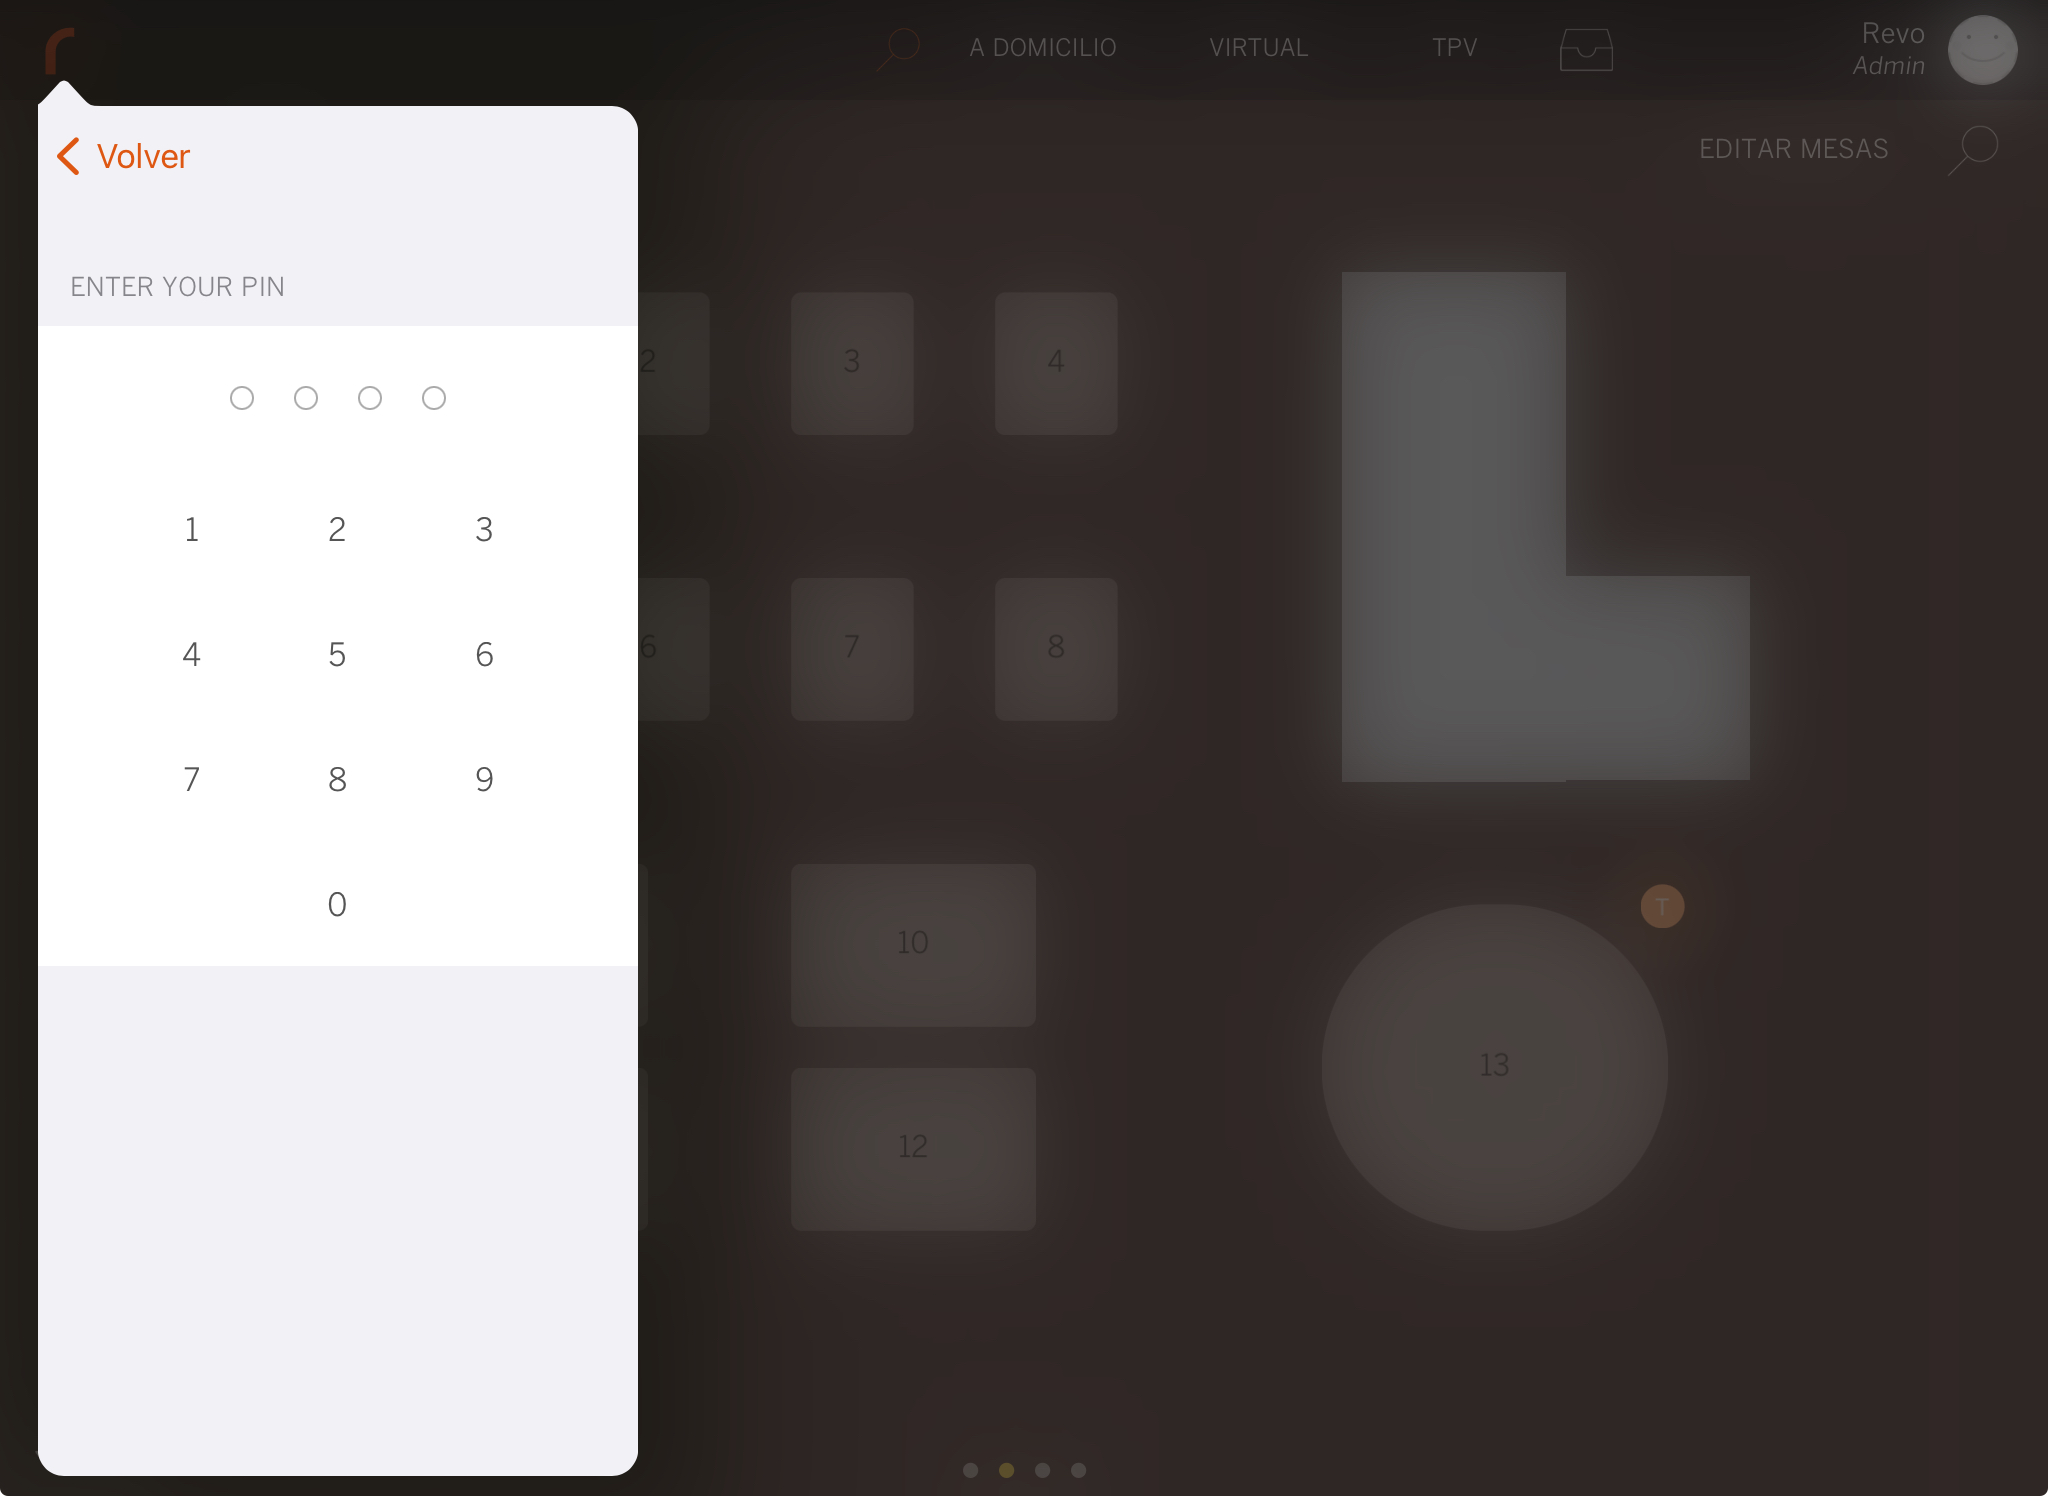

5. Tap Done to close the message.
You can activate Automatic Presences in the order settings of the back-office so that presence starts automatically the first time you enter your pin in the Revo XEF app.
RECORDING BREAK
You can also record your breaks during the shift:
1. Go to the REVO menu r.
2. Select again Presence.
3. Enter your pin code, and you will see the options for End of presence and Start break.

4. Choose Break and you will see the message: Enjoy your break, 'employee name'!.

5. Tap Done to close the message.
6. At the end of the break, repeat the process. Since a break is already started, it will end automatically. You will see the message: Break is over. There are 'number' tables open.

7. Tap Done to close the message.
RECORDING EXIT
At the end of your shift, make sure to record your departure:
1. Go to the REVO menu r.
2. Select again Presence.
3. Enter your pin code, and you will see the options for End of presence and Start break.
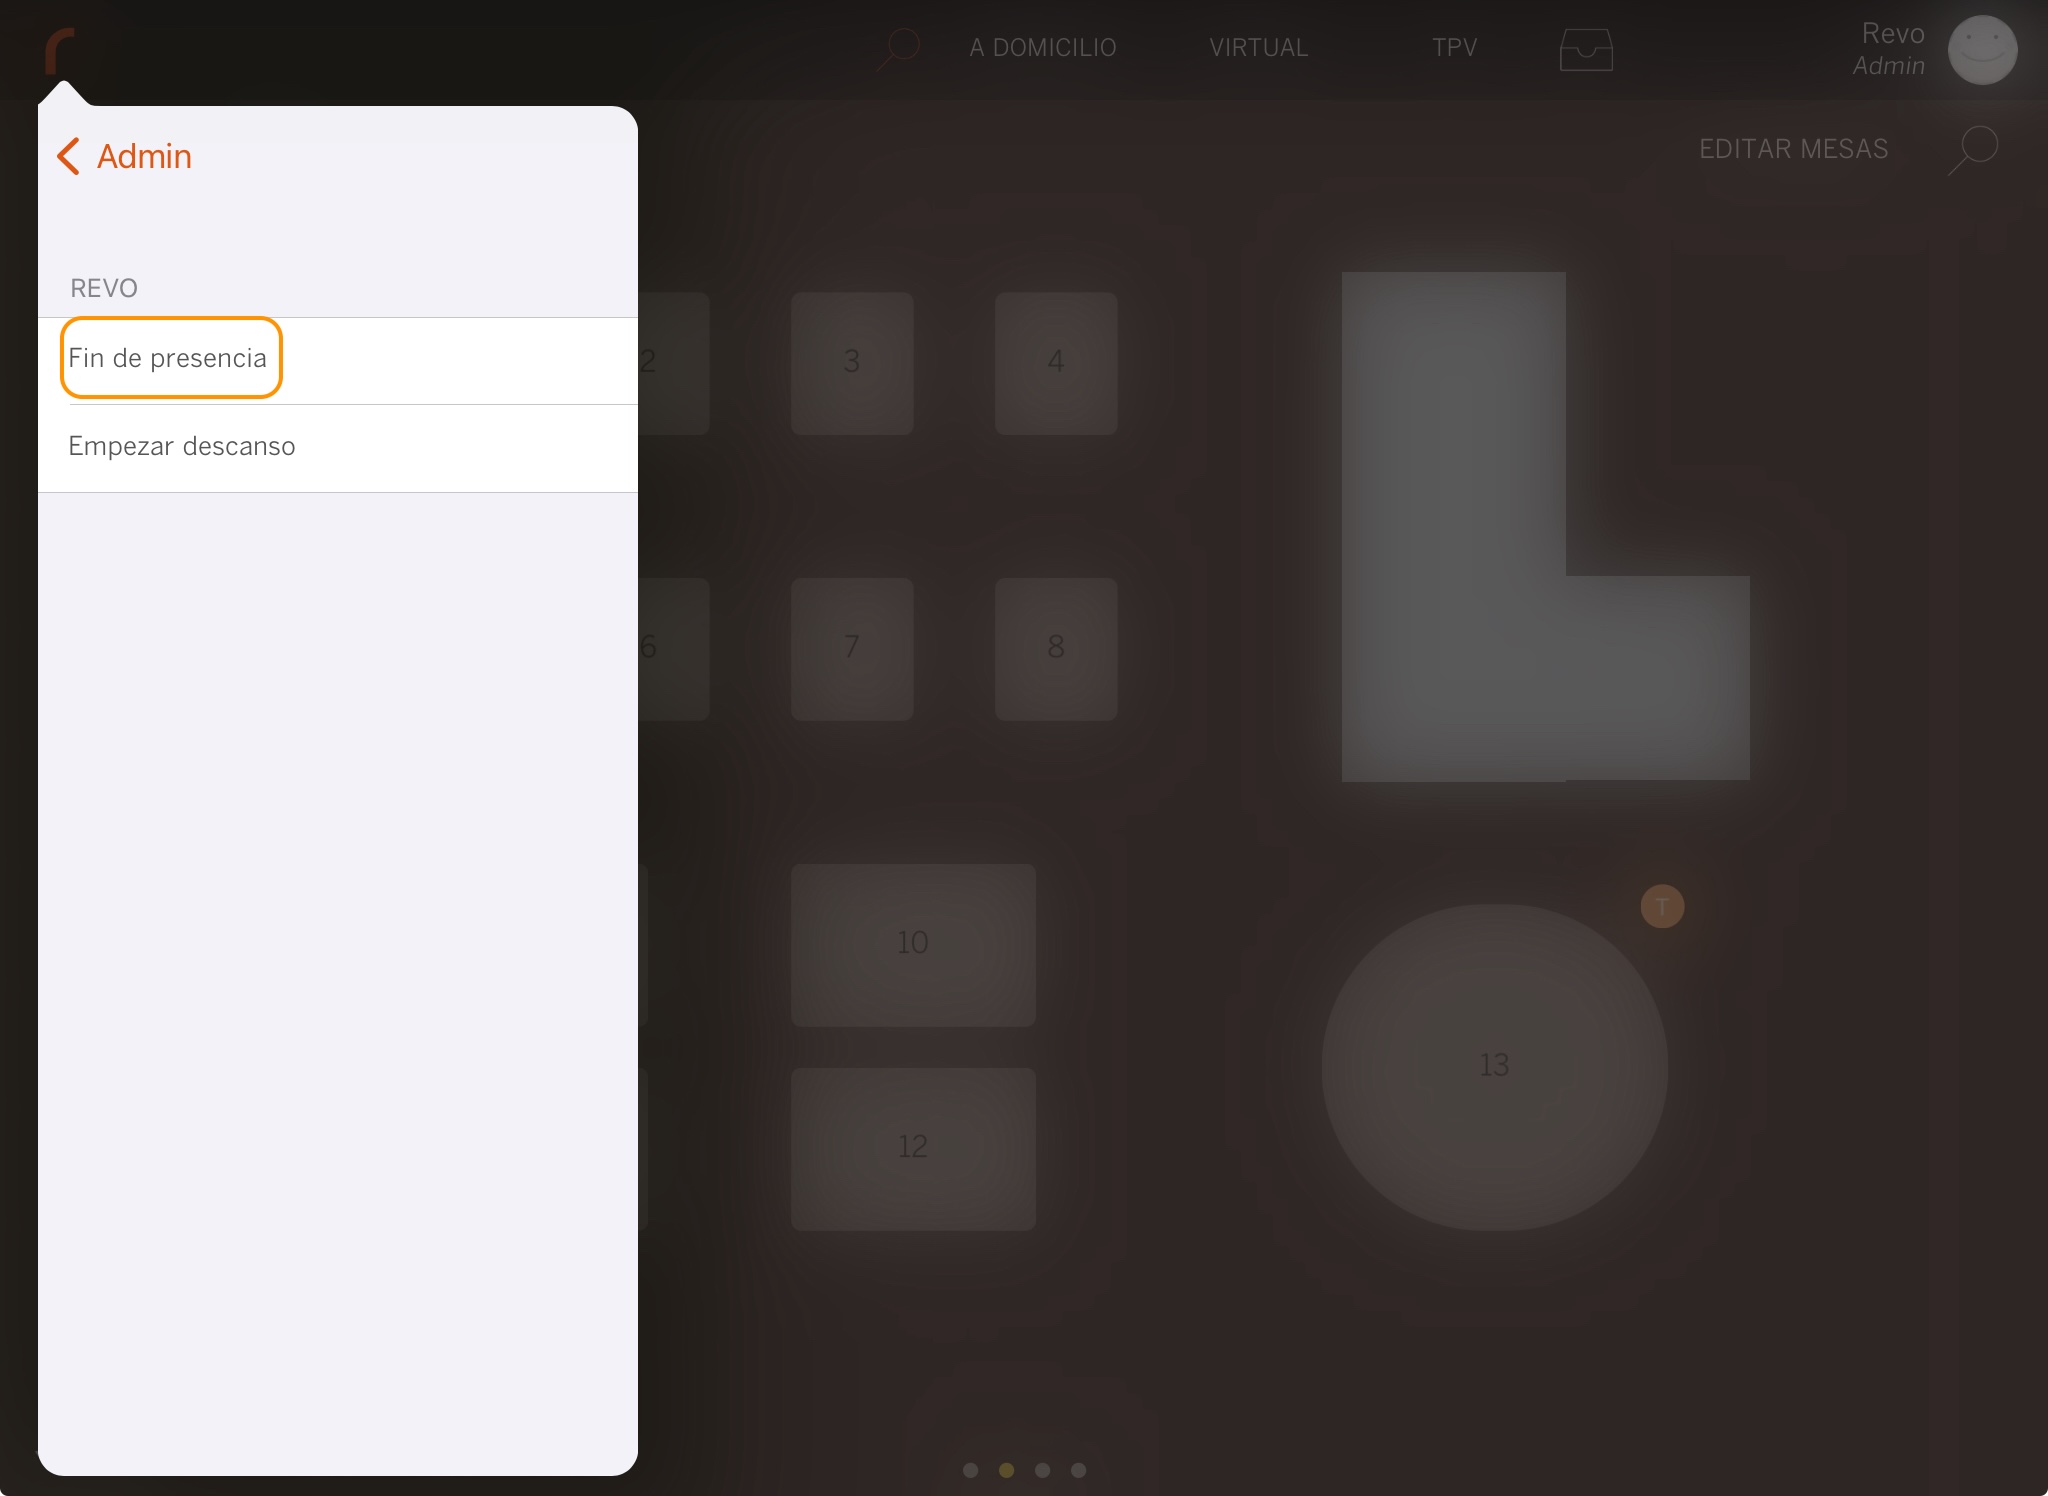
4. Choose End of presence, and you will see the message: Have a nice day, 'employee name'!.
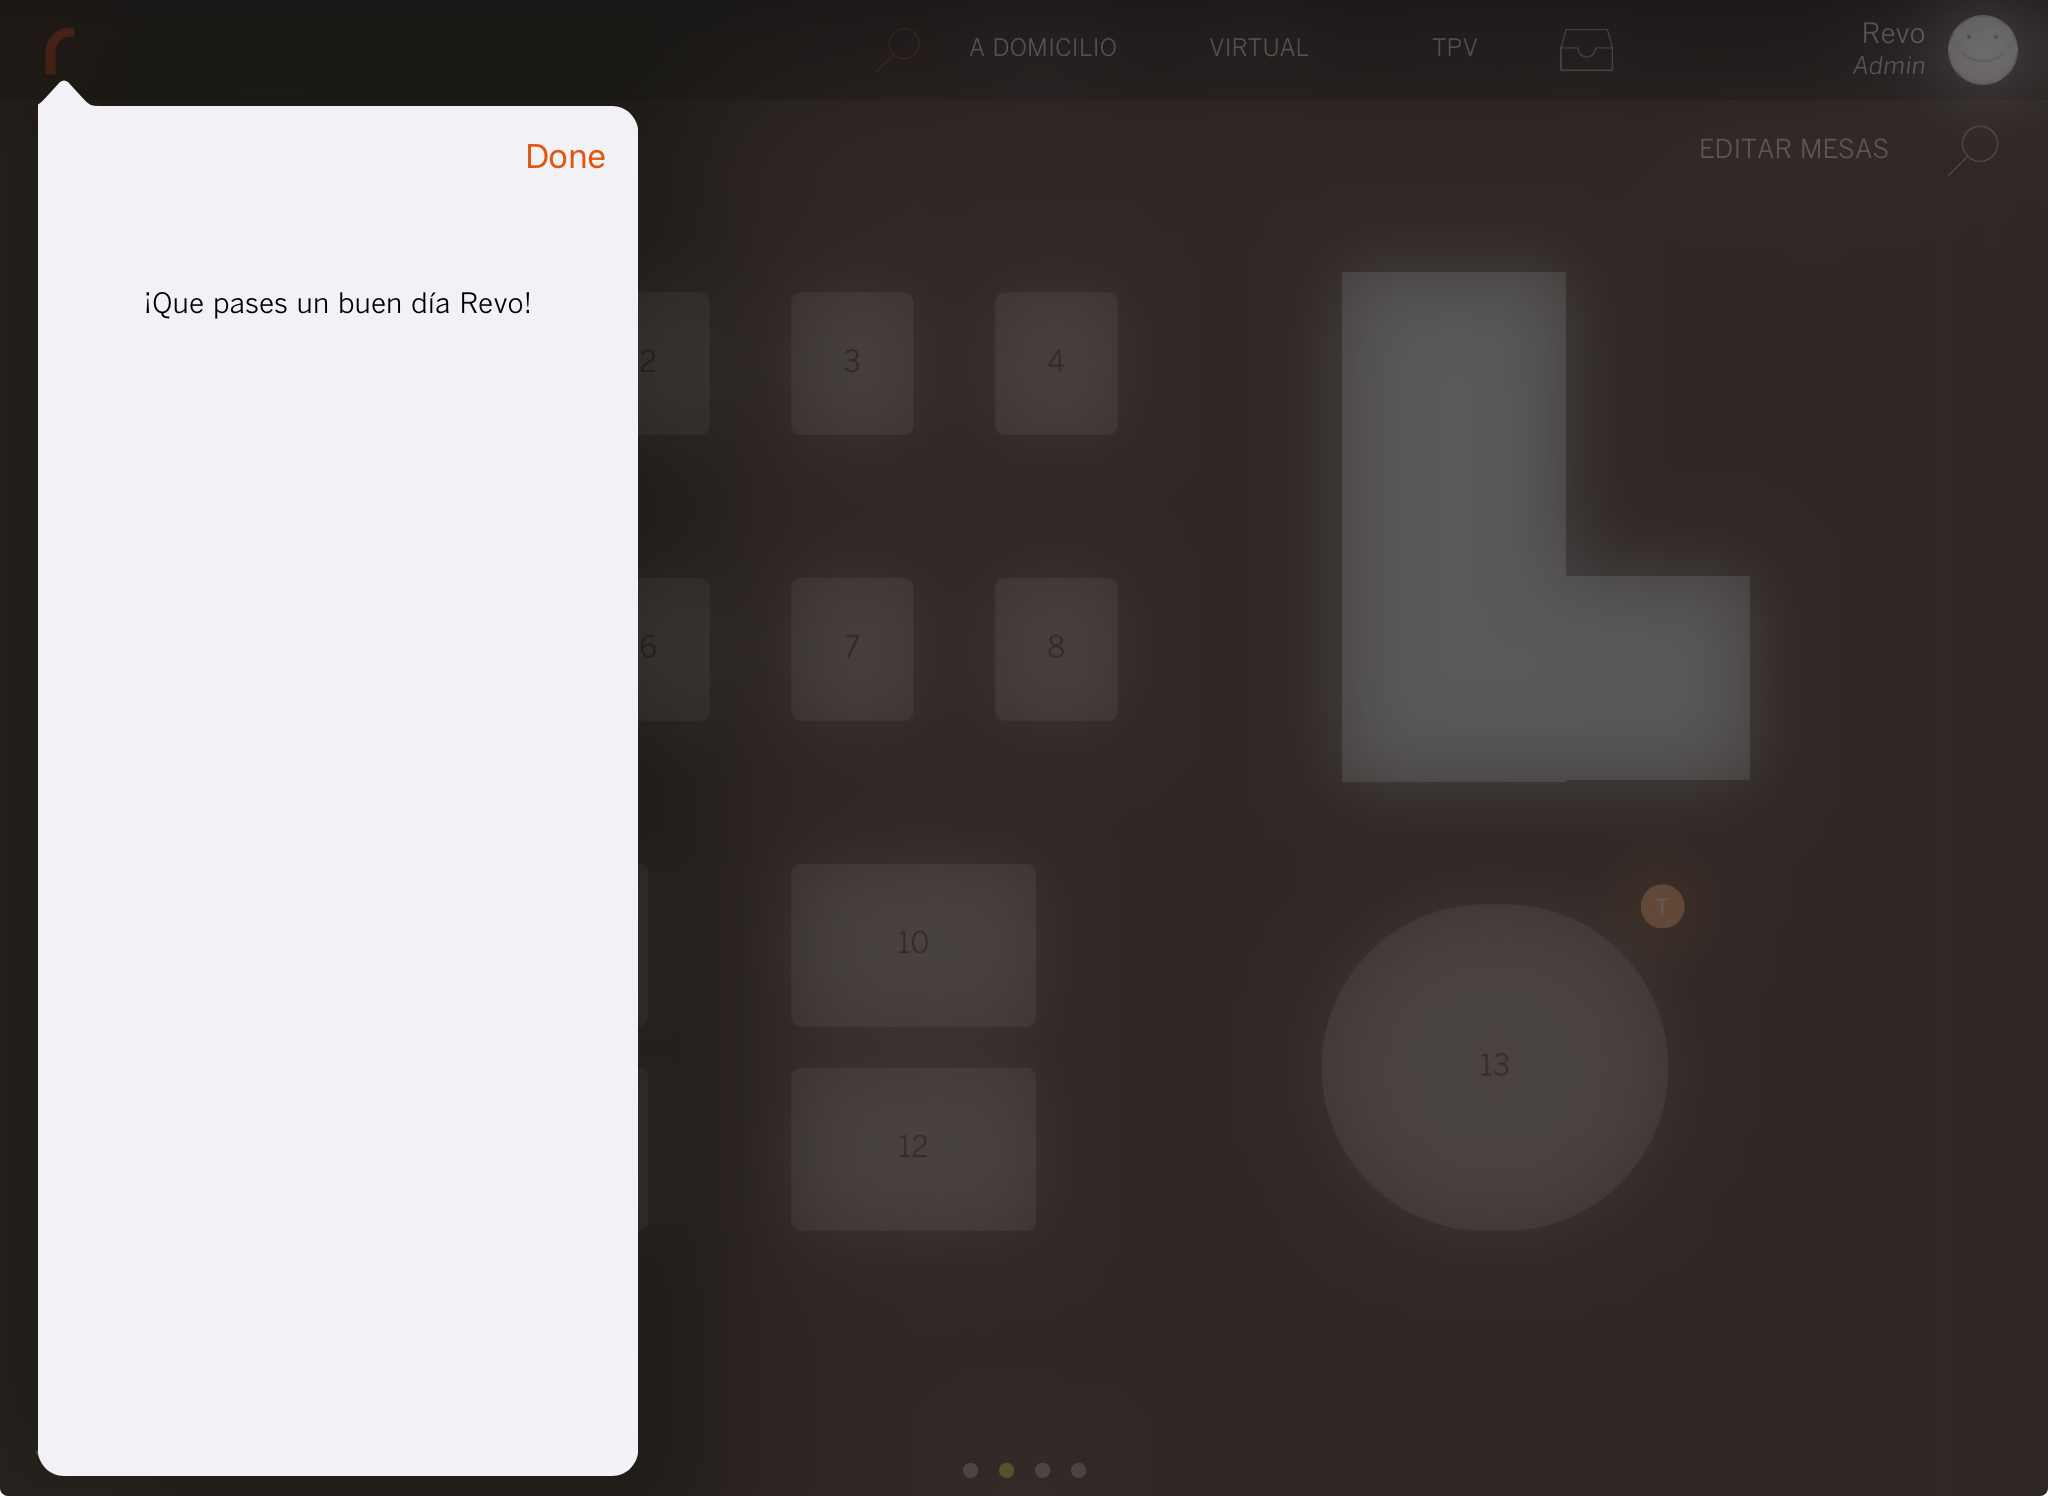
5. Tap Done to close the message.
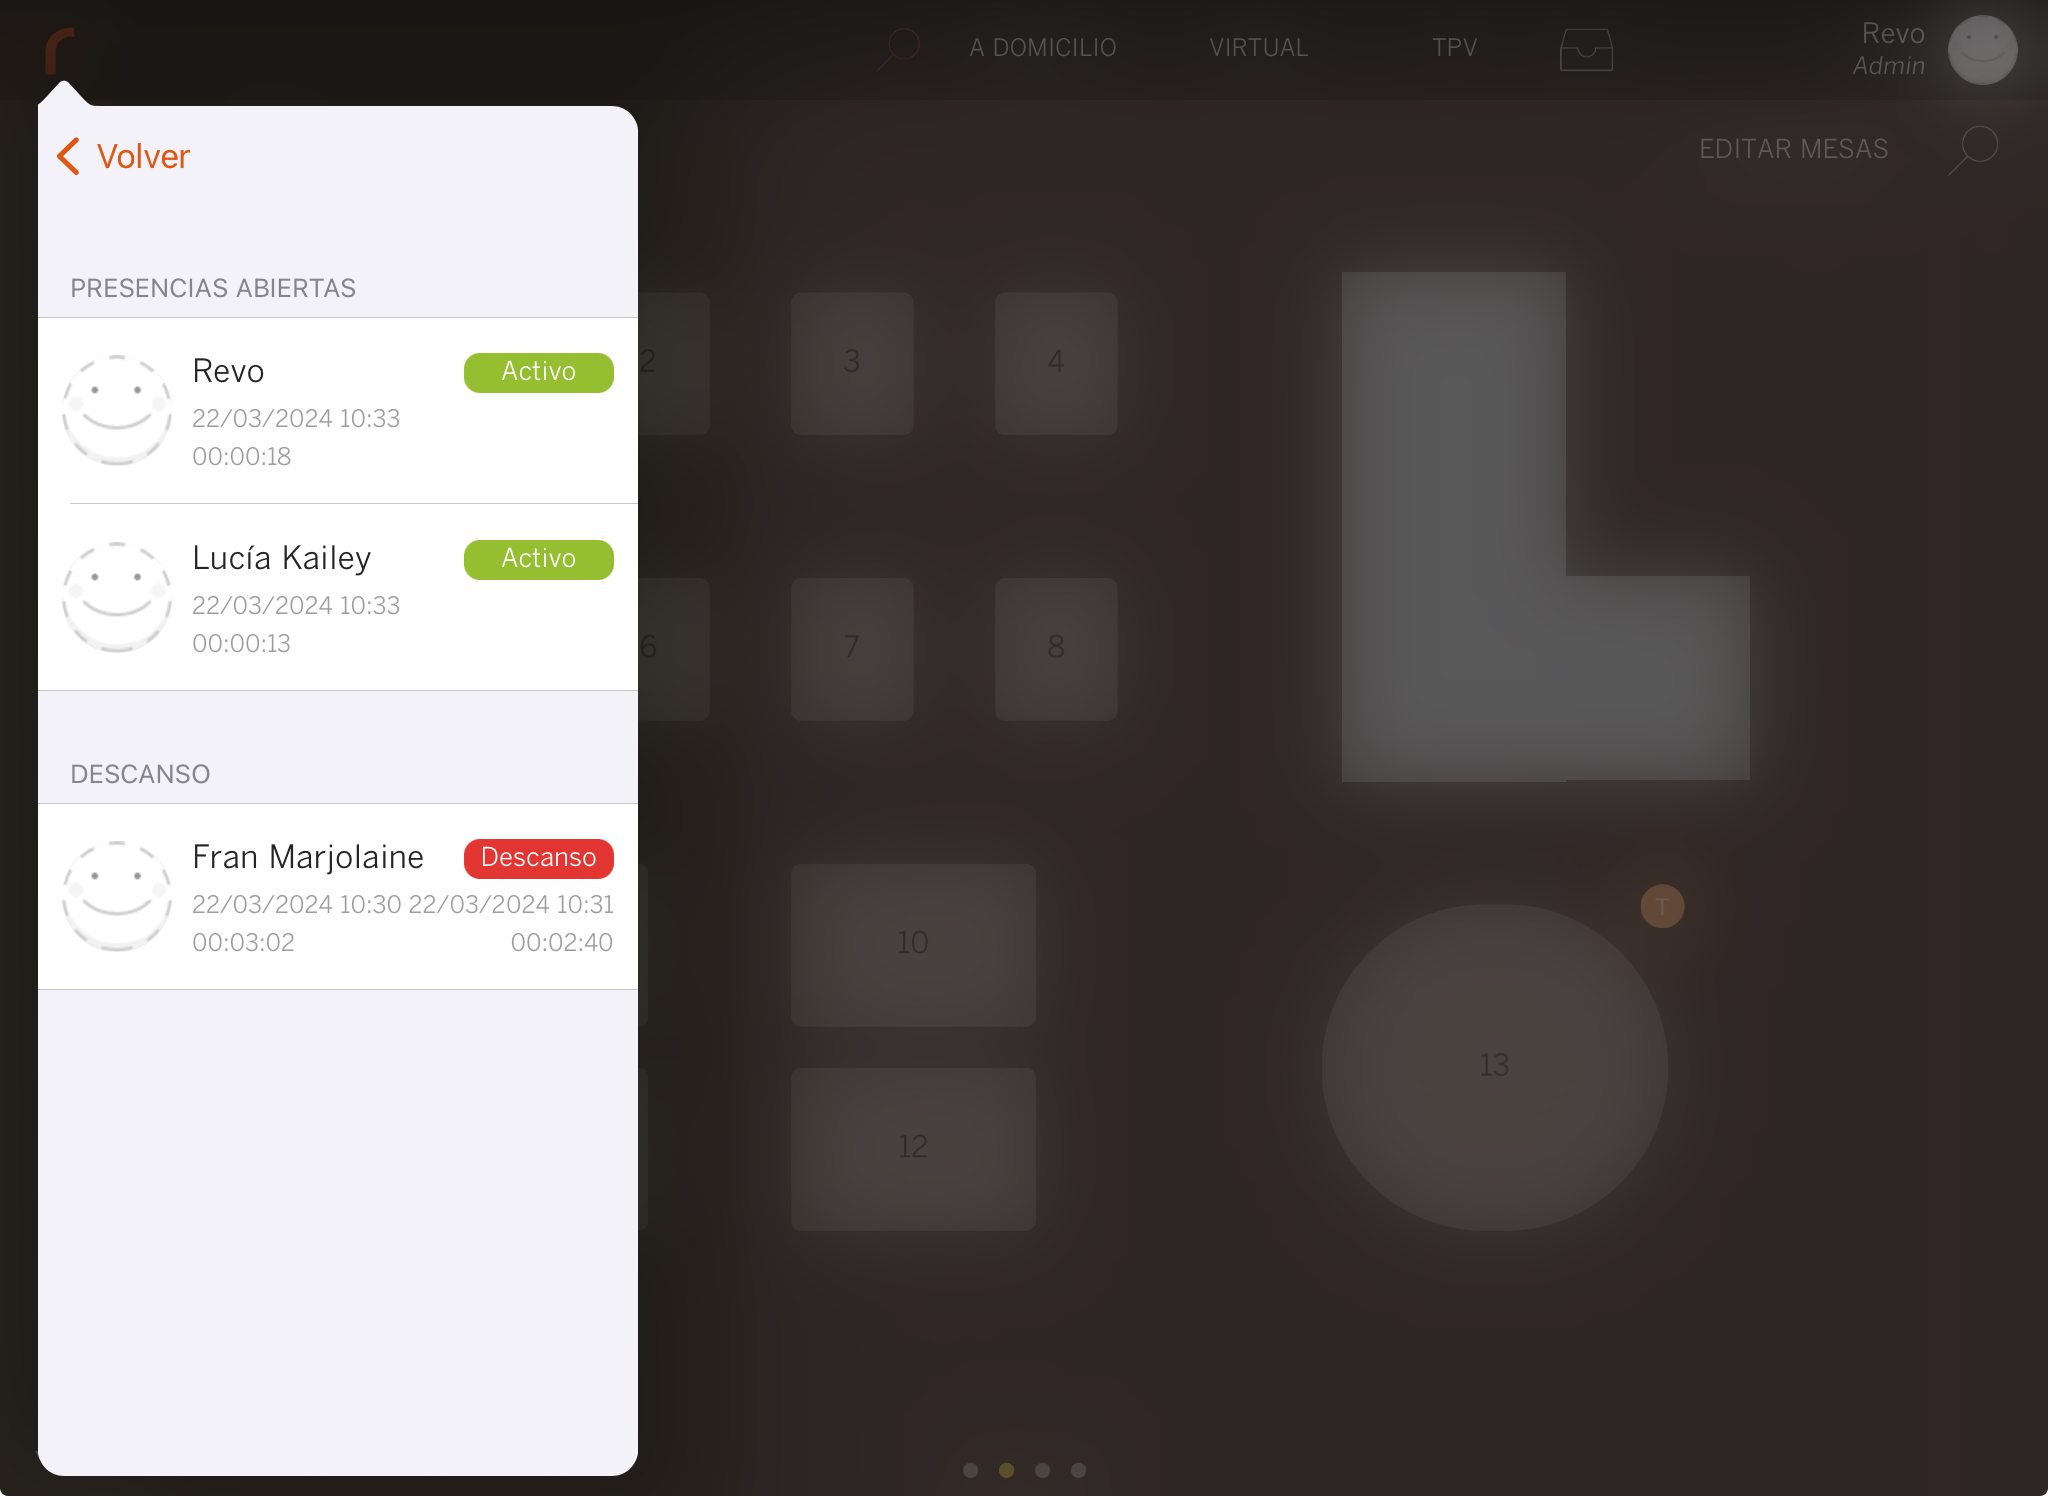
Open Presences
If you don't remember if you started your presence at the beginning of the shift, you can check:
1. Go to the REVO menu r.
2. Select Open Presences.
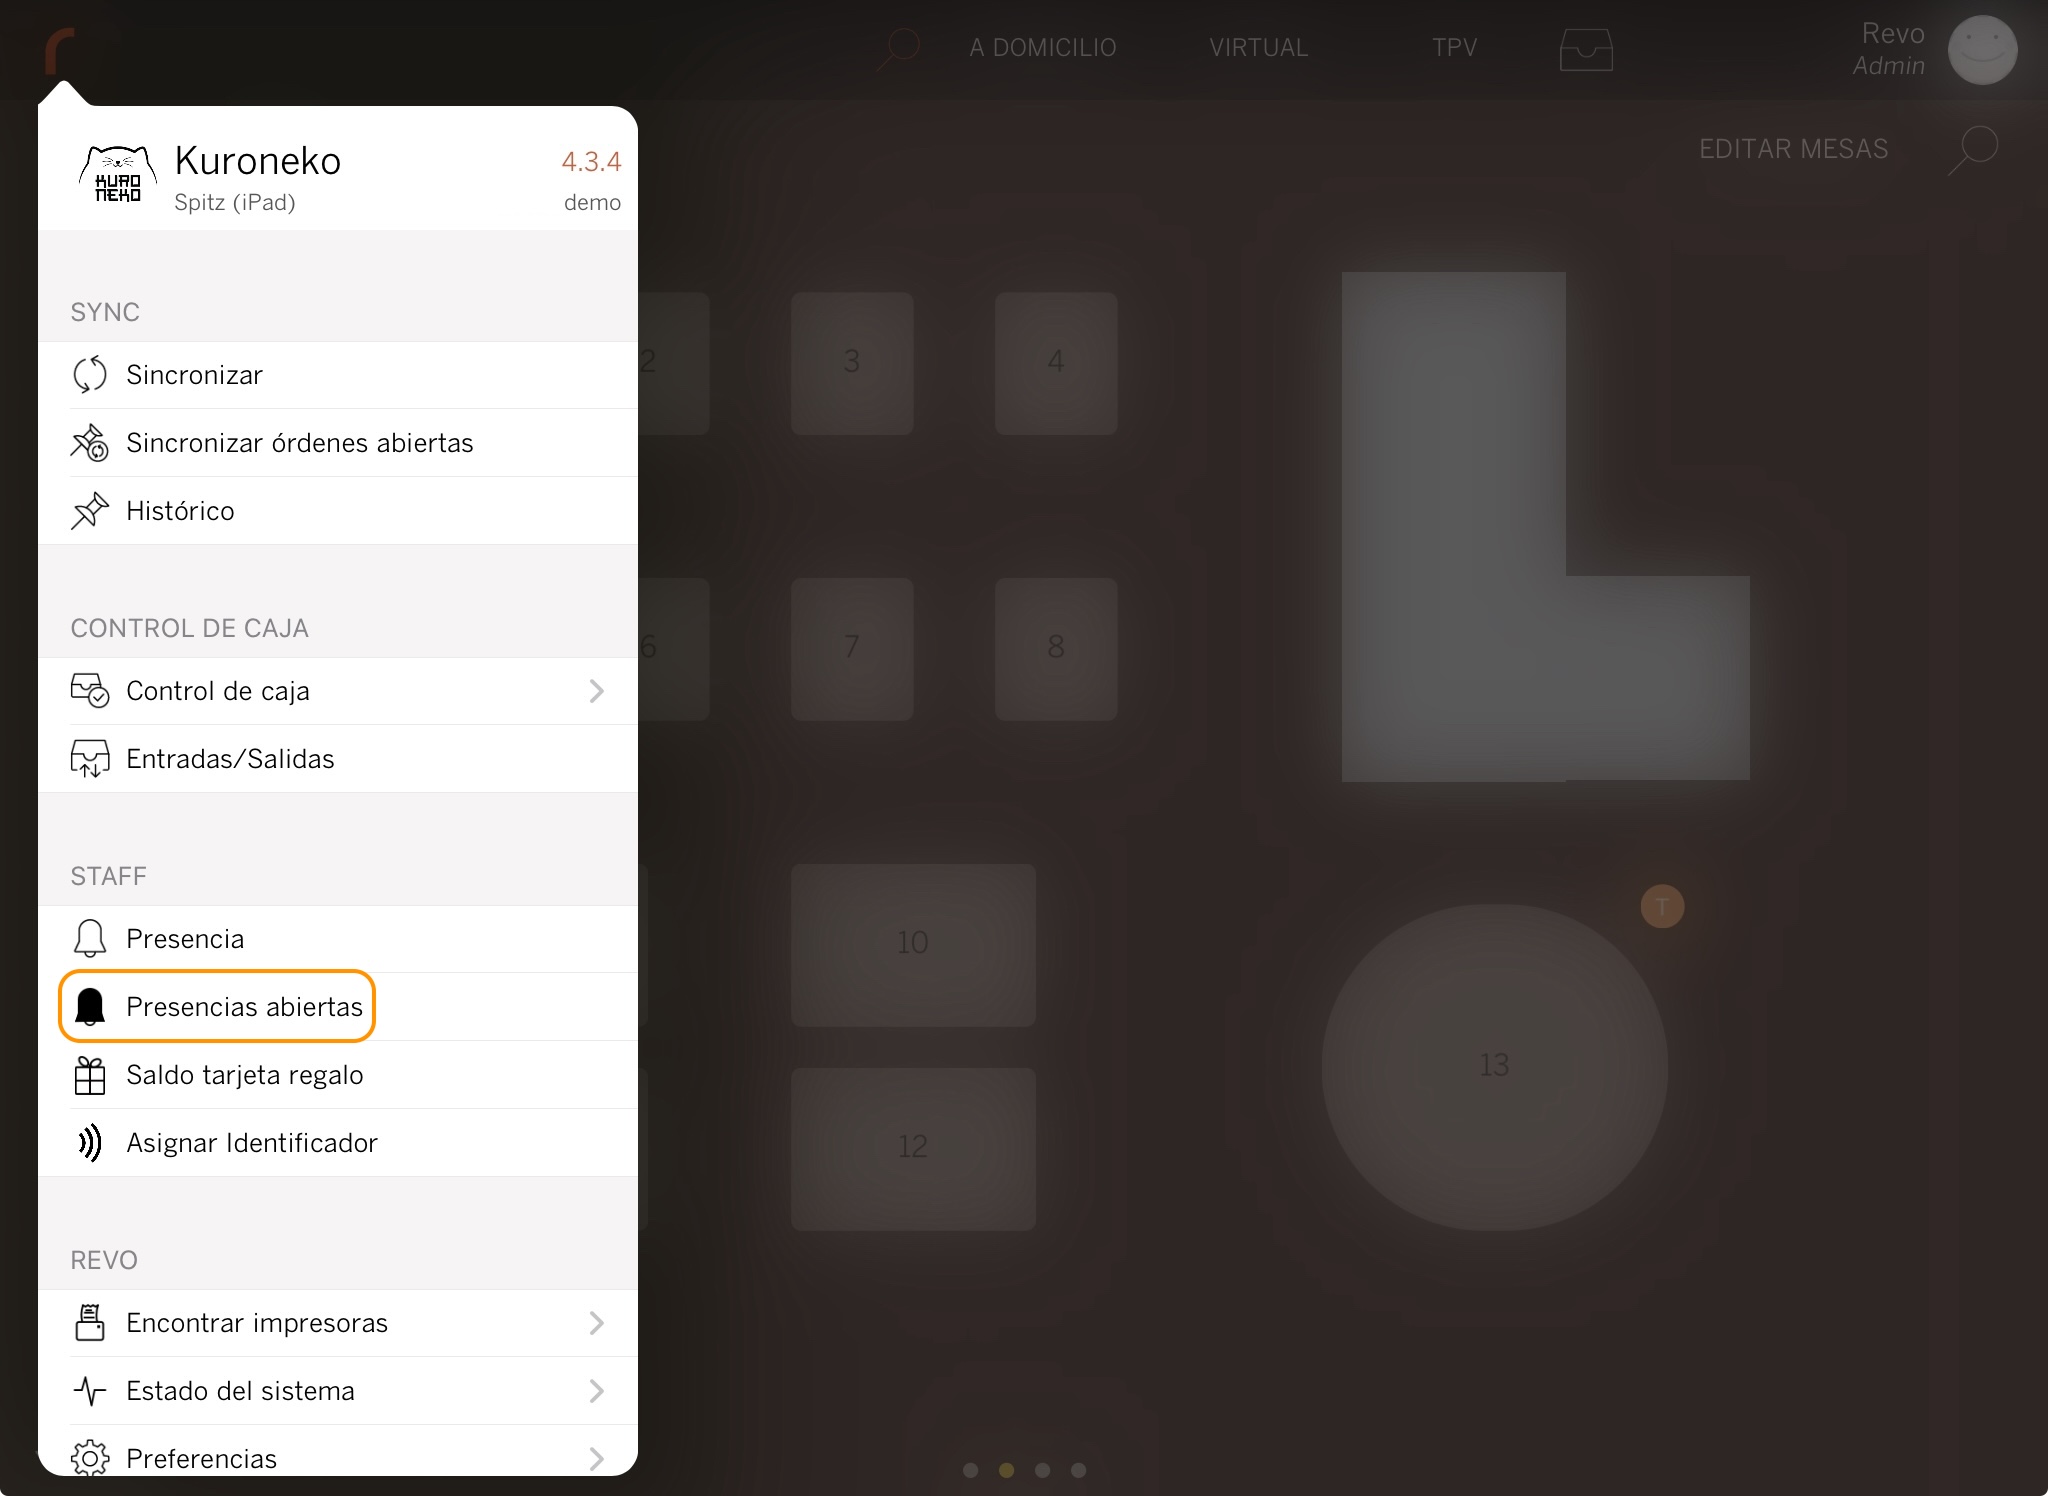
3. You will see the names of all users who have started their presence or are on break.
2. PRESENCE REPORT
In the back-office, you have a detailed report of all presences. Access from Reports / PRESENCES.

2.1. FILTERS:
- Use the calendar to select desired dates for searching.
- Click on to select a user and search presences on the selected dates and for the selected user.
- In , you can choose different criteria to totalize:
- User: Total on selected dates by users.
- User & Day: Total on selected dates by users and days.
- User & Month: Total on selected dates by users and months.
- Day: Total on selected dates by day.
- Month: Total on selected dates by month.
2.2. RECORDS:
In this section of the report, records are displayed according to the selected filters. Here you have the following information:
-
User: Name of the user who recorded the presence.
-
NIF: User's NIF.
-
Opened: Start time of presence.
-
Closed: End time of presence.
-
Total: Total presence time, including presence time and breaks.
-
Presence Time: Total real presence time of the user.
-
Breaks: Number of breaks during presence.
-
Break Time: Total time of all breaks during presence.
-
Modify: Click the icon to modify the start (opened) and end (closed) time of the presence.
This function is used to correct presence records in case of error or forgetting to start or finish a presence.
IT IS NOT POSSIBLE to modify the start or end times of the break.
3. PRESENCE TEXTS
You can configure messages that will be displayed when starting presences from your back-office. For example, when a waiter starts their presence, you can remind them to check the cleaning schedule. Follow these steps:
1. Go to the back-office of XEF.
2. Access Settings / PRESENCE TEXTS.
3. Click on +New:
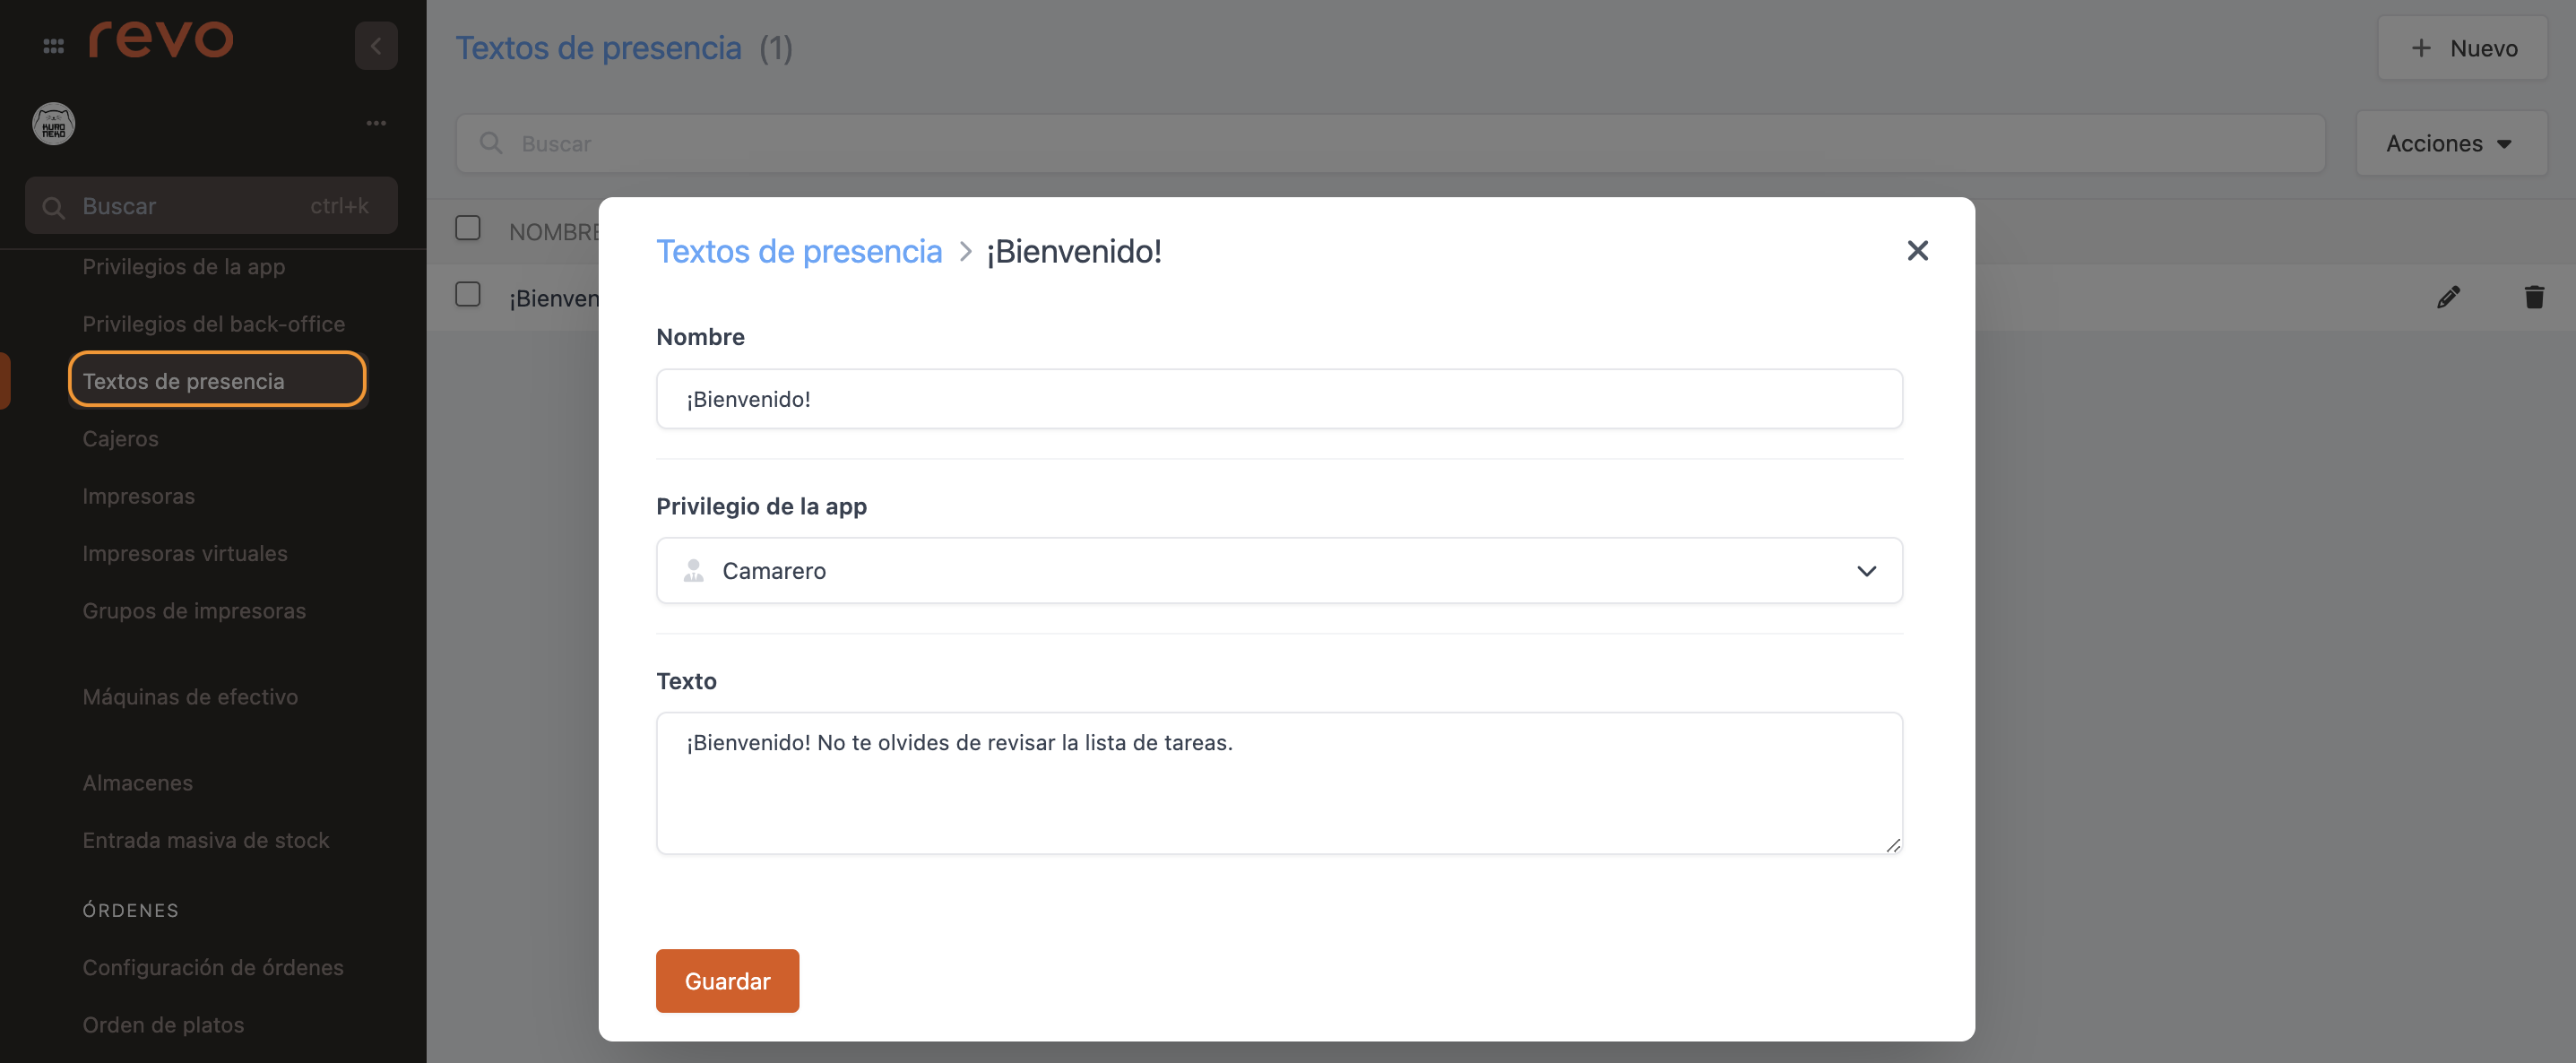
-
Name: Give it an identifiable name.
-
App Privileges: Choose who it is addressed to from the dropdown. More information on configuring app privileges here.
-
Text: Write the message you want to appear when starting a presence.
4. Finally, click Save.
5. If you access the app, you will see the configured message when logging in:
