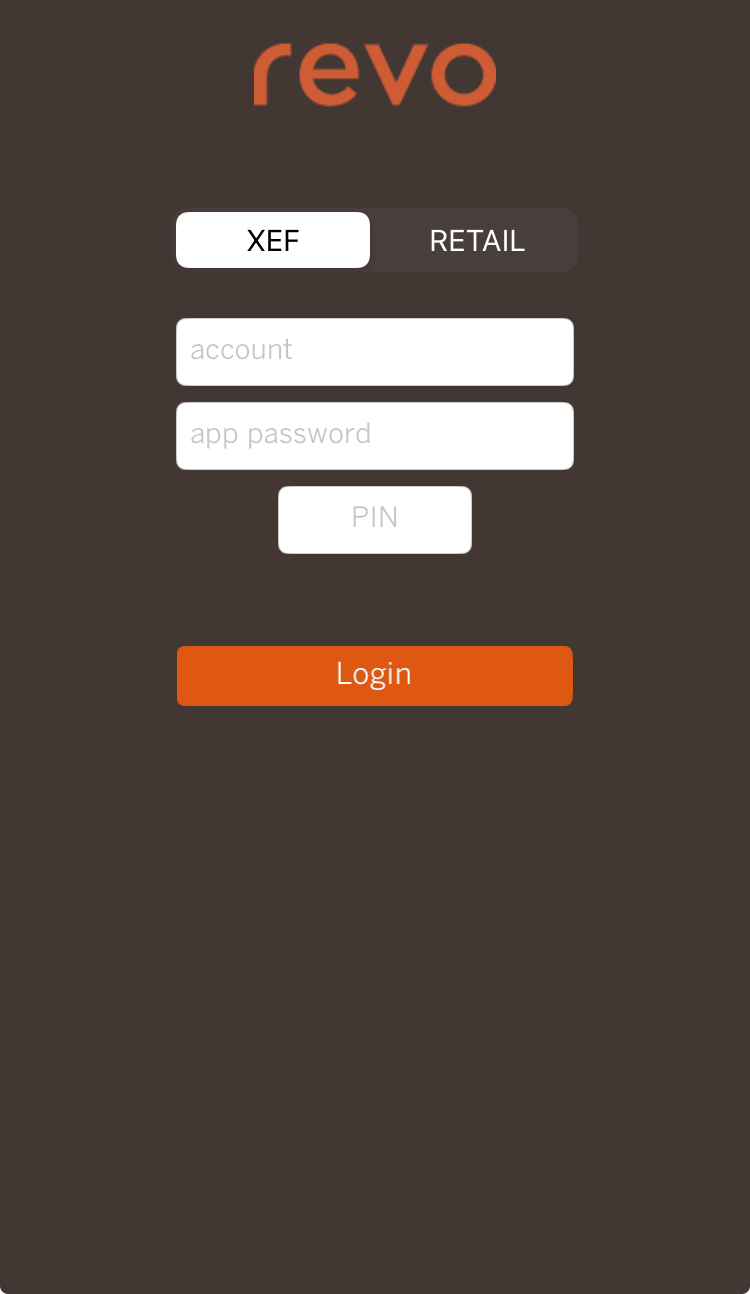
1. LOGIN
2. REVO STOCK OPTIONS
Revo STOCK is the ideal application for inventory control with Revo XEF or Revo RETAIL. With an easy and intuitive interface, it helps us manage supplier orders, material reception, merchandise transfer between warehouses, and the option to perform a blind inventory.
1. LOGIN
The Revo STOCK application can be downloaded for free from the App Store. Once downloaded, the following screen will appear:
In order to update to version 2.4.0, the app must be deleted and re-downloaded from the App Store.
To access Revo STOCK, we need the following credentials:
1. Account: Name of the Revo XEF or Revo RETAIL account.
2. Password: Password of the Revo XEF or Revo RETAIL application.
3. Pin: Your pin in Revo XEF or Revo RETAIL.
The user pin controls whether the employee has the appropriate privilege to access Revo STOCK.
4. XEF or RETAIL: Select one platform or the other, depending on your needs.
IMPORTANT: To access Revo STOCK, it is important to have the purchase module of the back-office active, either in XEF or RETAIL.
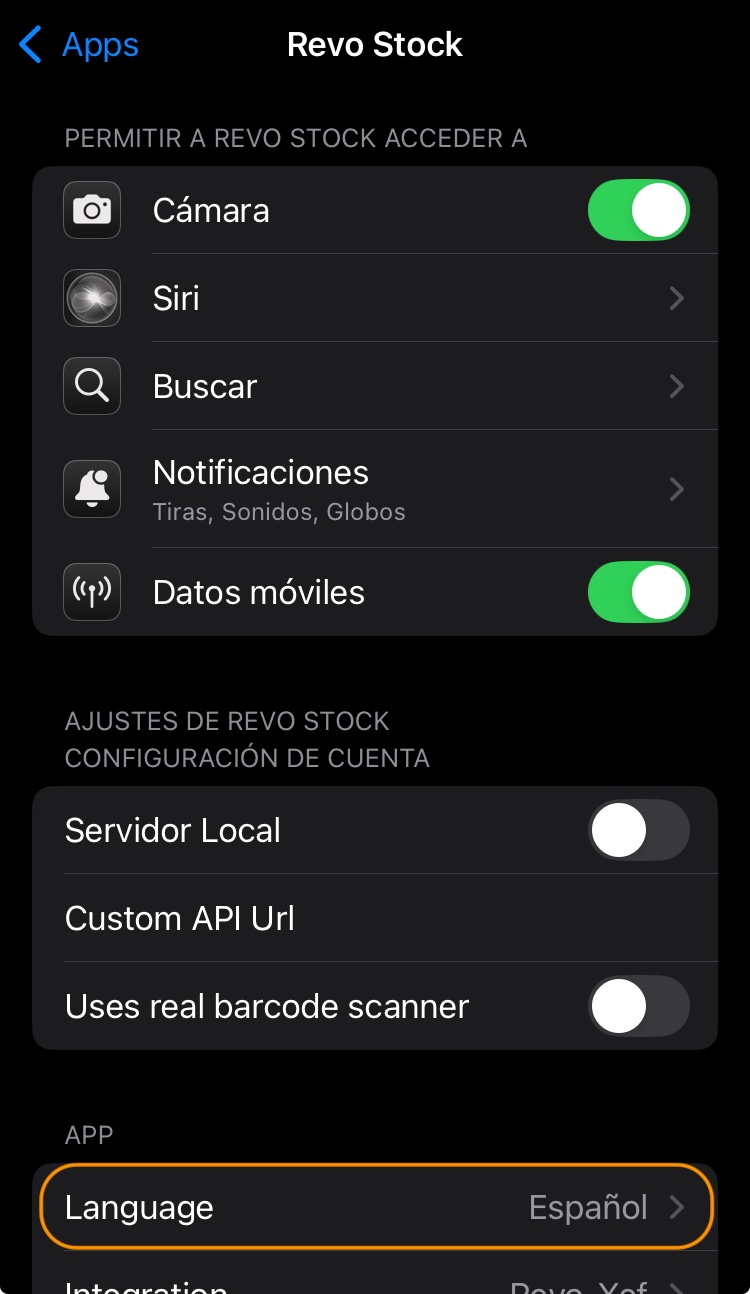
HOW TO CHANGE THE APP LANGUAGE
To select another language in the Revo STOCK app, we must access the device's Settings (iOS) > Revo STOCK > Language. The dropdown menu will display the available languages.
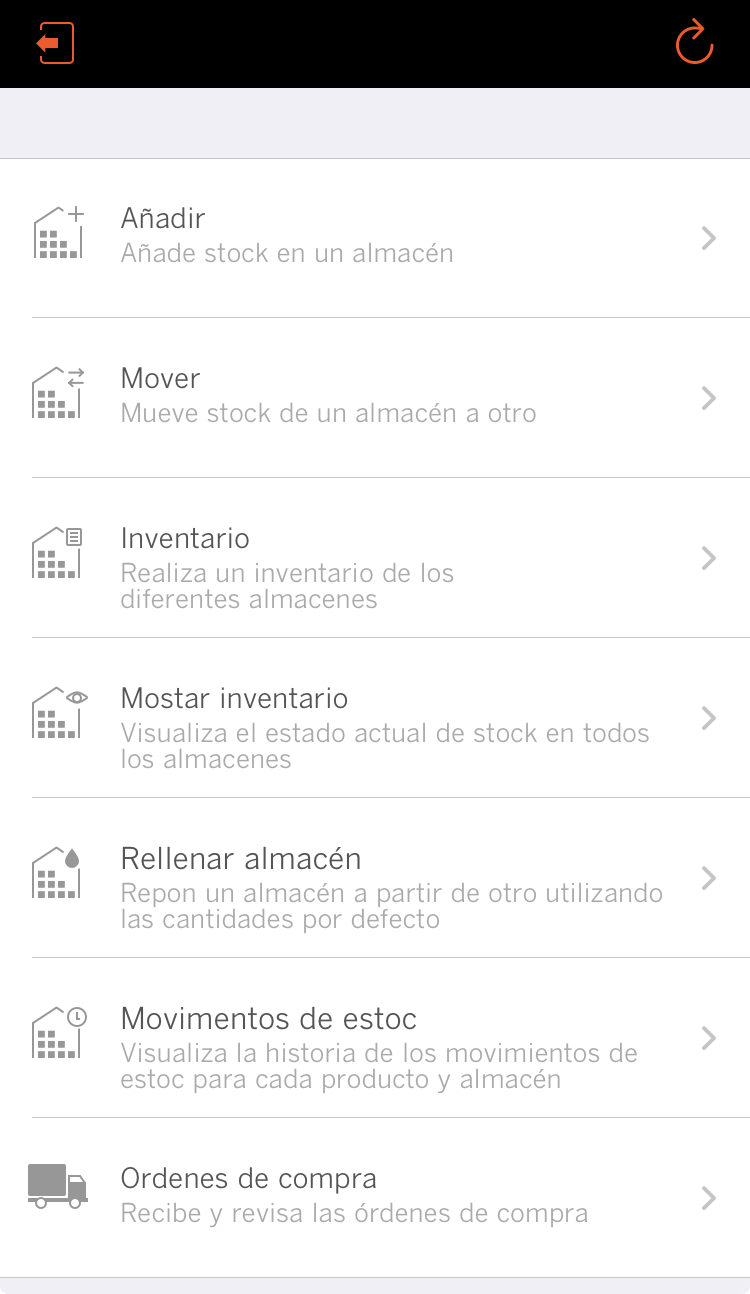
2. REVO STOCK OPTIONS
: Log out.
: Update the changes made in the back-office.
ADD
We can easily add stock to any of our warehouses configured in the back-office.
Once the warehouse is selected, we will find the following options:
Back: Go back.
: Delete the changes.
: Use the device's camera as a barcode reader to add stock.
: Add stock manually.
: Confirm and save the changes.
HOW TO MANUALLY ADD INVENTORY
1. Select the warehouse.
2. Click on .
3. Select the desired product.
4. Indicate the quantity.
5. Repeat the steps for each product.
6. Finally, use the icon to save the changes.

HOW TO ADD INVENTORY USING THE DEVICE'S CAMERA AS A BARCODE READER
1. Select the warehouse.
2. Click on .
The first time, the application will ask for permission to use the camera.
3. Scan the barcode with the device's camera.
With the marked icon ![]() , once we scan the barcode, a screen will appear to add the quantity. With the unmarked icon
, once we scan the barcode, a screen will appear to add the quantity. With the unmarked icon ![]() , it automatically adds +1 quantity each time we scan the code.
, it automatically adds +1 quantity each time we scan the code.
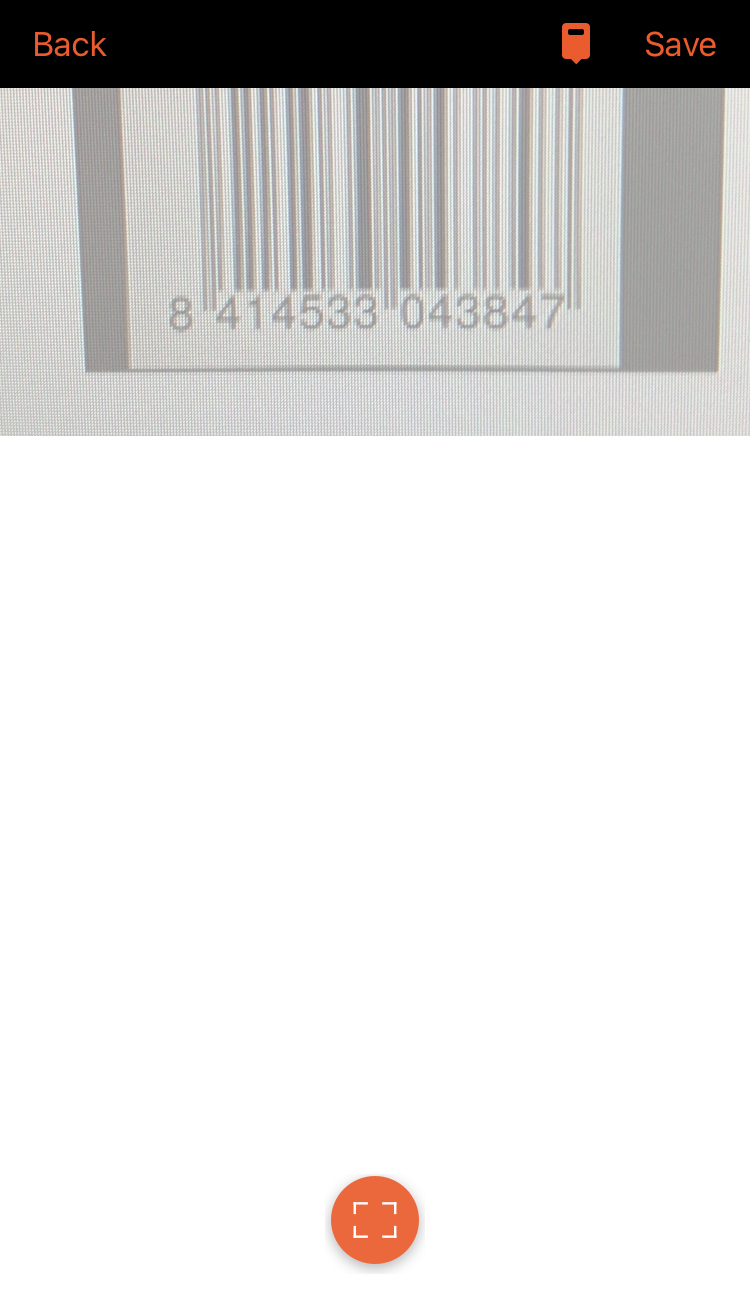
4. Finally, click on Save to save the changes.
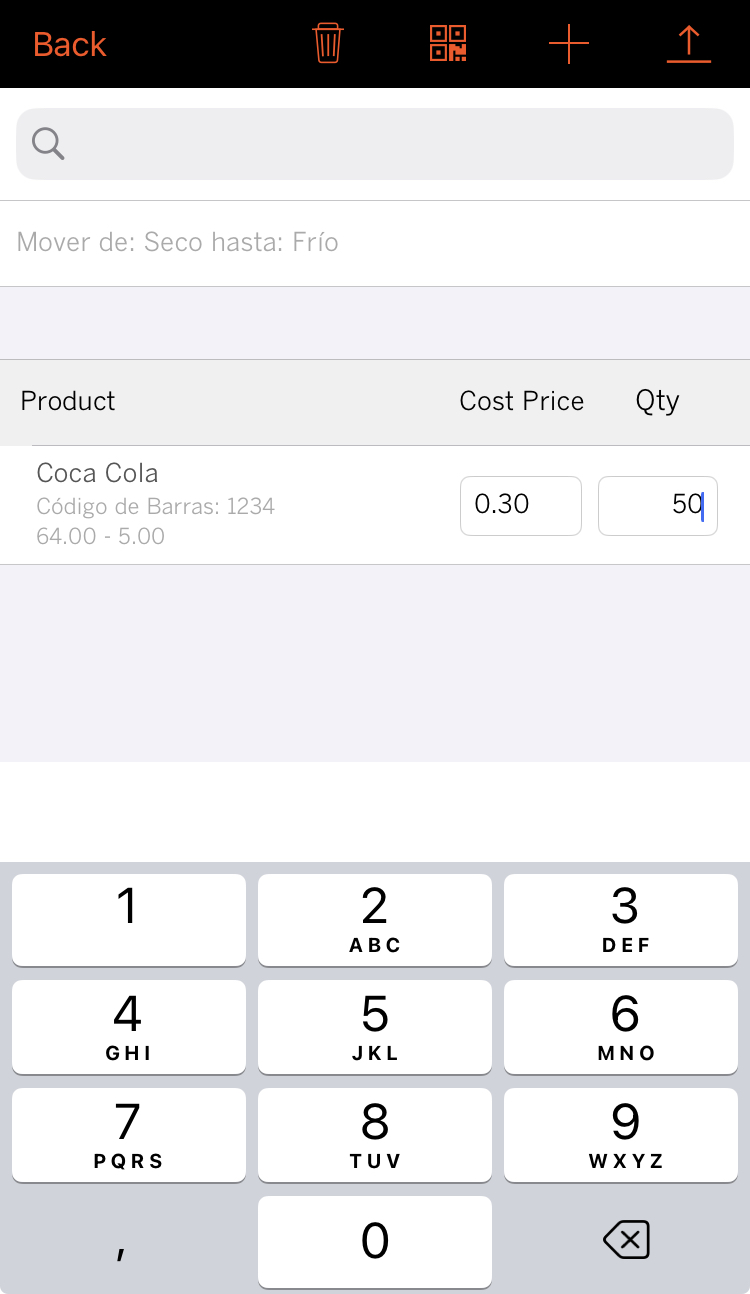
MOVE
Option to move stock from one warehouse to another.
1. Select the source warehouse.
2. Select the destination warehouse.
3. Add products through the icon.
4. Select the desired product.
5. Indicate the quantity.
6. Repeat the steps for each product.
7. Finally, use the icon to save the changes.
INVENTORY
Option to perform an inventory of one or more warehouses.
Both in the back-office of Revo XEF and in Revo RETAIL, two options can be configured that affect how inventories behave. To do this, we access warehouses and click on the :
-
Blind inventory: With this option activated, when performing the inventory, the existing units are never reported. The idea is for the employee to do the inventory without having that data.
-
Automatically approve inventory: With this option activated, the entered units will be updated immediately on that or those products once we click on to confirm the changes.
With this option deactivated, the inventories will remain pending in the XEF back-office or RETAIL back-office, and we can manually approve or reject them depending on our needs. This section includes information such as the inventory status (approved or rejected), the employee who performed it, and the date.
In this section, you will find information such as the inventory status, the employee who conducted the inventory, and the date.
Click on the icon to access the product details.
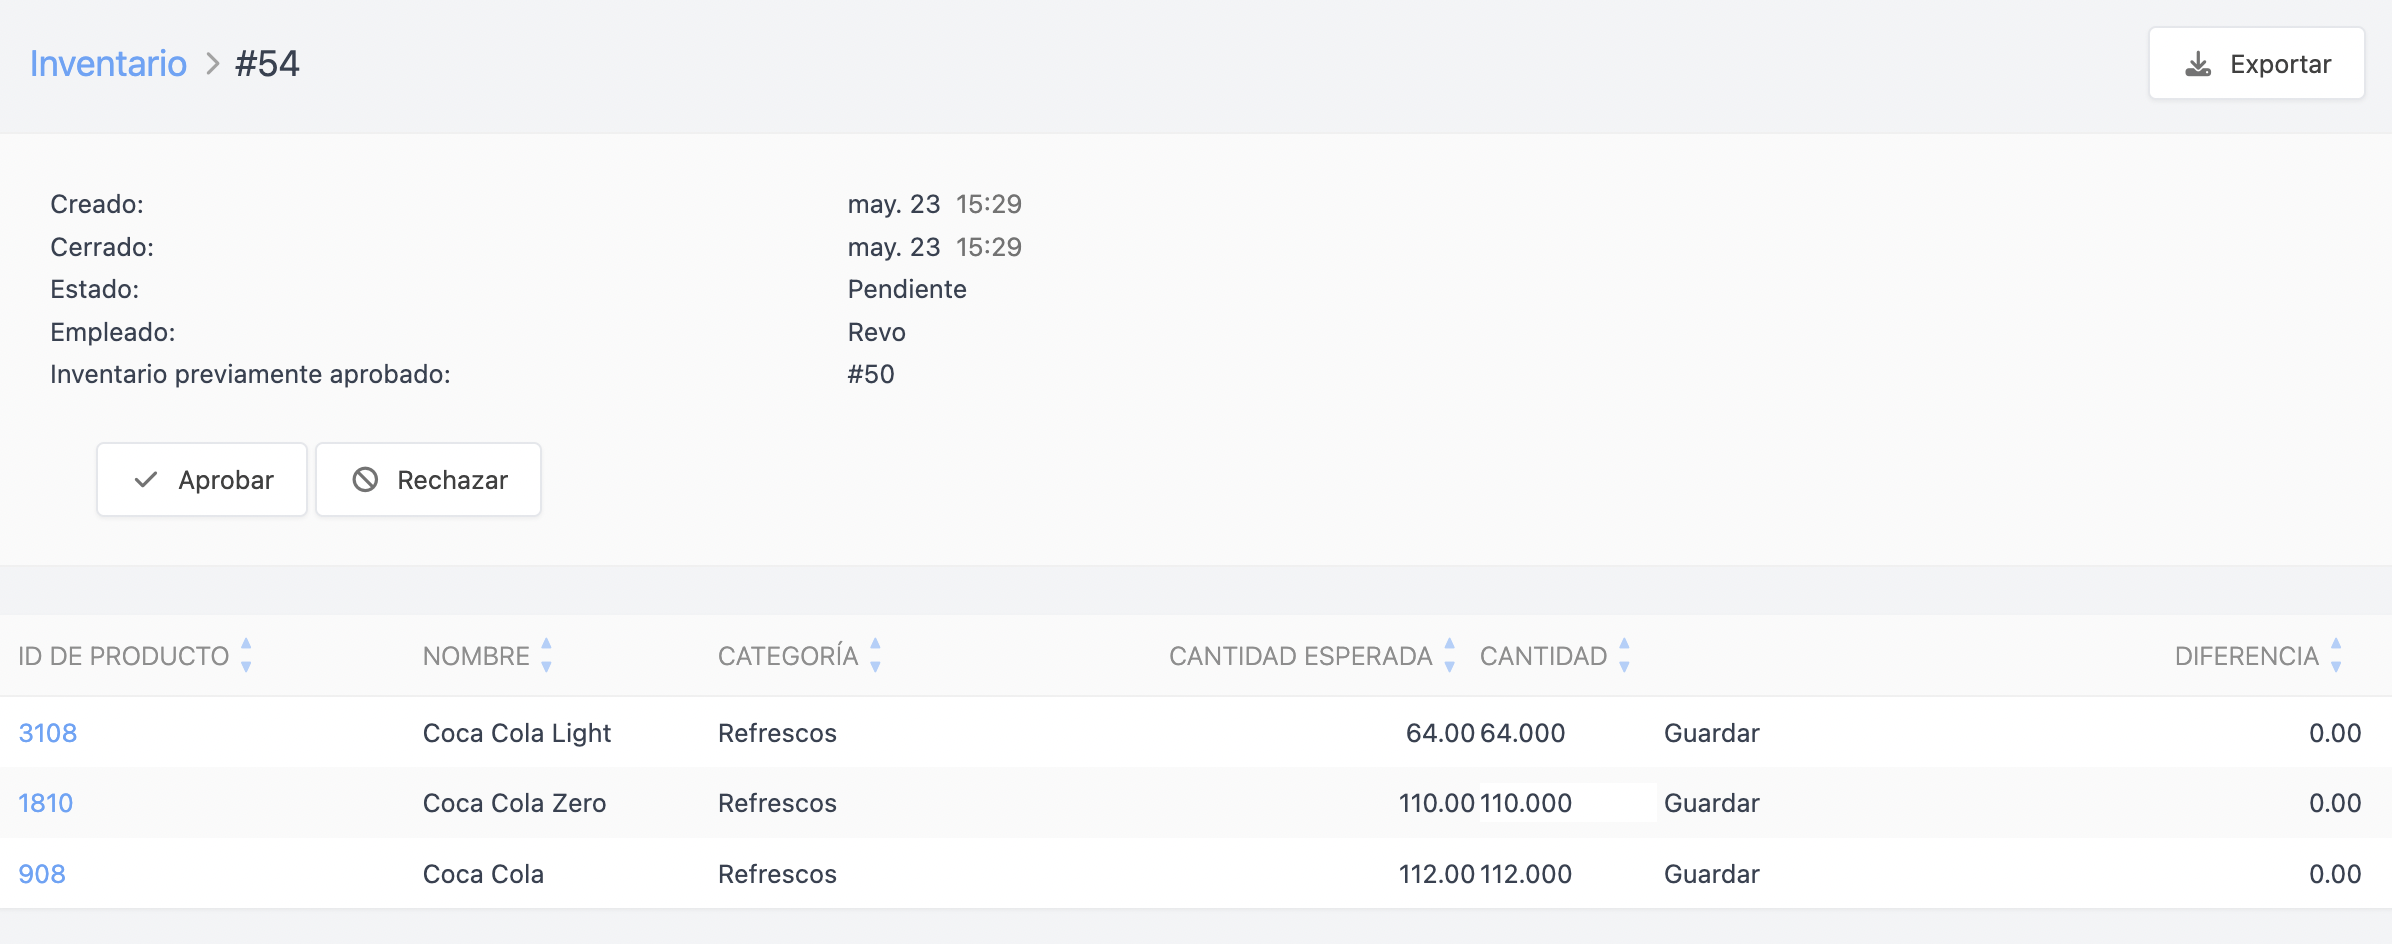
If everything is correct, click on Approve, while if there are errors, click on Reject.
If there is any quantity that you have entered incorrectly, you can edit it beforehand, click on Save, and finally approve the inventory.
1. Select the warehouse.
2. Select the categories manually or all categories to perform a complete inventory.
3. Click on each product to add the quantity, or use to use the camera as a barcode reader.
4. As we enter quantity, we can filter by pending products or all.
5. Finally, use the icon to save the changes.
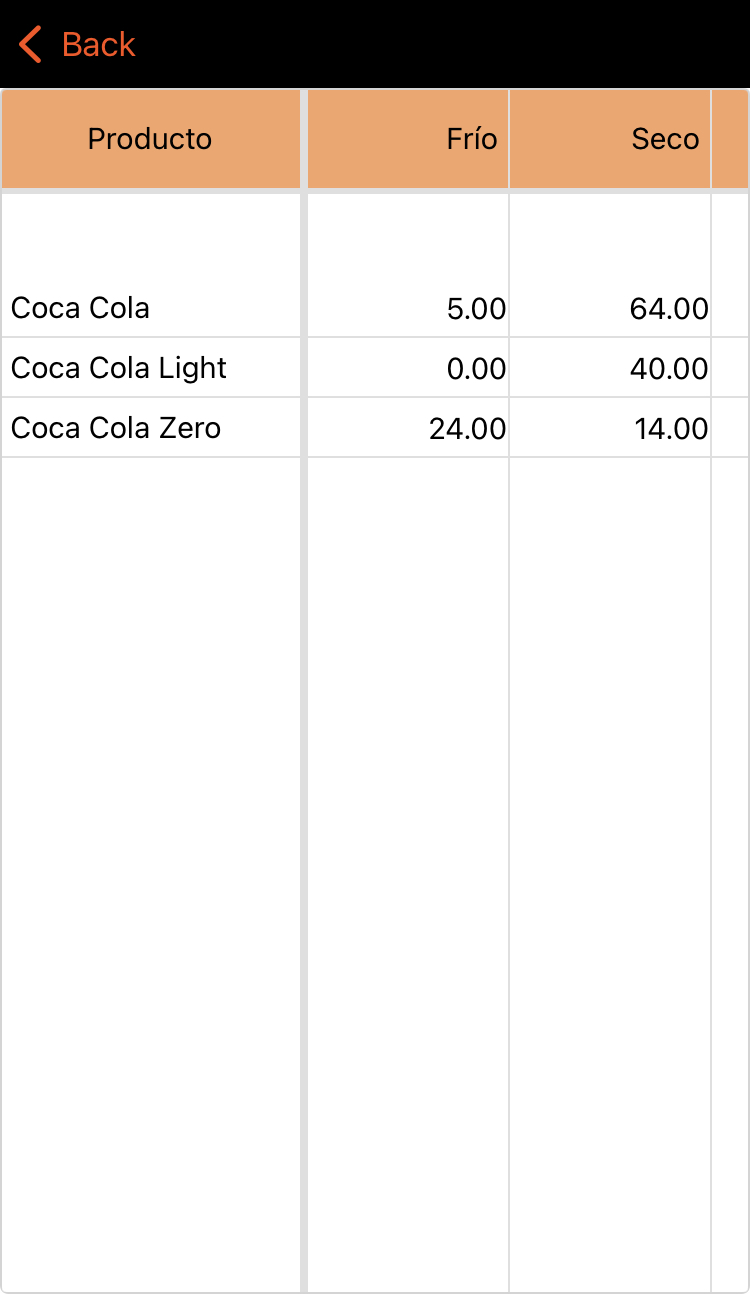
SHOW INVENTORY
This option is used to show real-time stock by categories. Quickly and efficiently, we can have total control and see all the units we have.
1. Click on the option to show inventory.
2. Select a category, and it will display the stock of each product.
REFILL WAREHOUSE
Option to quickly replenish a warehouse from another using default units. This option is very useful for the nightlife sector, such as nightclubs or music bars, where the establishment's bars are configured as small warehouses and are replenished from the central warehouse.
1. Select the warehouse.
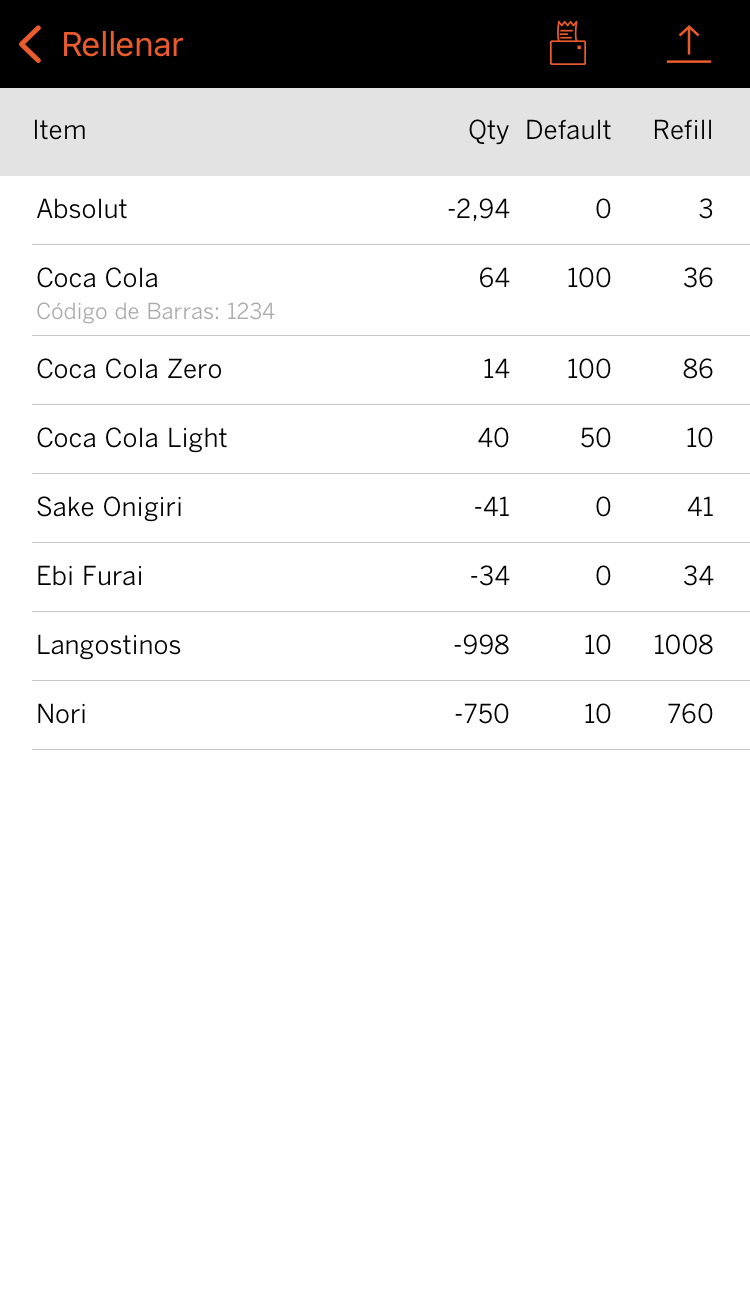
2. It shows us the name (Item), the current stock quantity (Qty), the default quantity we want to have in that warehouse for each product (Default), and finally, the quantity to refill (Refill).
3. Finally, use the icon to save the changes.
This action will modify the entire stock of those products in the selected warehouse.
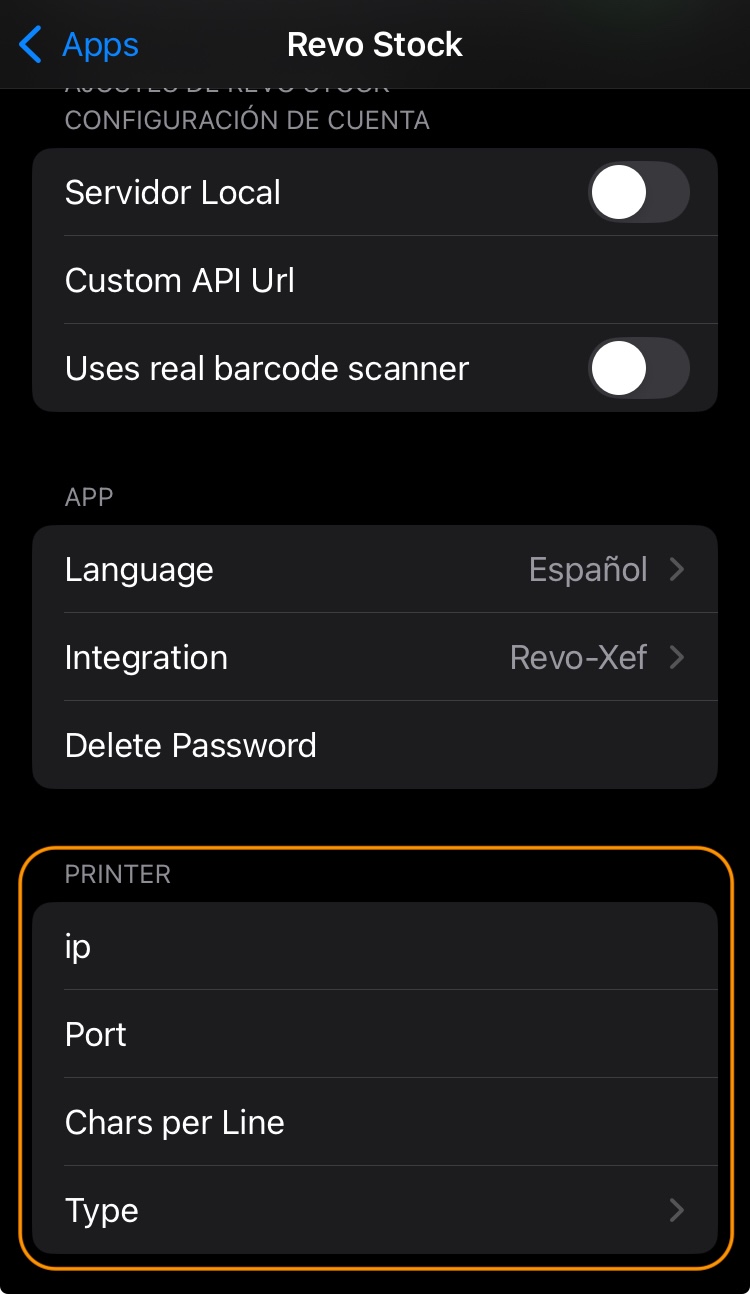
There is the option through to print those quantities displayed on the screen on paper format. We must previously configure the printer in the device's Settings (iOS) > Revo STOCK > enter the IP, port 9100 (default for all printers), characters per line, if necessary, and finally the type (driver).
STOCK MOVEMENTS
We will quickly visualize the stock movement history for each product and warehouse.
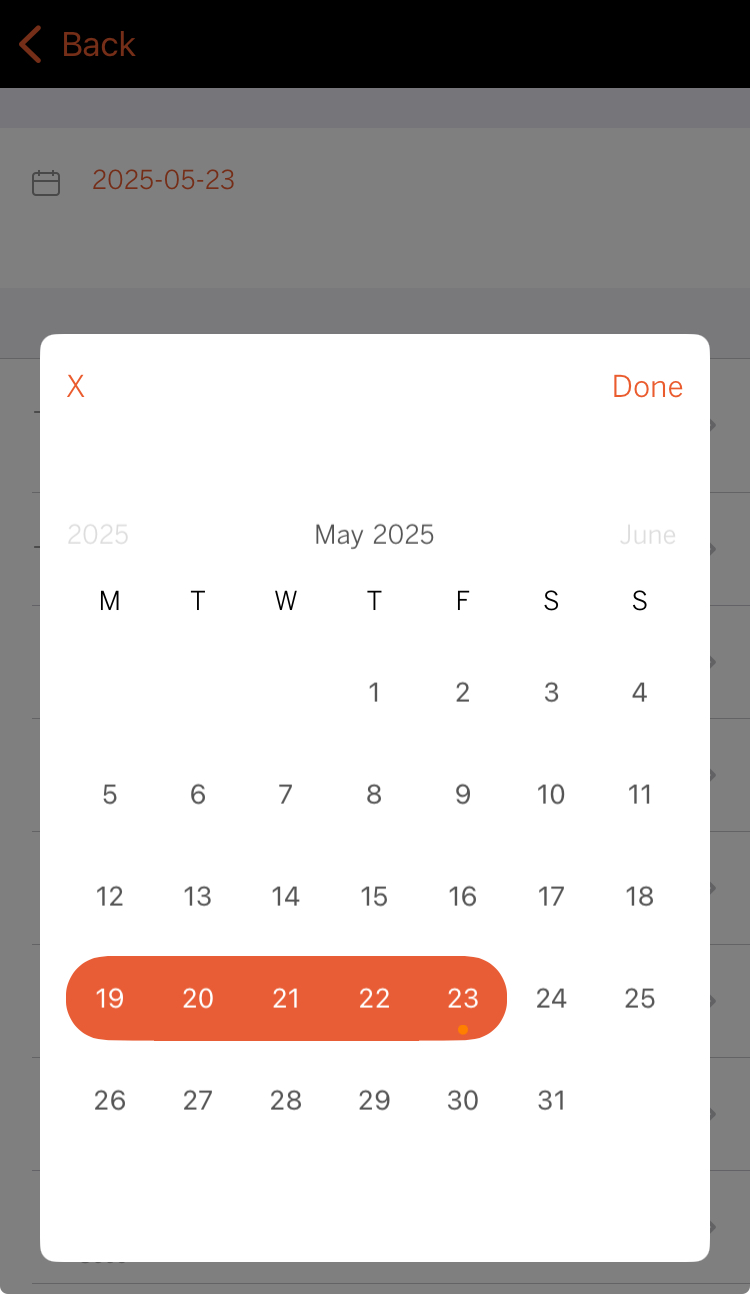
1. Click on the stock movements option.
2. Select a date or date range, indicating the start and end, and click on Done.
PURCHASE ORDERS
We can visualize, receive, manage, and create purchase orders in just a few seconds.
Receive orders:
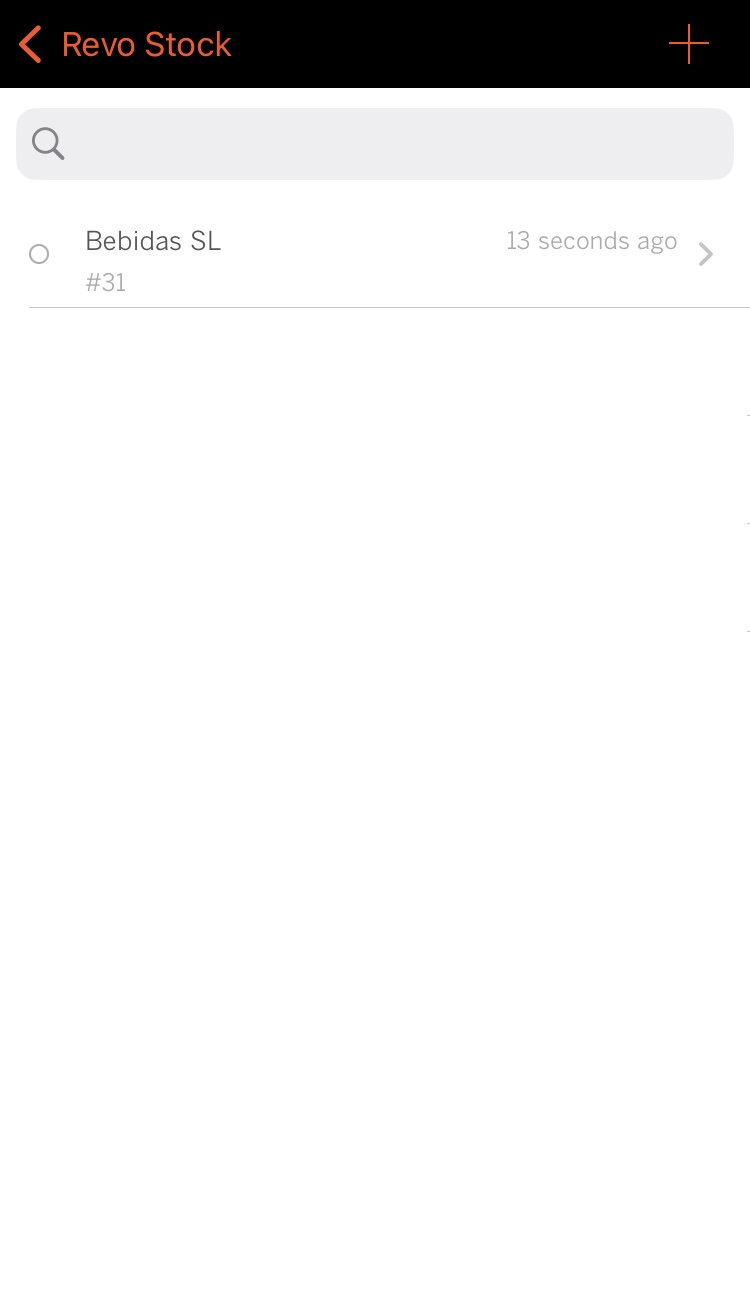
1. By default, the latest purchase orders are displayed.
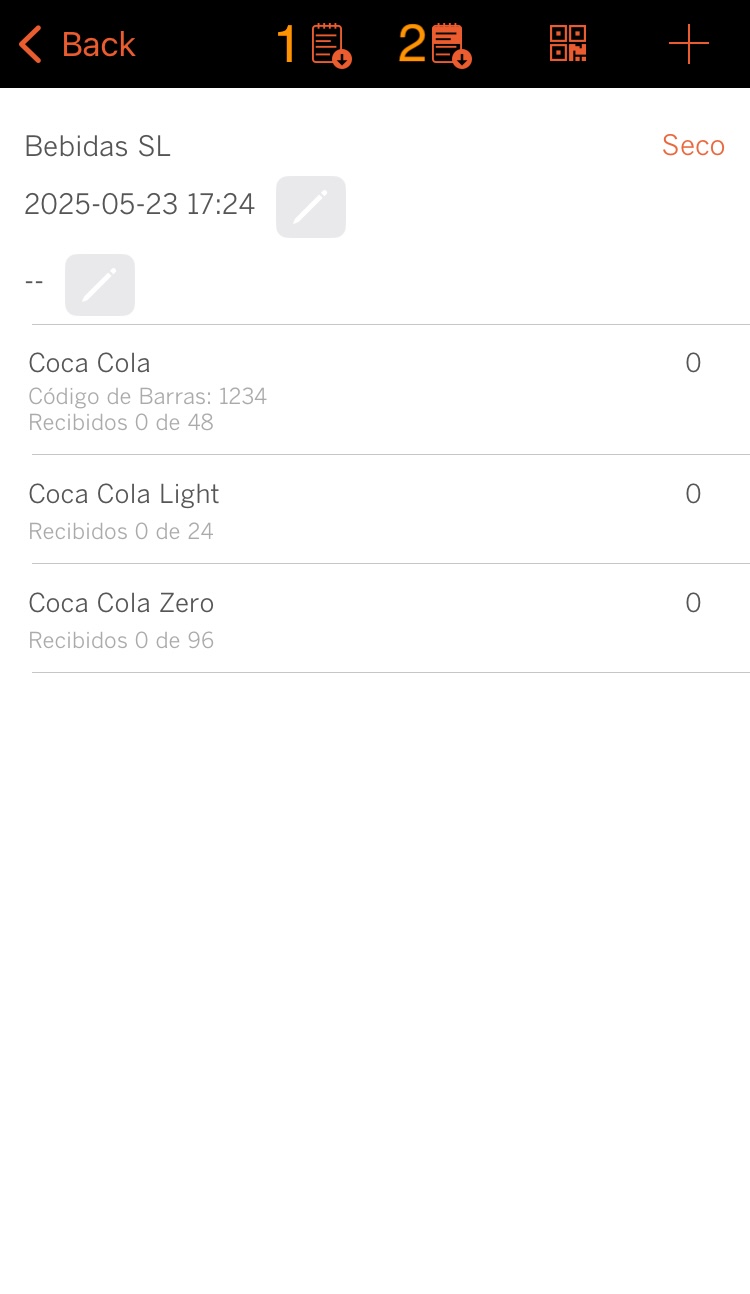
2. Click on one that is pending to receive.
The circle indicates that the order has been received. Otherwise, the circle indicates that it is pending to be received. When receiving an order, all the products that compose it will add the established quantities to their inventory.
3. Select the warehouse.
4. Click on ![]() to receive the entire order, or indicating the received quantities of some products, click on
to receive the entire order, or indicating the received quantities of some products, click on ![]() to receive that order partially. This option can be very useful when, for some reason, the supplier does not deliver all the units we had requested. For example, because the supplier lost part of the merchandise or due to lack of stock.
to receive that order partially. This option can be very useful when, for some reason, the supplier does not deliver all the units we had requested. For example, because the supplier lost part of the merchandise or due to lack of stock.
Create orders:
1. By default, the latest purchase orders are displayed.
2. Click on the button to create a new purchase order.
3. Select the supplier.
4. Add products and quantities manually through the button, or with the button to use the camera as a barcode reader.
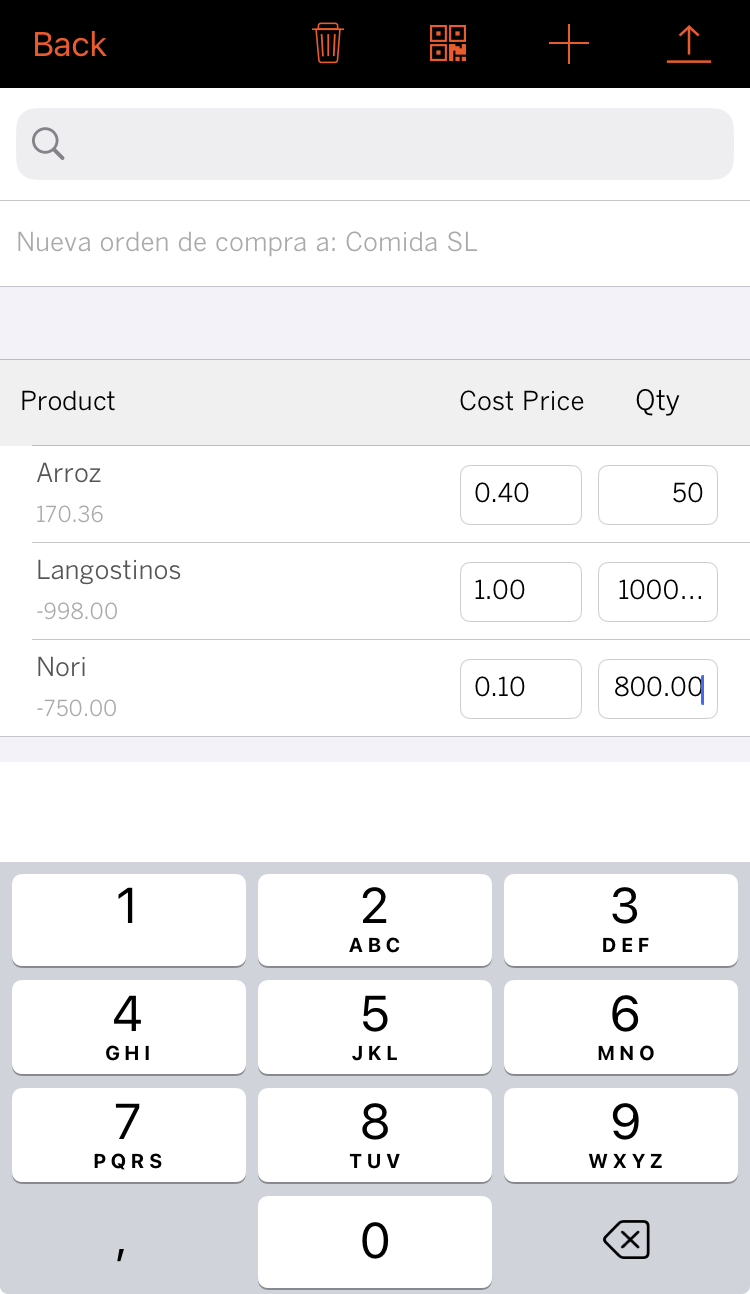
5. Once all the products and quantities of that supplier are entered, click on to save the changes.
3. MULTIPLE INVENTORIES
The concept of multiple inventories arises from the need of the customer to take an inventory of their entire premises by "zones." There are situations where a customer wants to take an inventory, but their premises are very large, so it is useful to divide the staff (each with their device) into zones of the premises, so that each group takes an inventory and thus speeds up the process.
If we add the same product to different inventories (zones), REVO will understand that we are dividing the premises into several "parts", if the different inventories are in the same TIME RANGE, the products that are identical will be summed up.
The time range includes from when we open the inventory (HA) until we APPROVE the inventory (AP). Either through the back-office or with the option to Automatically approve inventories.
For example:
1. INVENTORY 1 (ZONE 1): 1x Coca-cola, 2x 1 L Water. (HA= 9:00 a.m.)-(AP= 12:00 p.m.).
2. INVENTORY 2 (ZONE 2): 2x Coca-cola, 1x Beer (HA= 10:00 a.m.)-(AP= 11:00 a.m.).
Result of the stocks of the products: 3x Coca-cola, 2x 1 L Water, 1x Beer.
If the two conditions are not met (product repetition + same time range), it will simply act as a regular inventory, explained above.