
STATUS: ACTIVE
VERSION: 4.2
Note: This integration is available for all countries (without the need for fiscal configuration) if it will only be used to make room charges.
1. WHAT IS CLOUDBEDS? 2. HOW DOES THE INTEGRATION BETWEEN CLOUDBEDS AND REVO WORK? 3. CONFIGURATION IN REVO 4. HOW TO MAKE A ROOM CHARGE? 5. HOW TO CANCEL A ROOM CHARGE? 6. CLOUDBEDS BACK-OFFICE 7. HOW TO DISCONNECT THE INTEGRATION IN REVO XEF BACK-OFFICE? 8. HOW TO DISCONNECT THE INTEGRATION IN CLOUDBEDS BACK-OFFICE?
1. WHAT IS CLOUDBEDS?
Cloudbeds is a cloud-based PMS designed for independent hotels and hotel chains. Set up your property, define contracts, assign credit, manage deposits, and start controlling all your bookings.
Reduce costs, automate processes, and increase your direct bookings. Subscribe to learn more about this cloud hotel management software used by top-performing hotels.
2. HOW DOES THE CLOUDBEDS AND REVO INTEGRATION WORK?
This integration allows you to use Cloudbeds together with REVO. Manage everything from a multi-platform cloud-based system.
The CLOUDBEDS <-> REVO integration allows you to:
- Make charges from REVO to the customer's account (room or bed).
- Process refunds from REVO to the customer's account.
- Send tax details either per line or on a separate line.
3. CONFIGURATION IN REVO
INTEGRATION SETUP
1. Go to the Revo XEF back office.
2. Navigate to Integrations / INTEGRATIONS.
3. Click + New, search CloudBeds, and select + Add.

4. Fill in the following fields:
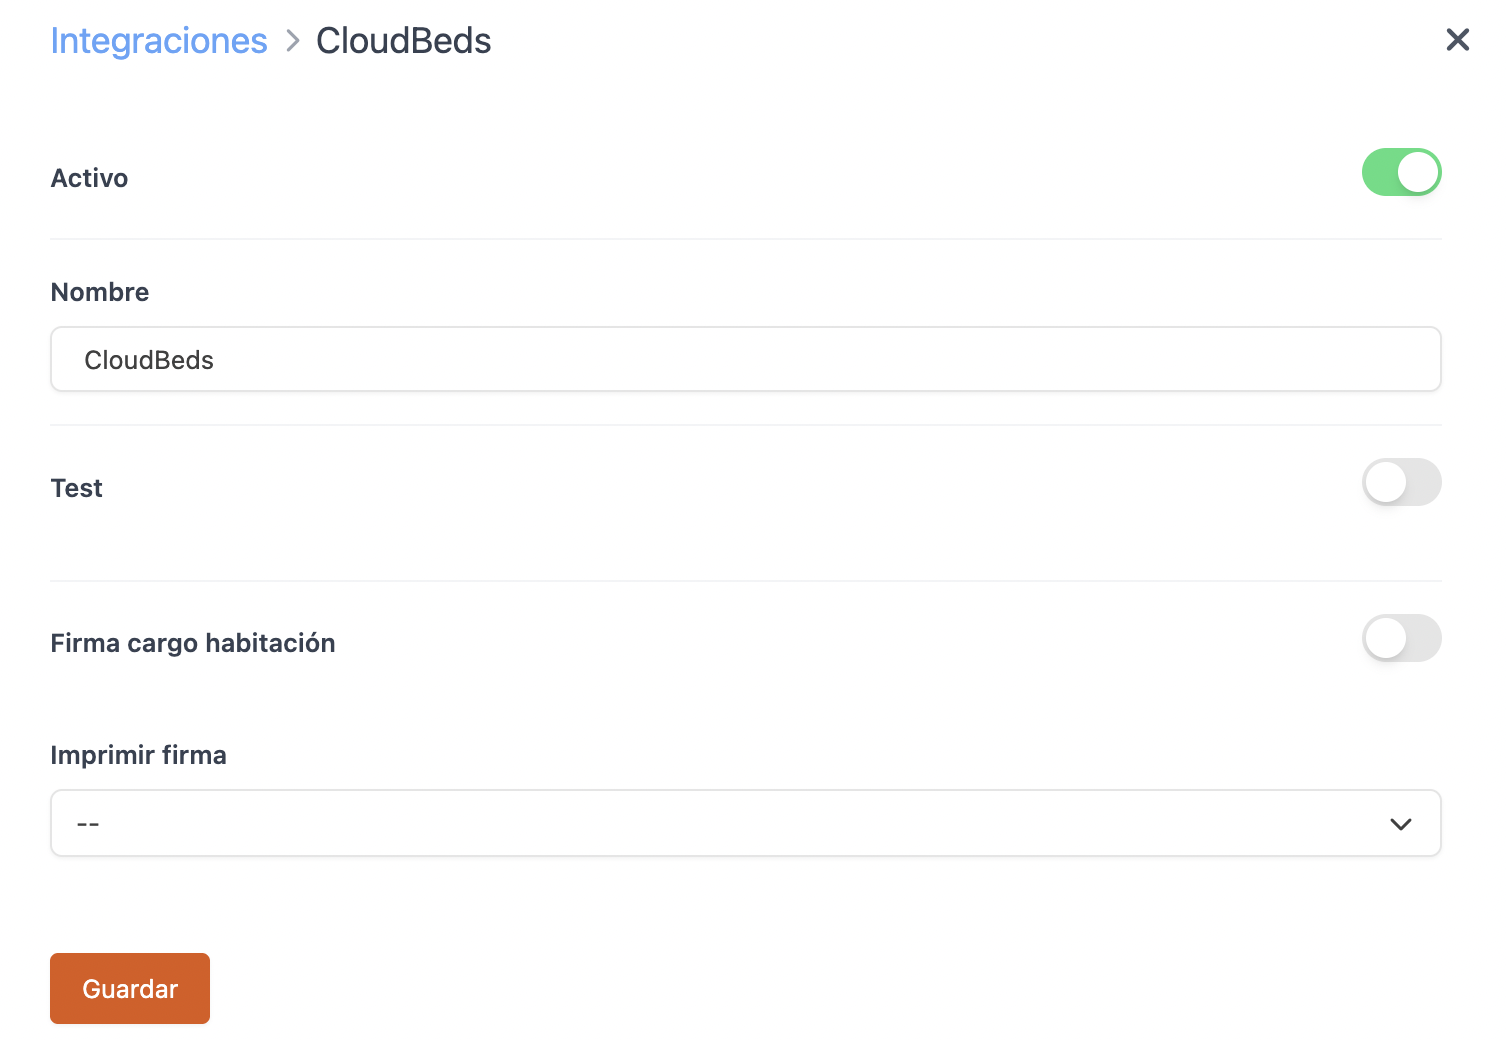
-
Active:
-
Name: Give the integration a name.
-
Test: Disabled.
-
Room charge signature: Enable to request customer signature.
-
Print signature: Choose whether you want to print the signature.
5. Click Save.
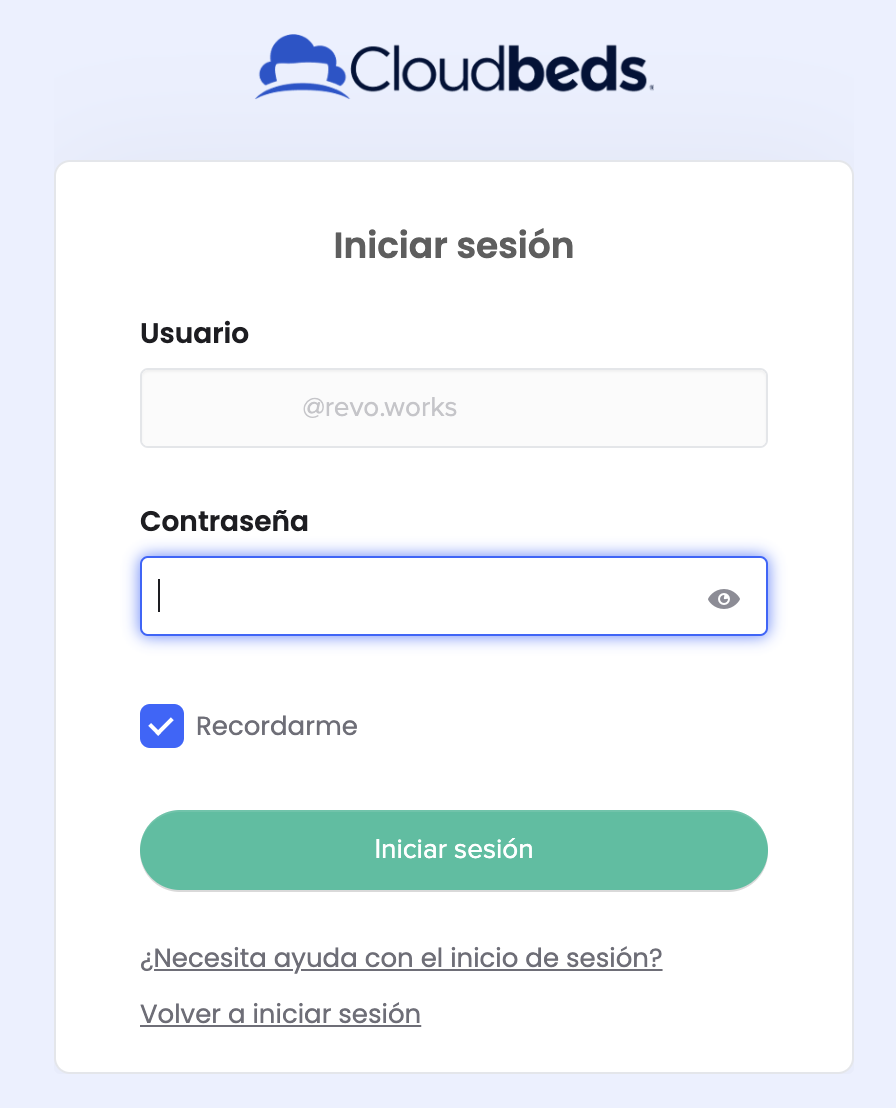
6. In a new browser tab, go to the Cloudbeds back office: https://hotels.cloudbeds.com
7. Log in: enter your email, password and click Login.

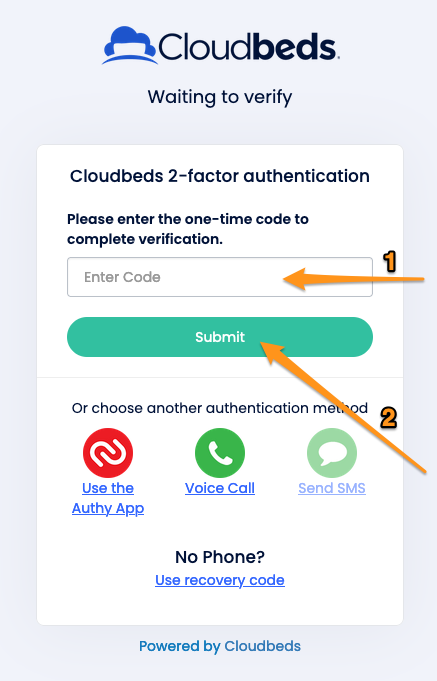
8. If your Cloudbeds account has two-step verification enabled: enter the code received by email or mobile and click Submit.
Connecting via Cloudbeds
1. Click on your profile and select Apps & Marketplace.
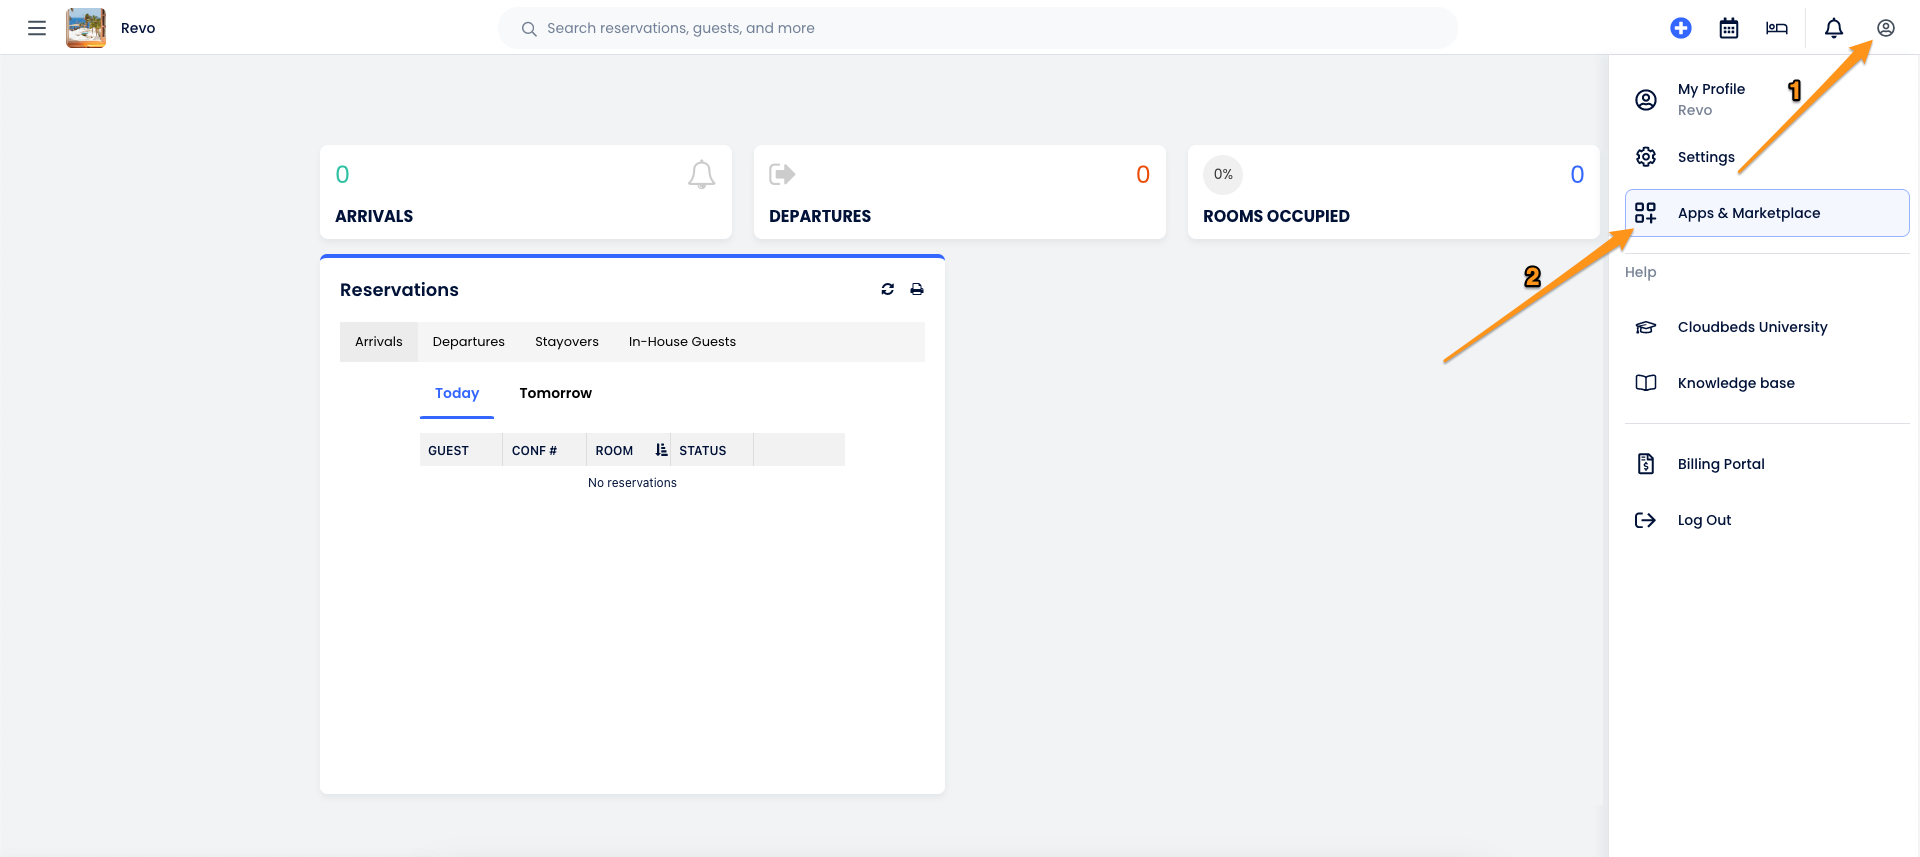
2. In Search Apps, search for REVO and select LEARN MORE under the REVO app.
3. Click CONNECT APP.
4. Enter your Revo XEF username and password in the new window and click Login.
5. Click Allow.
Once these steps are completed, you can go directly to the payment method setup.
Connecting via REVO
1. Go back to the Revo XEF back office. In the INTEGRATIONS section, log in: click the actions button for the integration and choose Login.

2. A Cloudbeds page will open (with your session already active), click Allow Access.
SETTING UP THE PAYMENT METHOD
1. Go to Configuration / PAYMENT METHODS.
2. It will be created automatically. You can edit it by clicking .
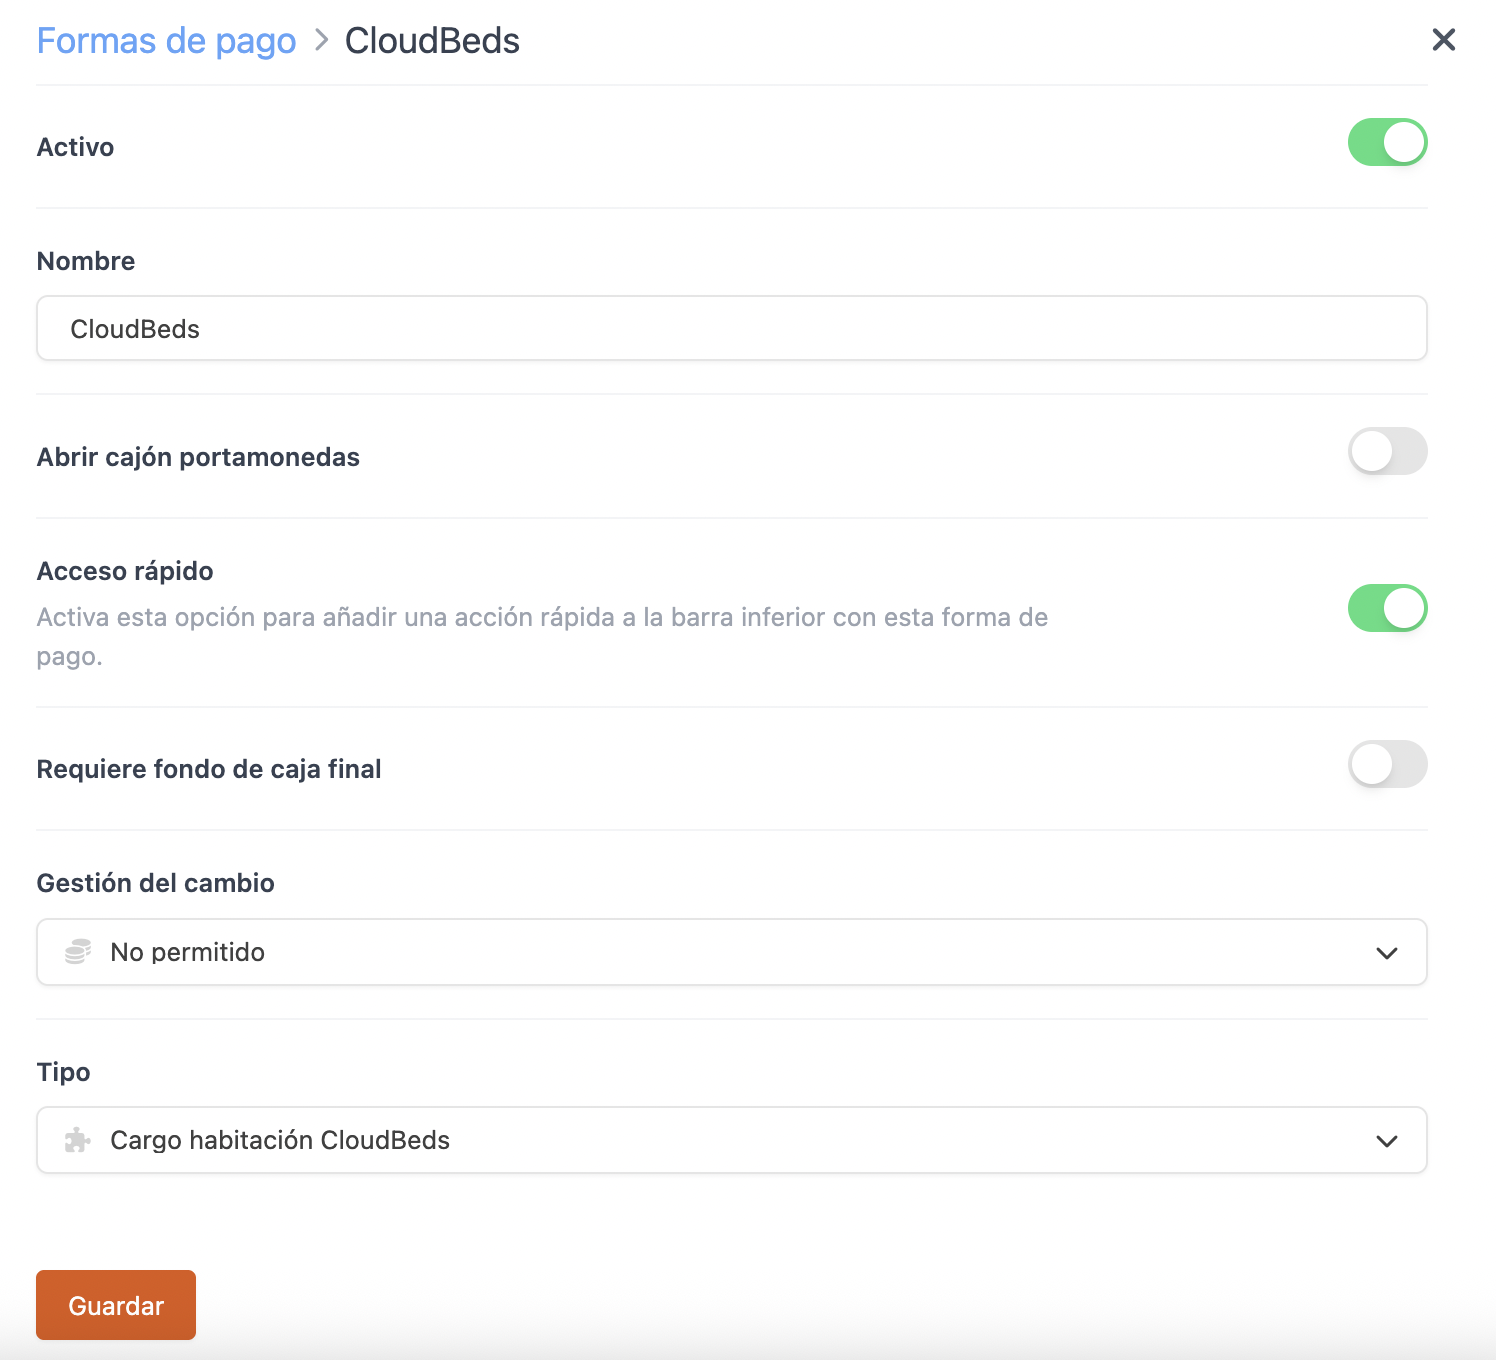
-
Active:
-
Name: CloudBeds.
-
Open cash drawer:
-
Quick access: Enable for quick access.
Requires Revo XEF Advance.
-
Requires end-of-day cash: Enable if necessary.
-
Change handling: Not allowed.
-
Type: CloudBeds room charge.
4. Click Save.
Done! The integration is now configured.
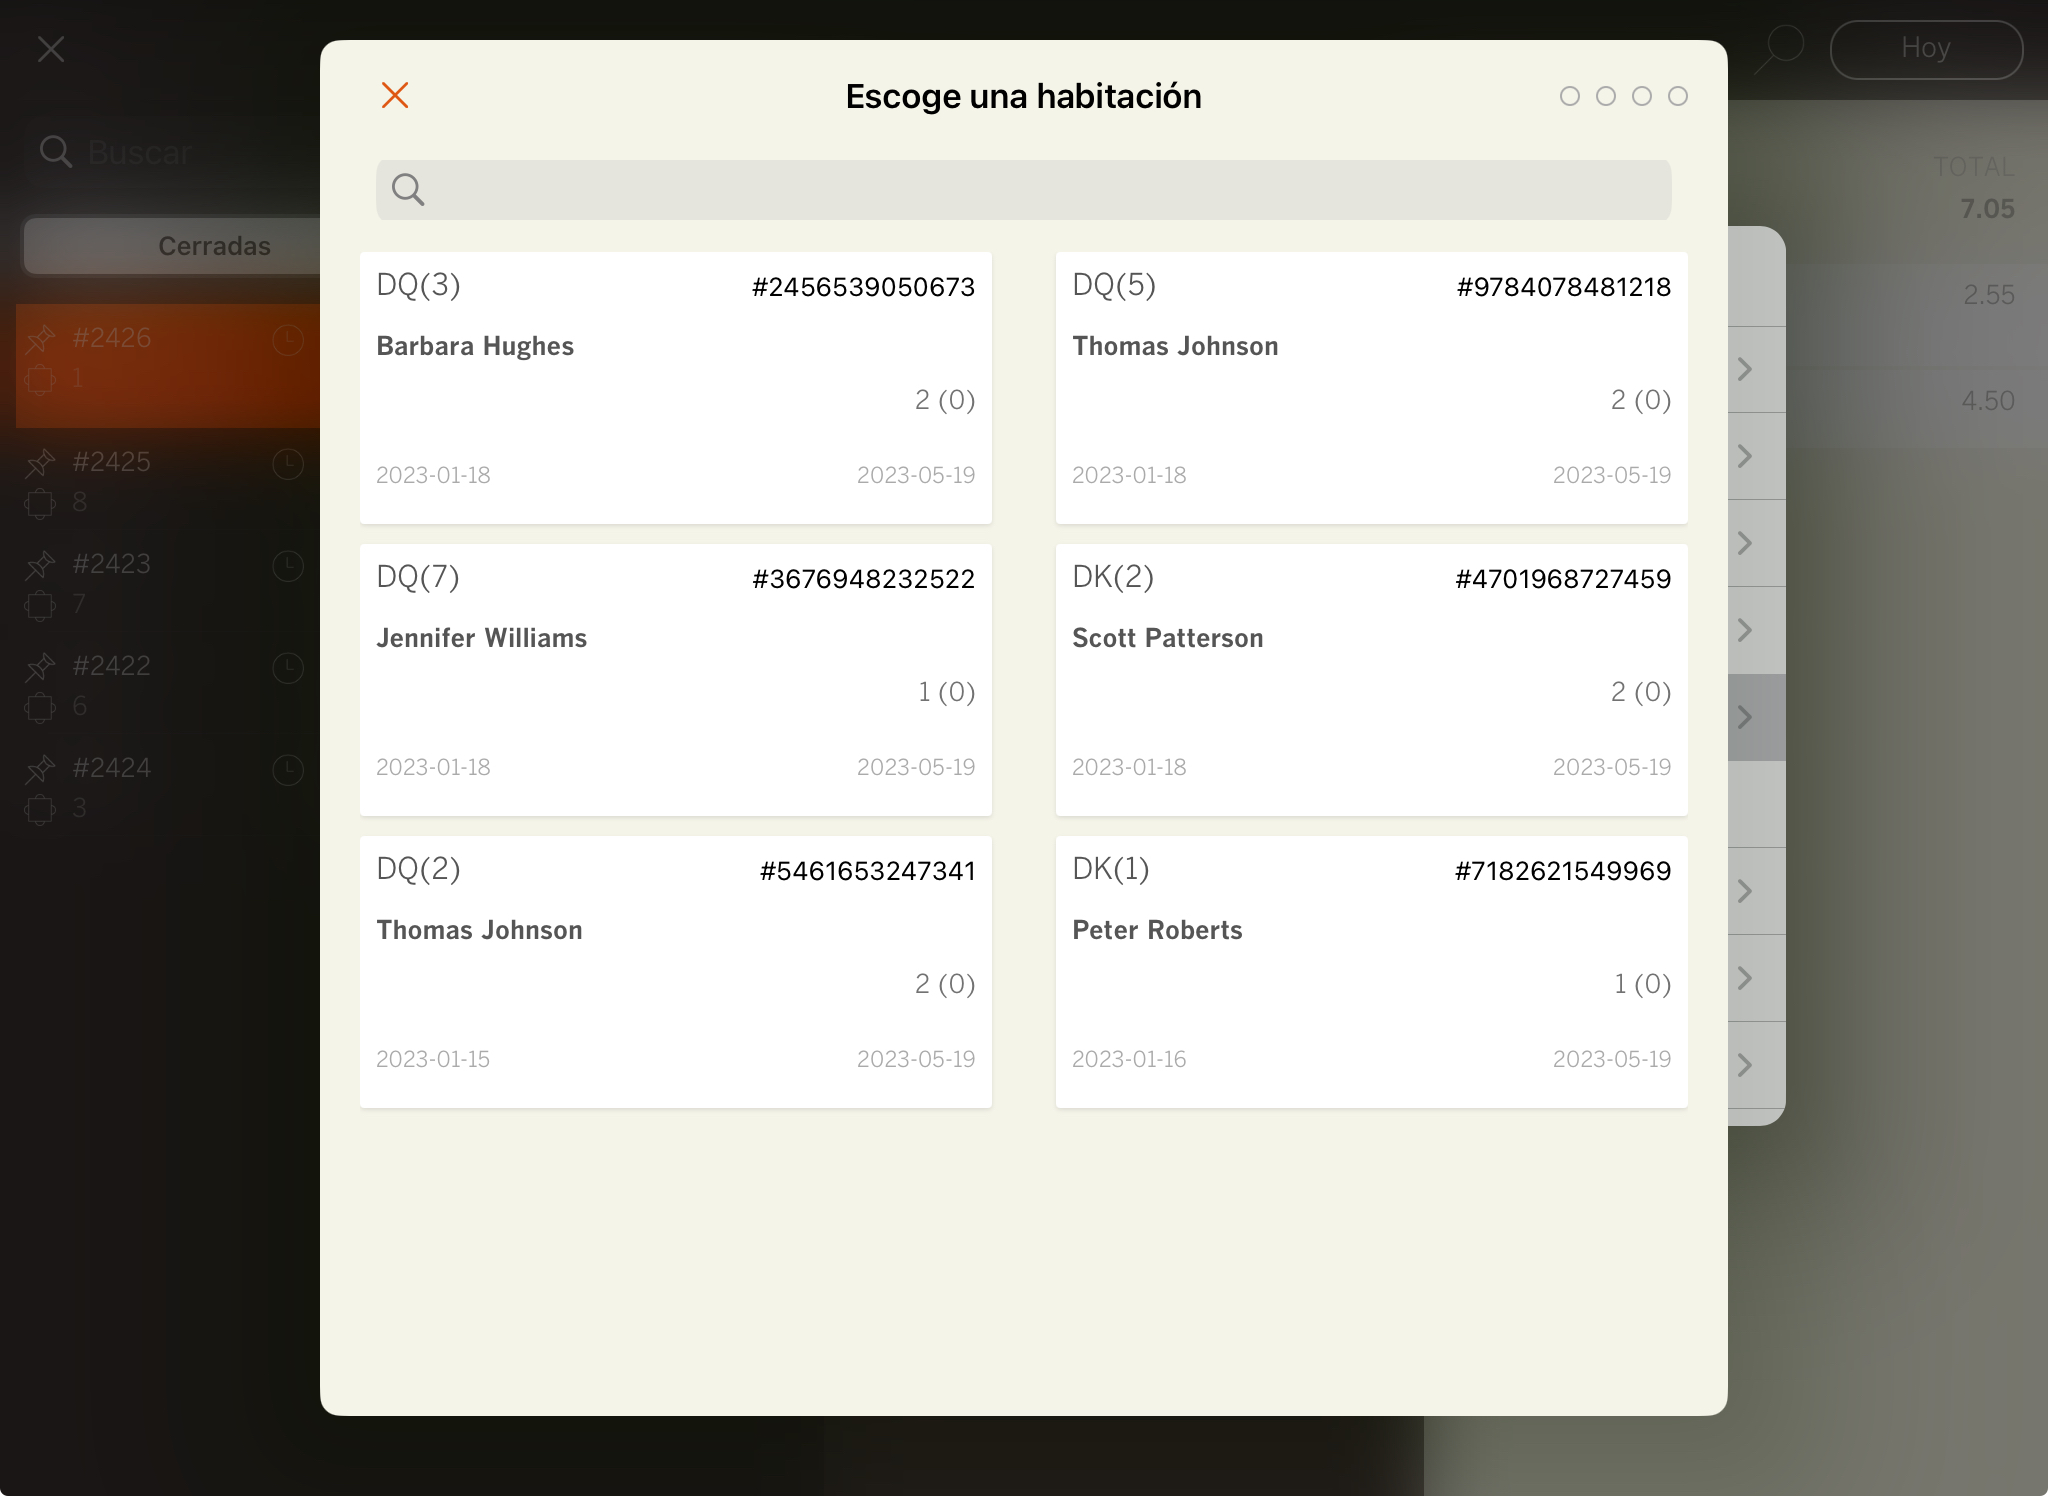
4. HOW TO CHARGE A ROOM
1. Open an order, add products, and proceed to payment.
2. If you have quick access, tap . Otherwise, tap other payment methods and select CloudBeds.
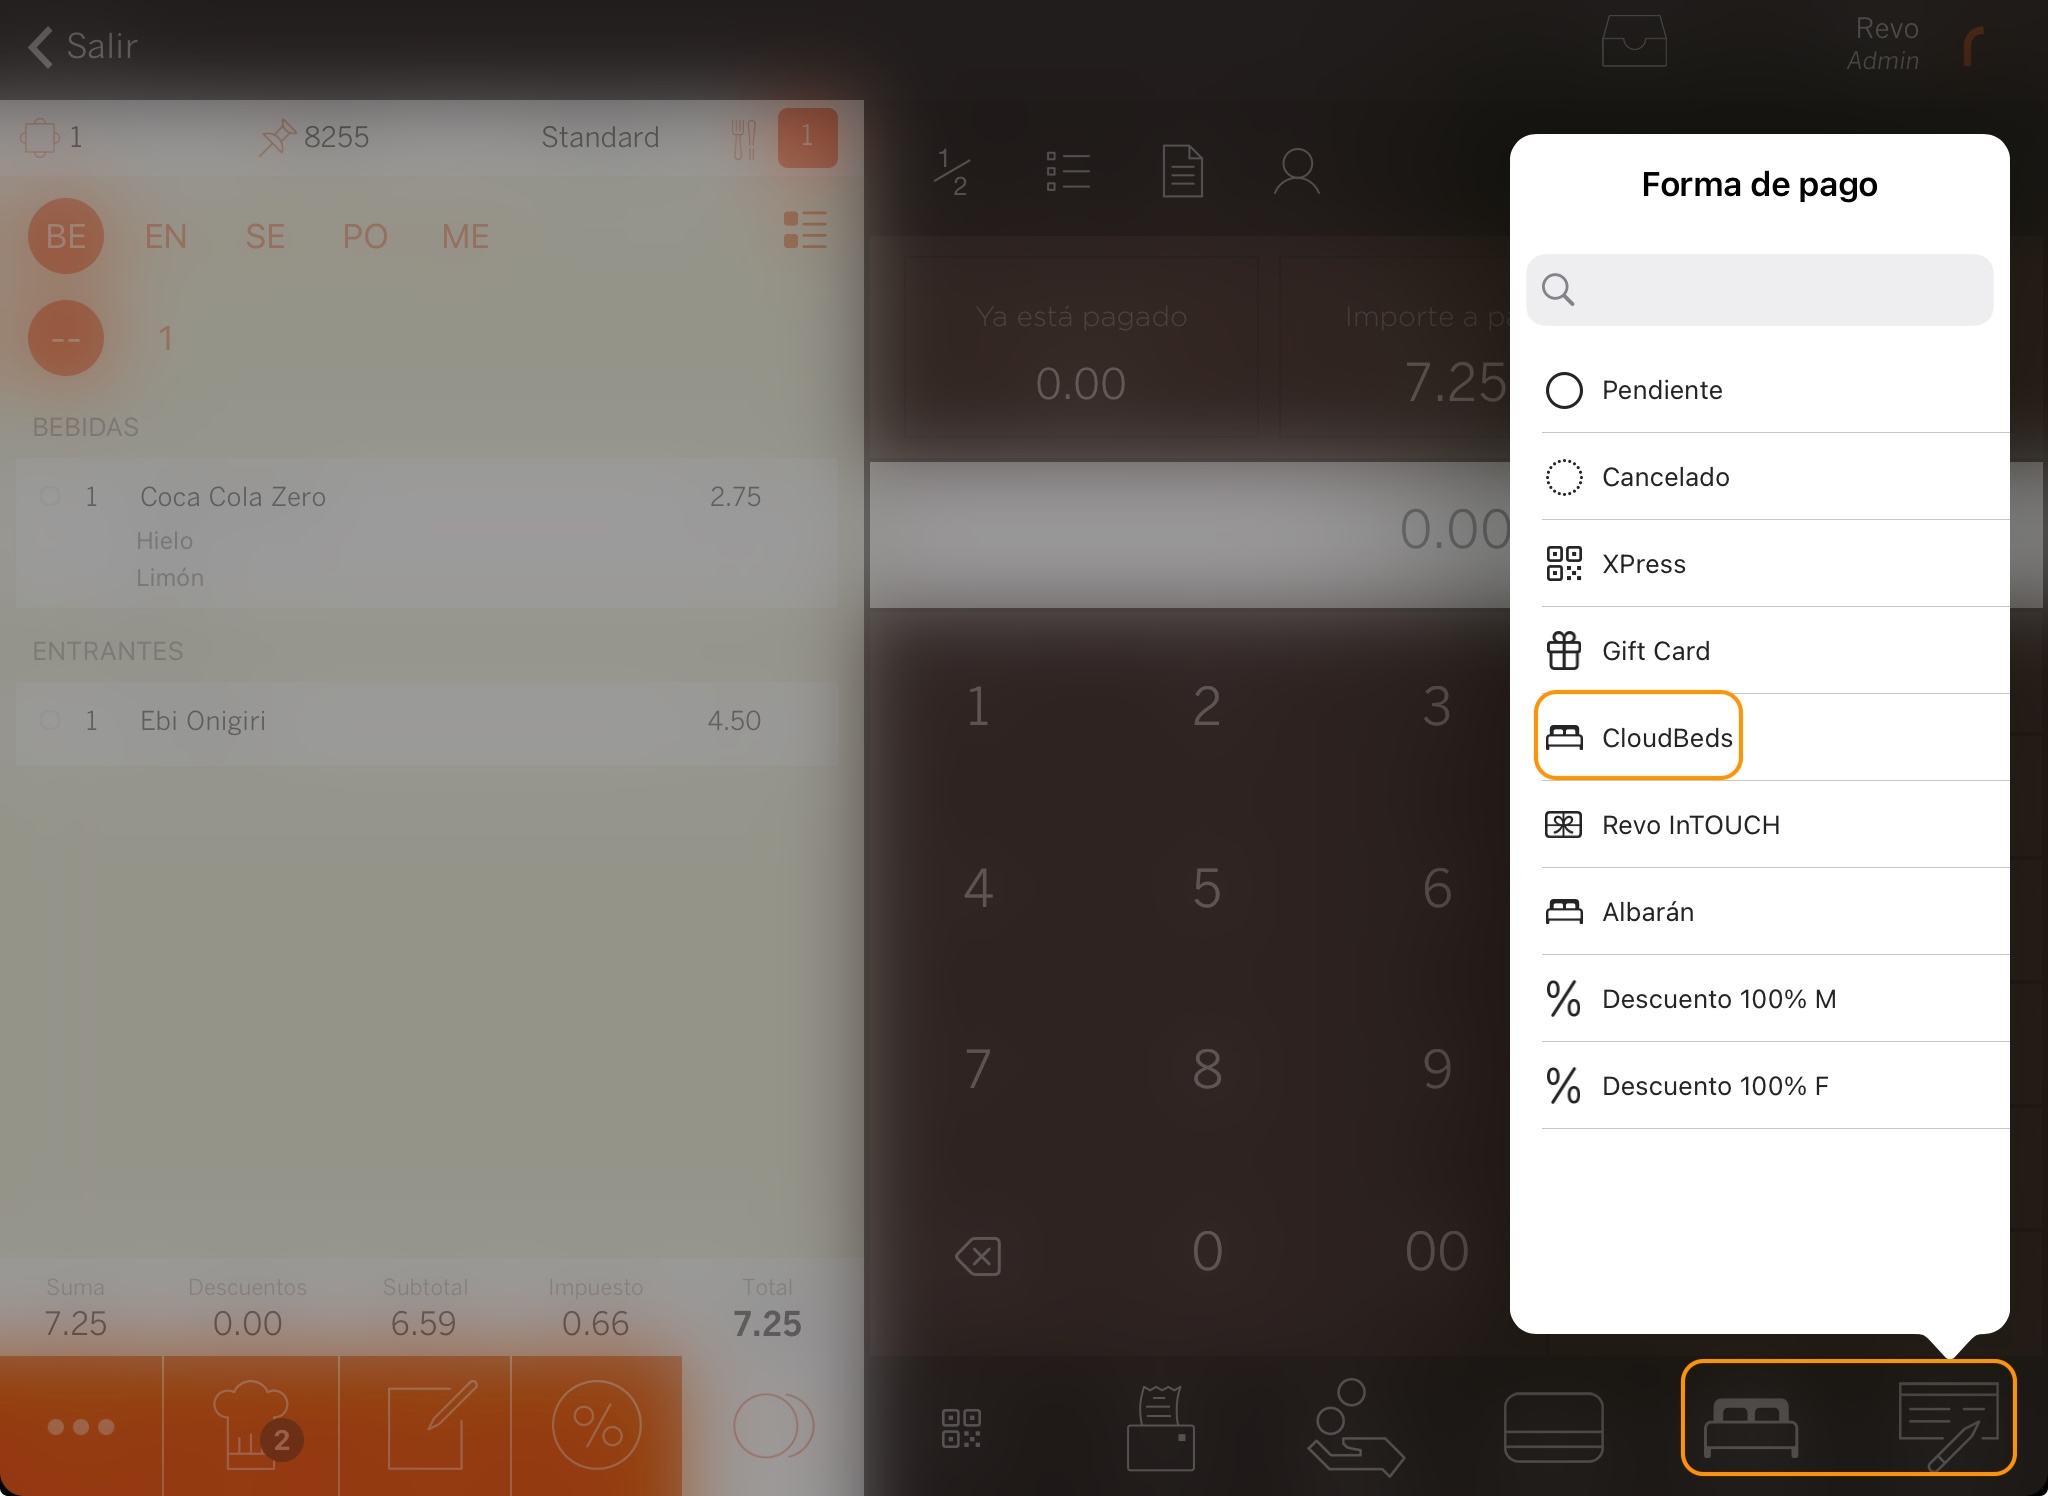
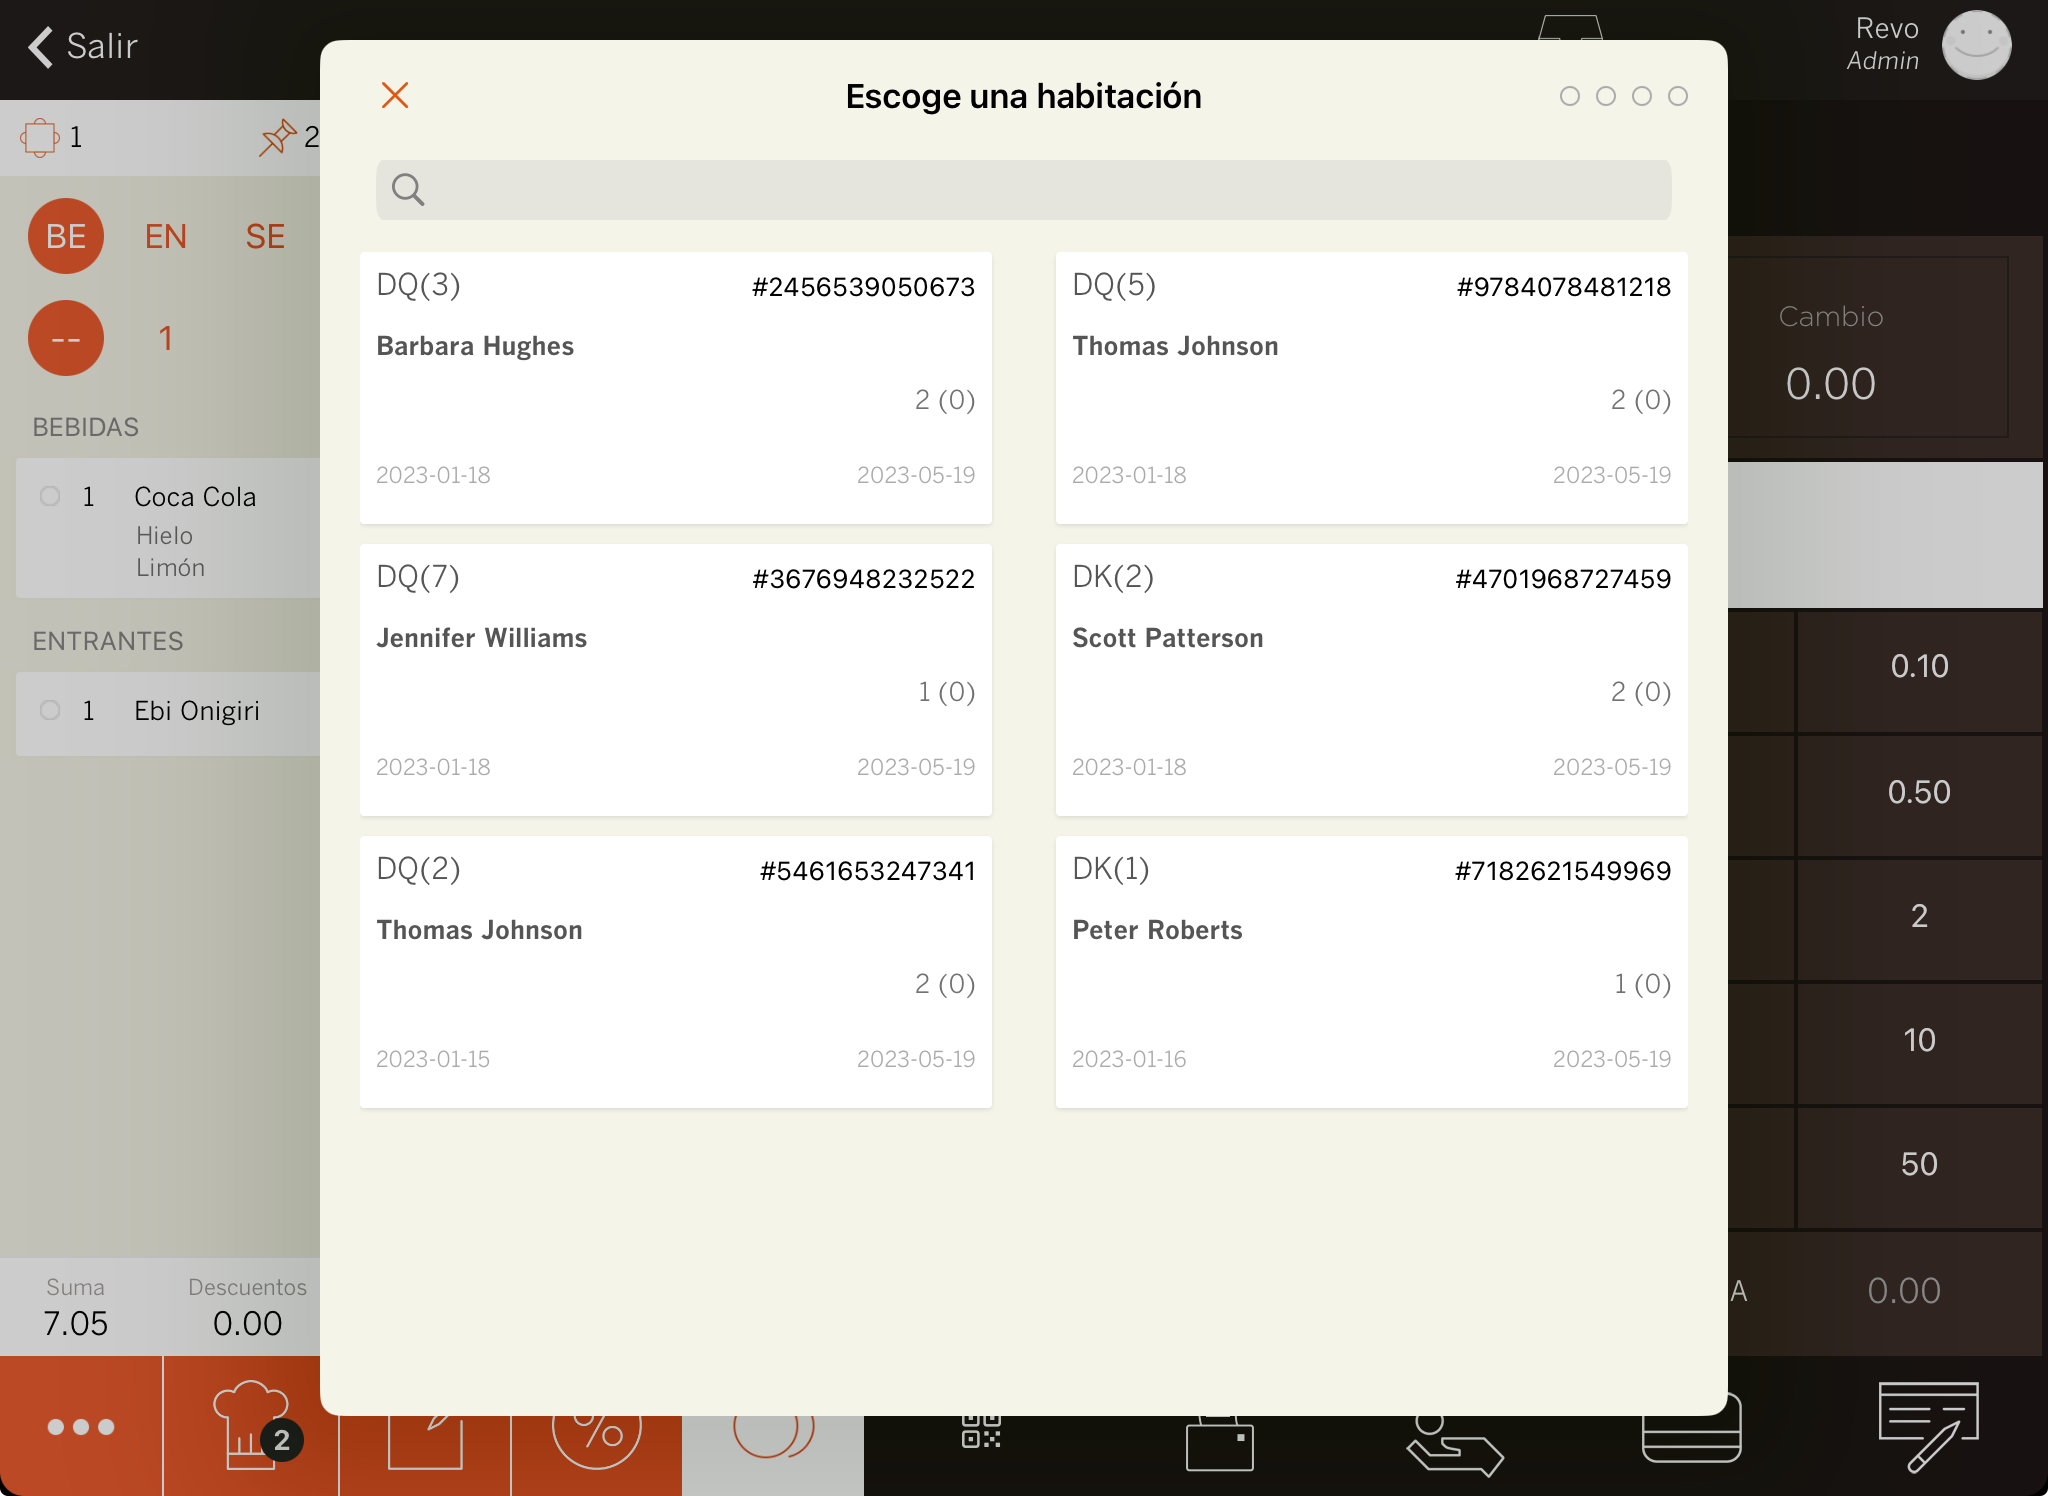
3. Enter the room number. You can only search by room, not by guest.
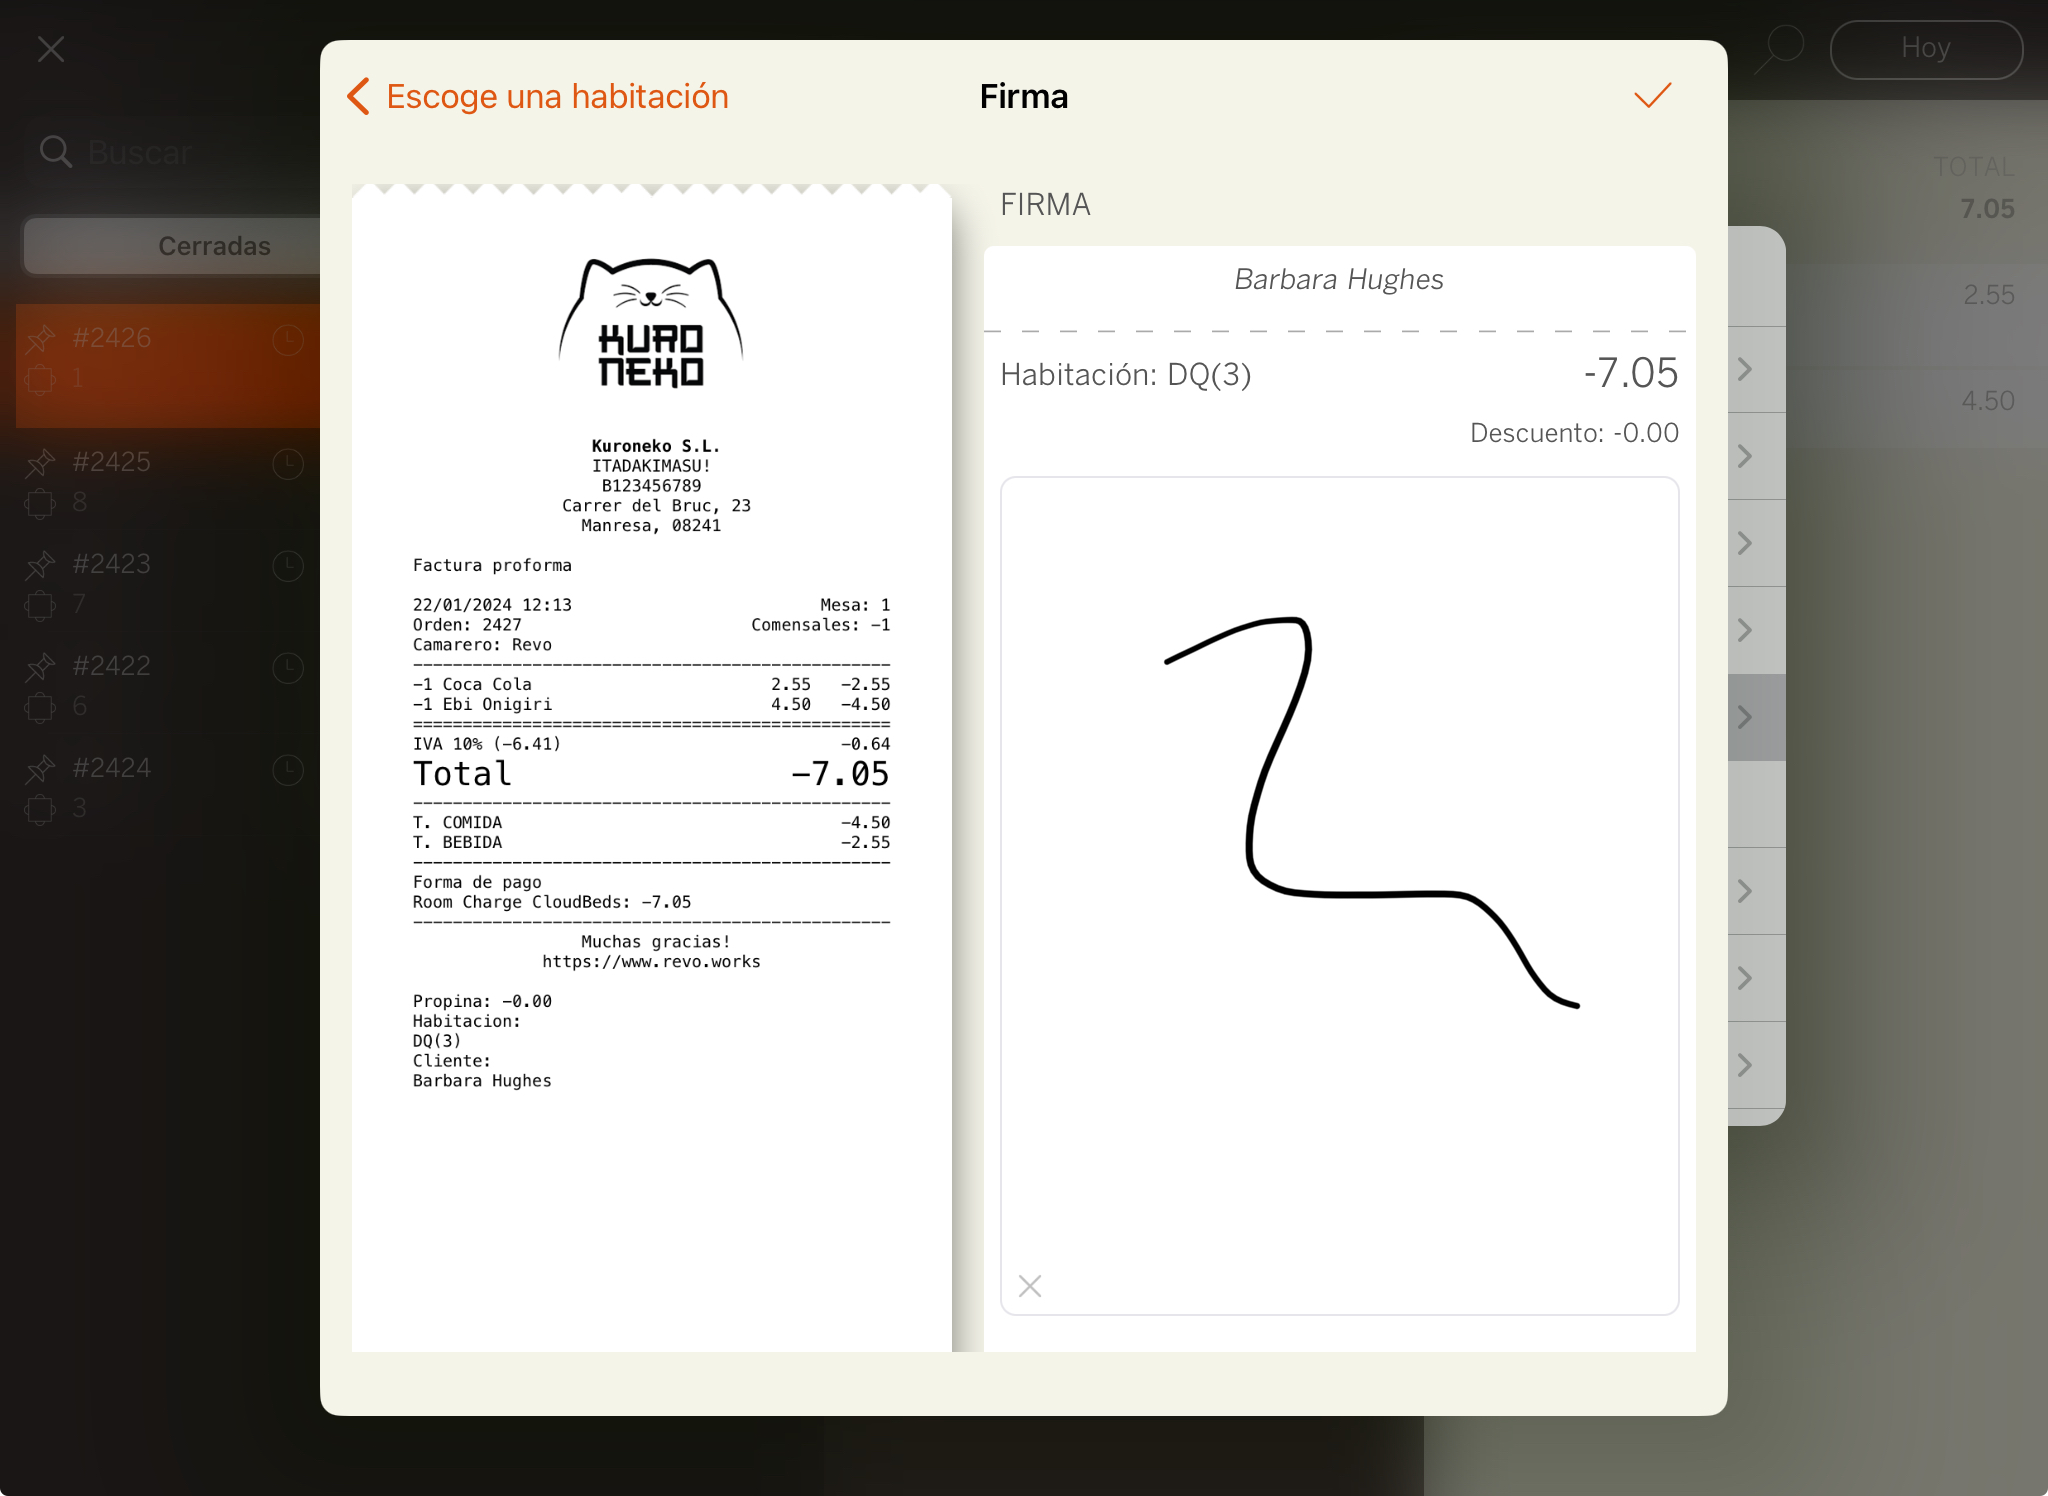
5. If Room charge signature is enabled: ask the customer to sign and press .
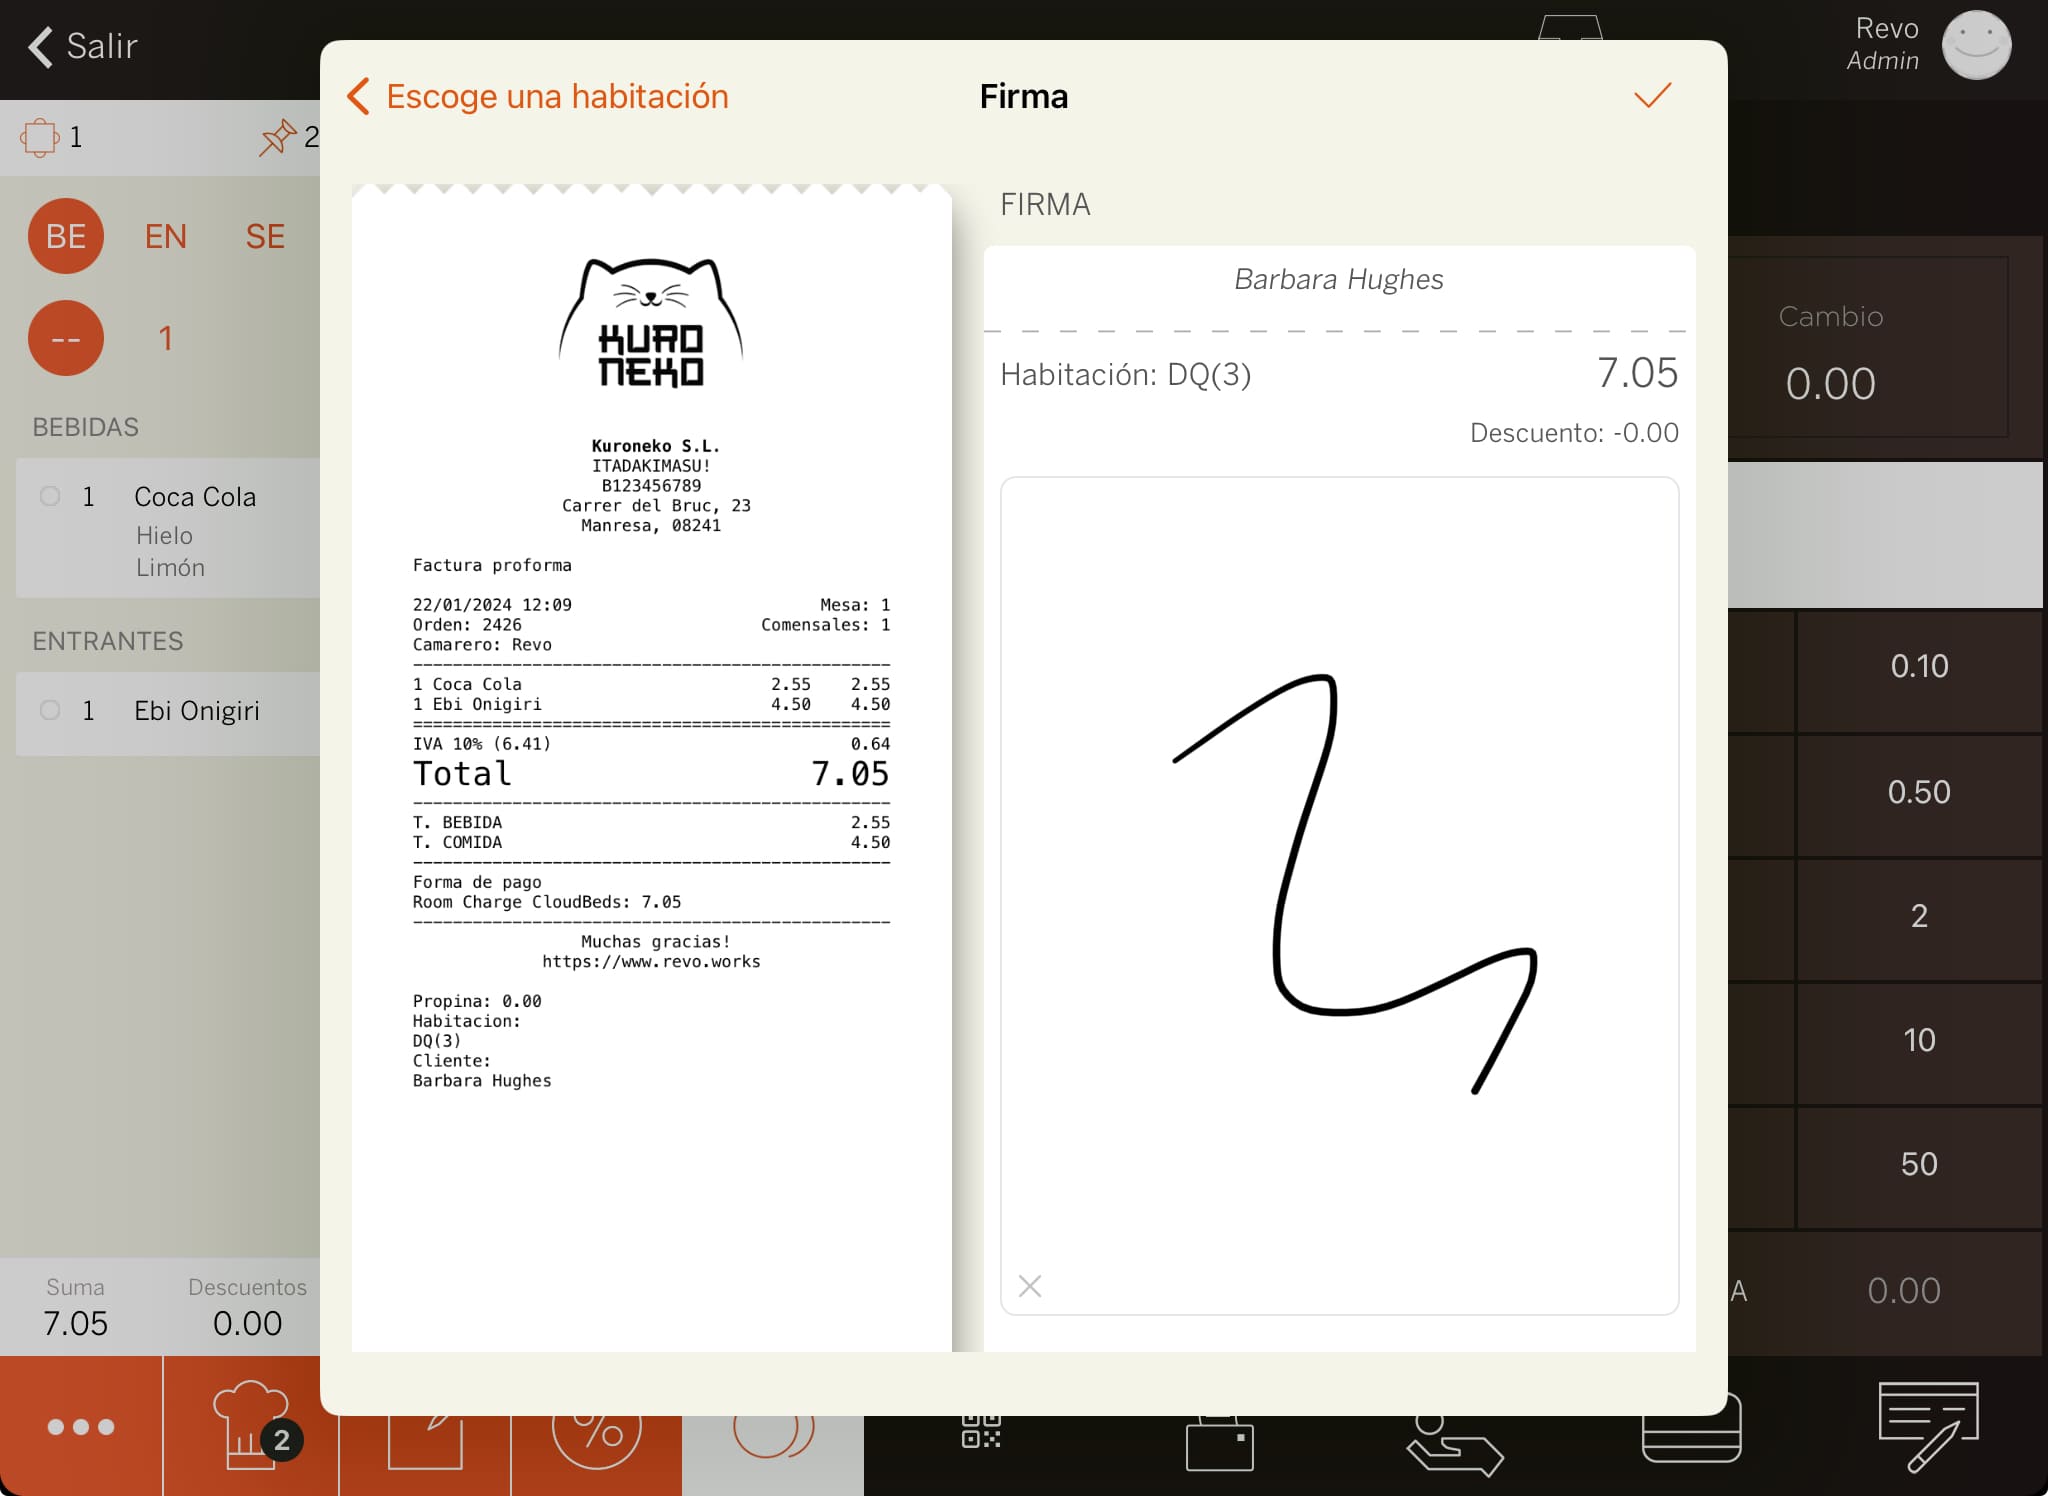
6. The system will print the receipt or ask if you want to print it.
5. HOW TO CANCEL A ROOM CHARGE
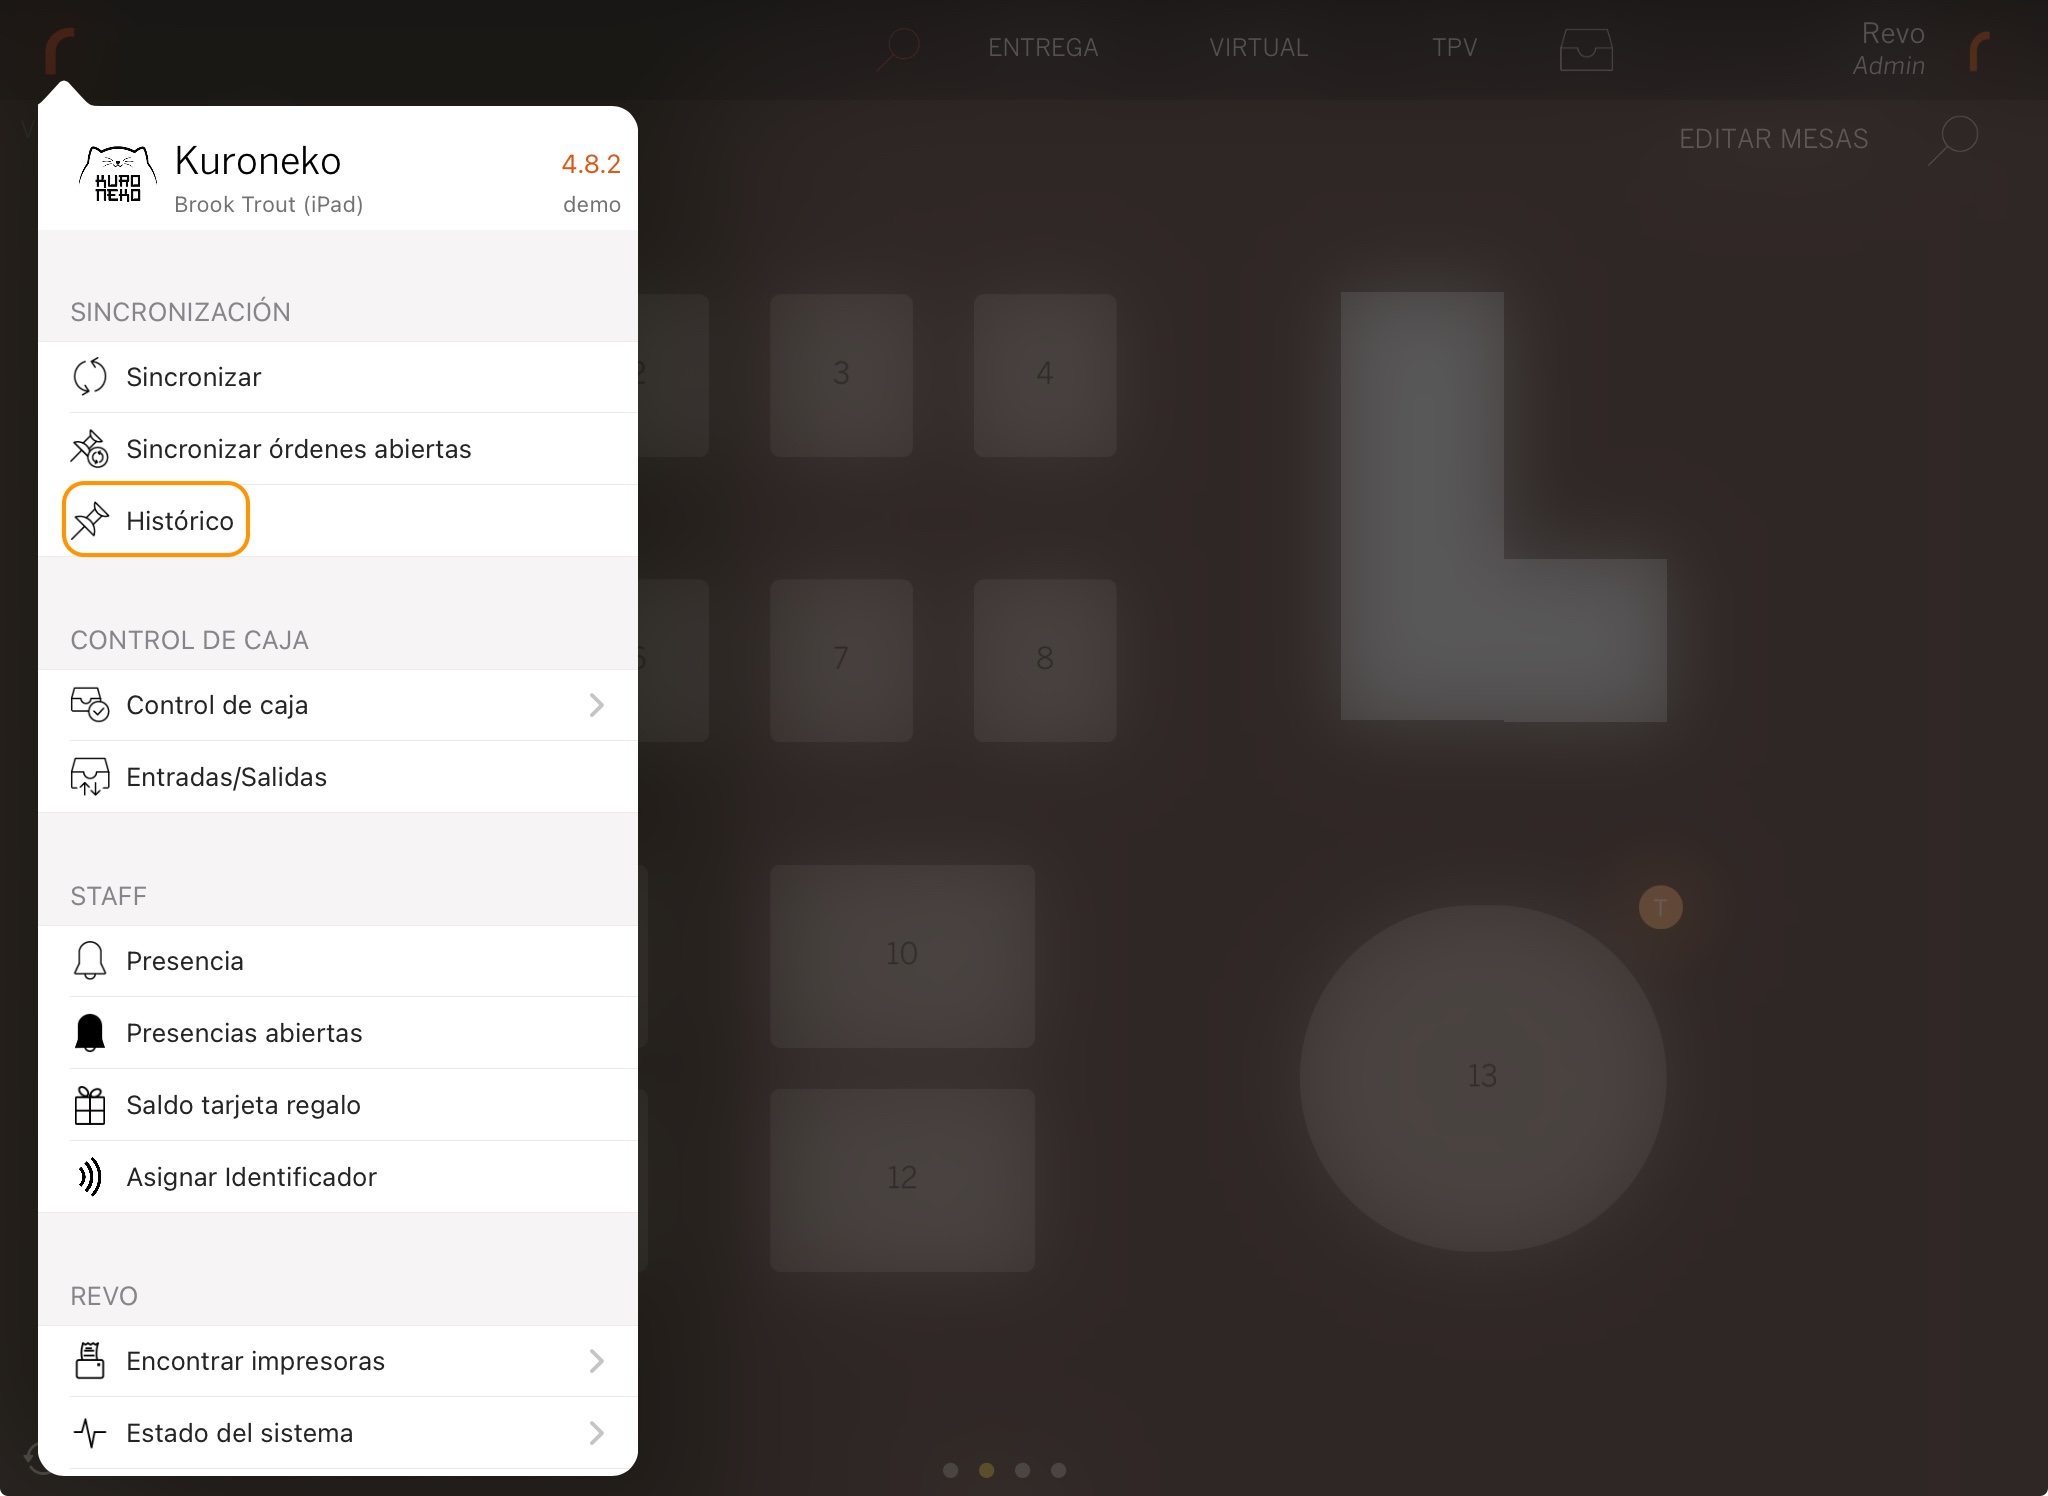
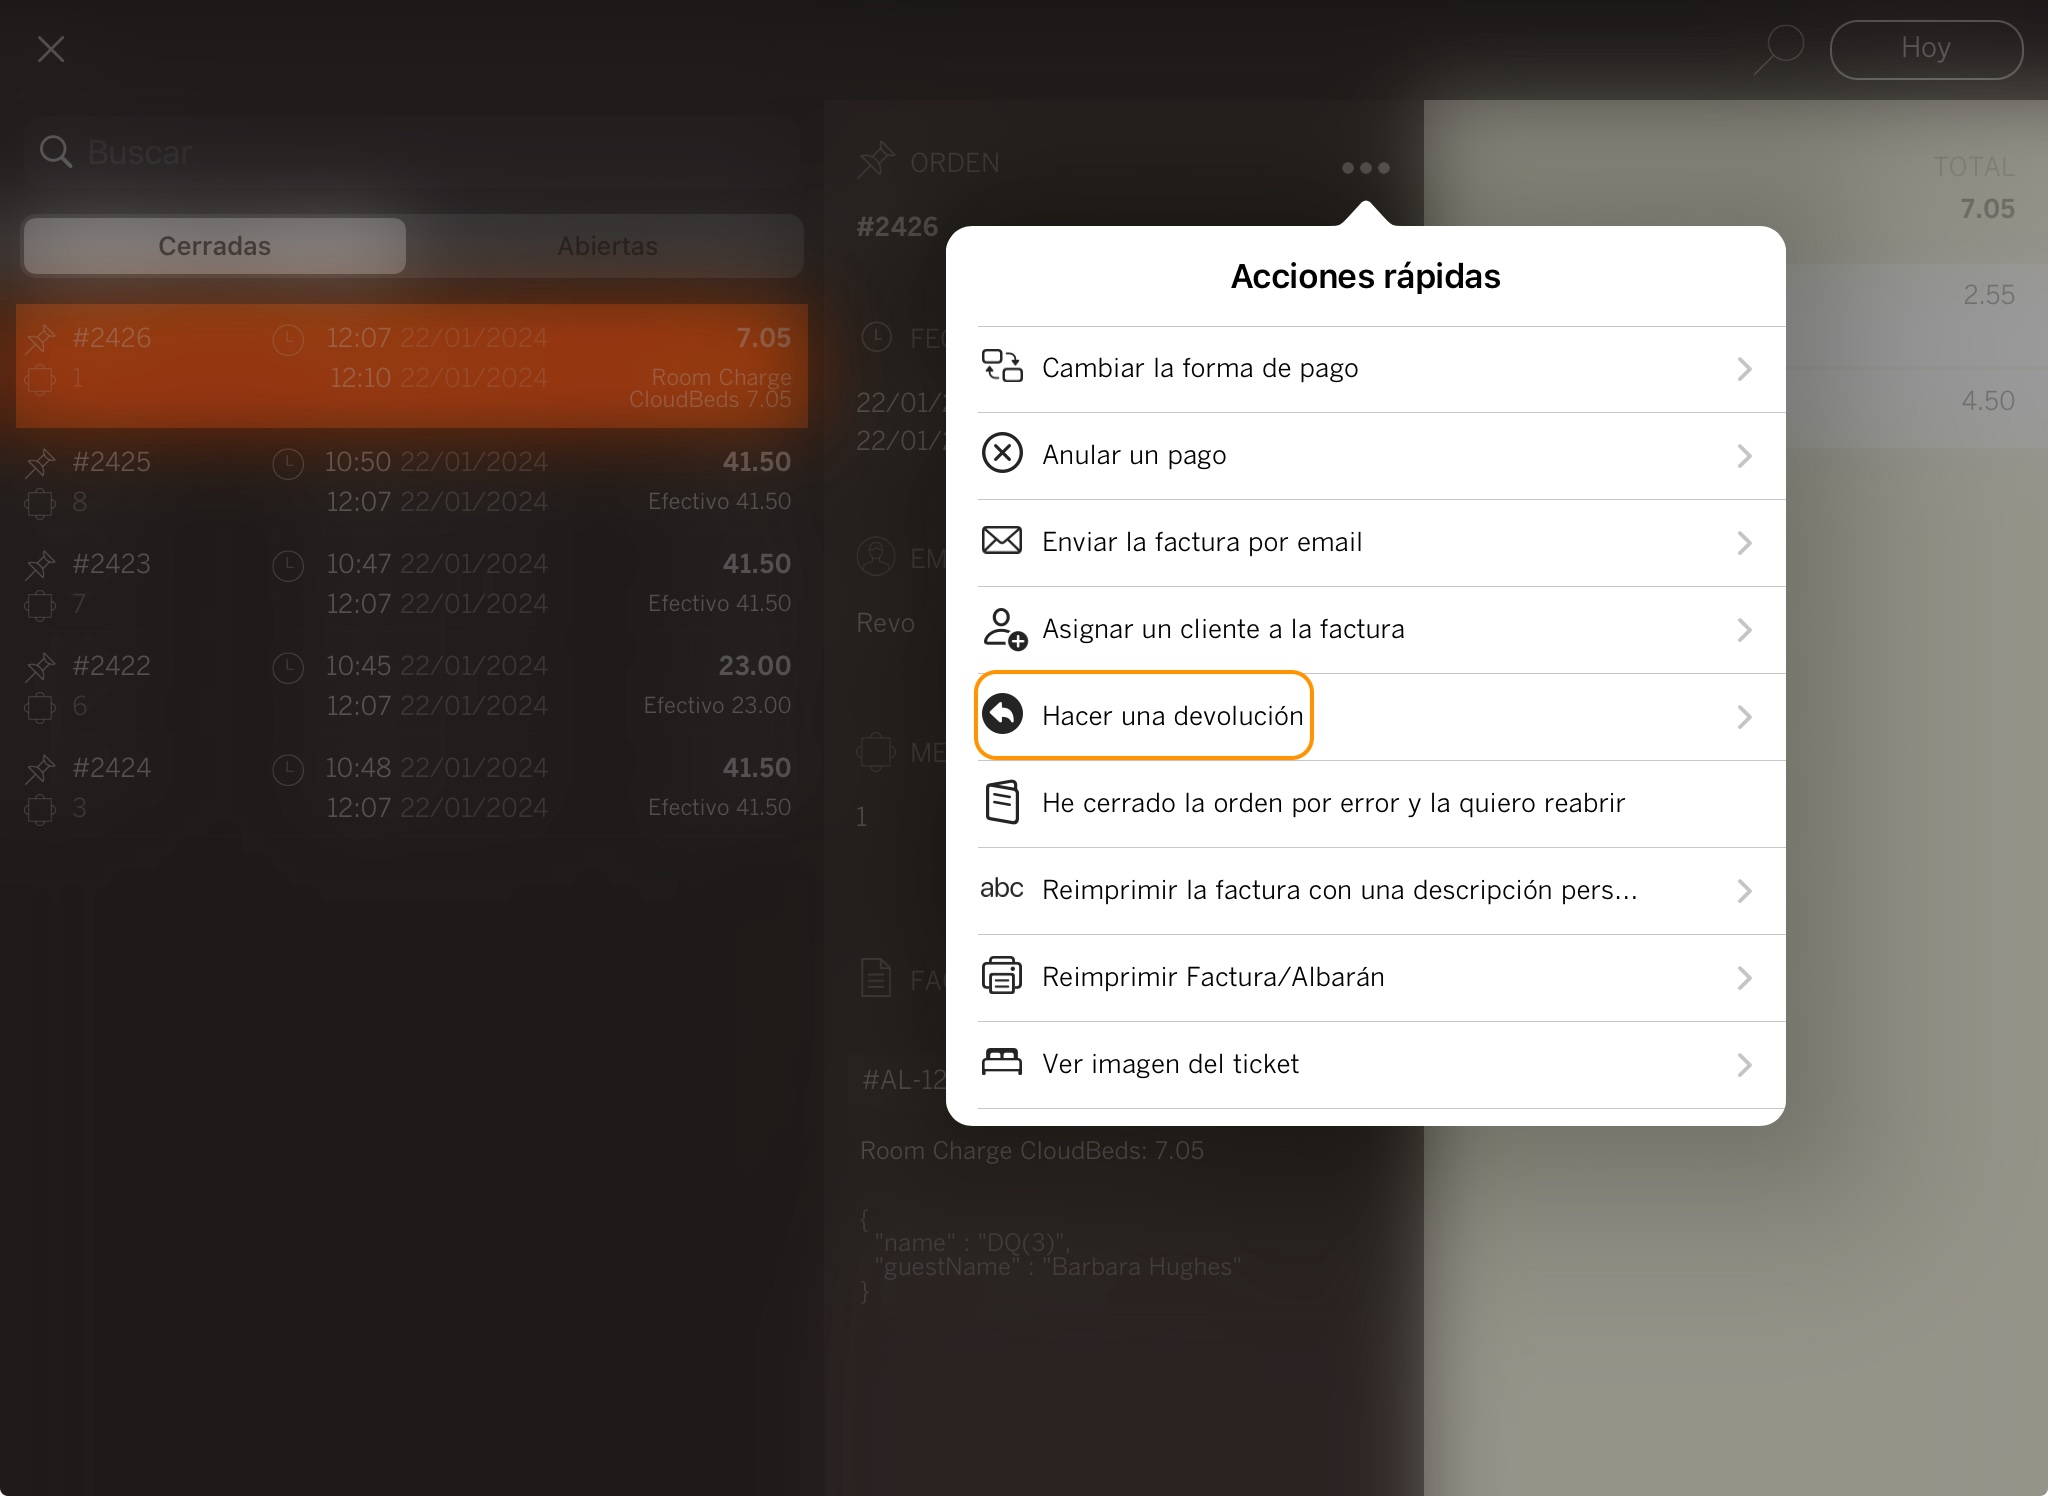
1. From the REVO r menu, go to History.
2. Find the order, click to see Quick actions and select Make a refund.
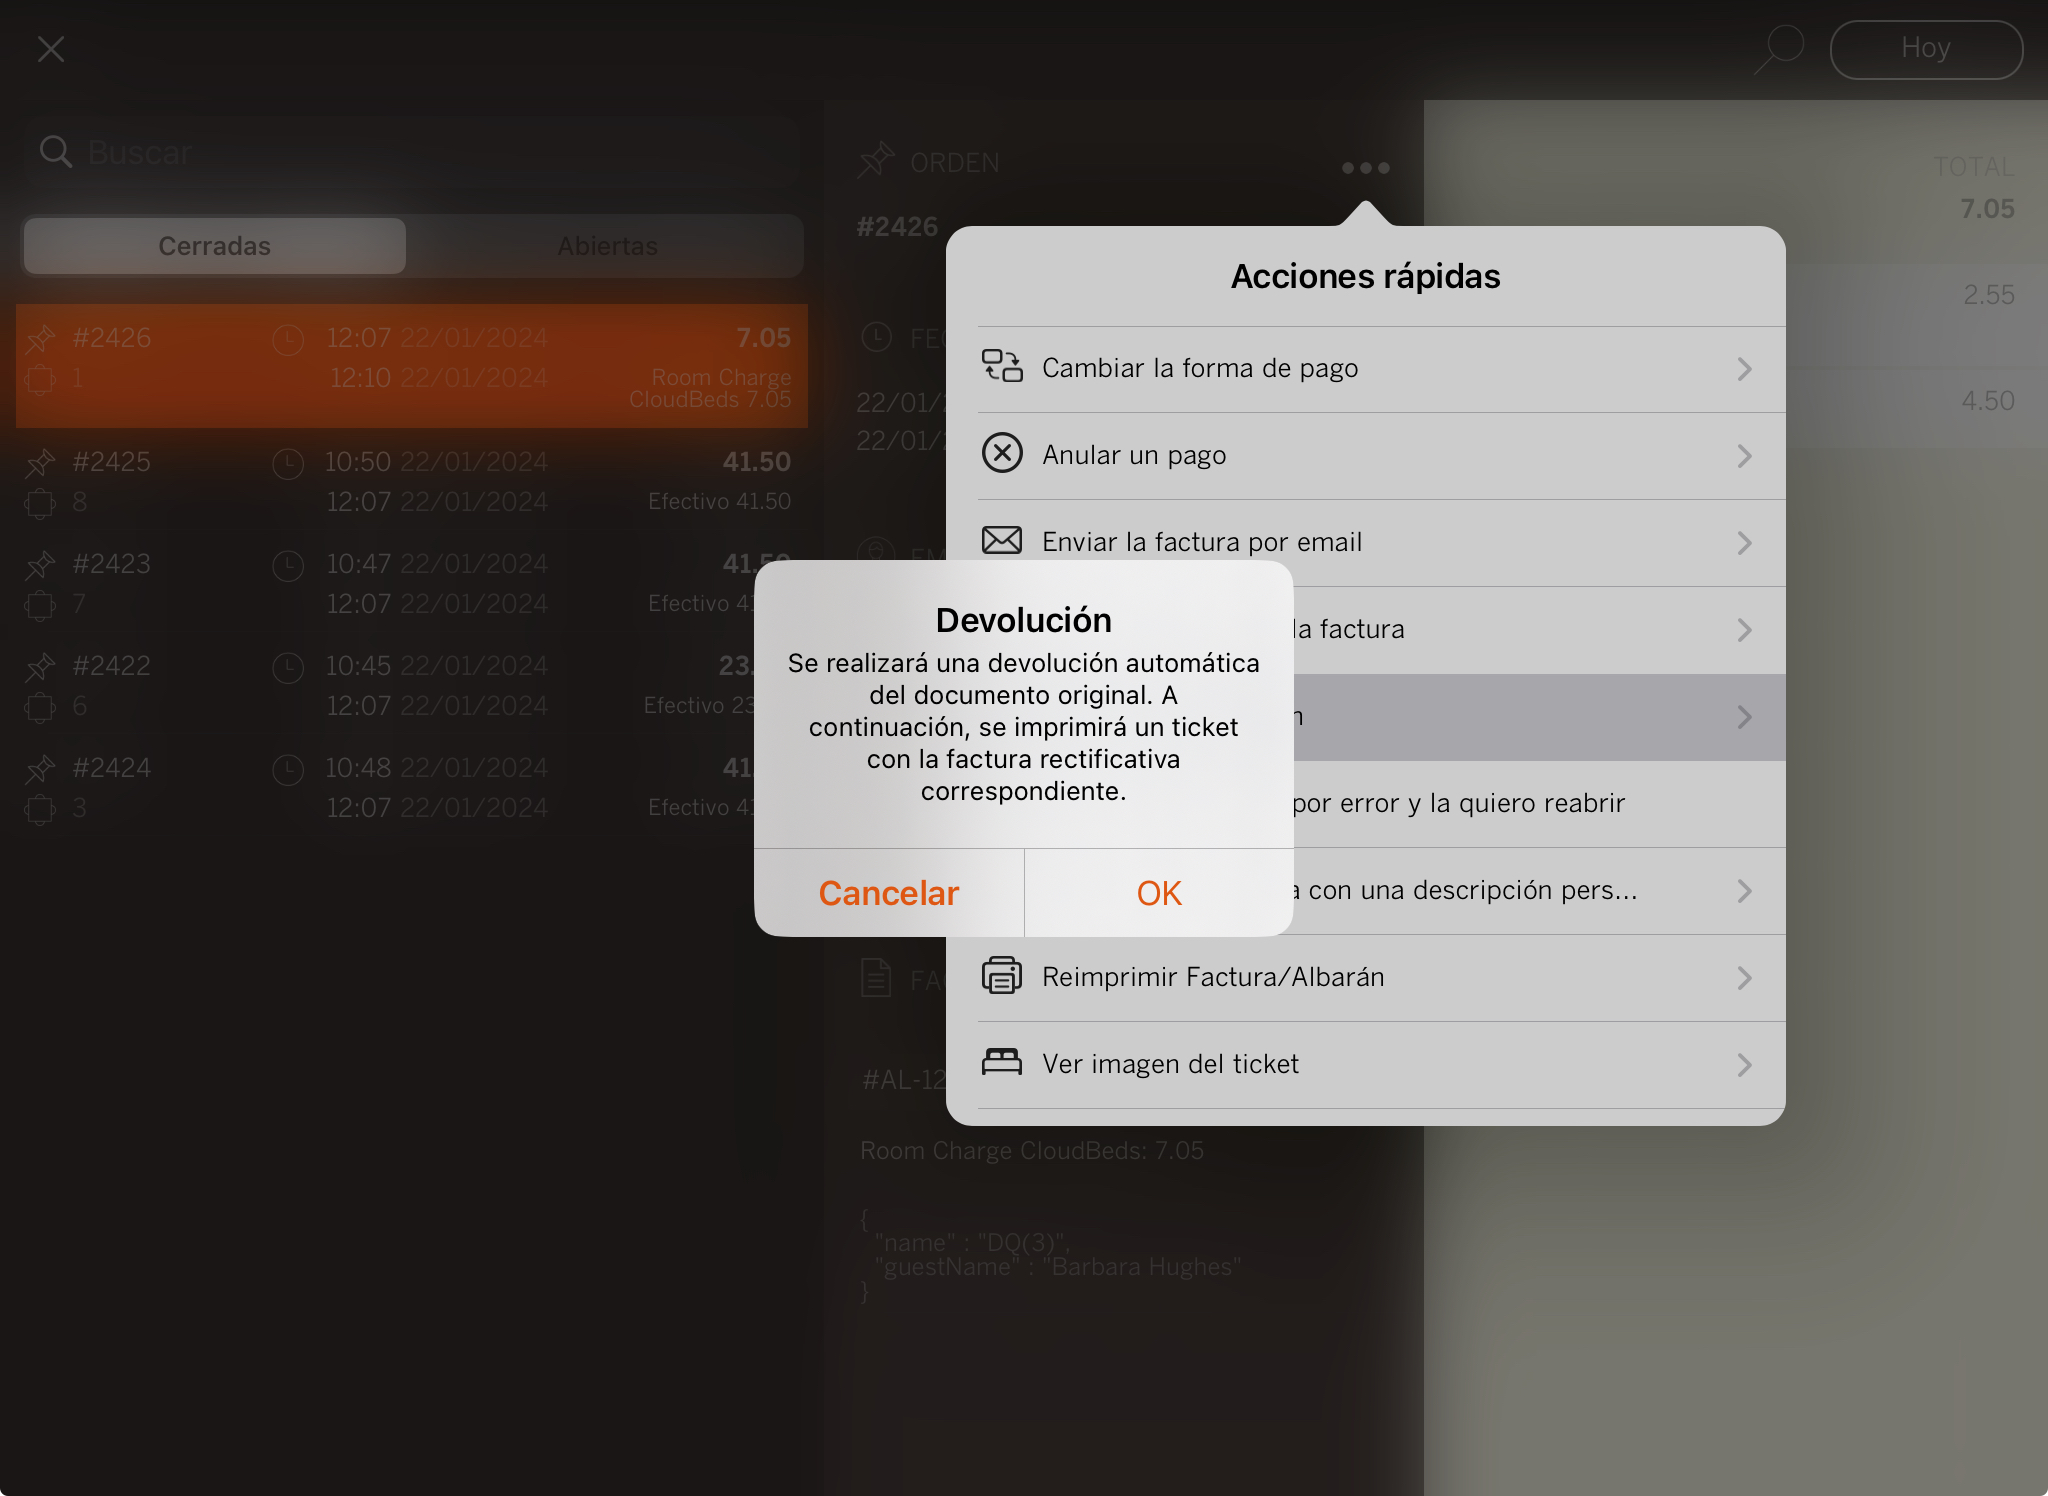
3. Confirm by clicking OK.
4. Enter the room number. You can only search by room, not by guest.
5. If Room charge signature is enabled: ask the customer to sign and press .
6. The receipt will print or the system will ask if you want to print it.
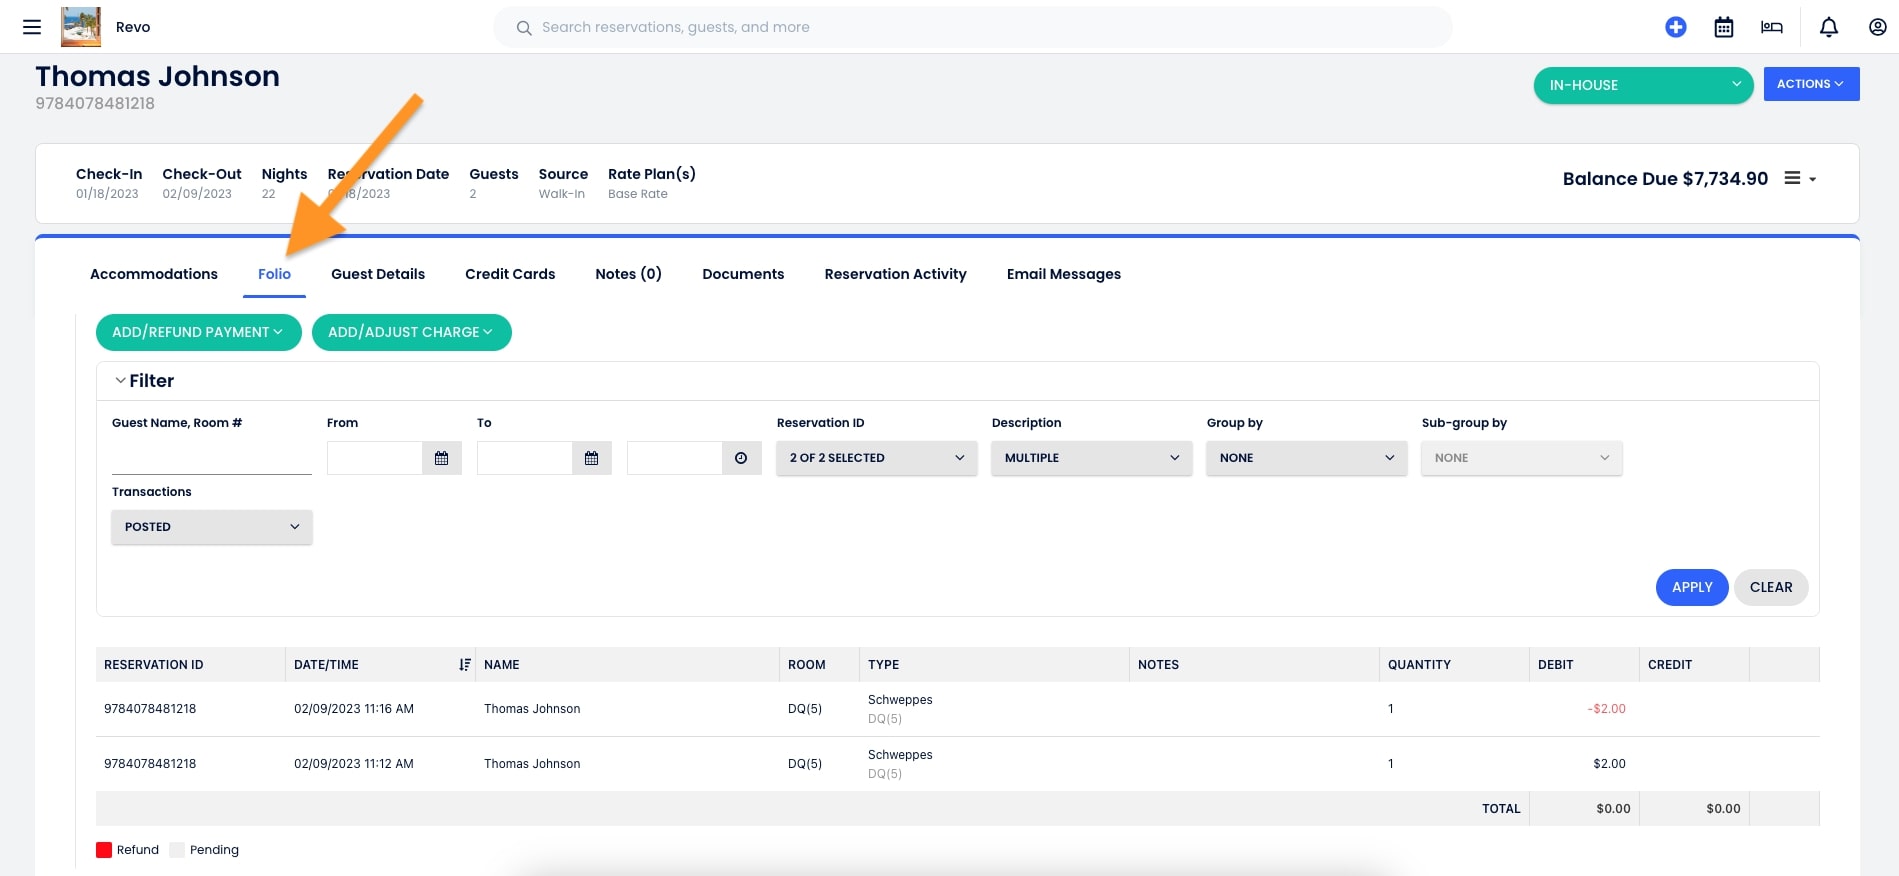
6. CLOUDBEDS BACK OFFICE
1. Go to the CloudBeds back office: https://hotels.cloudbeds.com and log in.
2. In the menu, select Reservations or click the icon in the top right.
3. Select the guest from the list, or enter the customer's name or reservation ID in the search box.
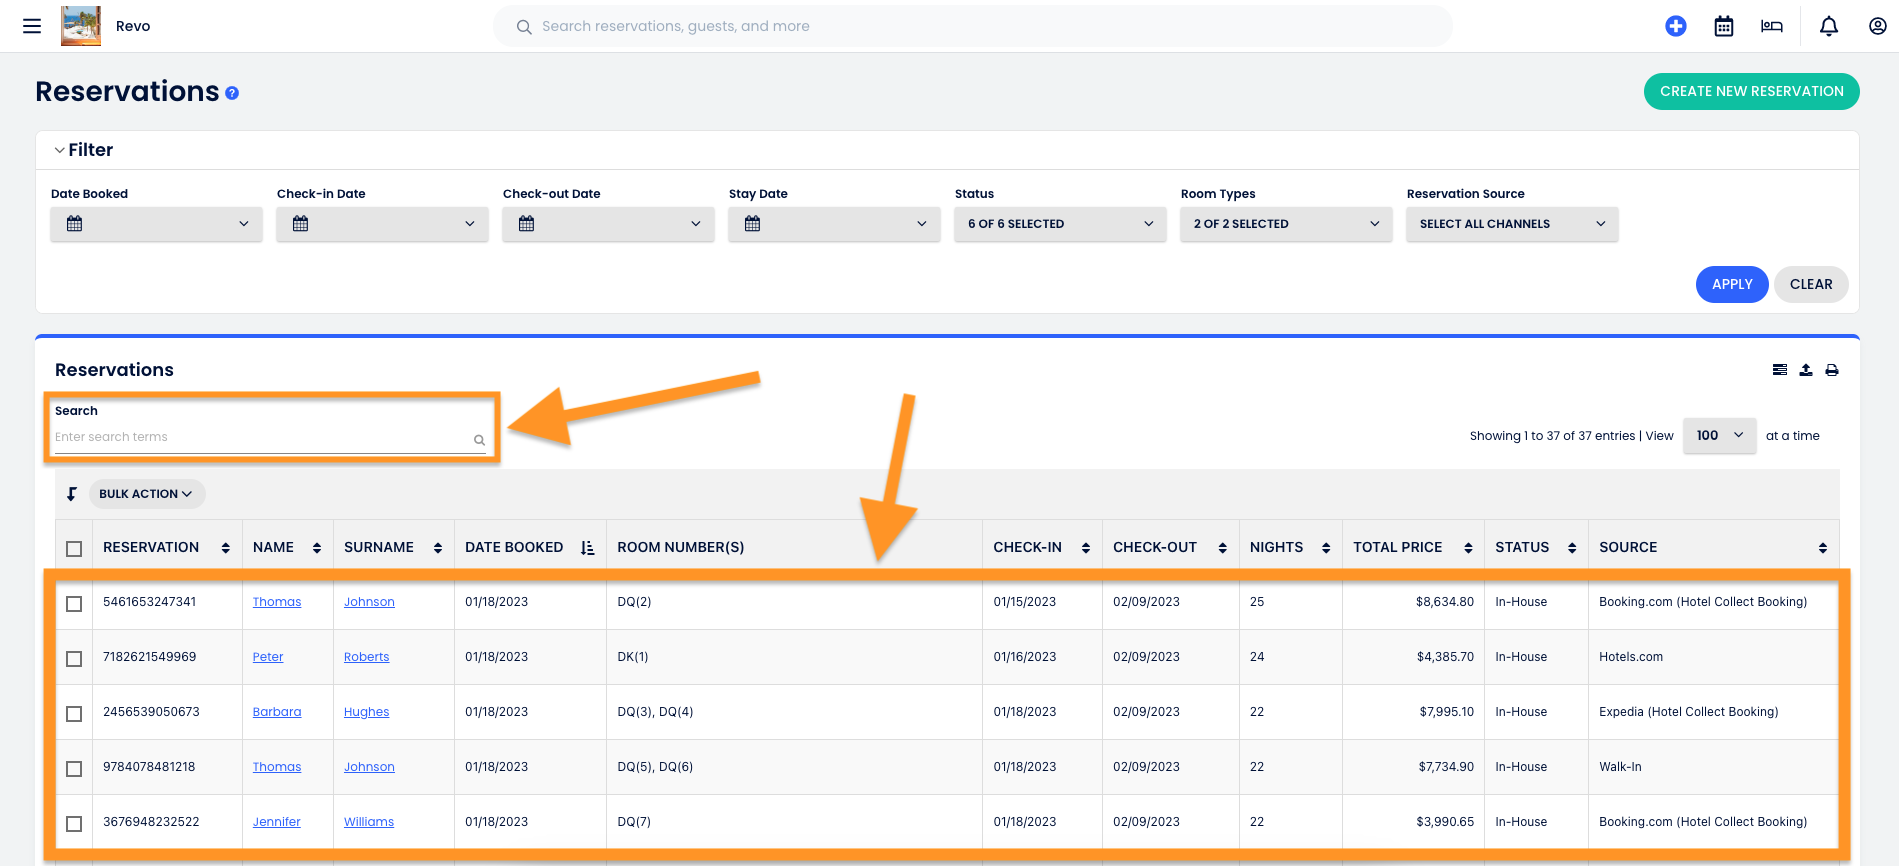
4. To see room charges, go to the Folio tab.
7. HOW TO DISCONNECT THE INTEGRATION FROM REVO XEF BACK OFFICE?
1. Go to the Revo XEF back office.
2. Navigate to Integrations / INTEGRATIONS.
3. Click the icon for the CloudBeds integration.
4. Confirm by clicking Yes, otherwise click Cancel.
8. HOW TO DISCONNECT THE INTEGRATION FROM CLOUDBEDS BACK OFFICE?
1. Log into the CloudBeds back office.
2. Click your profile and choose Apps & Marketplace.
3. In the left-hand menu, select Manage Apps and click Disconnect on the integration you wish to remove.
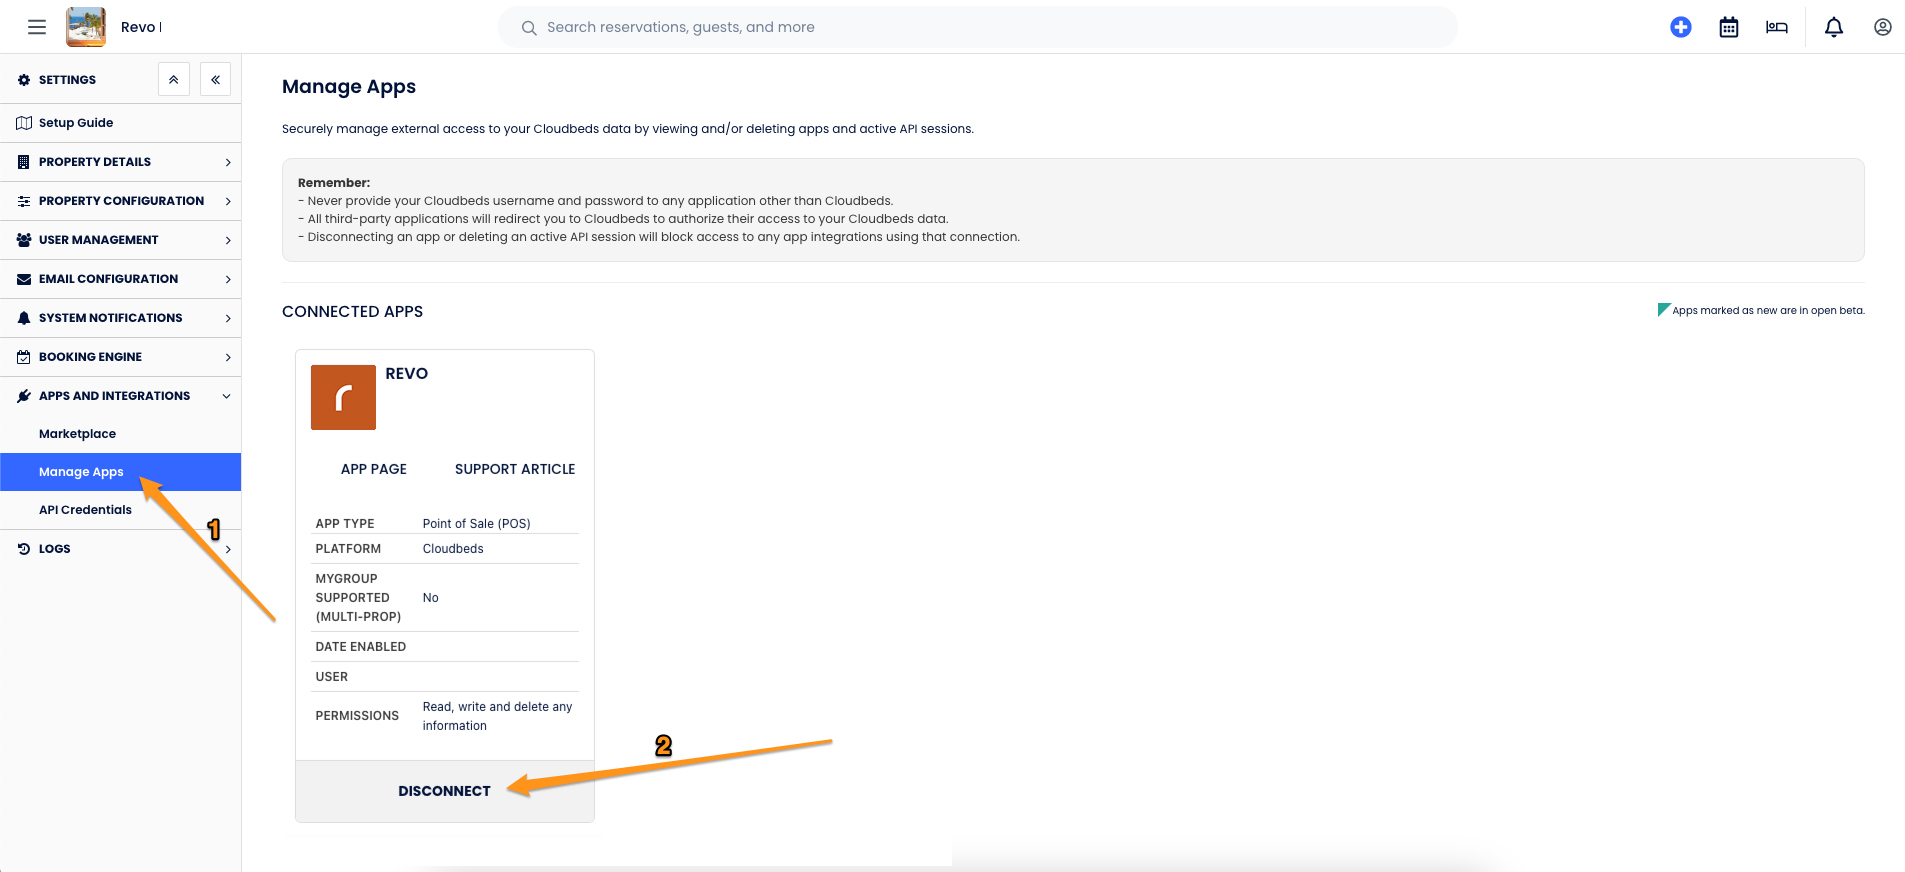
4. Confirm by clicking Yes, otherwise click Cancel.