1. THE DESIGN 2. UNIFIED VIEWS 3. BAR WITH VISUAL SERVICE OCCUPANCY INDICATOR 4. CALENDAR 5. SEARCH 6. MOBILIZATION BUTTON TO THE CURRENT SERVICE 7. SERVICE SUMMARY WIDGET 8. CREATION OF RESERVATIONS 9. RESERVATION LIST 10. FILTERS 11. RESERVATION VIEWING CALENDAR 12. ACTIONS TO BE DONE AT THE TABLES
With Revo FLOW 2.0 for the restoration version, you have new functionalities at your disposal that will facilitate and improve your experience.
What has been improved?
1. THE DESIGN
It is much more visual, intuitive and consists of new functionalities.
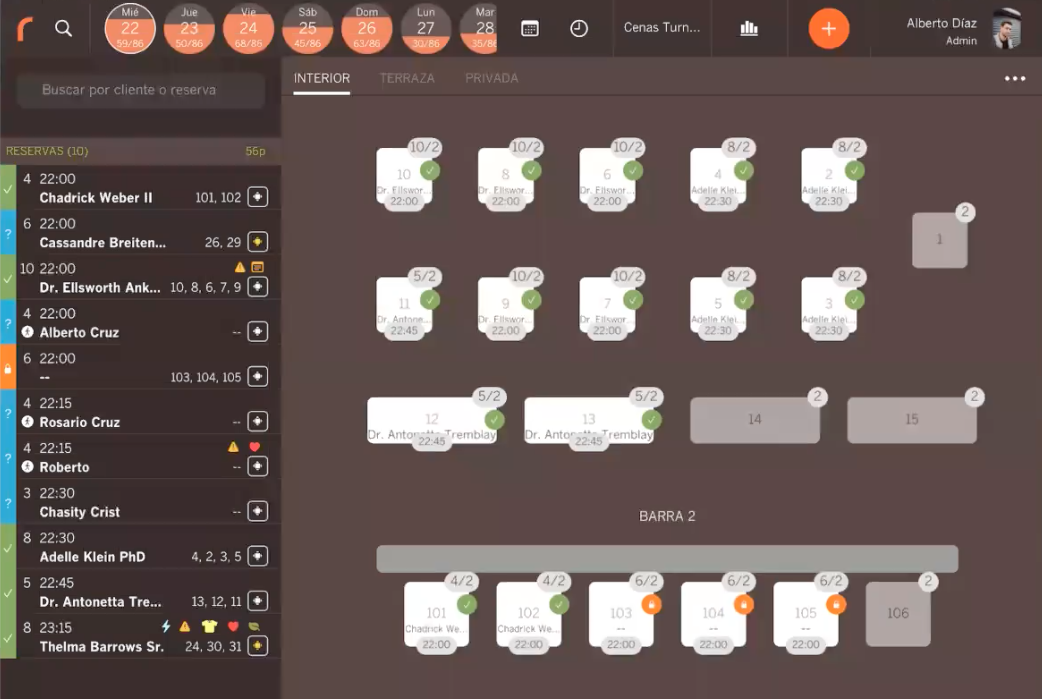
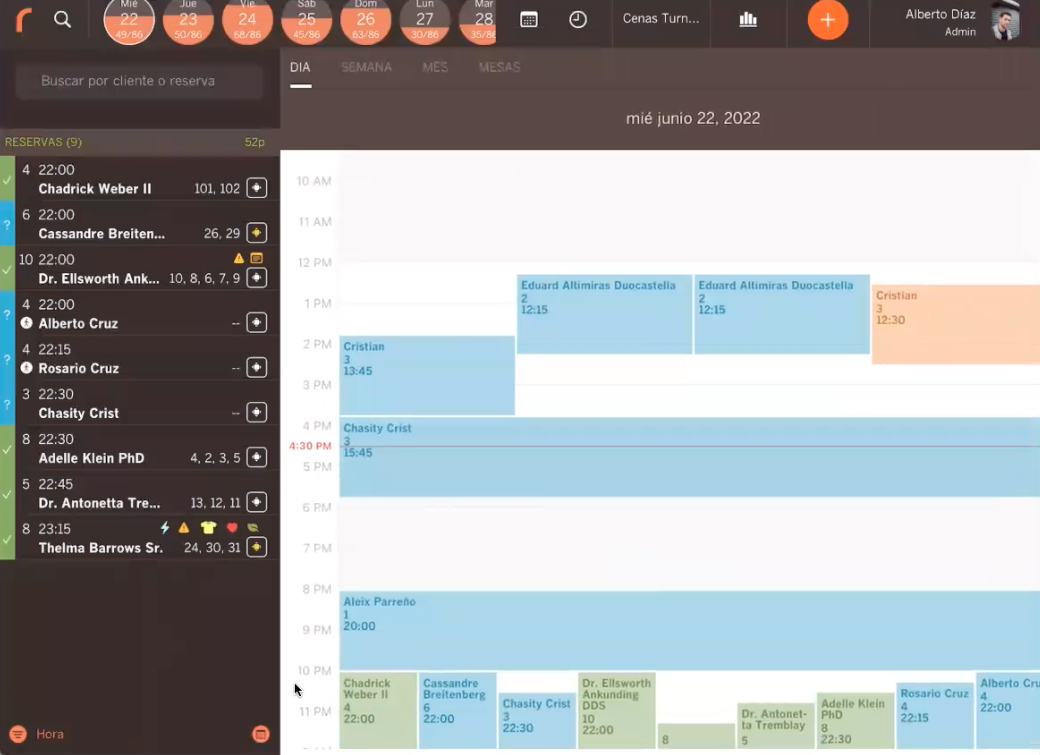
2. UNIFIED VIEWS
You have the reservation list, the table plan and the calendar on the same screen.
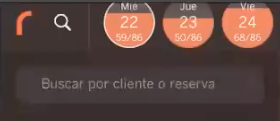
3. BAR WITH VISUAL SERVICE OCCUPANCY INDICATOR
A horizontal bar of the calendar days with a visual indicator that tells you how full your shifts/services are.

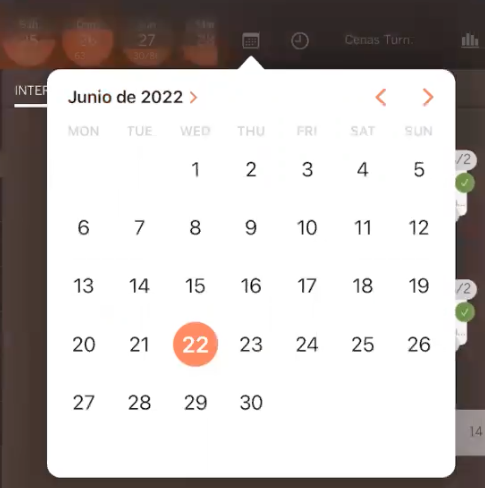
4. CALENDAR
A calendar through which you can also scroll through the different days and view the reservations.
5. SEARCH
There are two types of search engines.
First search engine
It searches by customer information or reservation information.
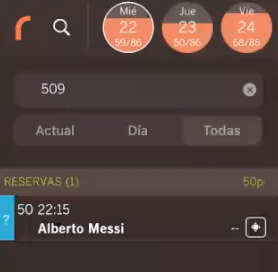
Second search engine
Search engine for reservations or customers.
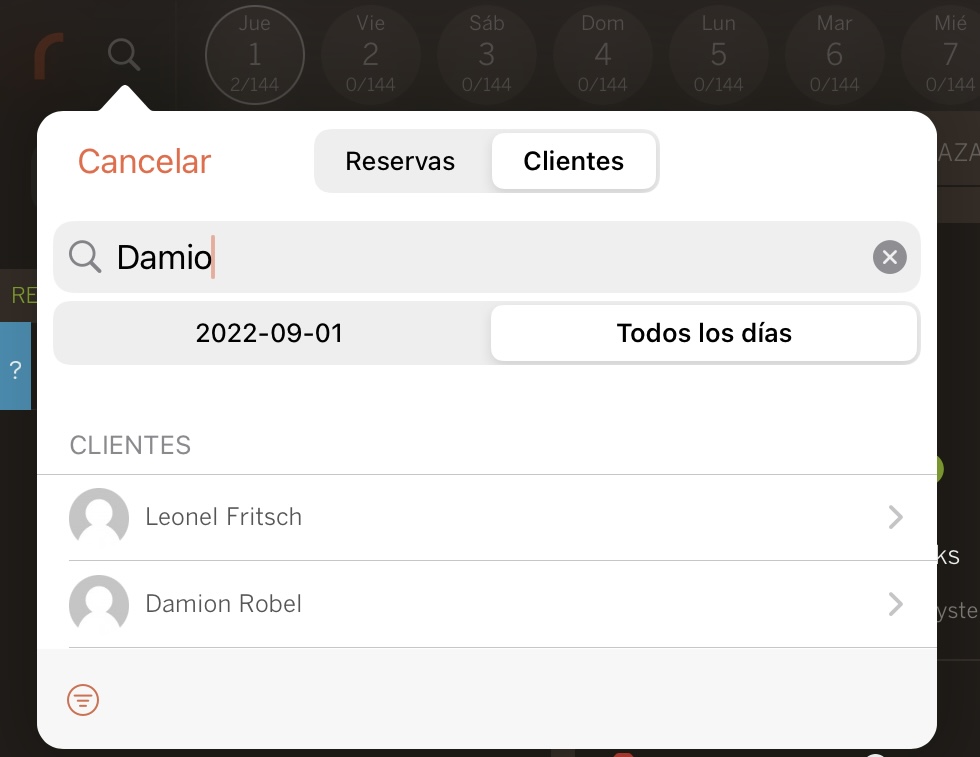
By locating a customer's file, it can be modified at that same moment.
6. MOBILIZATION BUTTON TO CURRENT SERVICE
With this button you can quickly go to the current service or the nearest one.
When it is colored green, it means that it has moved to a service that is currently underway.

If the button is gray, it means that it has moved to the nearest service.

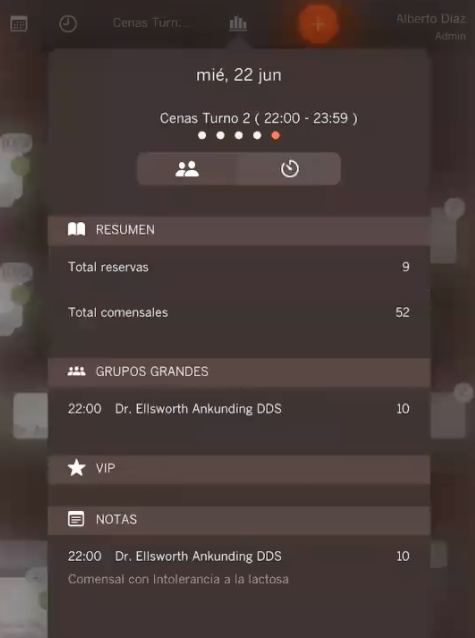
7. SERVICE SUMMARY WIDGET
With this widget you can see the summary of all services or a specific service.

First section
More focused on a general level.
The data will always be from the service selected at that moment.
You can choose whether to view the data of a specific service or of all services.
In this tab you see:
-
Total reservations
-
Total diners
-
Large groups: Large groups of 8 or more are considered.
-
Notes: Indicates the notes created for all the reservations you have for the selected service.
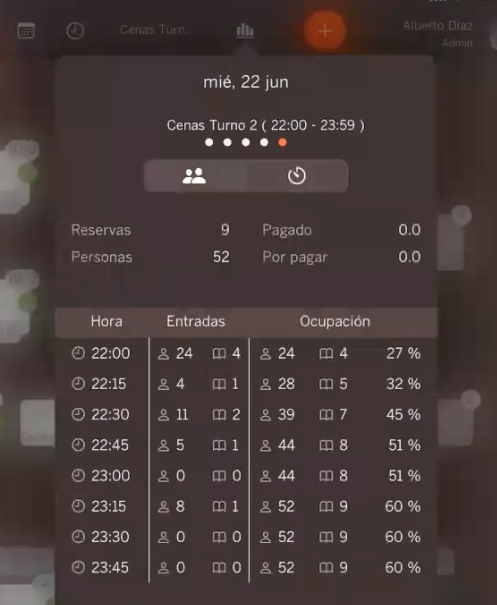
Second section
In this tab you see more detailed information.
You observe all the available hours in the selected service.
It specifies the number of reservations you have with the number of people per hour, the percentage, etc.
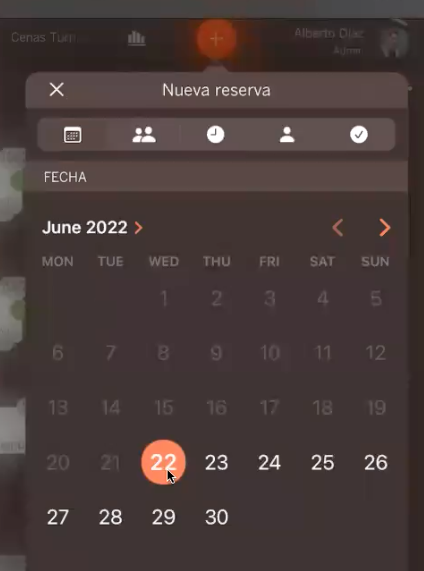
8. CREATION OF RESERVATIONS
There are two methods of creating reservations:
1. Reservation creation widget at the top of the screen (+)
More optimal and fluid.
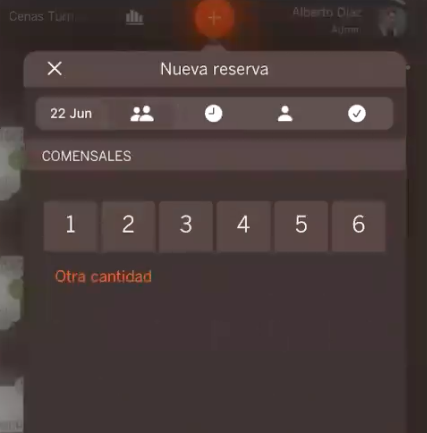
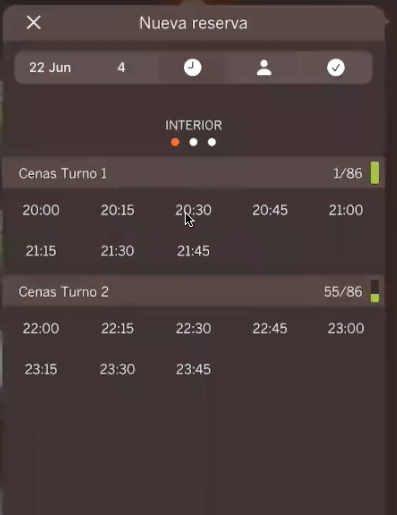
This method consists of five steps:
1. Selection of the day
2. Selection of diners
3. Selection of enabled shifts
You also display the capacity per room, so that you know the capacity you have for that day and that selected shift.
4. Customer finder or creator
If you create a customer, there are two ways to do it:
-
Add customer: It will create and save the customer file
-
Sporadic customer: It will collect the necessary data from the customer but without storing their file. Useful when you know that the customer is not going to return to your premises again.
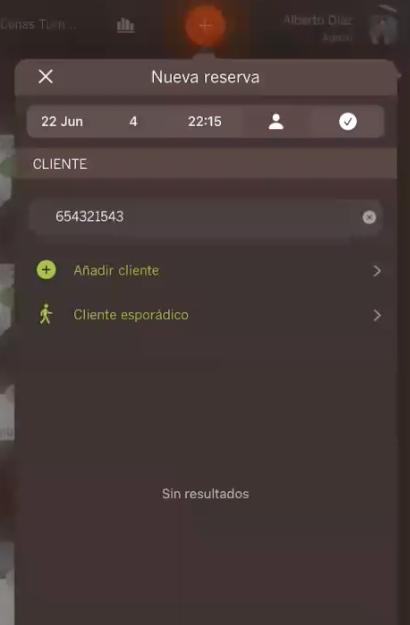
Also comment that at any time you can convert a sporadic customer to a normal customer and have their file stored.
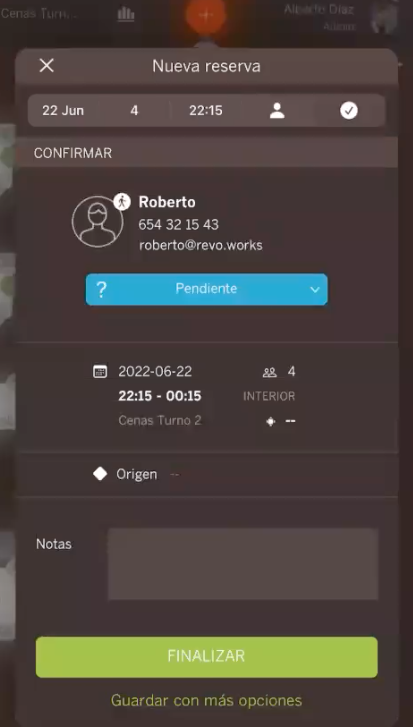
5. Final reservation modifications
Assign reservation status, assign products, assign payments, add notes, add identifiers, origin, etc.
2. From a table in the table map
In this case, the day and service selected at that moment will be preselected.
The diners that the table has capacity will also be preselected.
9. RESERVATION LIST
In this list you can see all the reservations existing on the selected day and service.
It tells you the number of reservations you have for the selected day and service.
It also has a counter of people and diners who are going to come.
You display the status of each reservation, that is, if a reservation is pending to be confirmed by the customer (blue) or is already confirmed (green).
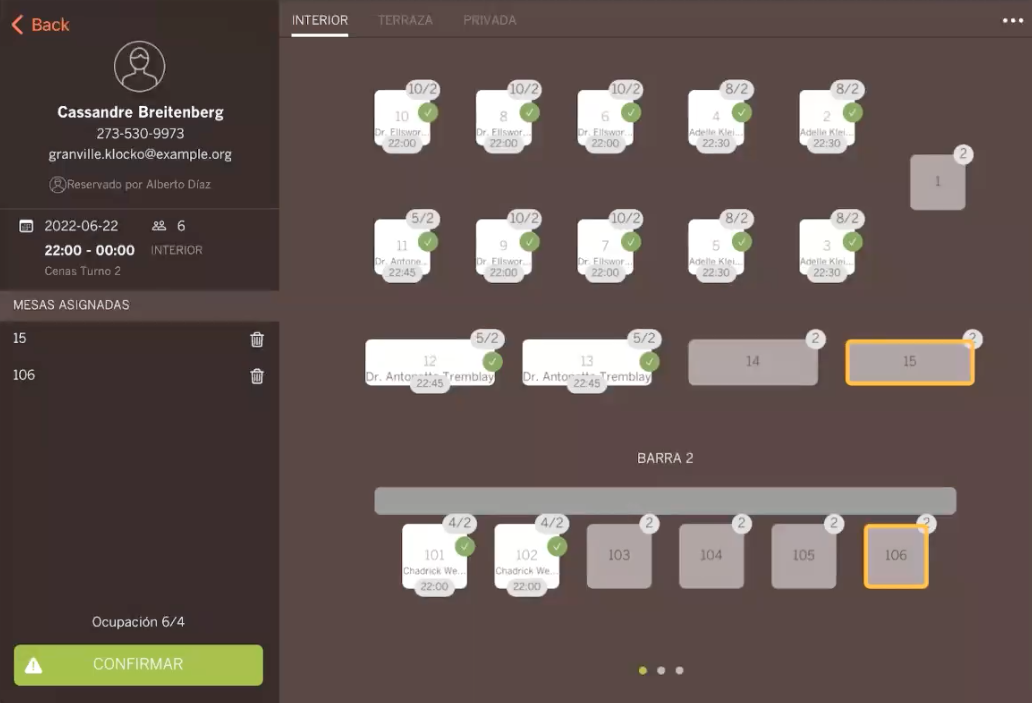
The date of each reservation, the customer and also if the reservation already has a table assignment.
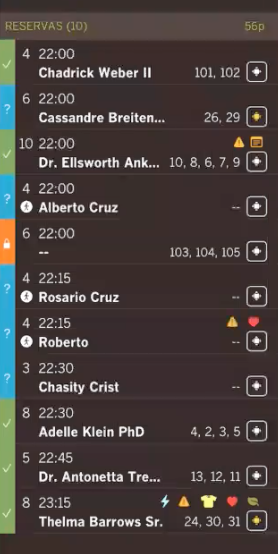
Table assignment
As you can see, in each reservation there is a button that will help you assign tables automatically or manually to each reservation:

If you click on that button you will have two options to assign tables in the selected reservation.
Automatically
Clicking on the "Autoassign" button ensures that the tables are together, free and that there are enough diners for the capacity of the reservation.

Manually
You can select the tables you want for that reservation:
Indicators
You also have indicators:

Insufficient diner occupancy indicator
In case you have assigned tables in a reservation manually and you have not correctly calculated the tables due to the occupancy of diners that that reservation required, the yellow table assignment button will appear to indicate that the table assignment that you have done is insufficient for the number of diners who have the reservation.

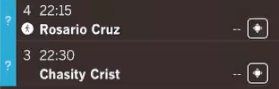
Indicator of sporadic customers:
Next to the customer's name you have an indicator to know which sporadic customers you have in your reservations.
On the other hand, as you already know, you have a widget on the website.
By default, all customers will be created as one-time customers. unless FLOW detects that the data entered already exists and automatically records it in the stored record.
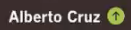
From the APP itself you can convert that sporadic customer to an end customer by simply clicking on the green button next to the customer's name:
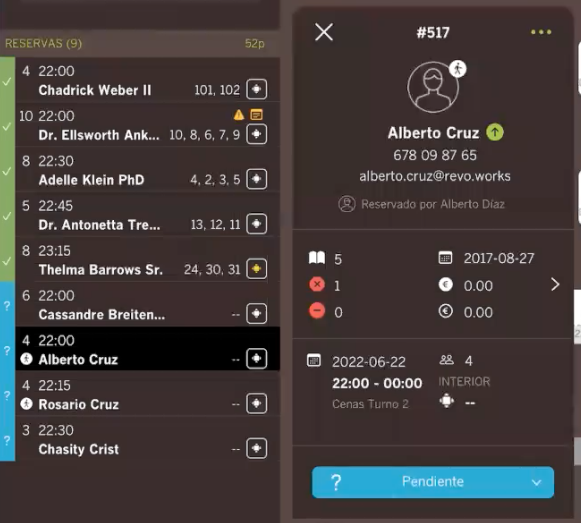
On this screen you see the following information:
-
The worker who made the reservation.
-
The most important information of the customer** (Name, telephone number and email and if the customer has a photo in their email, you would also display it in the reservation itself).
-
History of the times the customer has booked with you.
-
Number of reservations they have made.
-
If they have ever canceled.
-
If they have ever not presented to the premises with a reservation.
-
The creation date of the customer record.
-
The total you have paid for the reservation.
-
The average per ticket (total paid divided by number of diners)
-
Time of reservation, service they have reserved, day, number of people.
-
If you have tables assigned to that reservation and in which room.
-
You see the status of the reservation and you can modify it.
There are four states:
- Pending:
- Sitting:
- No-show:
- Cancelled:
Assigning products to a reservation
By modifying one of the reservations in the list, you can assign products to that reservation:


Assigning payments to a reservation
You can also add payments. In case you have the customer in front of you and he makes a payment and deposit in cash, you can make a cash entry in XEF:


Add extra information to a reservation
On the other hand, in each reservation you can add/modify different information.
You have identifiers that you can use for each reservation depending on the needs of each location.
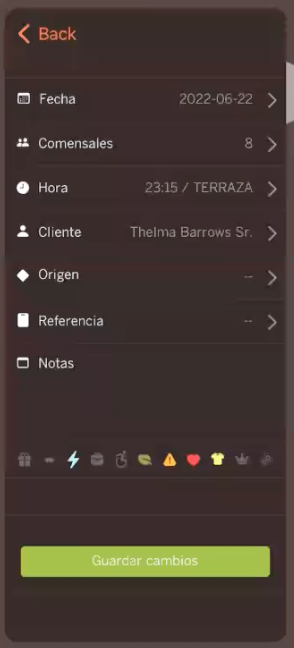

If a note is added to a reservation, you would display the following identifier:

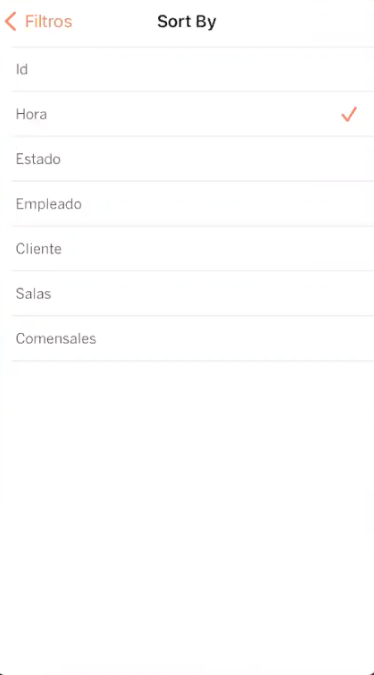
10. FILTERS
The filters will allow you to view the reservations in a specific order, filtering by status and even by employee.

How are reservations ordered?
By default they are ordered by reservation ID (Ex. #502).
With the filters you can sort it according to your preferences:
11. RESERVATION DISPLAY CALENDAR
This function is regulated by a privilege.
you have the possibility of viewing all reservations on a calendar and even seeing information about each of the reservations.
In the calendar you can view reservations in different types of views:
-
Per day:
-
Per week.
-
Per month
-
By tables.
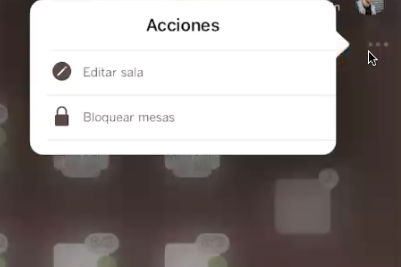
12. ACTIONS TO BE DONE AT THE TABLES
When a table is busy:
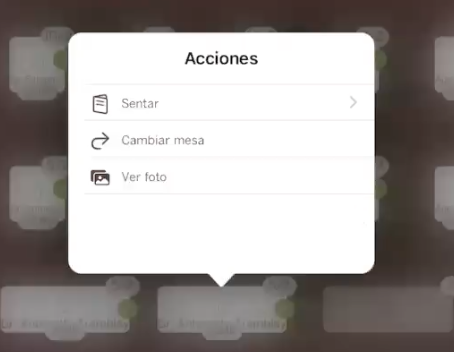
- Sit
you also have another way to seat a reservation at a table.
If you slide the reservation to the right. This way you will seat/occupy a table in Revo XEF (as long as Revo XEF is linked, that the reservation has an associated table and that it is not occupied).

-
Change table: Modify the table of an already assigned reservation.
-
View photo: From the back-office you can assign a default photo to a specific table and view it from here.
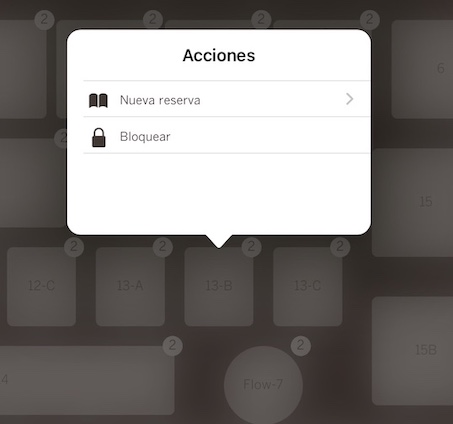
When a table is empty:
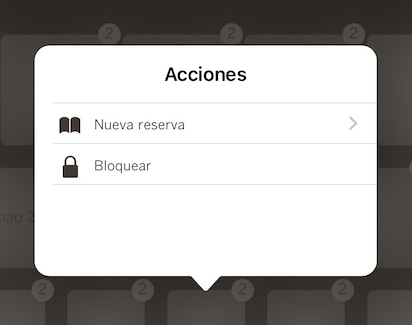
-
New reservation: Create a new reservation.
-
Lock: Lock a table if you do not want that table to be used.
If you want to block more than one table at a time, find the option "Block tables" by clicking on the three dots in the upper right:
Then you would select the tables that you want to block and, once blocked, you would view it as follows:
