- STATUS: ENABLED
- COMPATIBLE VERSION: 2.0
Steps to follow to configure the ZEBRA GK420t printer
1. Printer preparation and paper configuration: [Information obtained from Zebra GK420t User Guide](https://www.zebra.com/content/dam/zebra_new_ia/en-us/manuals/printers/desktop/legacy/ gk420t/gk420t-ug-es.pdf)
-
1.1. Insert a roll of Zebra type paper (page 23 guide).
-
1.2. Connect the power cable to the mains and the cable to the network via Ethernet. (page 22 power and page 38 ethernet).
-
1.3. Turn on the printer and check that the printer status light (page 82), and the Ethernet connection light (page 38), indicate correct operation.
-
1.4. Once the printer is working correctly, perform an automatic paper calibration (page 93, sequence 2 of flashes) and a print test (sequence 1 of flashes). It is advisable to do a calibration every time the paper cover is opened.
2. Backoffice: printing procedure
-
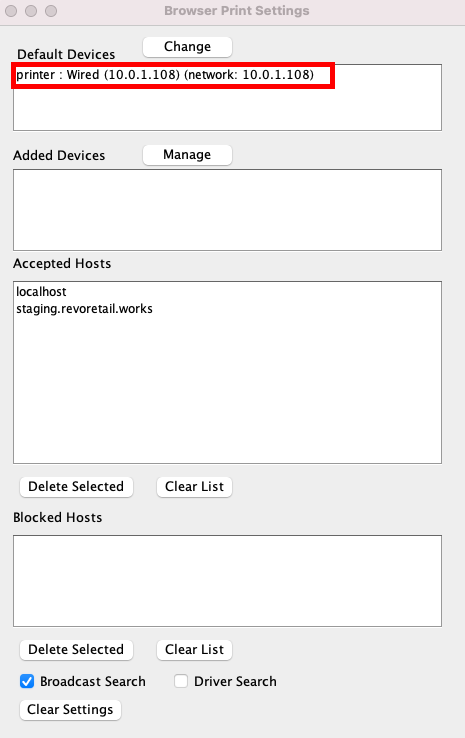
2.1. To establish the connection between the back and the printer, it is necessary to download the native app [Browser Print](https://www.zebra.com/us/en/products/software/barcode-printers/link-os/browser-print. html) that acts as an intermediary.
-
2.2. Follow the [Browser Print User Guide](https://www.zebra.com/content/dam/zebra_new_ia/en-us/solutions-verticals/product/Software/Printer%20Software/Link-OS/ browser-print/zebra-browser-print-user-guide-v1-3-en-us.pdf).
-
- To create labels in the REVO Retail backoffice, we will select Settings > Product Labels > Create new label.
-
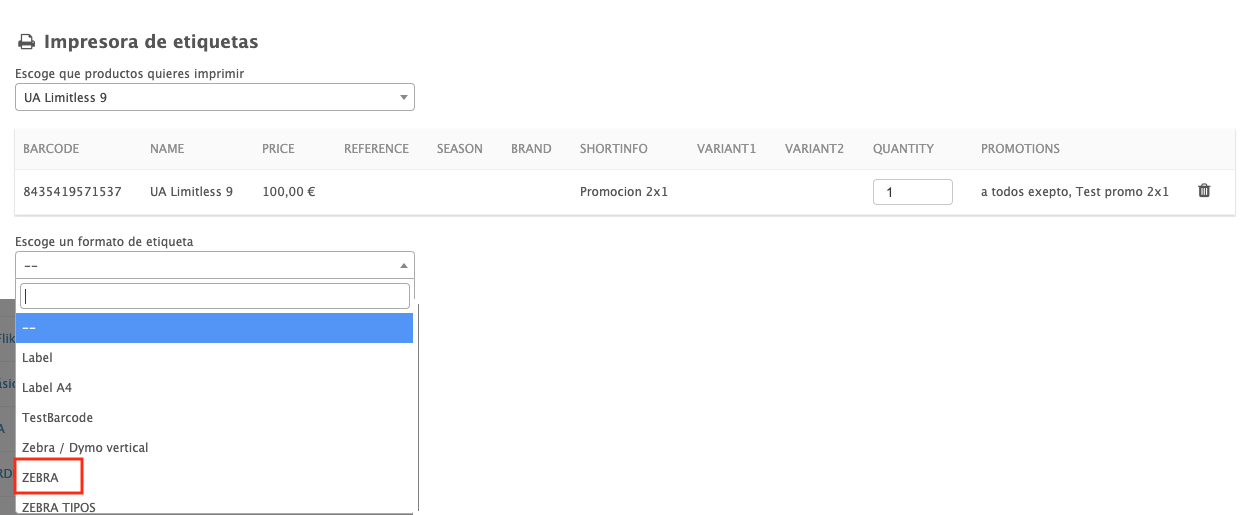
2.4. Click on Zebra in Label Format.
-
2.5. Add the content that you want to show in it.
-
2.6. Save.
Note: From this same screen, you can do a test print by clicking on the Print button.
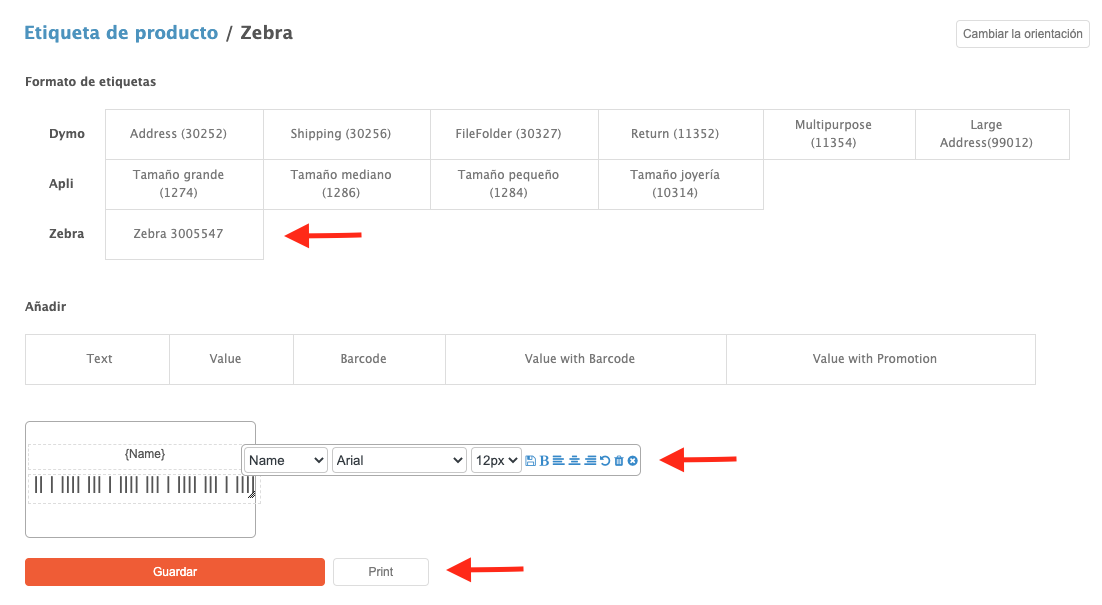
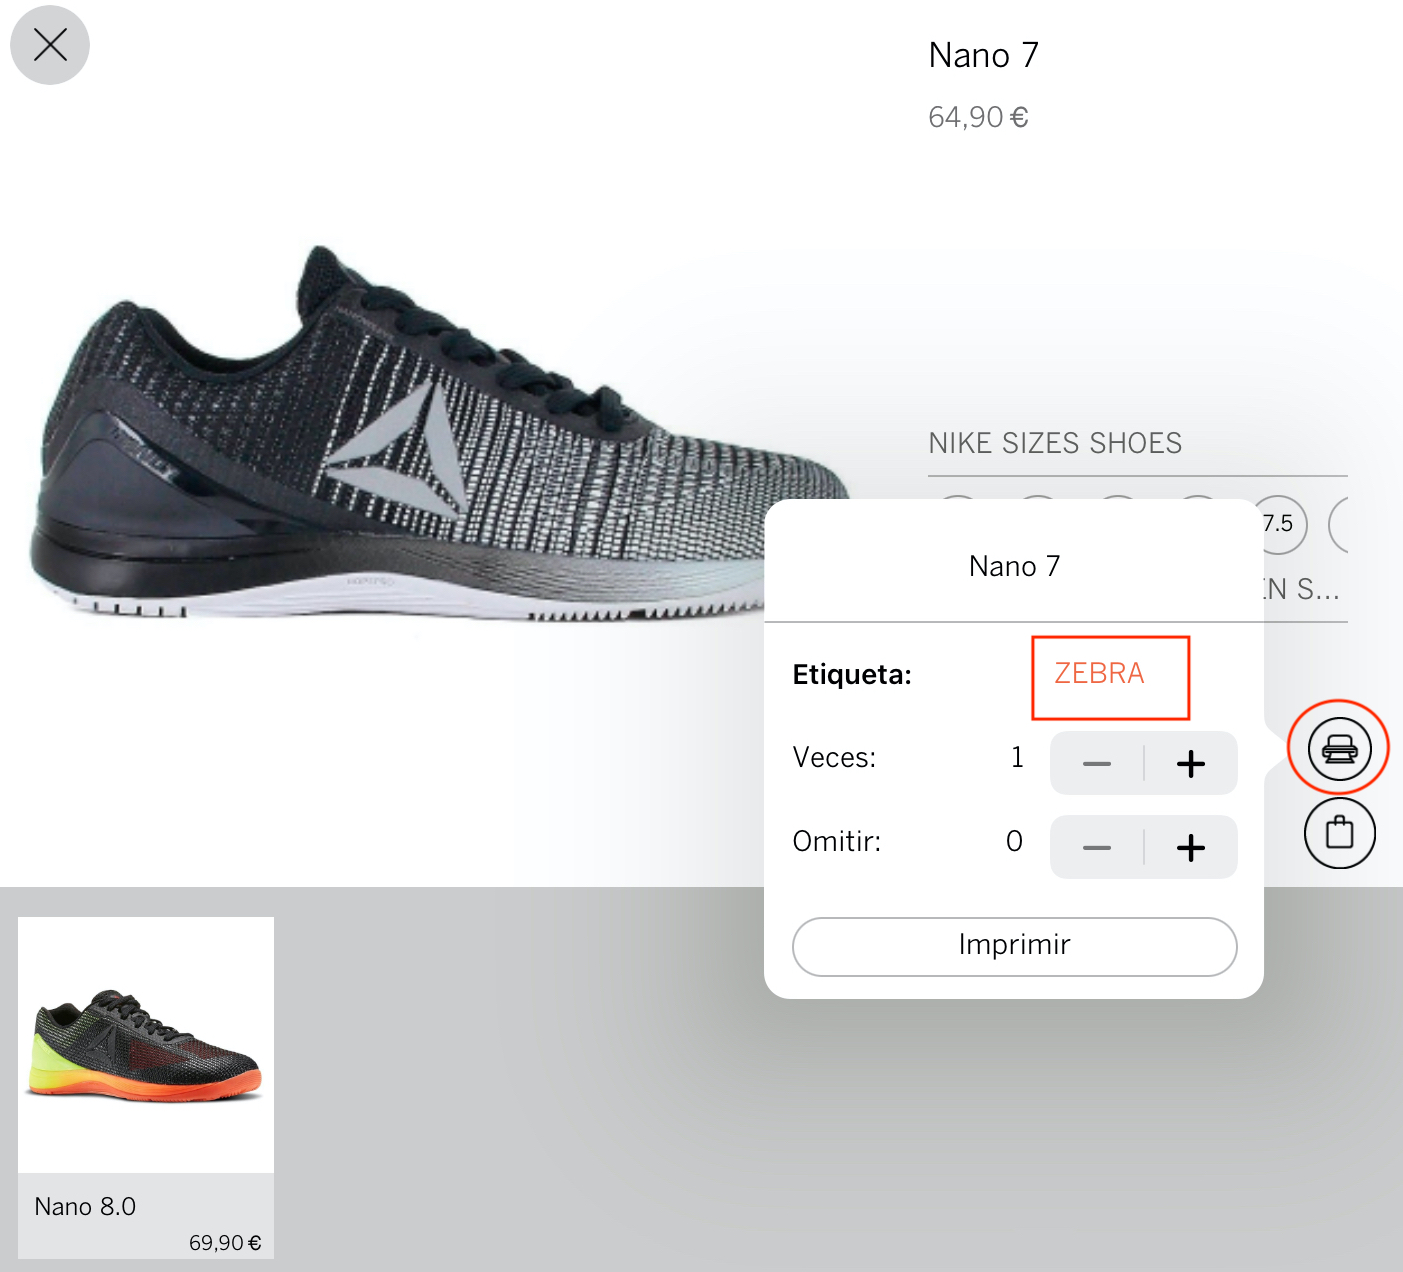
- 2.7. To print a label from the product sheet: Products > Search for the product within the Group/Category > Print > Open the label printing menu.

Select the type of label, previously created in Product Labels.
3. App - Printing procedure
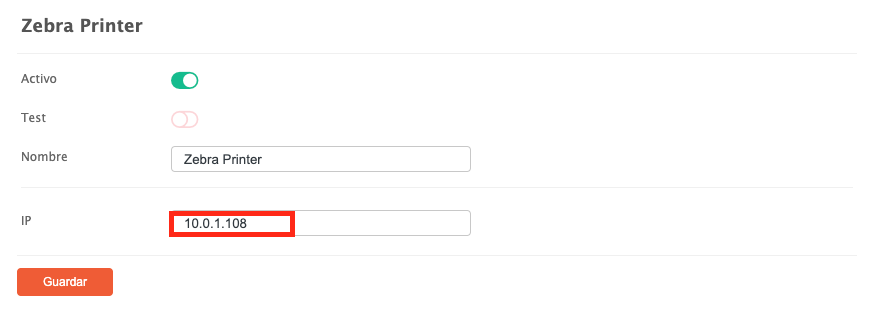
- 3.1. To print from the app, you need to create the Zebra Printer integration in the back office: In Integrations > New > Zebra Printer (Where the IP is the one that appears in the native Browser Print app.)
Note: It is not necessary to have Browser Print active for the Retail app.
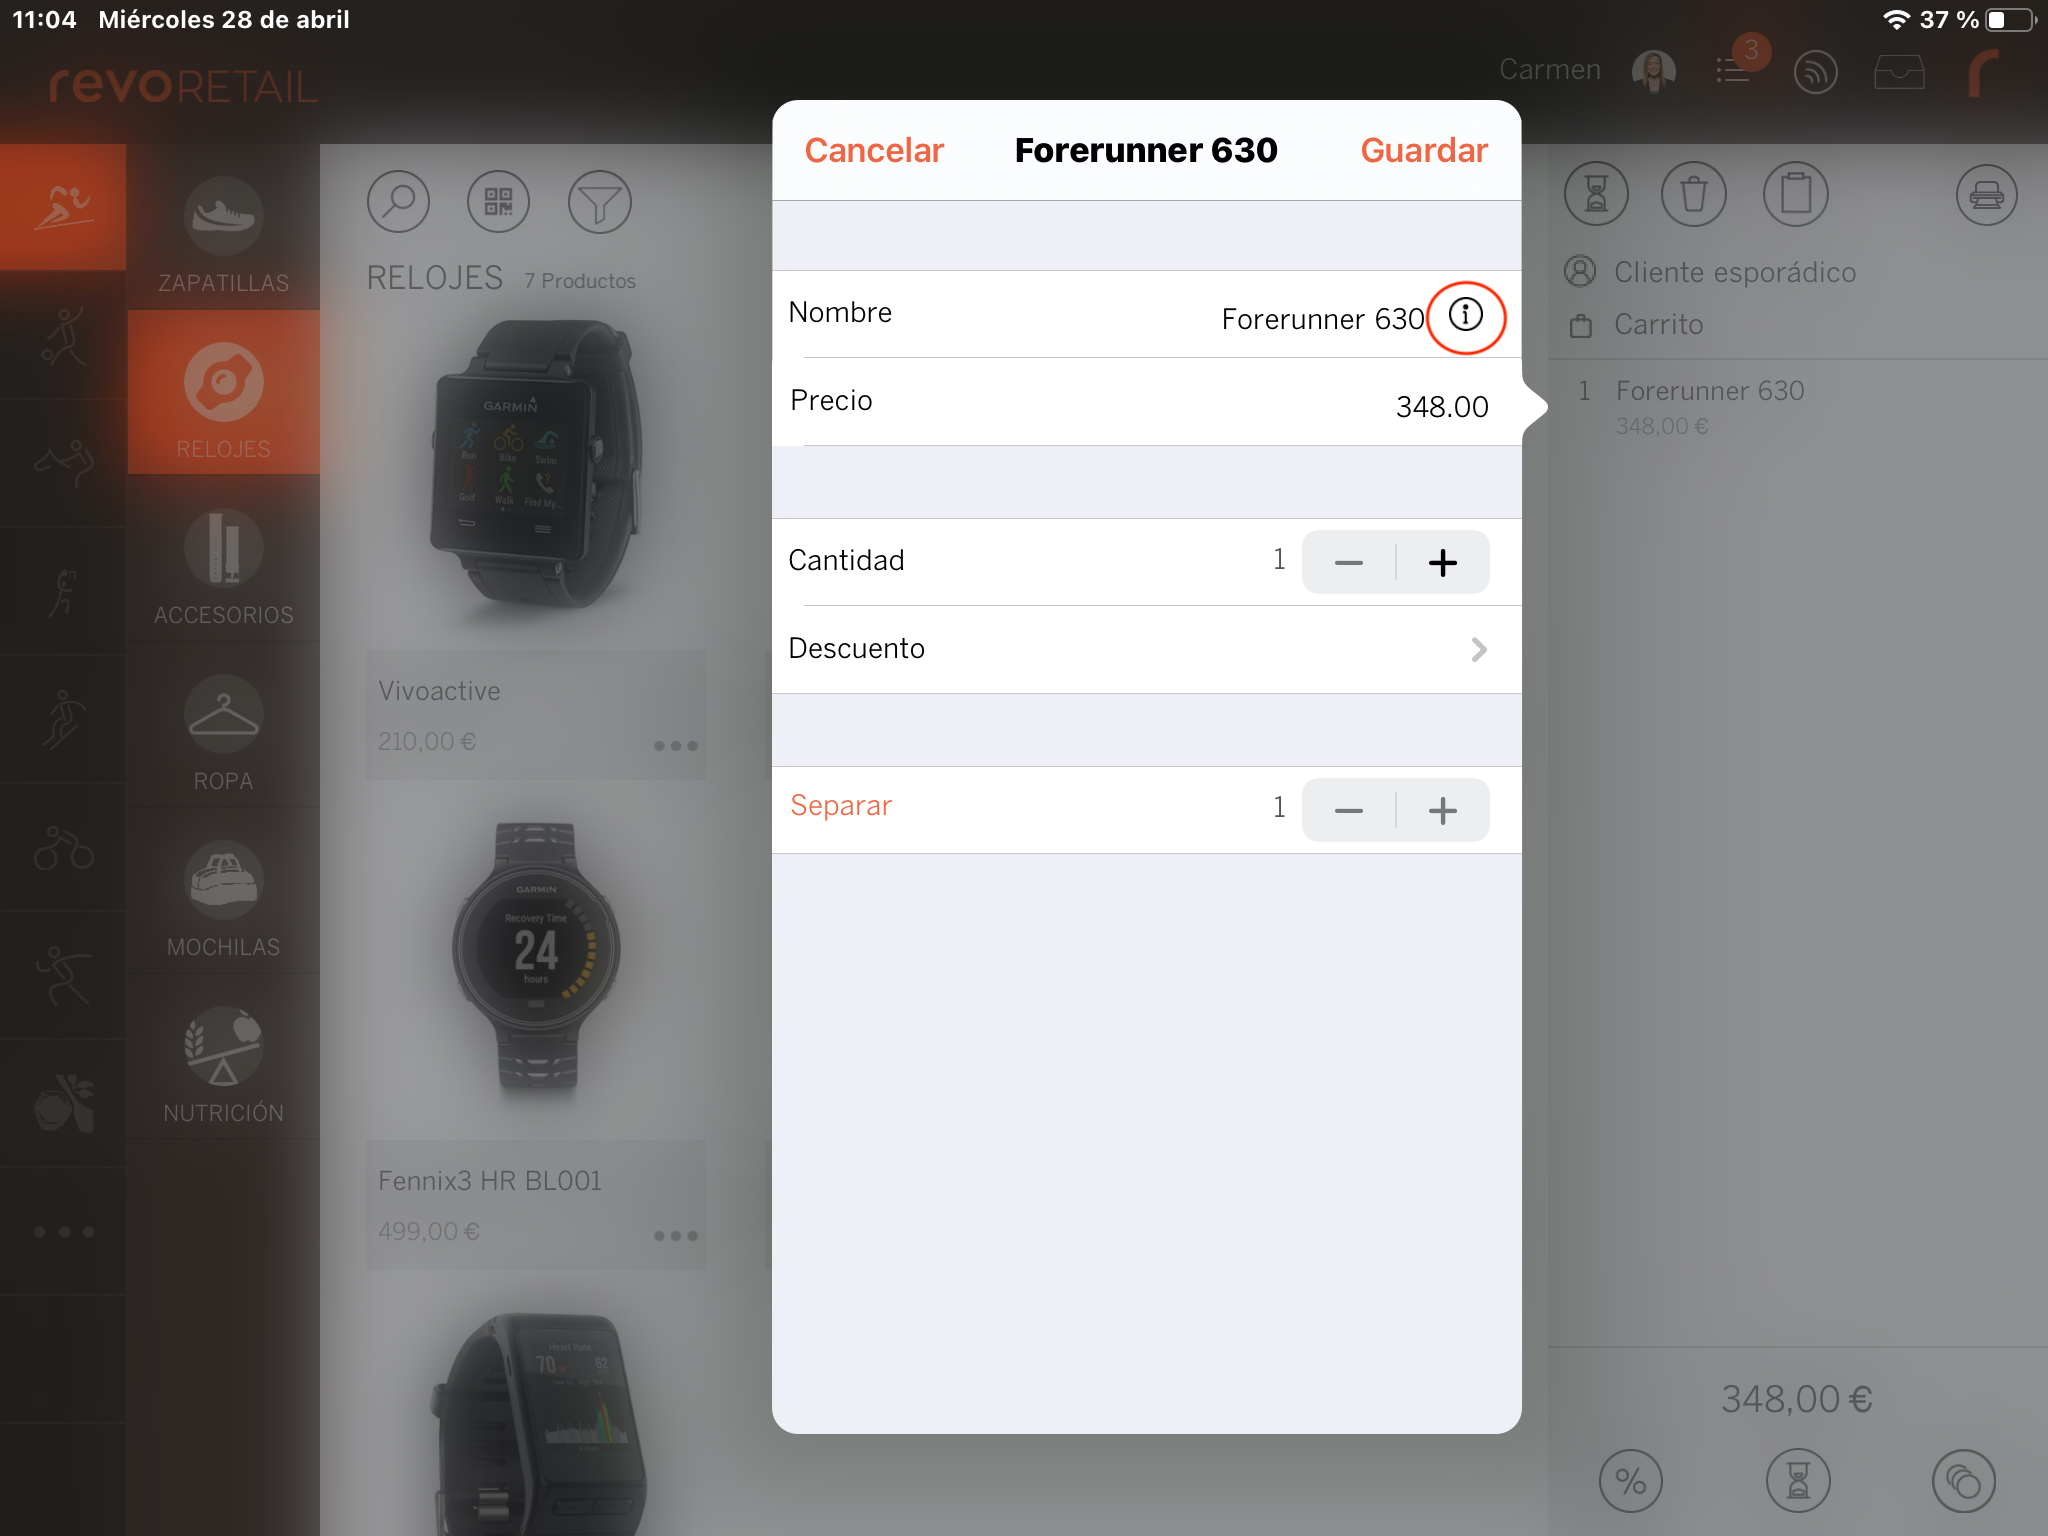
- 3.2. On the product information screen, select the printer icon and then the paper format previously created in the Back office.
- 3.3. On the order summary screen, select the product and then click on its information icon.