Sometimes, you may not be able to connect all devices to the same local network. With the EPSON TM-T88VI-iHub model, you can set up a print server to solve this issue.
For example, if you have a restaurant and a beach bar, this print server will allow orders from the beach bar to reach the restaurant's kitchen or till.
HOW TO CONFIGURE THE PRINTER
1. Set up a manual IP address with internet access.
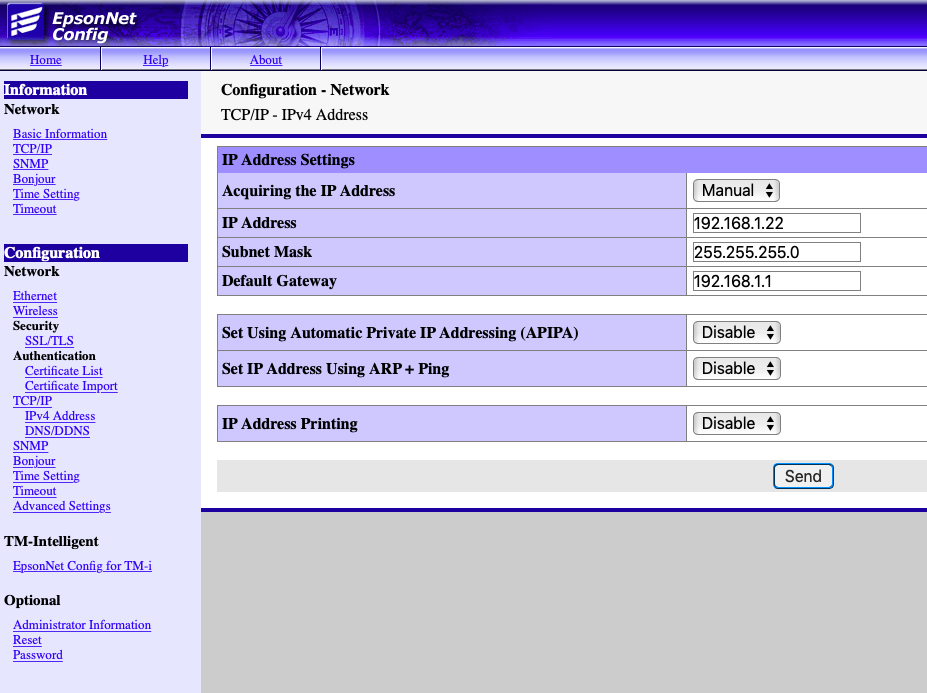
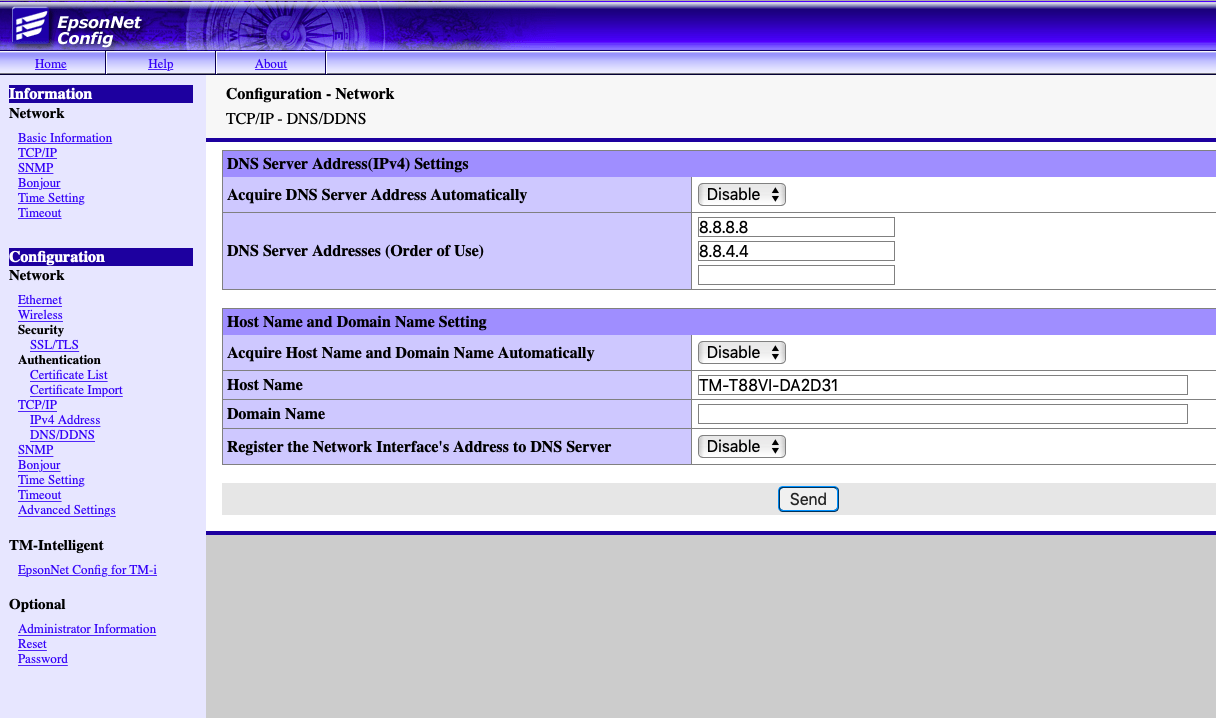
2. Ensure that the DNS is assigned, and the options are disabled.
3. In EpsonNet Config for TM-i, go to Server Direct Print.
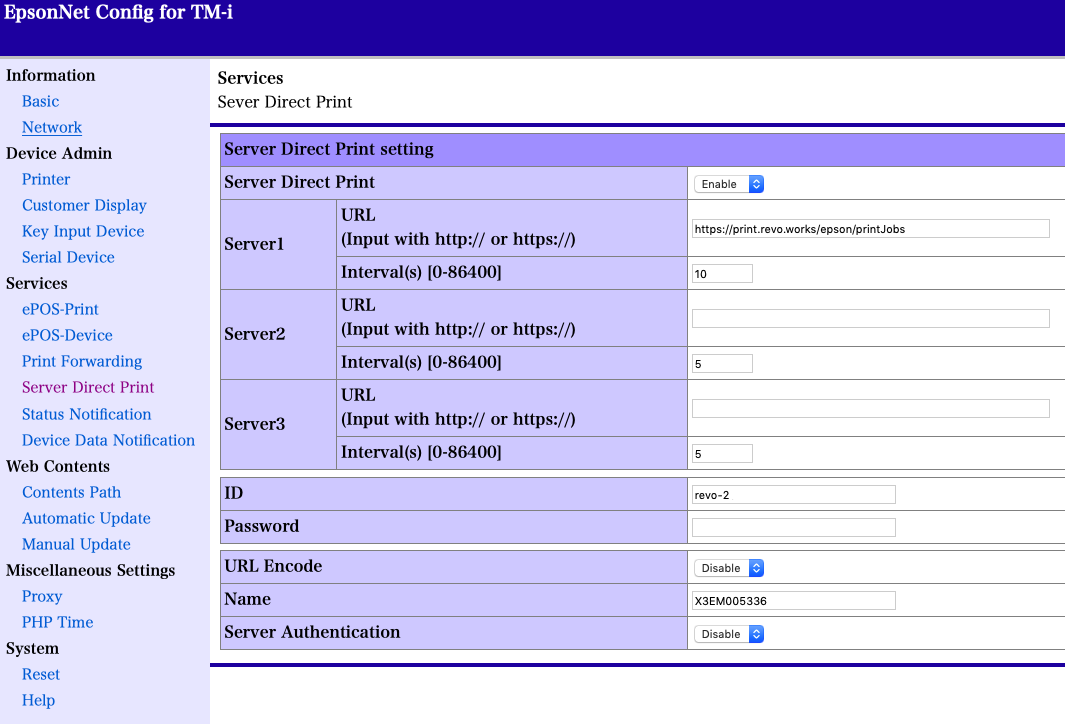
-
Server Direct Print: Enabled.
-
URL: https://print.revo.works/epson/printJobs
Copy this URL exactly.
-
Intervals: Set 5–10 seconds for the printer to check for pending jobs.
-
ID: Account name - printer number (example: revo-2). Useful if you have multiple printers.
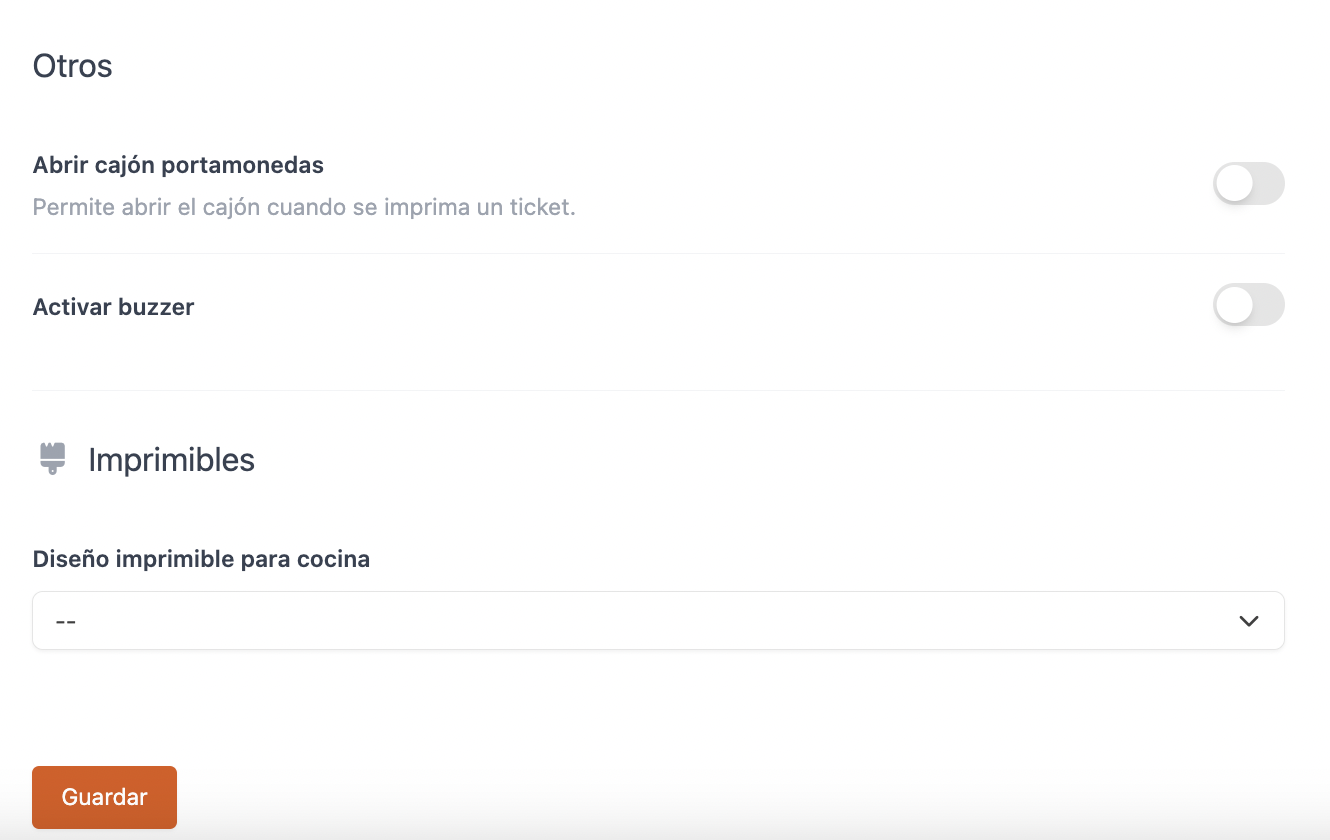
4. Access the back-office of Revo XEF.
5. Go to Settings / PRINTERS.
6. Click + New and fill in the information.
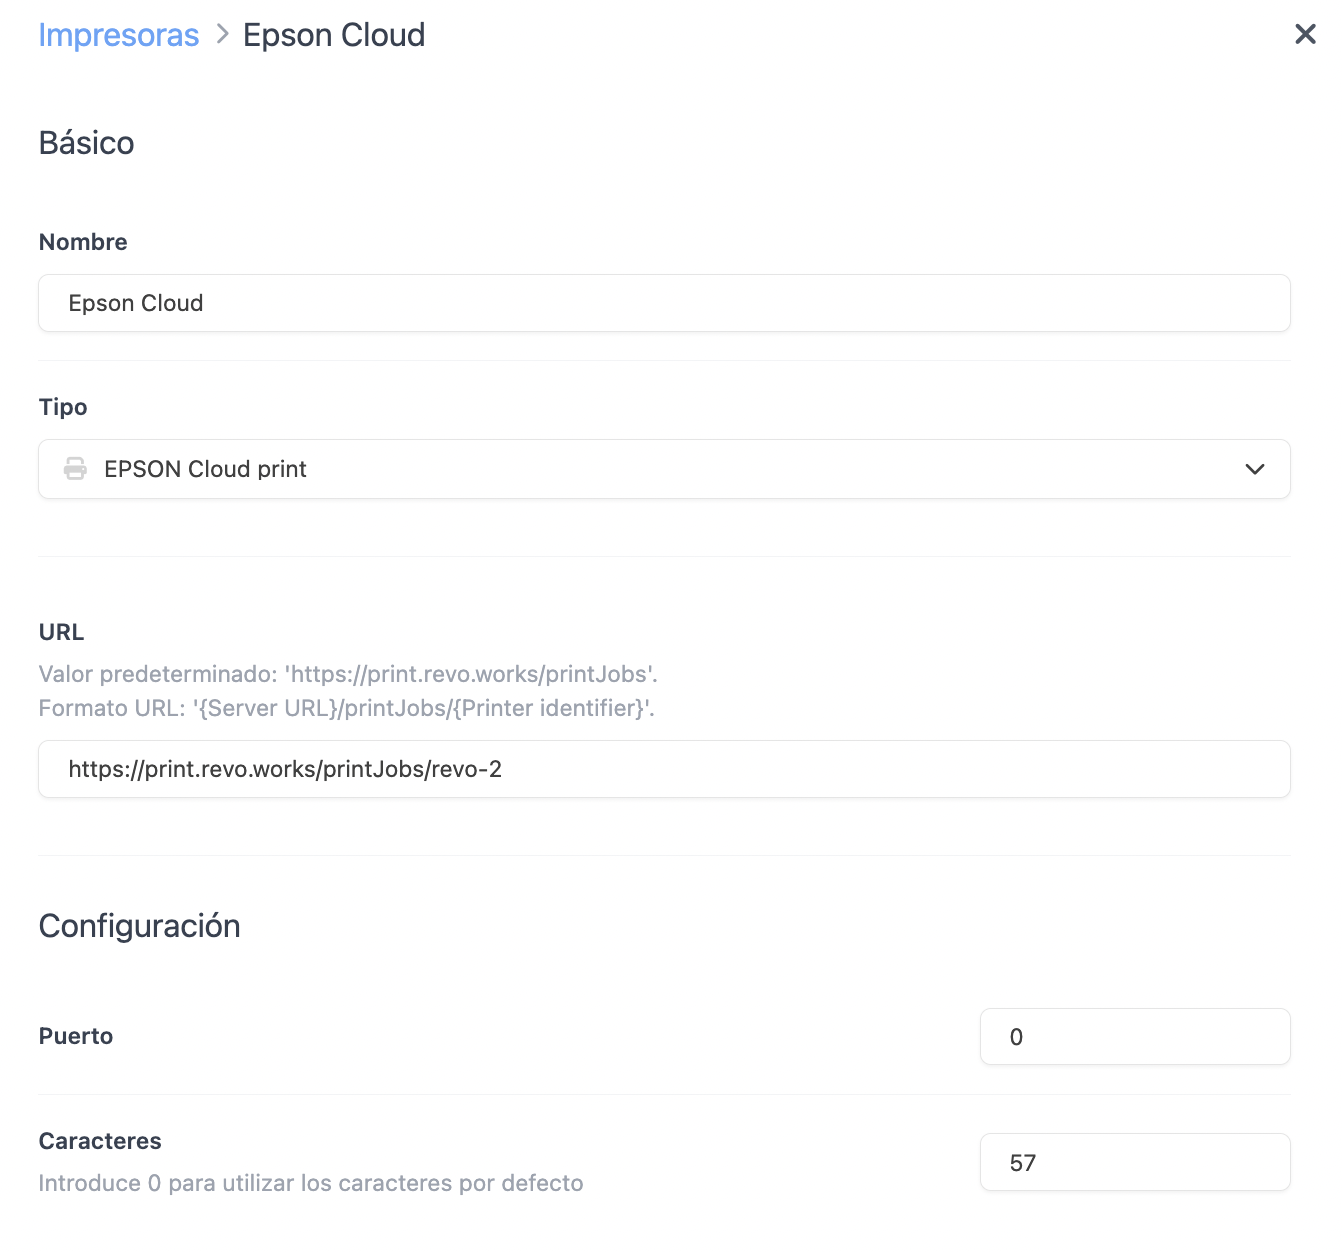
-
Name: Add an identifying name.
-
Type: EPSON Cloud Print.
-
URL: https://print.revo.works/printJobs/account name-printer number (Example: https://print.revo.works/printJobs/revo-2).
-
Port: 0
-
Characters: 57
-
Open cash drawer: Enable this option if you want the drawer to open when printing a receipt.
-
Enable buzzer: Enable this option if you want the printer to make a sound when receiving a receipt.
-
Print templates: Select an alternative kitchen ticket design.
7. Click Save.