
STATUS: ACTIVE
1. DOWNLOADS 2. SET UP REVO XEF BACK OFFICE 3. CONFIGURE THE TESIPRO SERVER 4. TEST THAT IT WORKS 5. CONCEPTS
To use the integration with Tesipro, you need to install an intermediate server to handle communication between REVO <-> Tesipro.
We recommend installing this web server on the same computer where the Tesipro software is installed.
1. DOWNLOADS
2. SET UP REVO XEF BACK OFFICE
Enable the integration
1. Open the Windows terminal on the computer where Tesipro is installed and run ipconfig to check the computer's IP address.
2. Log in to the Revo XEF back office.
3. Go to Integrations.
4. Click + New, search for Tesipro, and select + Add.
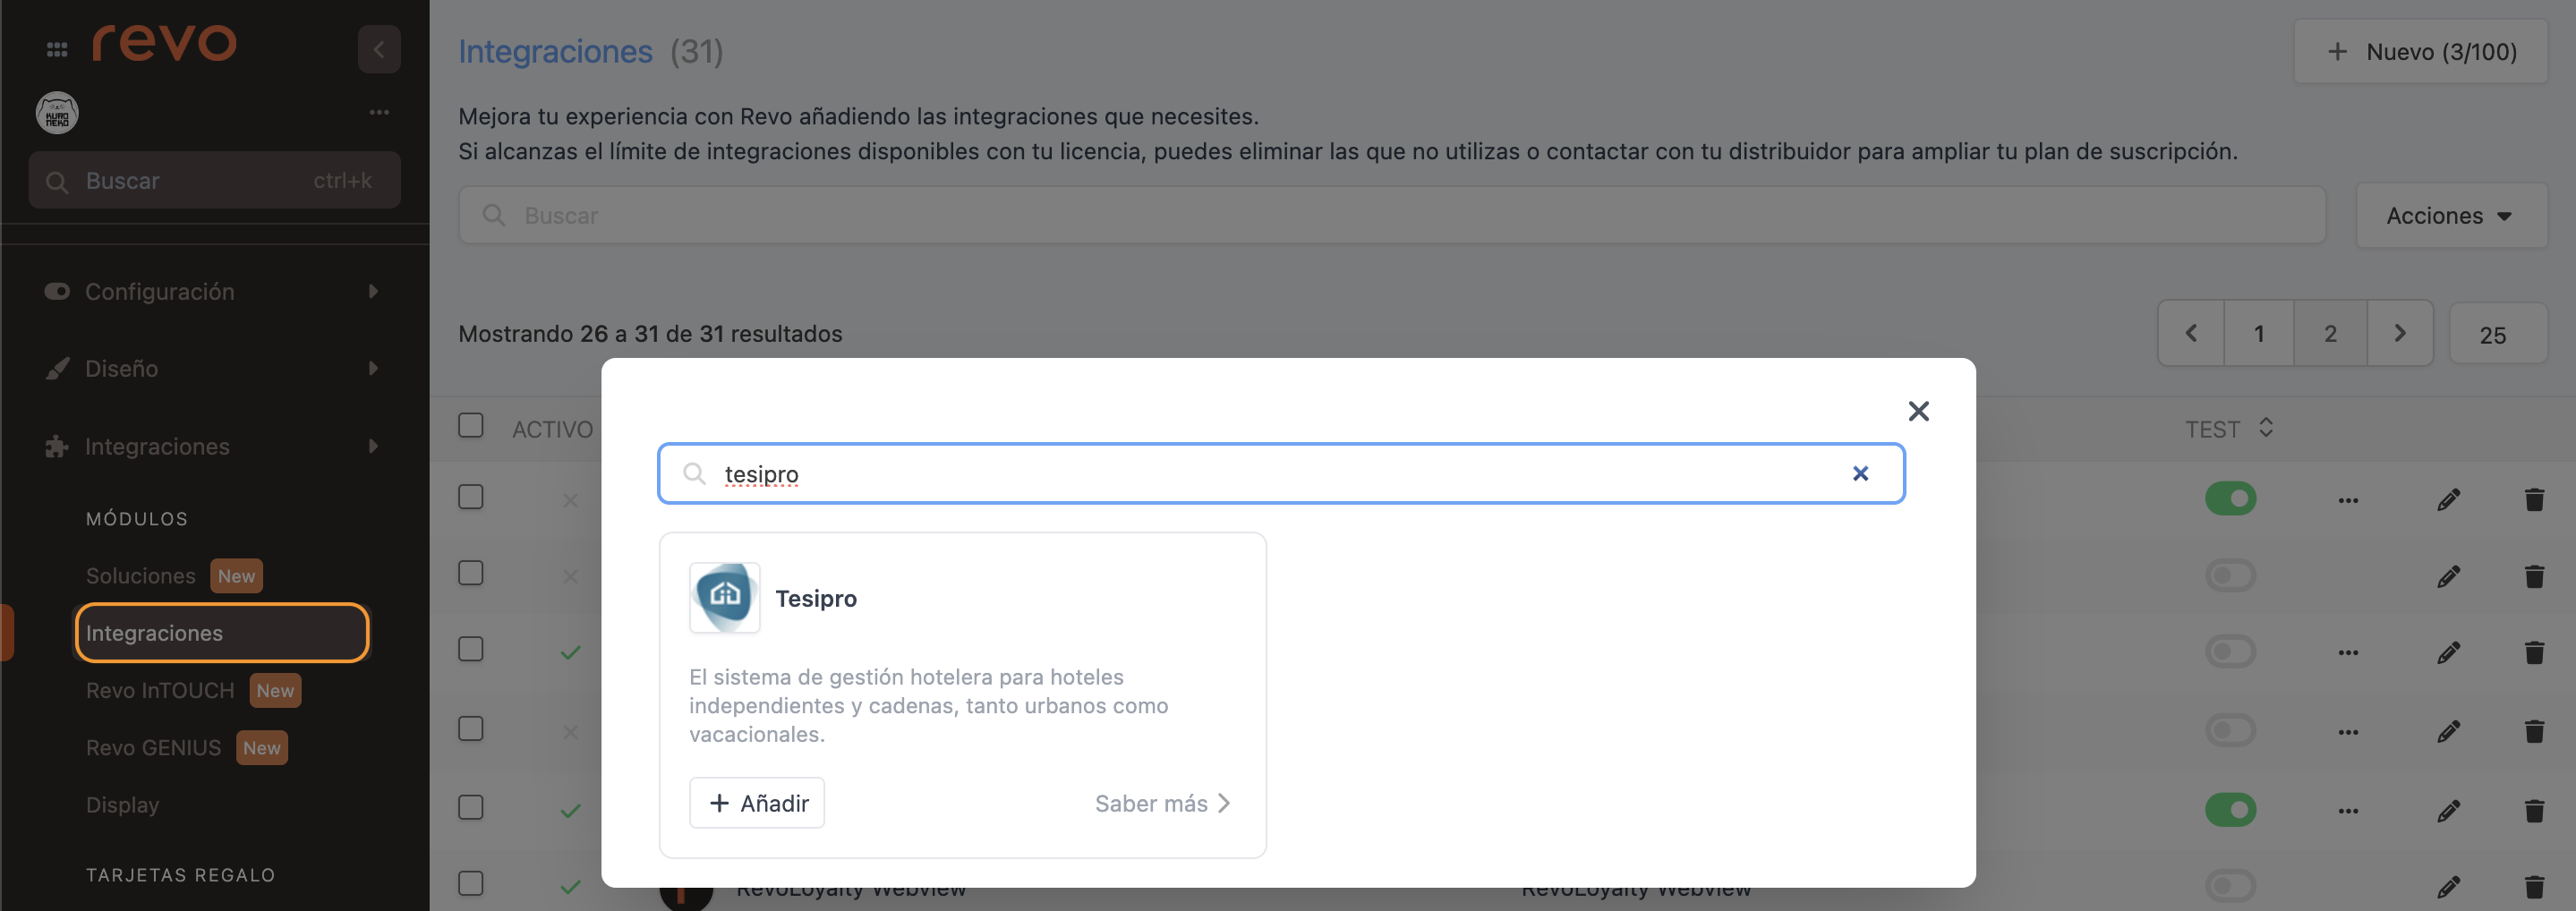
5. Fill in the fields:
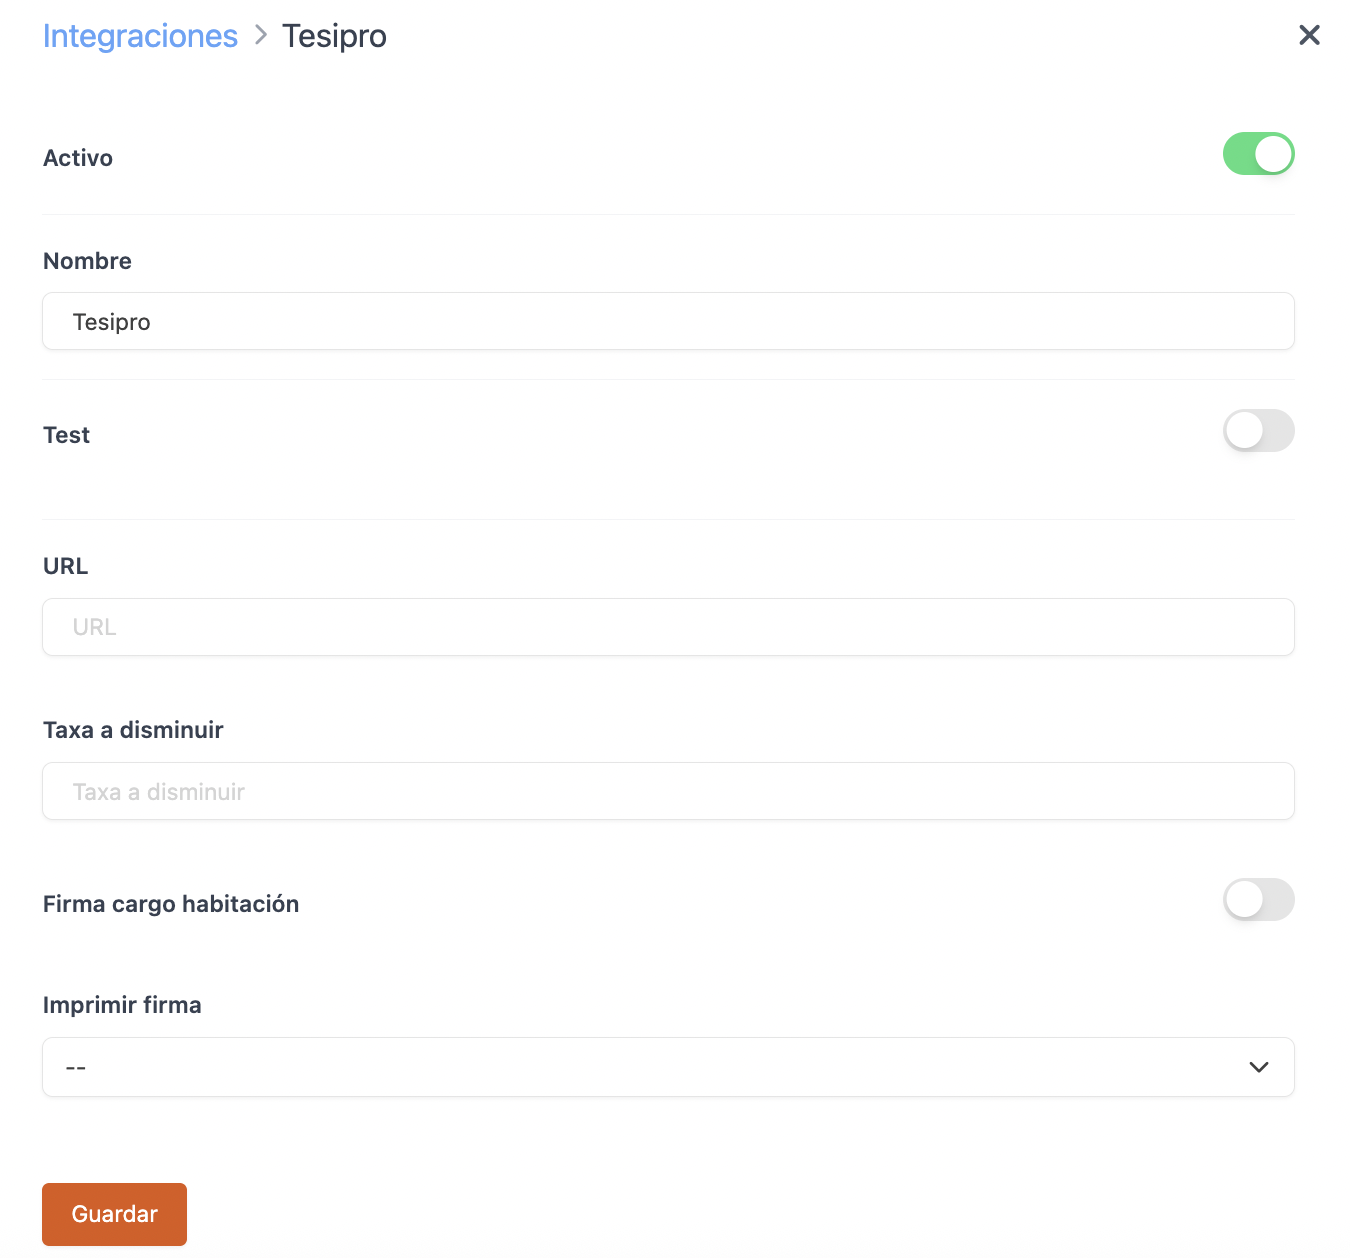
- Active:
- Name: Enter a name to identify the integration.
- Test: Disabled.
-
URL: Enter
http://serverIP/tesipro/public/api/(replace serverIP with the IP address from step 1). - Tax to deduct: If you want to apply a VAT discount, enter it here. For example, if a dish costs €10, and you want to save it without the 4.5% VAT, type 4.5.
- Room charge signature: Enable if you want the customer to sign the charge.
- Print signature: Choose whether to print the signature.
6. Click Save.
Add the payment method
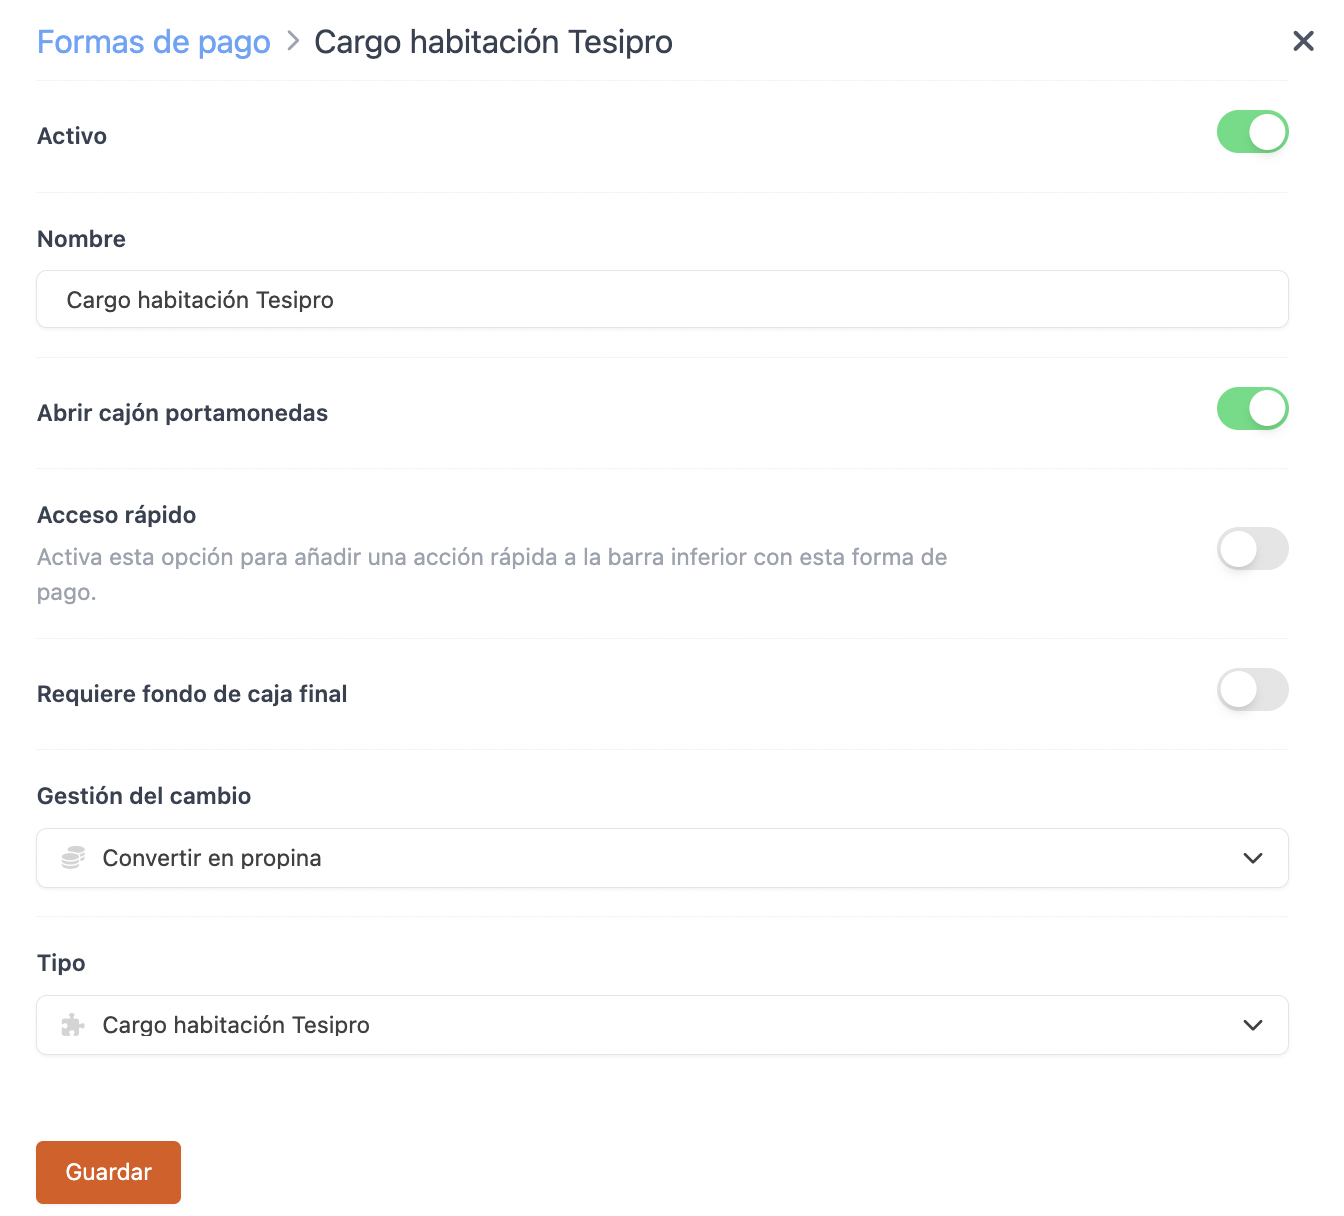
1. Go to Settings / PAYMENT METHODS.
2. REVO will create the payment method automatically. You can edit it by clicking .
-
Active:
-
Name: Tesipro.
-
Open cash drawer:
-
Quick access: Enable for quick access.
Requires Revo XEF Advance.
-
Requires end-of-day cash balance: Enable if needed.
-
Change management: Not allowed.
-
Type: Tesipro room charge.
4. Click Save.
3. CONFIGURE THE TESIPRO SERVER
Install XAMPP
- Run xampp-win32-5.6.28-1-VC11-installer.
- Follow all the steps.
- Copy the php_dbase.dll file to C:/xampp/php/ext/ (you’ll find it in the intermediate app zip).
Configure XAMPP
1. Open the XAMPP control panel
Search for xampp control panel from the Windows Start menu.
You’ll see something like this:
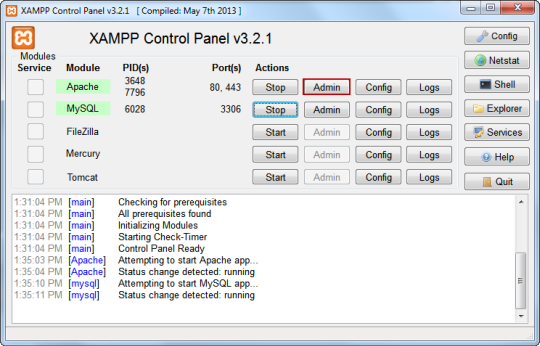
Click config next to Apache. This will open the C:/xampp/php/php.ini file. Scroll to the end and add:
extension=php\_dbase.dll
extension=php\_gmp.dll
2. Add the integration to the server
- Copy the Tesipro folder to C:/xampp/htdocs/
- Edit the file C:/xampp/htdocs/tesipro/config/services
Find this section:
'tesipro' => [
        'path' => '<pathToDbaseStorage>'
 ]
And replace <pathToDbaseStorage> with the folder containing the dbase files. Example: C:/dbase-storage/
Make sure the MAJCARGO and MAJHABIT files exist and are named exactly like that.
3. Set XAMPP to start automatically
To make XAMPP start with the PC:
- Copy C:/xampp/xampp_start to C:\Documents and Settings\Administrator\Start Menu\Programs\Startup
- If you can’t restart, just click start next to Apache in the XAMPP control panel and minimise the window.
4. TEST THAT IT WORKS
Open your browser and go to:
http://localhost/tesipro/public/api/rooms
If you see an error, something is misconfigured.
5. CONCEPTS
With Tesipro, you can add concepts to charges. By default, REVO will ask which concept to apply when selecting the room. But you can automate this by using profiles.
This is useful if each room has a fixed concept.
To do this:
- Create a profile with the Tesipro concept name.
- On the device, select that profile when making the charge.
The concepts are stored in the C:/xampp/htdocs/tesipro/config/concepts file, with a format like this:
[
    "CAFM" =>   "BAR /CAFETERIA",
    "MOOA" =>   "ROCA MOO",
    "OMMS" =>   "OMM SESSION",
    "RSA"  =>   "SERVICIO HAB.",
    "DEX"  =>   "DESAYUNOS",
    "BARP" =>   "TERRAZA",
    "AMOO" =>   "ROCA BAR",
    "OMMS" =>   "OMM SESSION 2"
];
You can enter any concepts you need. Remember to use double quotes ("") and commas (,) at the end of each line, except the last one.