Revo RETAIL is a comprehensive solution for managing sales and organisation in any retail business.
The app is designed to let you work quickly and efficiently with your iPad.
Take a quick tour to familiarise yourself with Revo RETAIL.
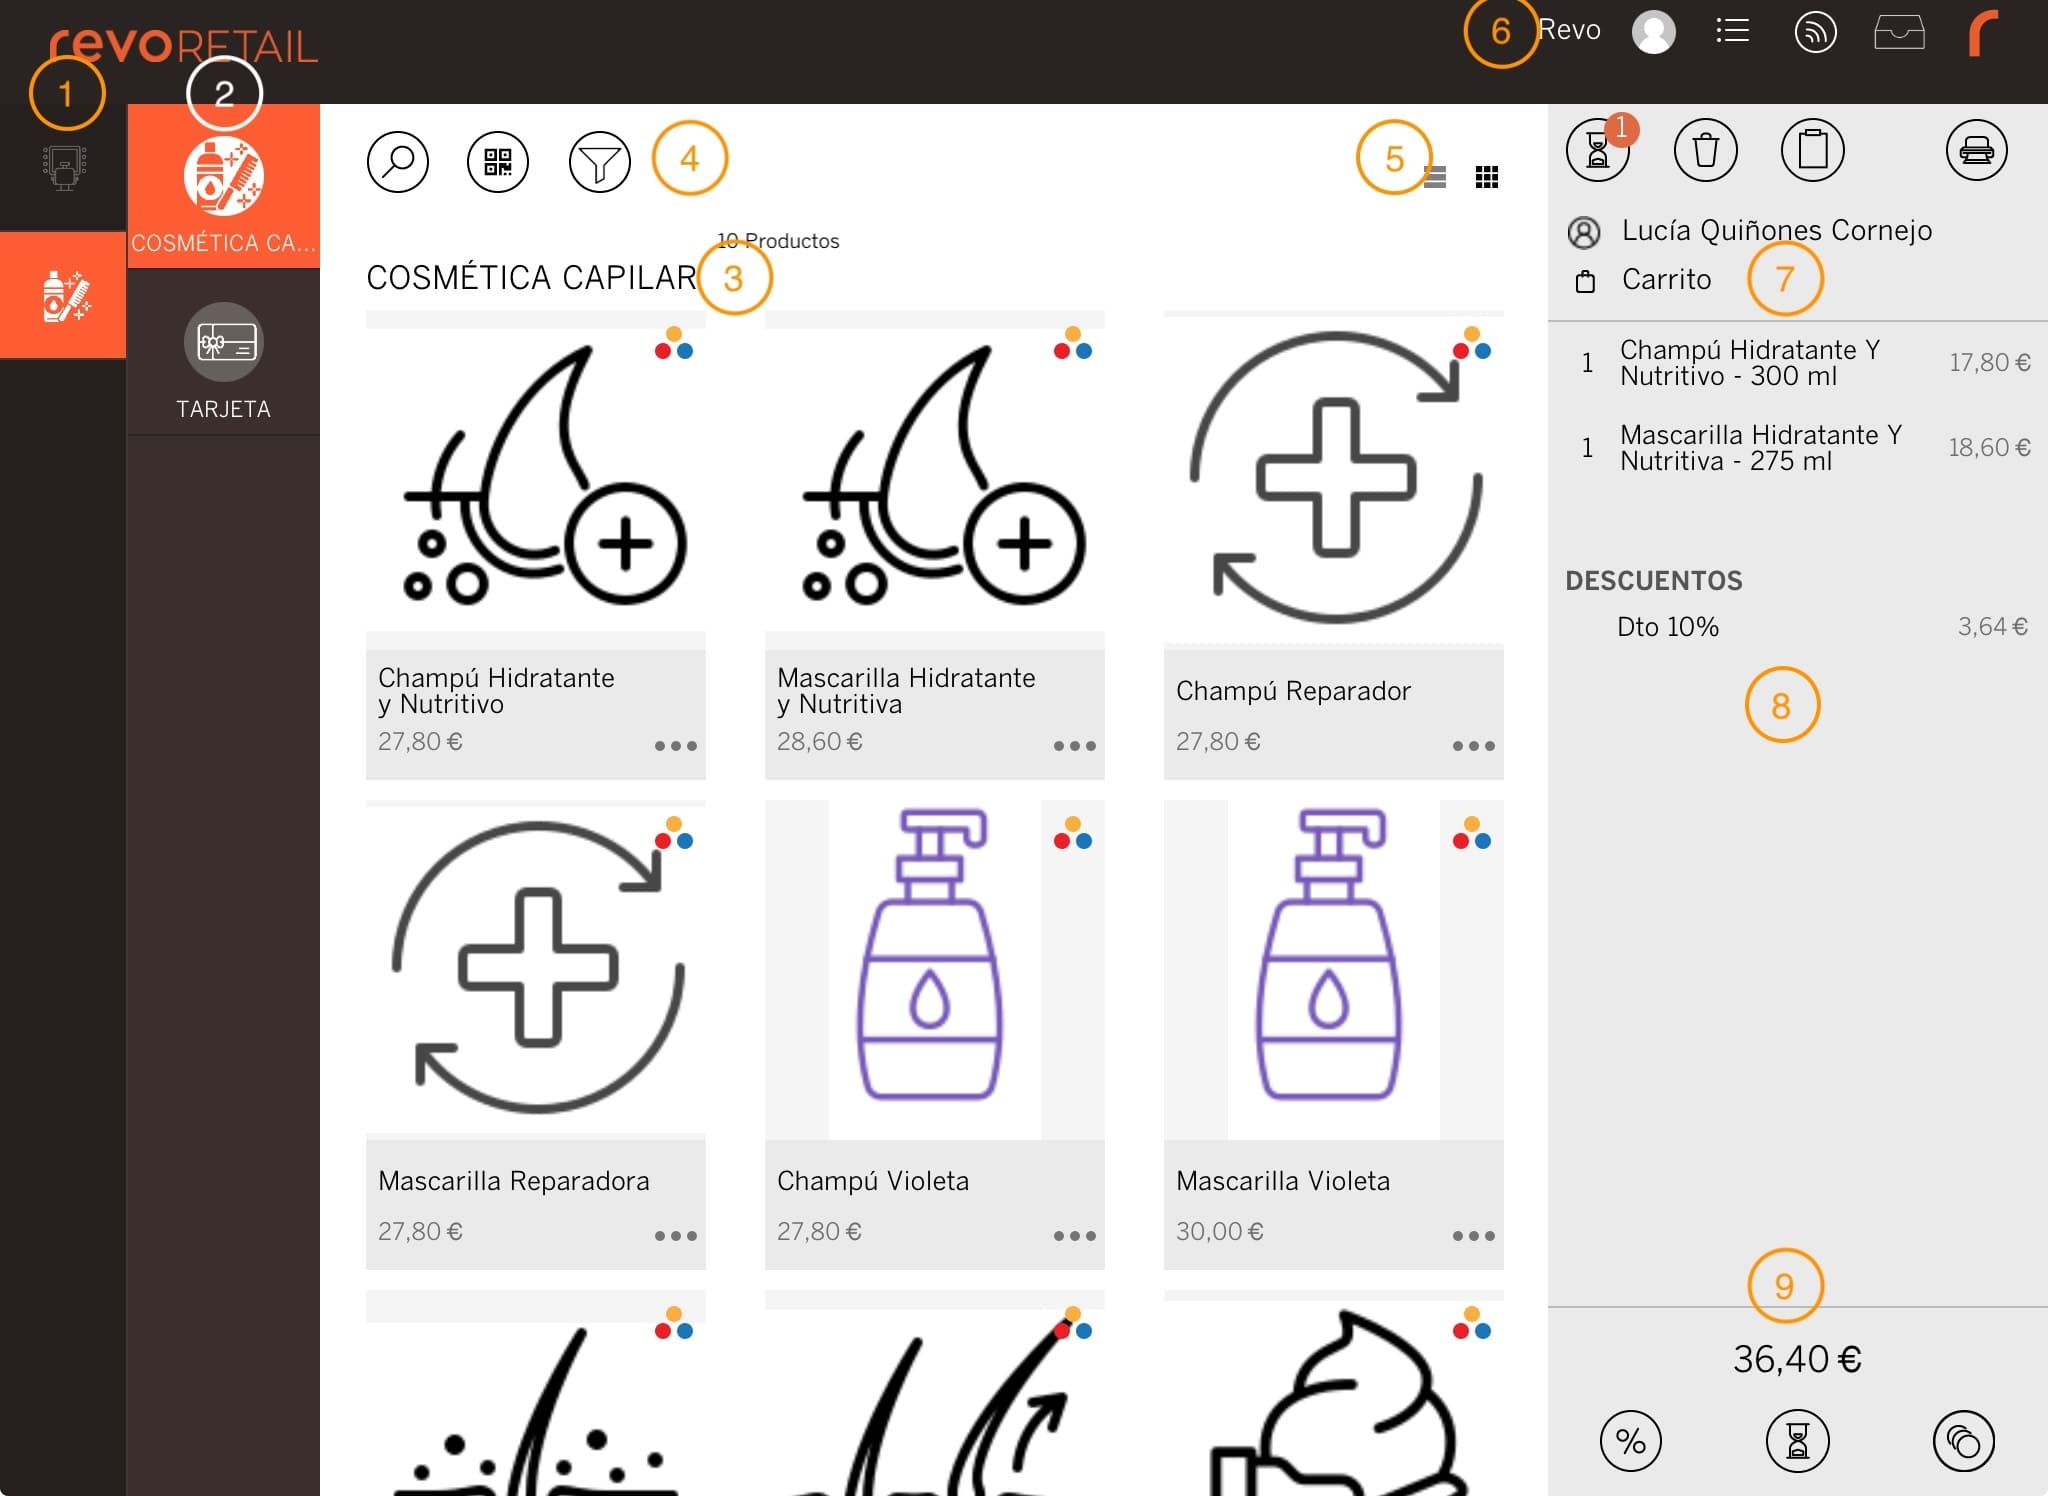
Revo RETAIL organises products into three levels: Groups, Categories, and Products. Additionally, you have containers for more detailed organisation. This structure is visible both in the back-office and in the app.
1. Groups Menu: Navigate through all groups by tapping on them. While you can create as many as you need, it’s recommended to use between 10 and 11 to keep things efficient.
2. Categories Menu: Each group contains categories. Using between 9 and 10 enhances the user experience.
3. Products: Products are found within categories. You can choose between icon view or list mode. Additionally, use containers for better organisation. Each product can have variants (sizes, colours, etc.).
4. Search Tools: Quickly find products:
- Manual text search.
- Use the iPad’s camera to scan barcodes.
- Filter and save custom searches.
5. Views:
- Icons: View products with images, names, and availability.
- List: Organise products into a list without images; this allows more products to be displayed.
6. Menu Icons:
-
r: One of the most used options in Revo RETAIL.
- v. X.X Displays the version of Revo RETAIL you are using.
- Synchronise: Manually synchronise devices after making changes in the back-office.
- Invoices: Manage invoices: process returns, send by email, etc.
- Search Invoice: Find invoices by number, barcode scanner, or the iPad’s camera.
- Cash Control: Open and close shifts, and print the Z Report.
- Cash In/Out: Record money movements to keep the cash drawer balanced.
- Gift Card Balance: Check or reprint the balance of gift cards.
- Voucher Balance: Verify the balance of a voucher using its code or manually.
- Target: Check progress towards business or employee targets.
- Attendance: Register work check-ins and check-outs. In the back-office, you can track employees’ working hours.
- Support: Consult help articles or open a support ticket with your distributor if assistance is needed.
- Find Printers: Search for connected printers and add them easily.
-
Logout: Log out of your account, though it is recommended to put the iPad to sleep at the end of the day.
-
Open the cash drawer (requires privileges).
-
Displays connection status:
- White: connected and synchronised with the Cloud.
- Orange: no connection, indicates unsynchronised sales. When reconnected, sales are automatically synchronised.
-
Access pending customer actions (a number appears if there are actions to complete).
-
Switch users by tapping the icon.
7. Header:
- Displays sales on hold.
- Deletes all products from a sale (requires permission).
- Create or review quotes.
- Print product labels.
- Enter customer details or select a regular customer. Manage purchases, information, or credit payments from here.
8. Sales Screen:
- Tap on a product to add it to the sale.
- Modify quantity or apply discounts from the options screen.
- Delete a product by swiping left with your finger.
9. Footer:
- €36.40: Displays the total for the active sale.
- Apply personalised or pre-defined discounts to the entire ticket.
- Put sales on hold and retrieve them later.
- Open the payment module to complete a sale.