- DESCRIPTION
- CREATE THE STAMPED CARD
- DEFINE THE CONDITIONS
- DEFINE THE GIFT ON COMPLETION
- CREATE STAMPING RULE
- DEFINE WHEN TO STAMP
- CONFIGURE STAMPING ACTION
- CONFIGURE WALLET PASS IMAGES
- FINAL RESULT
DESCRIPTION
The stamped card is a loyalty benefit that allows your customers to collect stamps or perforations each time they make an eligible purchase. Upon completing all perforations, they receive a gift (usually a free item).
NOTE: This feature is available in INTOUCH and is configured from the back-office.
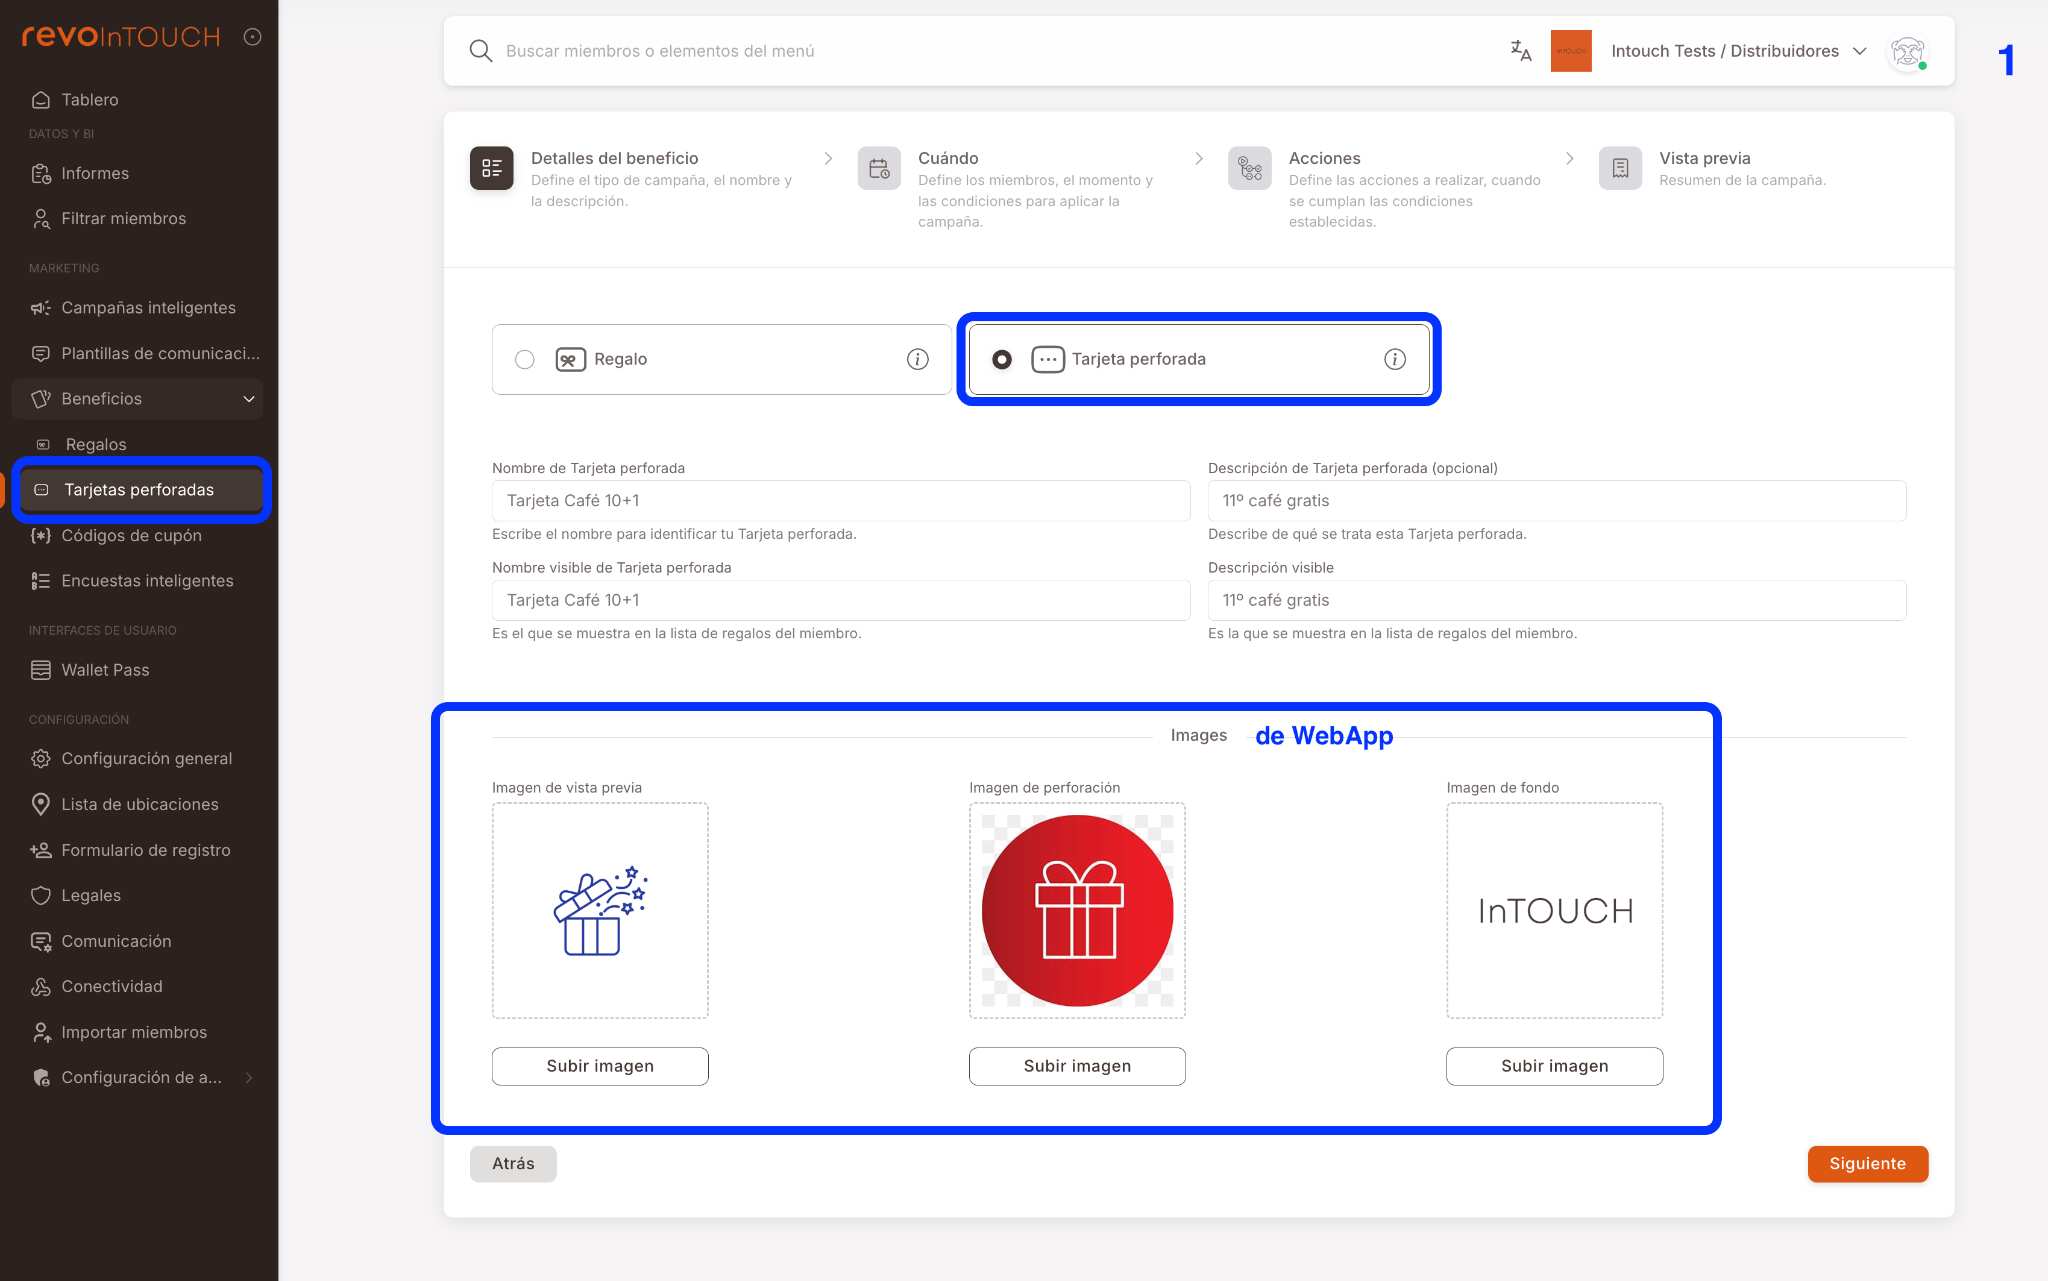
1. CREATE THE STAMPED CARD
Route: Benefits → Stamped Cards
In this step, you define the card and its appearance in the WebApp.
Configure:
- Benefit type: Stamped Card
- Card name (internal)
- Display name
- Description
- Display description
Images (WebApp)
Upload the images that will be displayed to the customer in the WebApp:
- Preview image
- Stamping image
- Background image
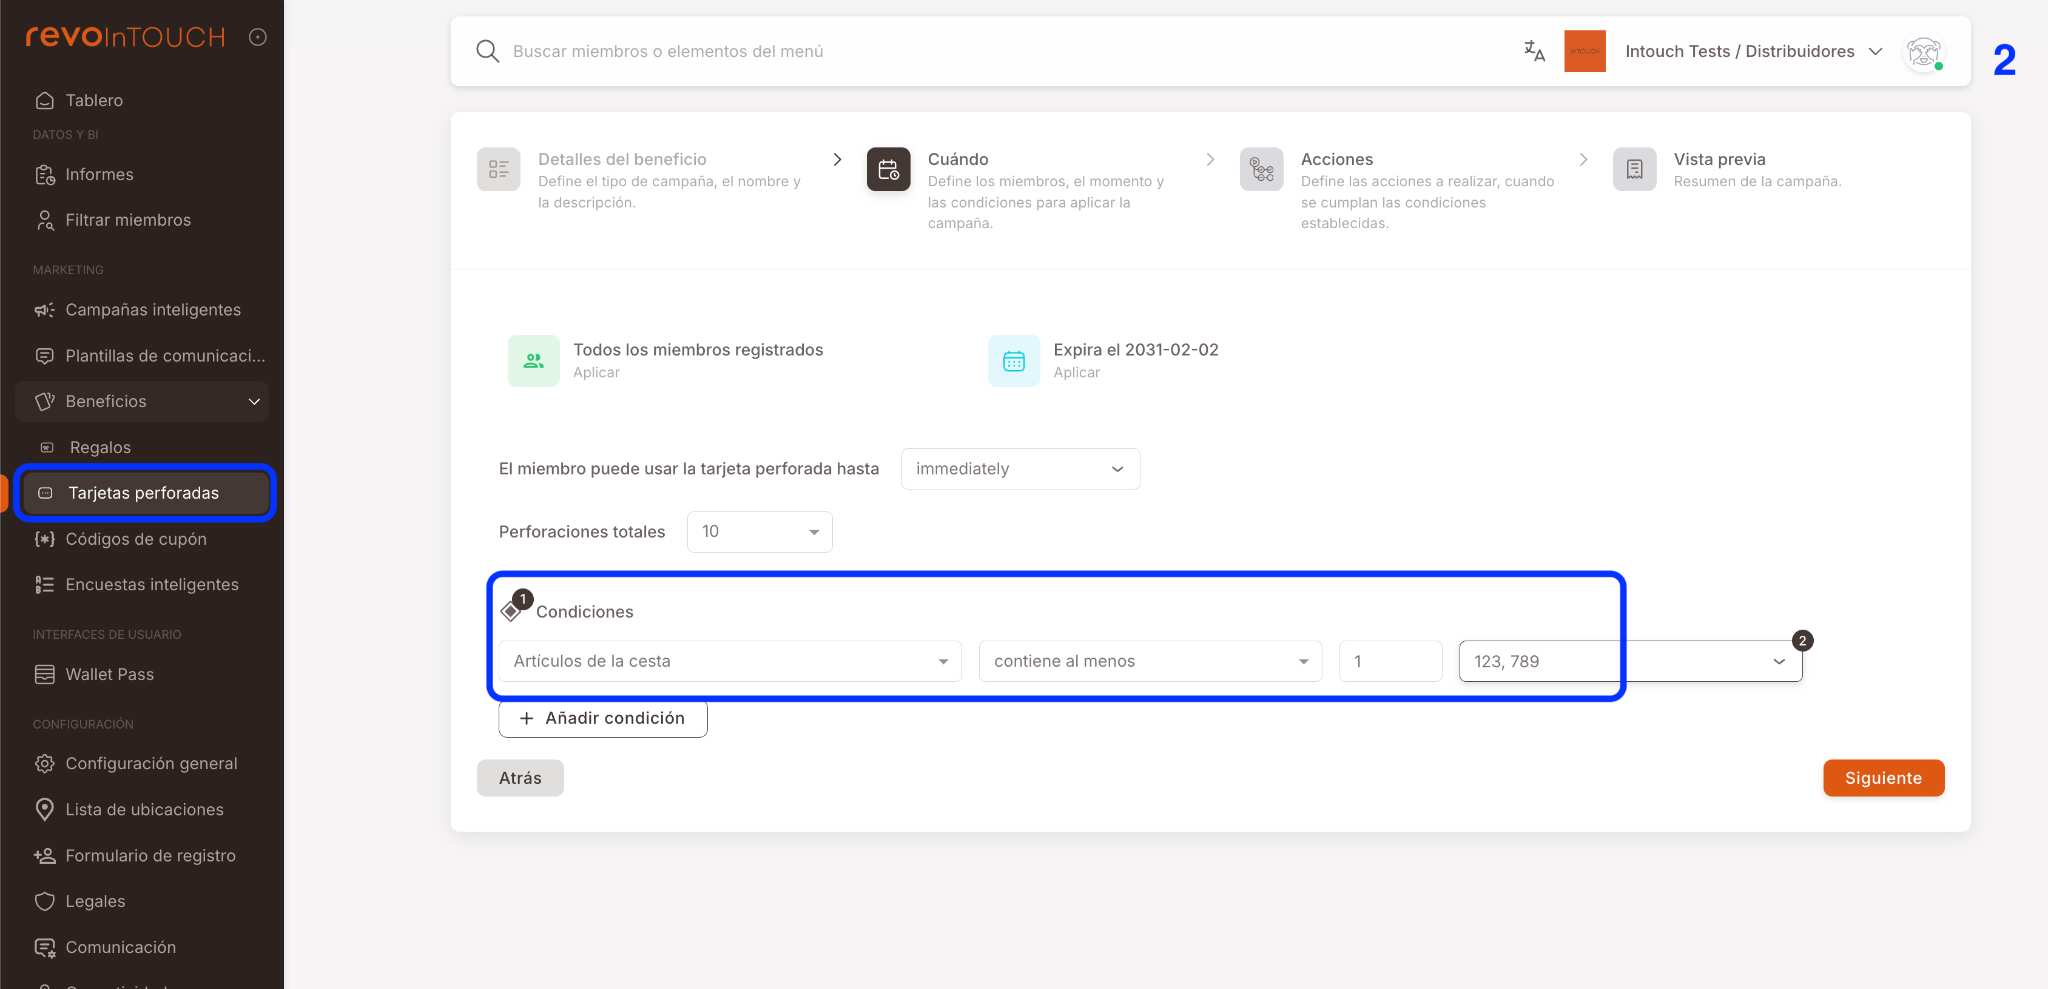
2. DEFINE THE CONDITIONS
Configure the condition that must be met to obtain a stamp:
- Type: Basket items
- Operator: contains at least
- Quantity: 1
-
Select:
- Article codes or
- Department codes
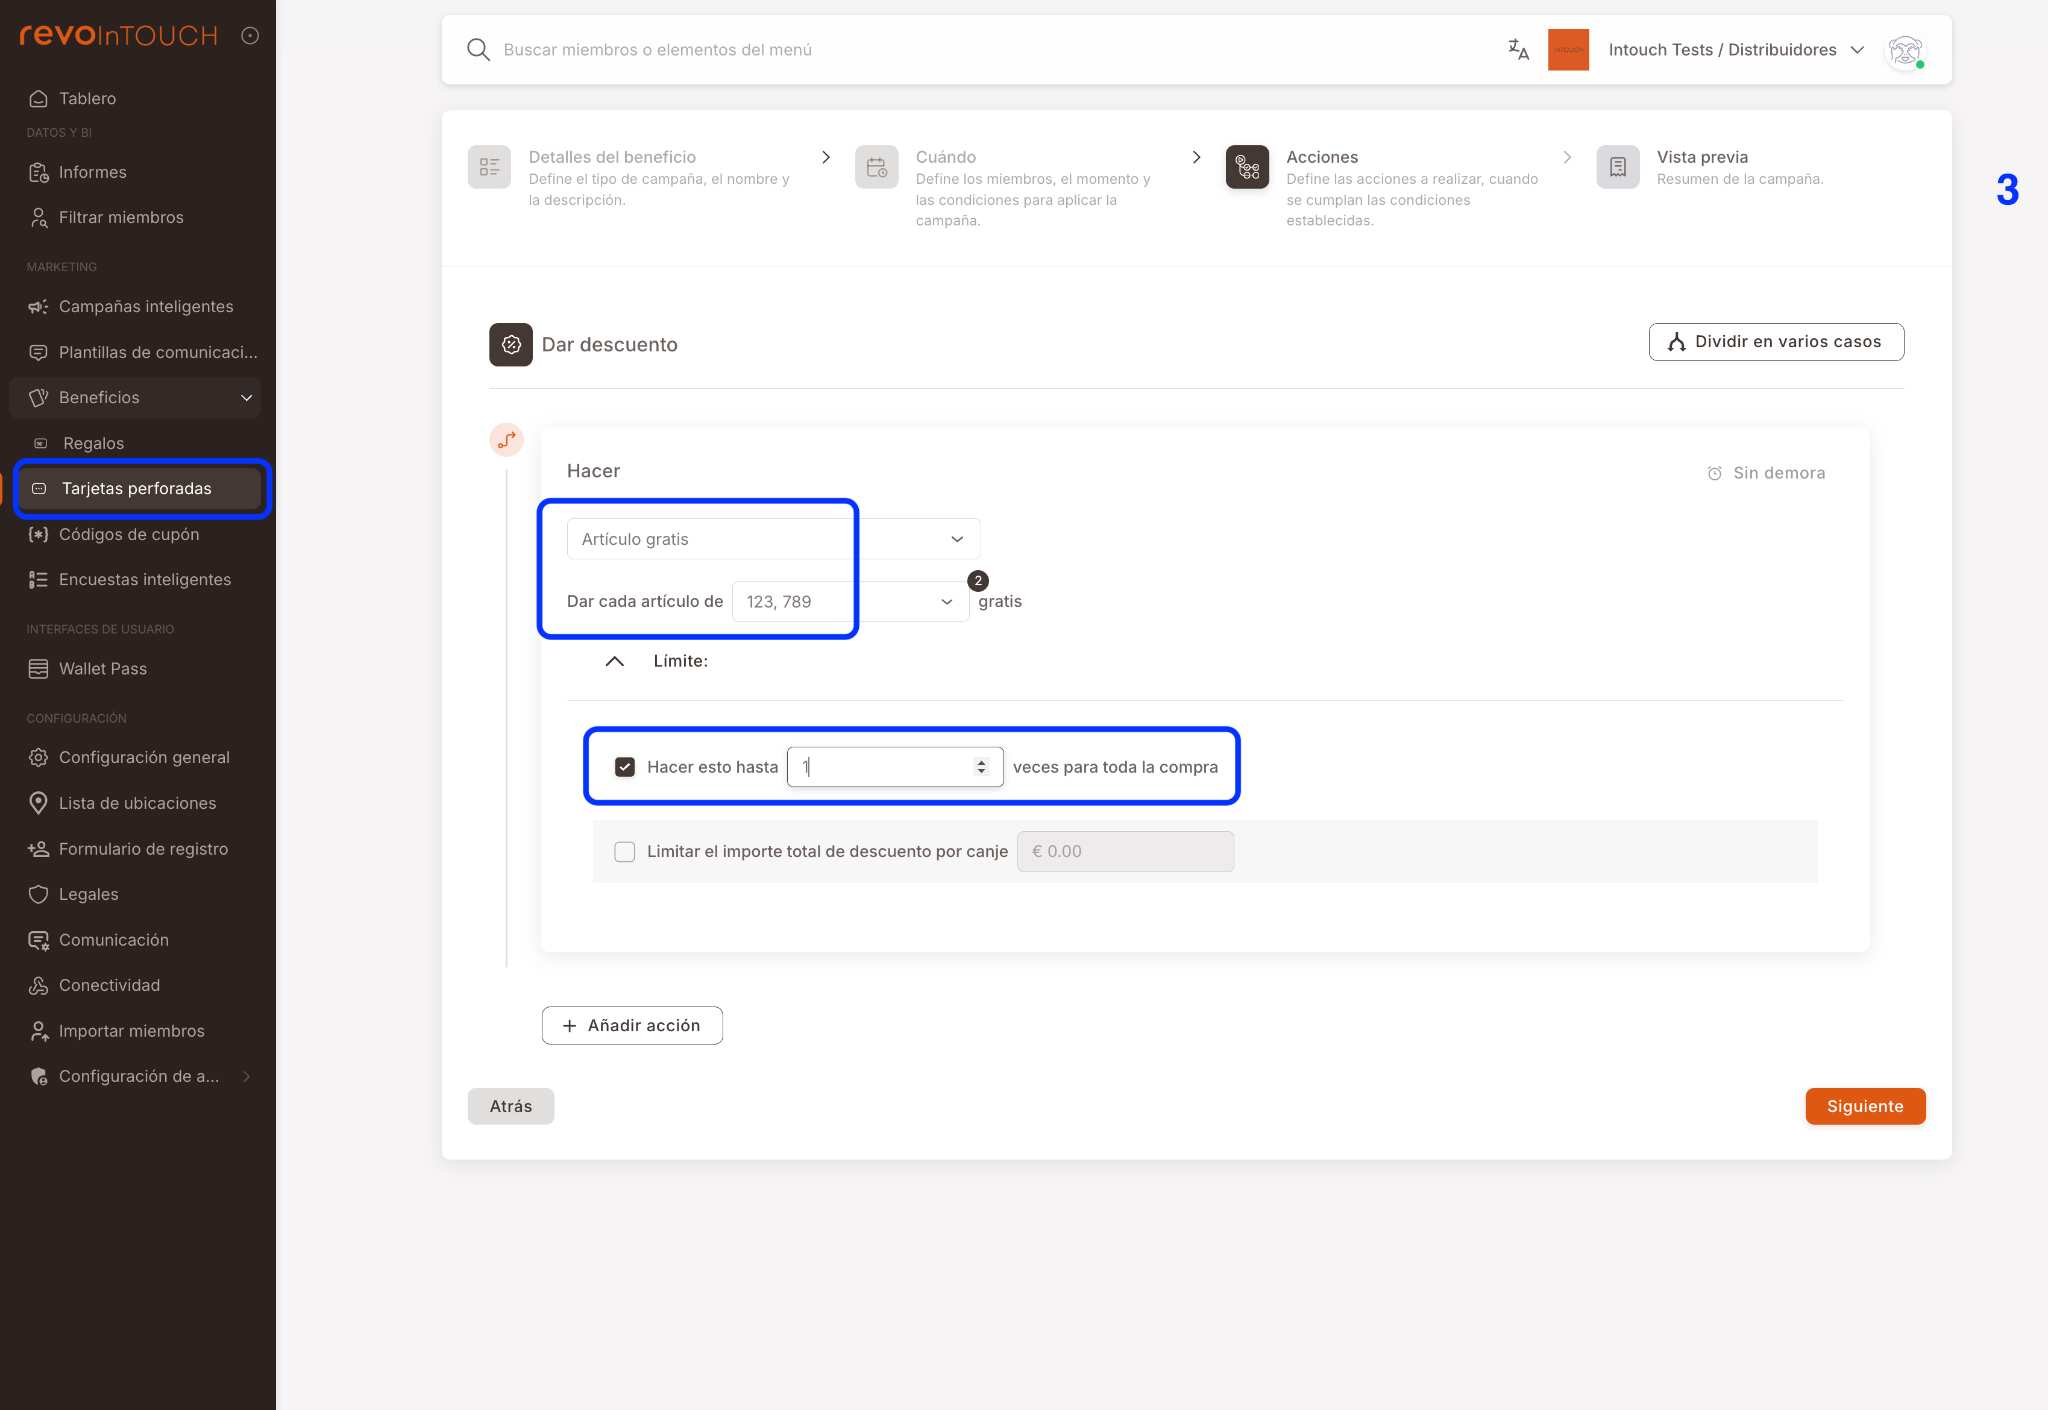
3. DEFINE THE GIFT ON COMPLETION
In the Actions step, configure the benefit to be granted when the card is complete.
Configure:
- Action: Give discount
- Type: Free item
- Select the article or department that will be free
Limit (important)
- Activate: Do this up to 1 time for the entire purchase
IMPORTANT: This configuration ensures that:
- Only one free item is delivered
- The gift is not repeated even if the condition is met several times
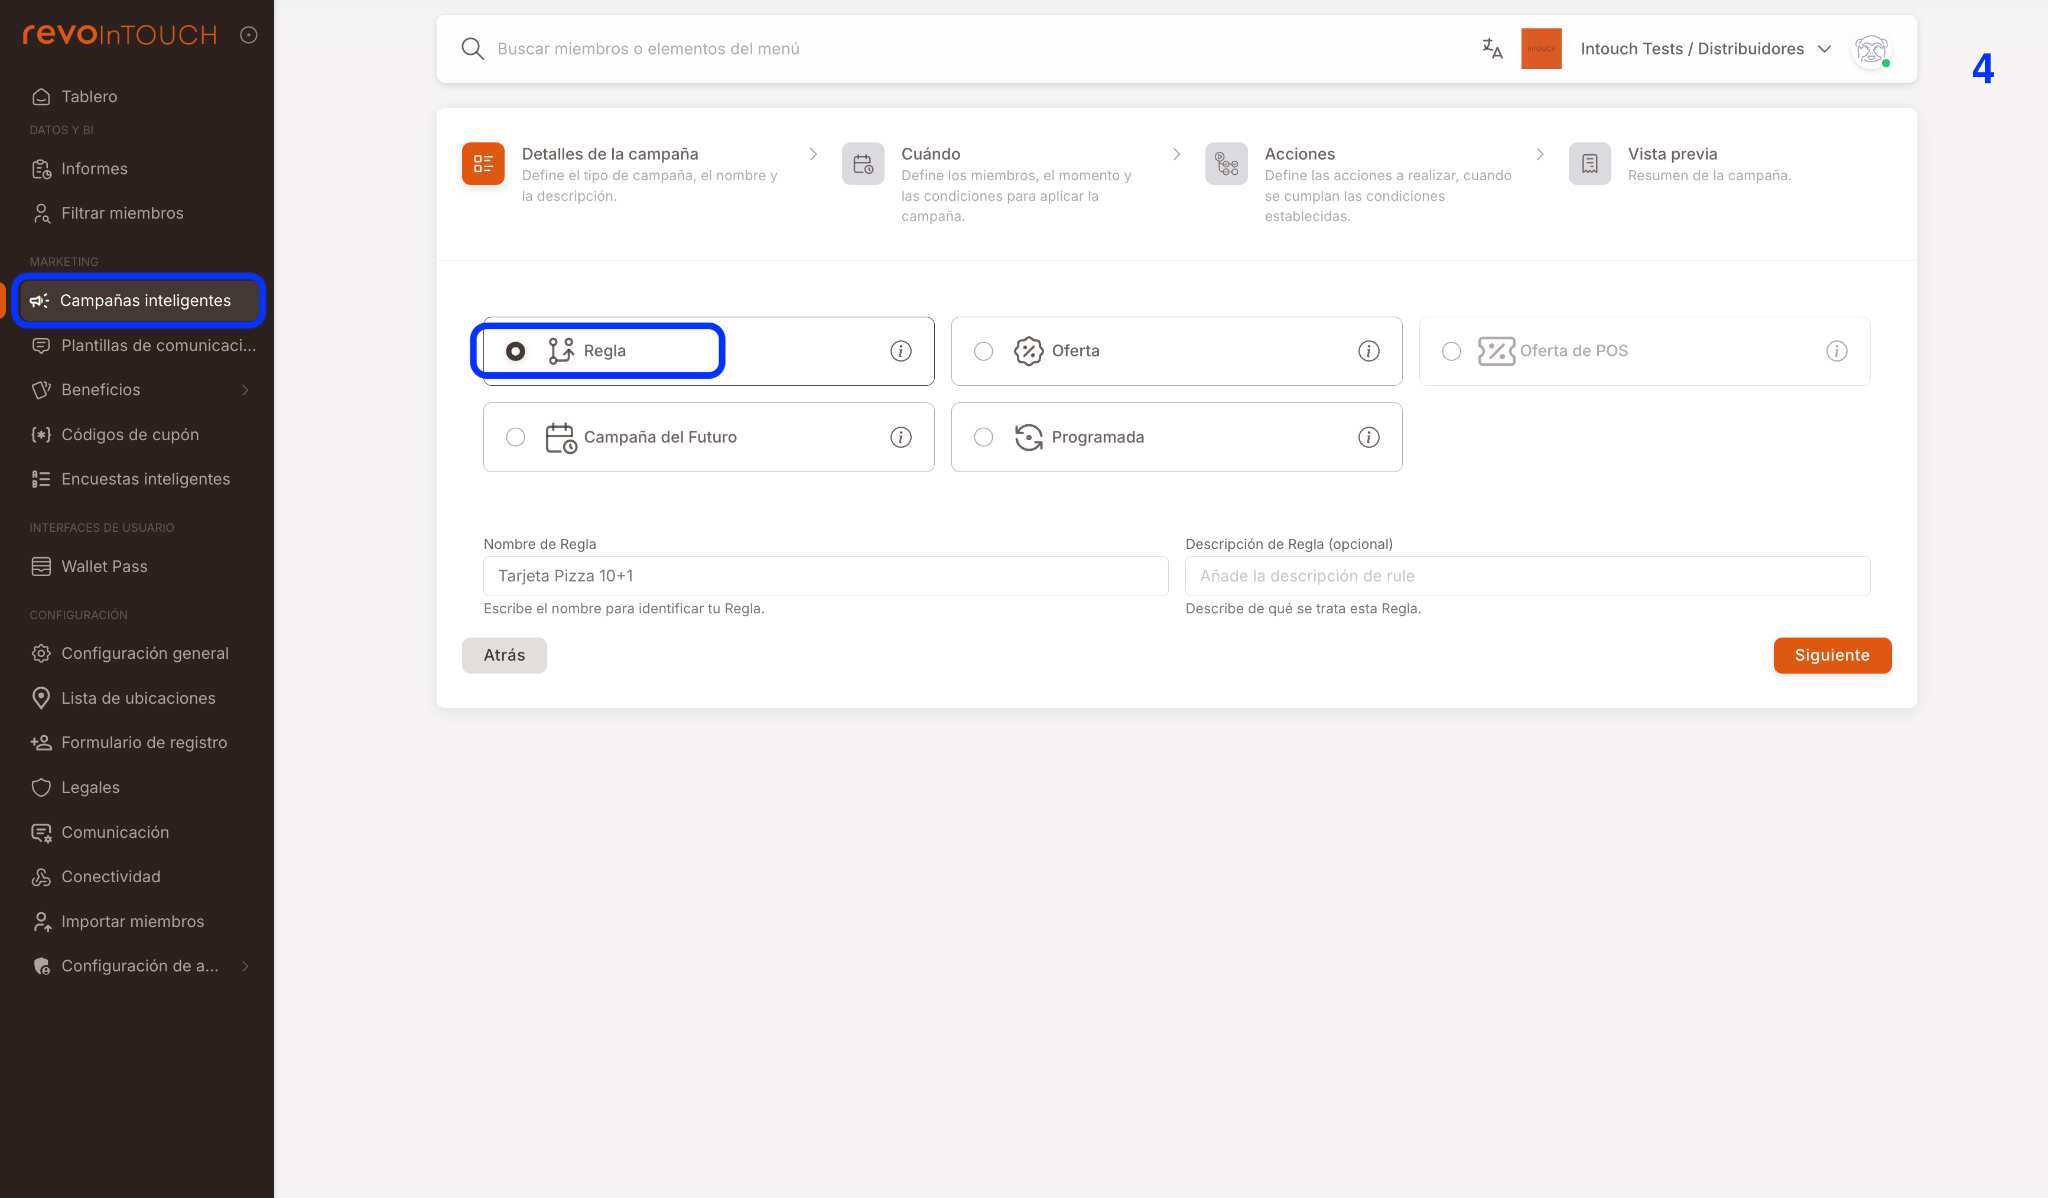
4. CREATE STAMPING RULE (Smart Campaigns)
Route: Smart Campaigns → Create campaign
Configure:
- Campaign type: Rule
- Rule name (e.g., Coffee Card Stamping)
- Description (optional)
This campaign will be responsible for adding stamps to the customer's card.
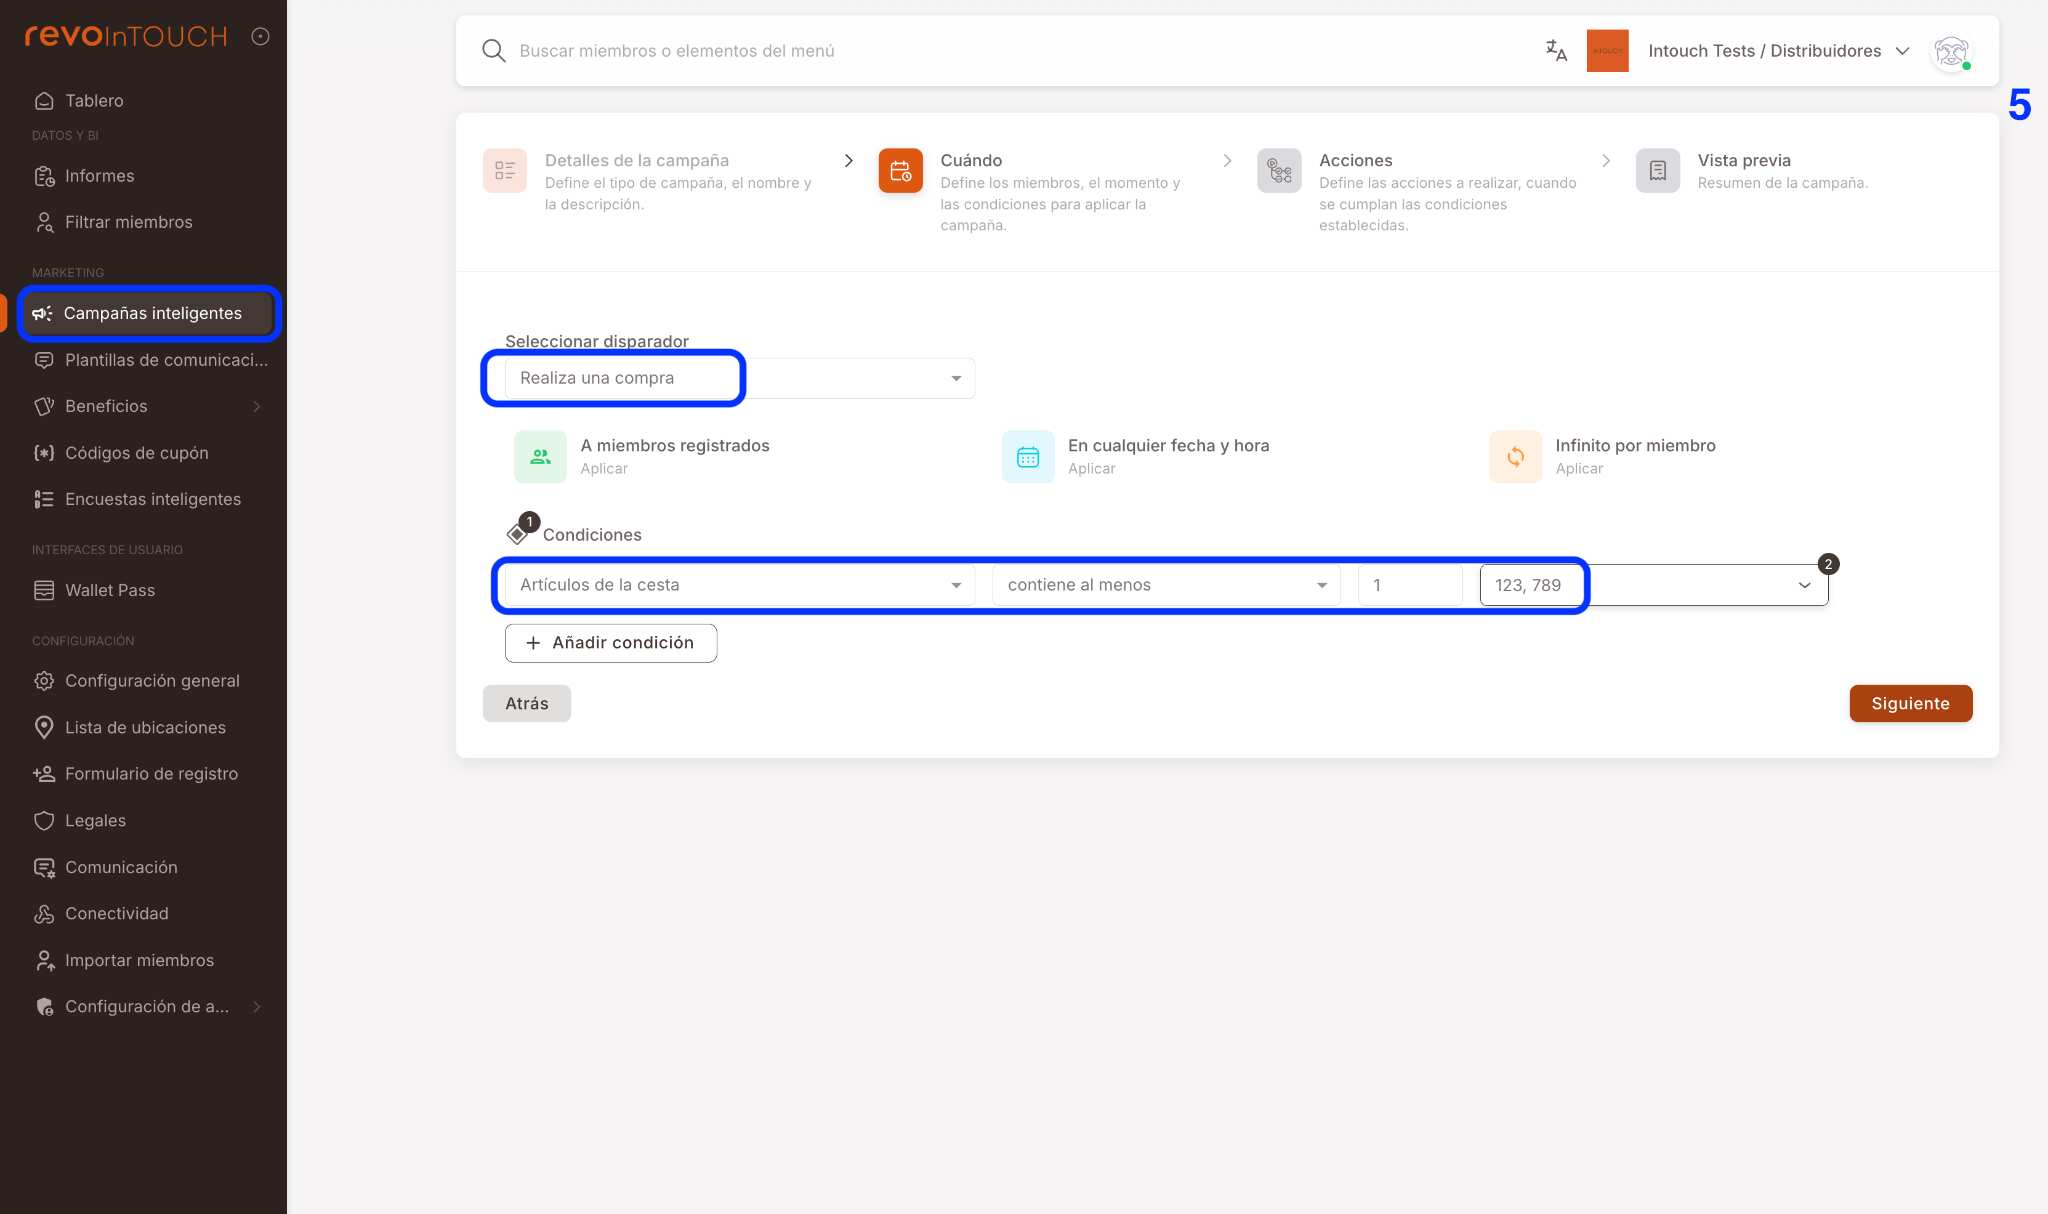
5. DEFINE WHEN TO STAMP THE CARD
In the When step of the campaign:
Configure:
- Trigger: Makes a purchase
Add the condition:
- Basket items
- contains at least
- 1
- Select the corresponding articles or departments
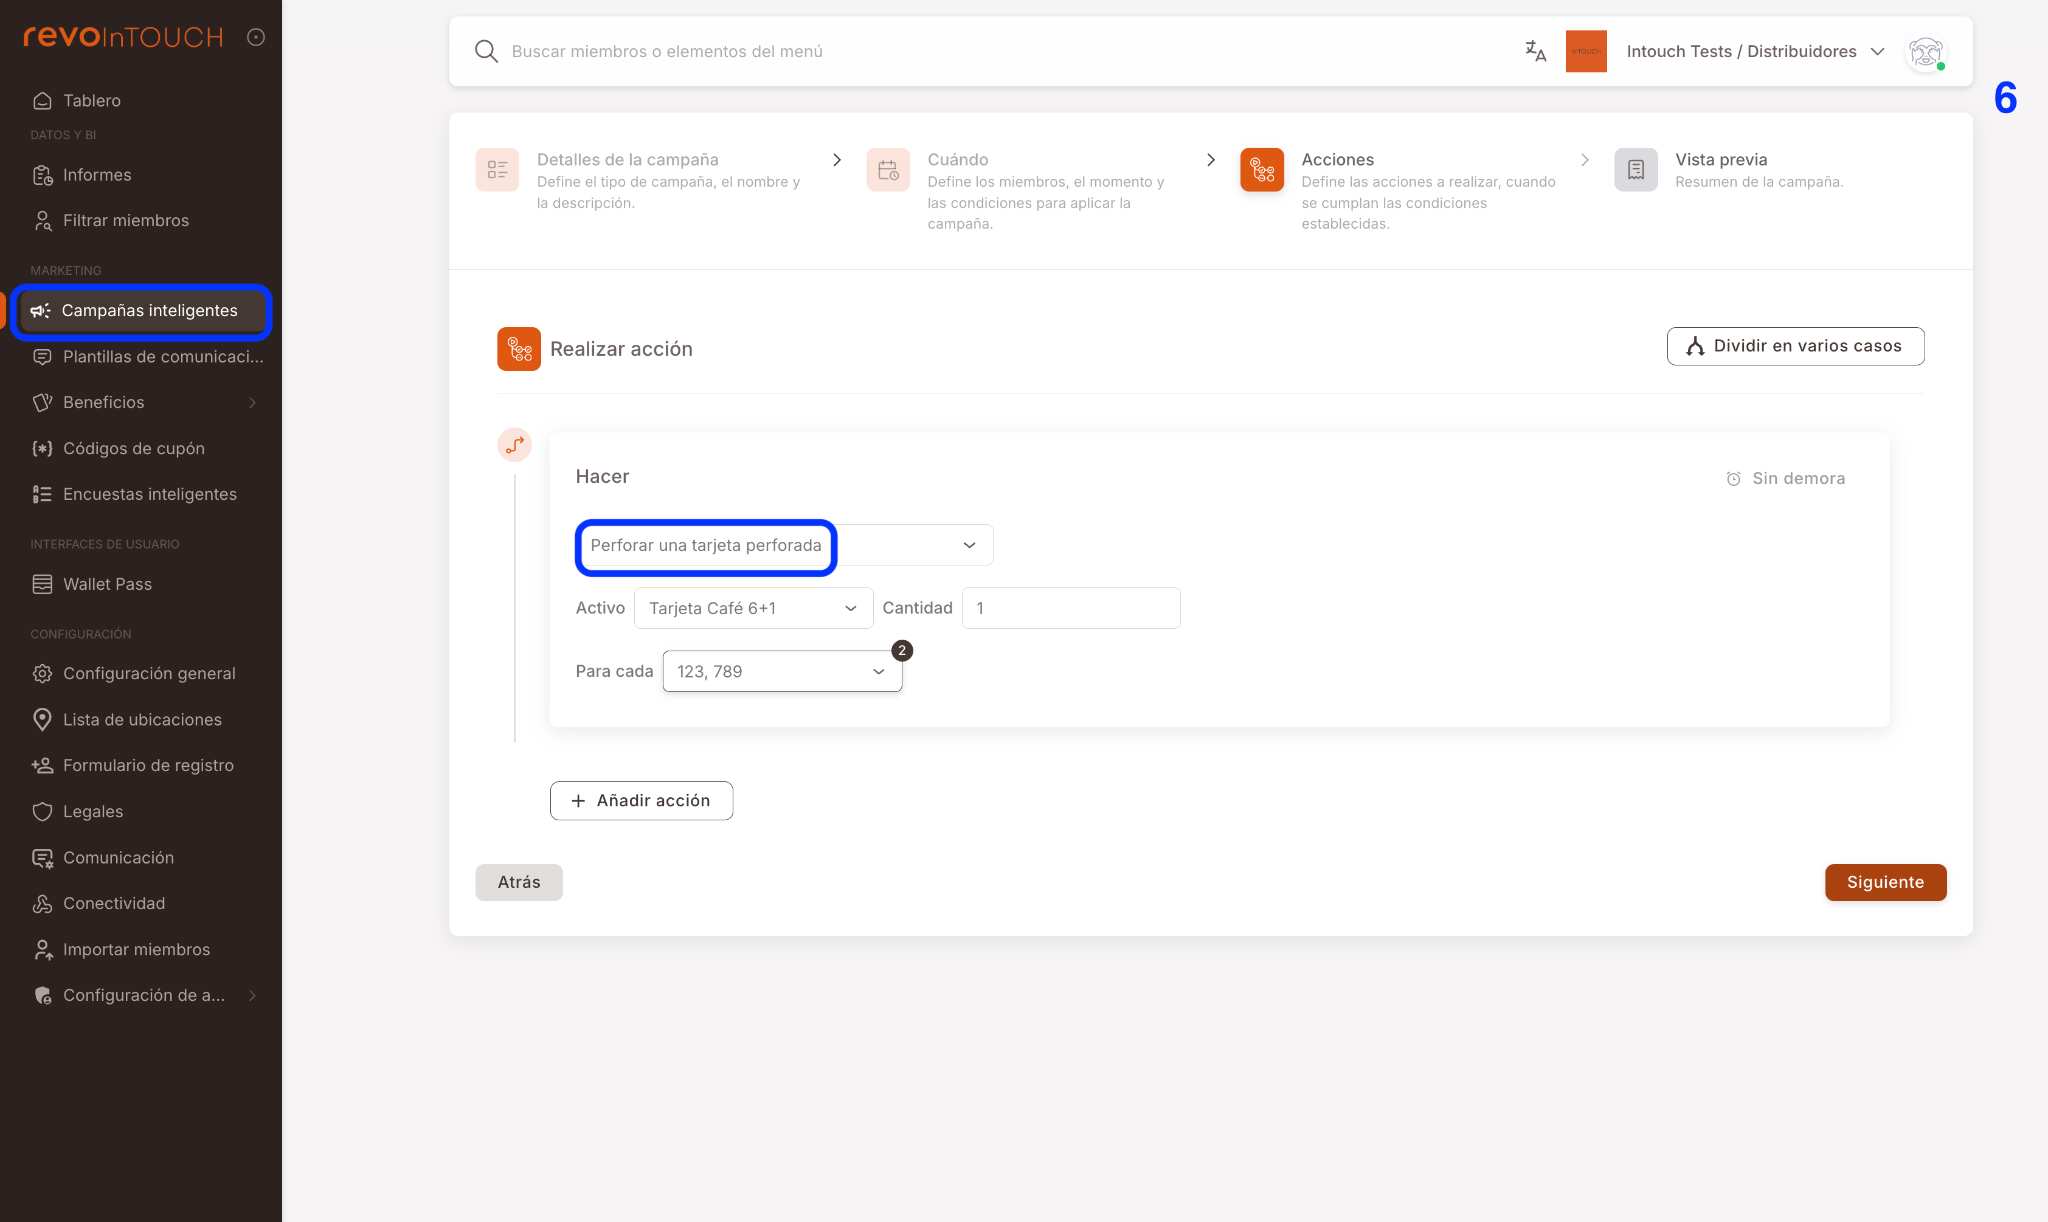
6. ACTION: STAMP THE CARD
In the Actions step of the campaign:
Configure:
- Action: Stamp a stamped card
- Card: select the created card
- Quantity: 1
- For each: corresponding article or department
Each valid purchase will add one stamp to the customer's card.
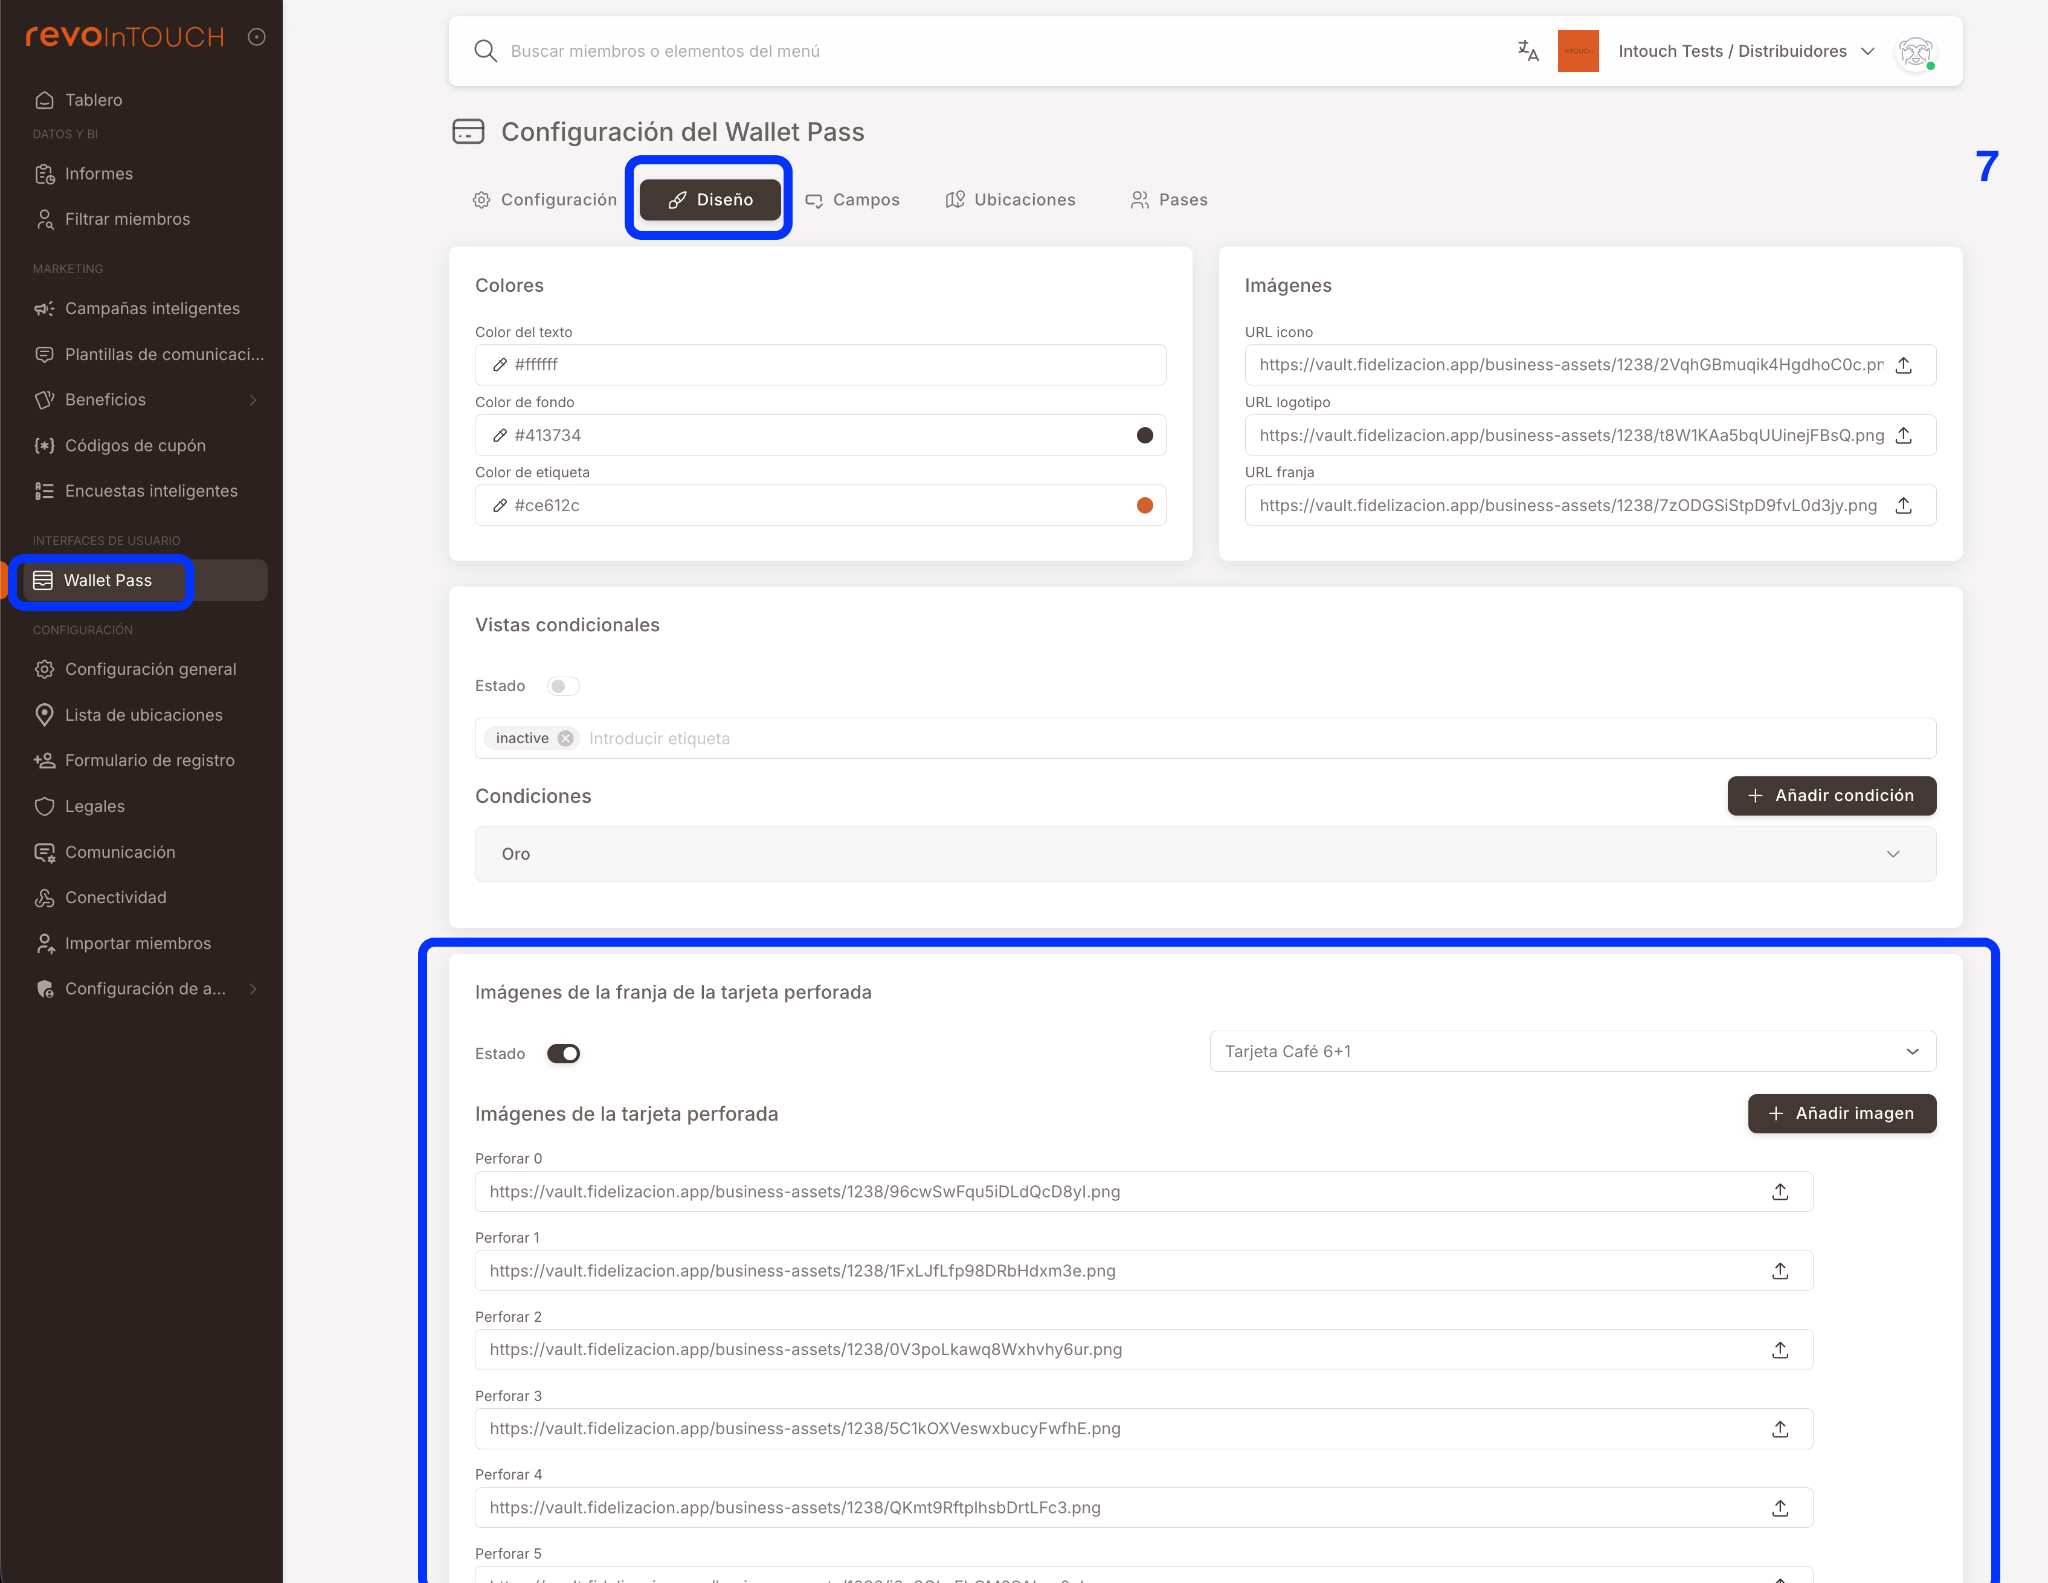
7. CONFIGURE WALLET PASS IMAGES
To properly display the card progression in Wallet:
Route: Wallet Pass → Design
Configure:
- Activate: Stamped card strip images
- Select the corresponding card
Upload images for each state:
- Stamp 0
- Stamp 1
- Stamp 2
- ...
- Provide one image for each number of stamps
NOTE: Each image visually represents the card's progress in Wallet.
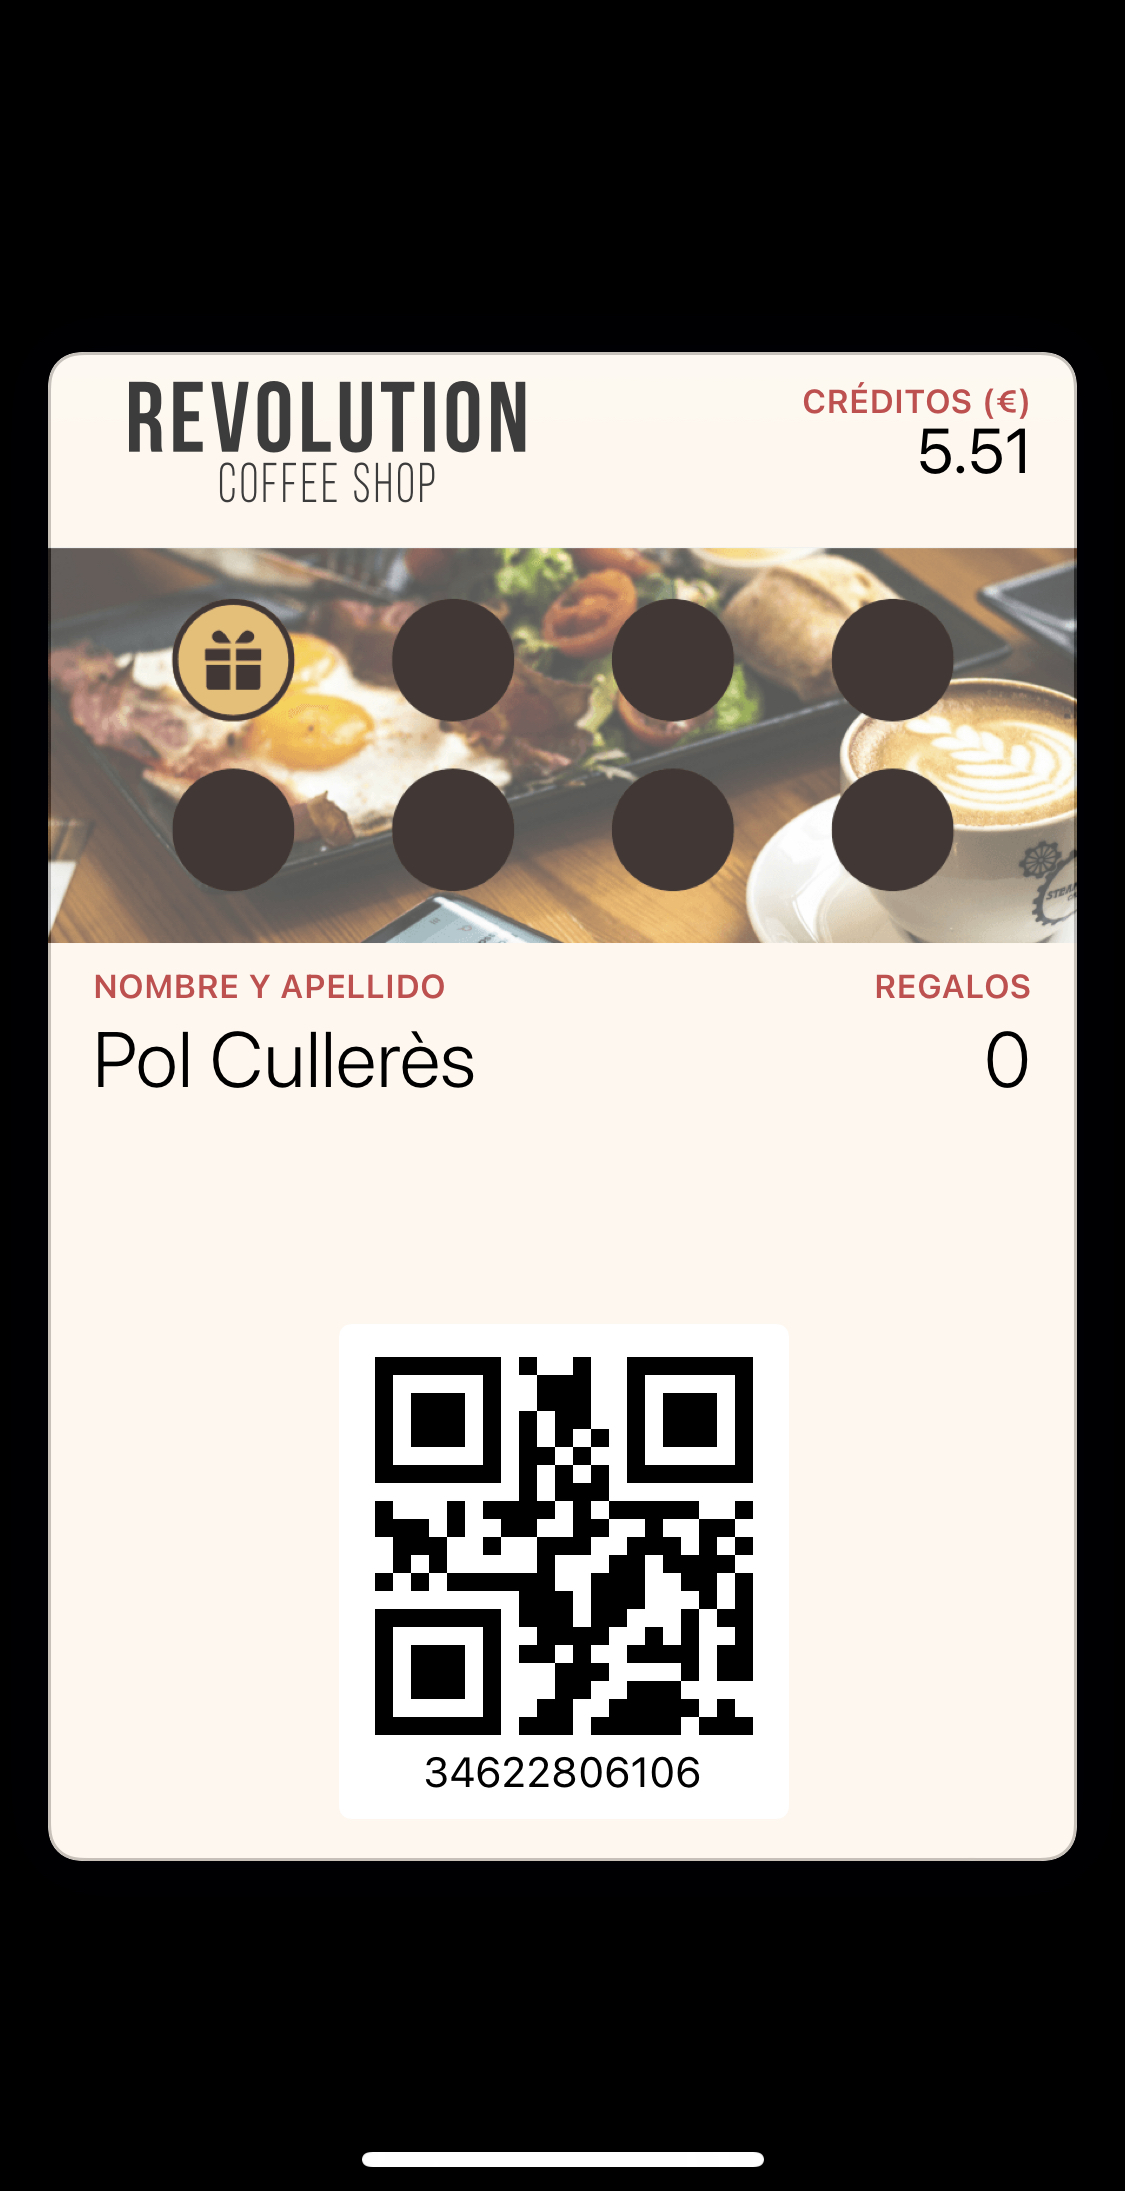
8. FINAL RESULT
The customer:
- Sees their stamped card in the WebApp and Wallet
- Each valid purchase adds an automatic stamp
- Upon completing all stamps, the free item is applied