DESCRIPTION PRICE INVENTORY CONFIGURATION SUPPLIER
A product is the item you sell to your customers at the point of sale.
Products are organized into groups and categories that are used for agile structuring both in the back office and in the app. You have a wide variety of details and related objects that you can define to create a customized solution that works best for your business.
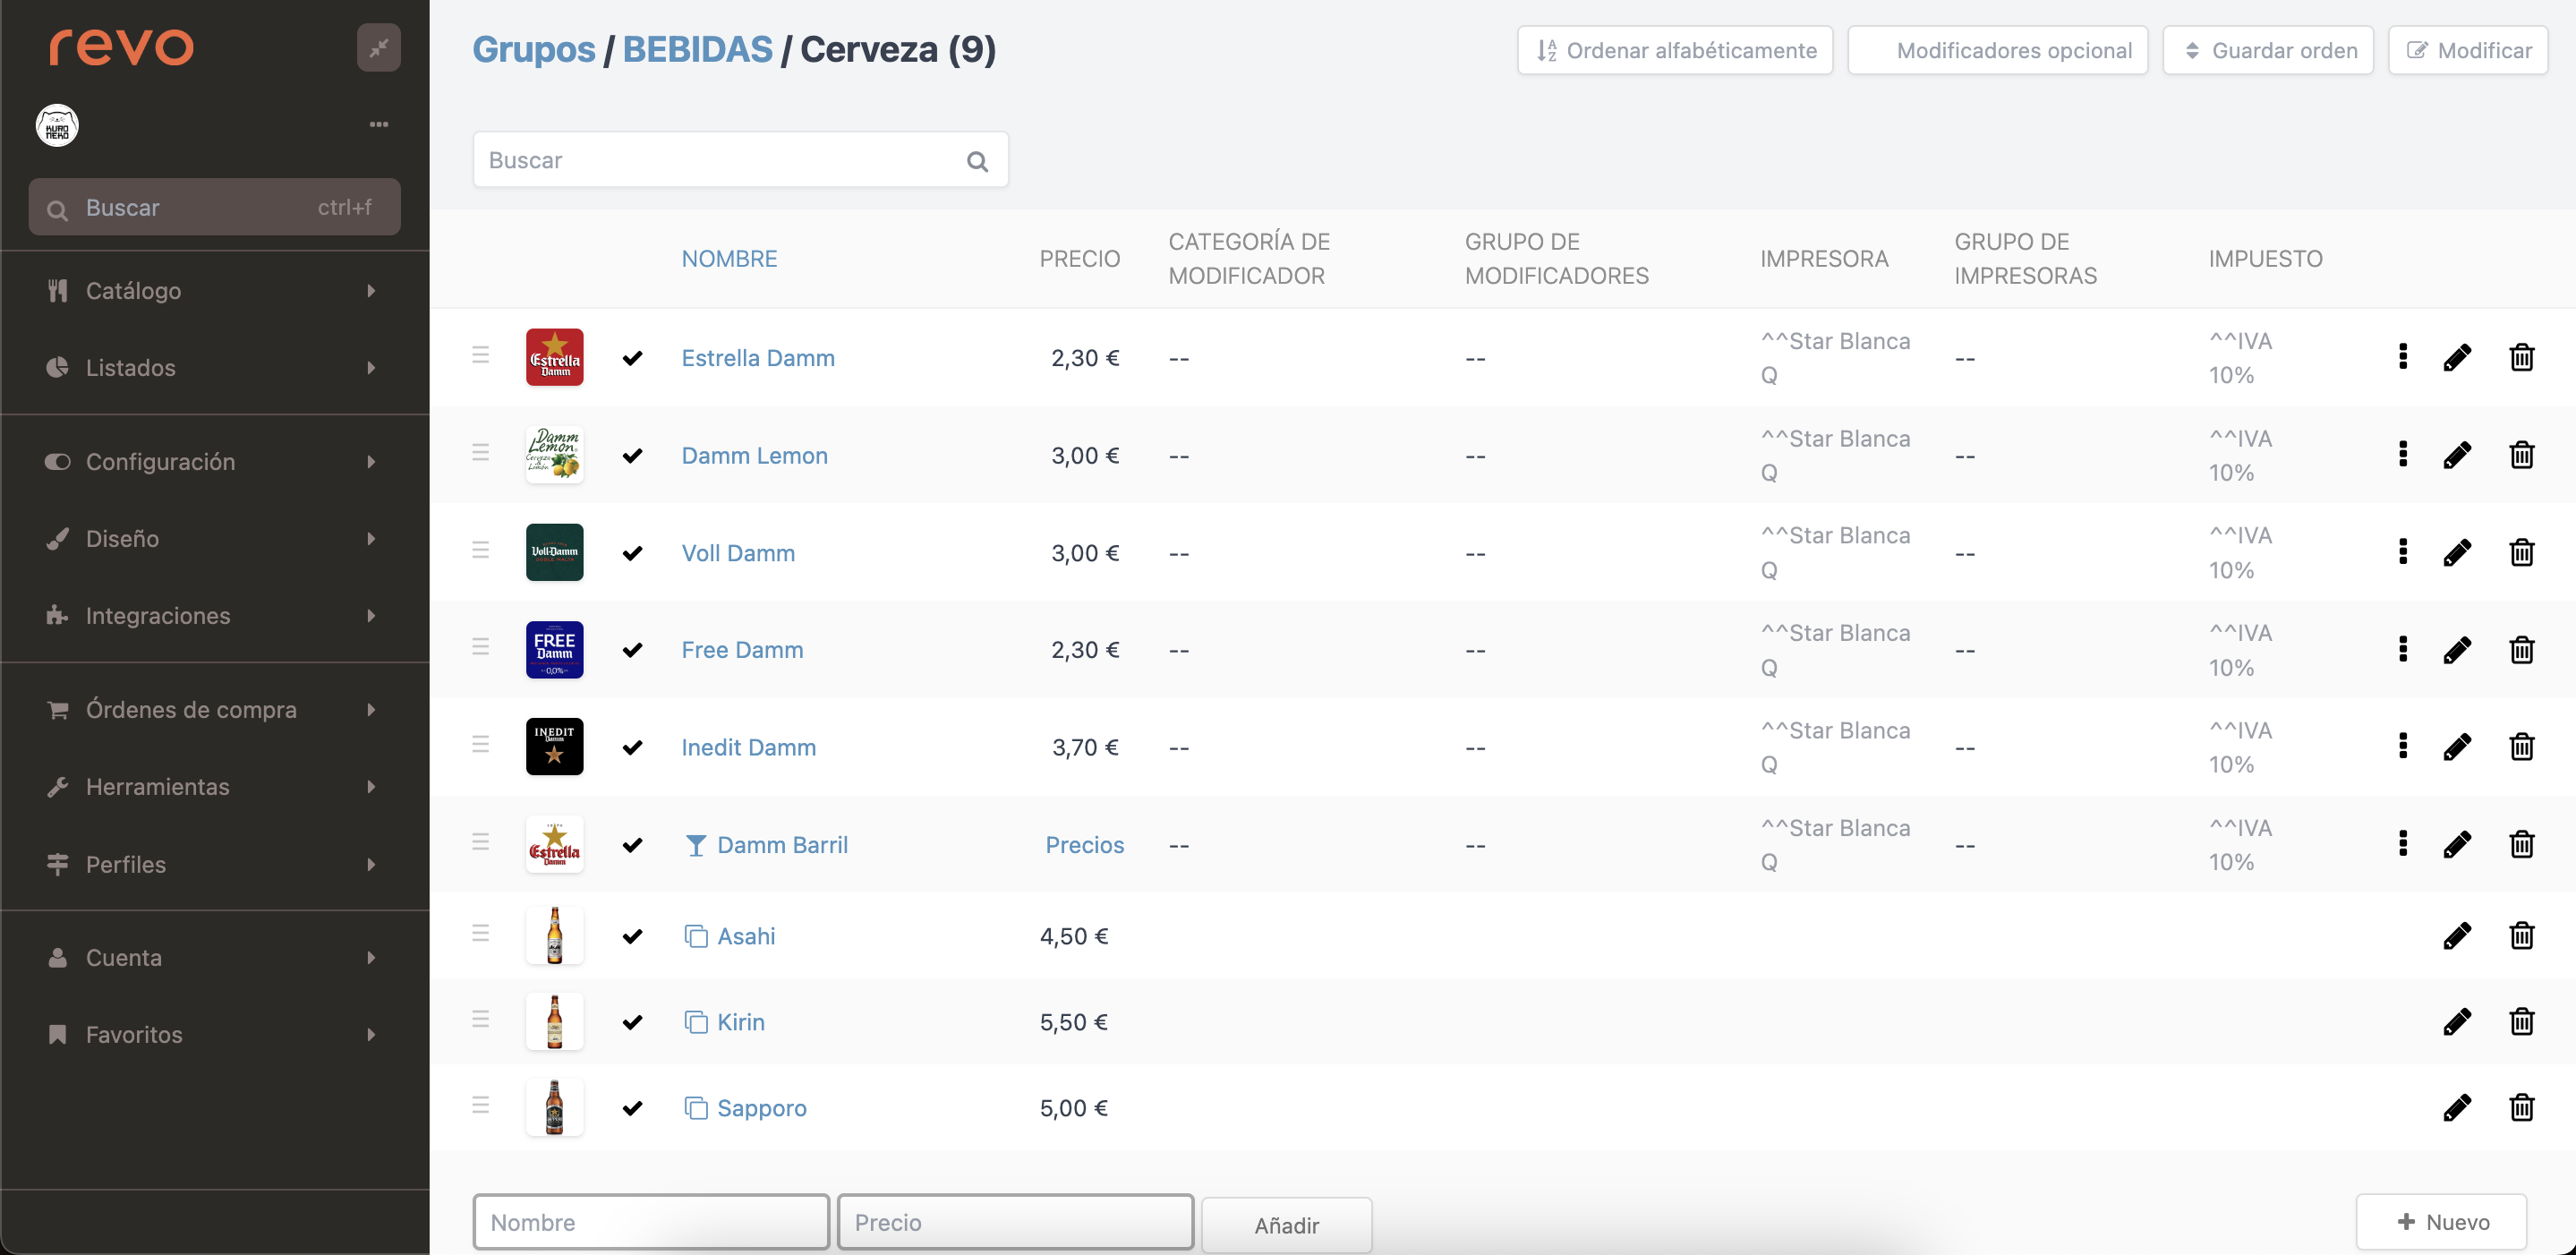
When you enter a category, we show you a screen with all the products that compose it. Here is where you find the following information:
-
Alphabetical order: Alphabetically sorts the list of products.
-
Optional modifier: You can add optional modifiers for this category. Learn more here.
-
Save order: Once you have changed the order of the products, you have to click this button to save the change.
-
Edit: You have two options:
-
Names and prices: The fields, names, and prices of all products will be editable so you can modify it more quickly.
-
Prices with operations: A dropdown will appear where you can choose what operation to perform (add, subtract, etc.), enter the value, and finally click Apply to all.

-
-
: You can change the order of the products by dragging them up or down.
-
: You can add an image to the product.
-
: You deactivate a product by clicking on , this way it will not be visible in the app. To reactivate it, you must click on the .
-
Search: You can search for any product in your account.
-
Name: By clicking on the product name, you can enter and edit its configuration.
-
Price: You can easily see the price of the product.
-
Modifier category: You can see if this has a modifier assigned without having to enter the product configuration. When shown in bold, it means the modifier is assigned to the product, and in gray it is assigned to the category.
-
Modifier group: You can see if this has a modifier group assigned without having to enter the product configuration. When shown in bold, it means the modifier group is assigned to the product, and in gray it is assigned to the category.
-
Printer: You can see if this has a printer assigned without having to enter the product configuration. When shown in bold, it means the printer is assigned to the product, and in gray it is assigned to the category or group (^category/^^group).
-
Printer group: You can see if this has a printer group assigned without having to enter the product configuration. When shown in bold, it means the printer group is assigned to the product, and in gray it is assigned to the category or group (^category/^^group).
-
Tax: You can see if this has tax assigned without having to enter the product configuration. When shown in bold, it means the tax is assigned to the product, and in gray it is assigned to the category or group (^category/^^group).
-
: From here, you can duplicate or move products to other categories very quickly and easily.
-
: You edit the product.
-
: You can delete the product if it has no associated sales.
If you want to temporarily stop selling the product, it is simpler to deactivate it.
-
Name and price: You add a new product quickly. Simply enter a name, the price, and add.
-
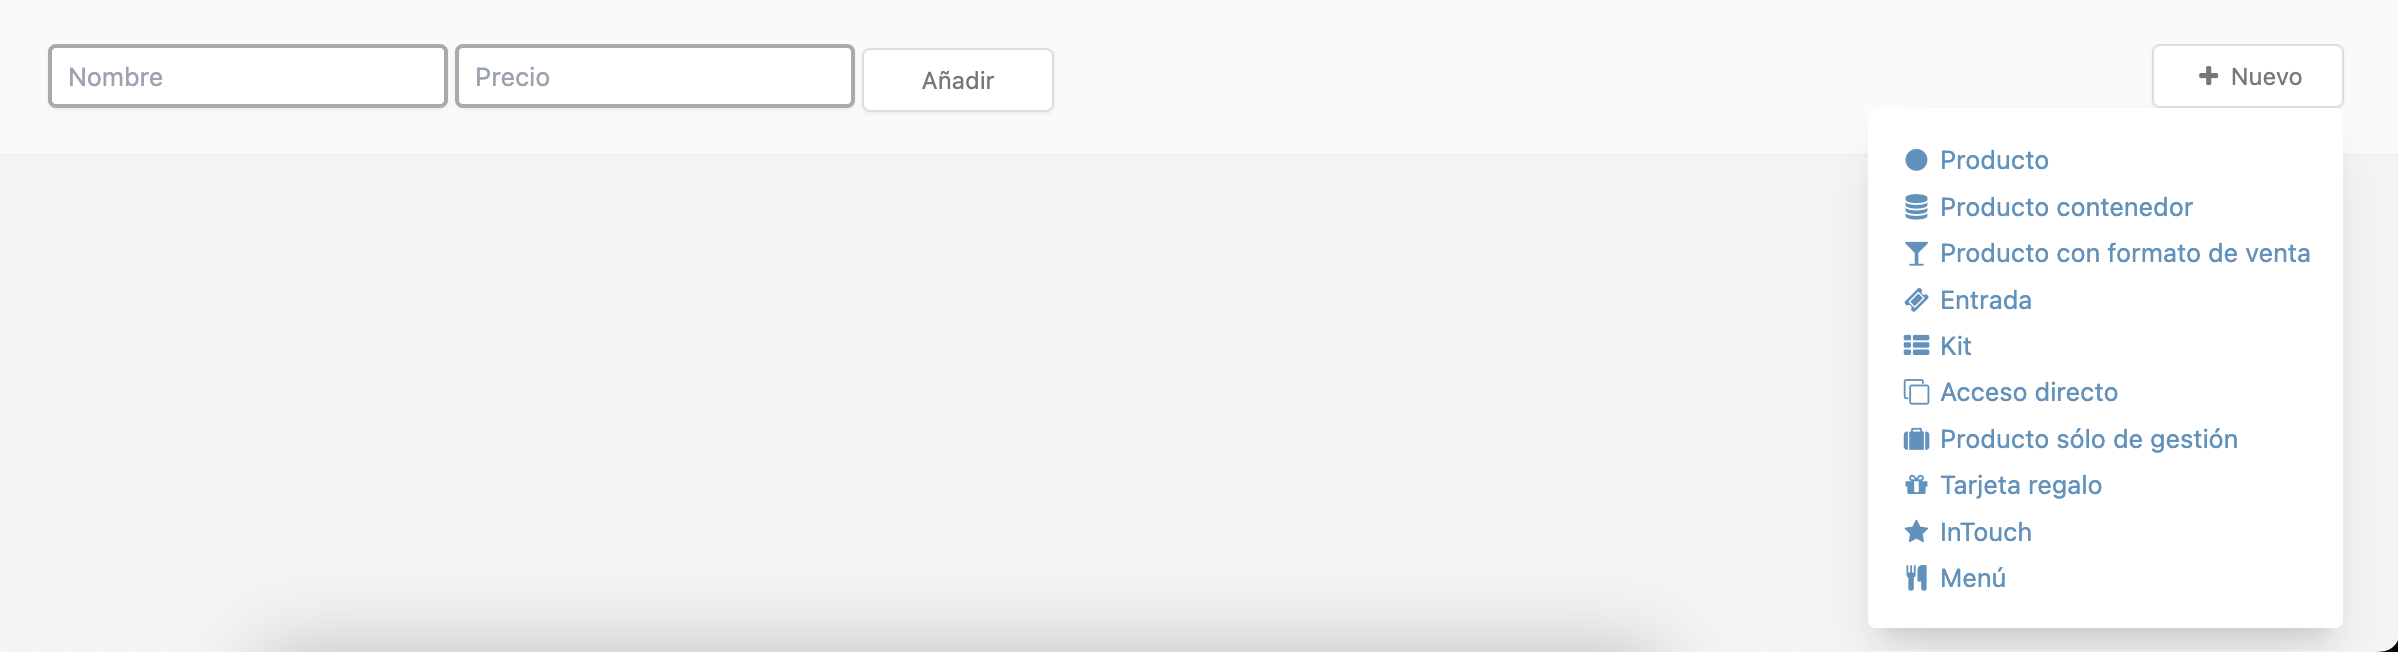
+New: Menu to add new products, containers, products with sales formats, etc.
HOW TO ADD A NEW PRODUCT
You can create products very easily. Once inside the category, at the bottom right, you find the +New button and select the Product.
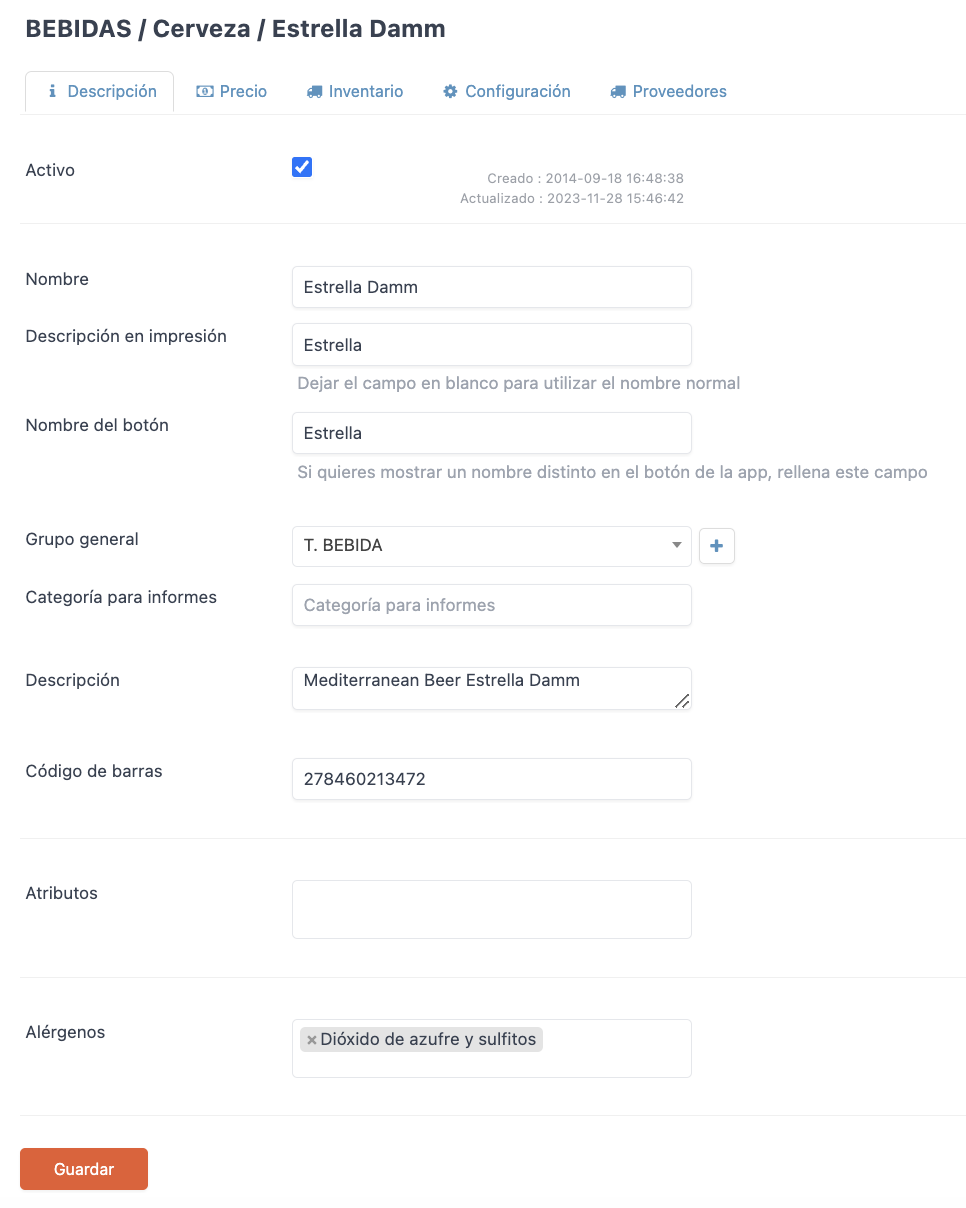
Then, you will see the following screen with different tabs:
DESCRIPTION:
-
Active: If you check this option, this product will be visible in the app. With the checkbox unchecked, it will not be visible.
Very useful option for creating new products in the back office but not yet selling them at the point of sale or for seasonal products that you only sell for a certain period.
-
Name: You add a name to the product. This name will be used in the app and will be printed on the invoice.
-
Print Description: This option is used to distinguish the name that will be printed on the order tickets. This prevents tickets sent to the kitchen or bar from having very long names.
-
Button Name: This option is used to display a different name for the product within the app.
-
General Group: With the option -- which comes by default, the configuration configured in its category or group will be applied.
-
Description: This text field can be used for different purposes, from describing the ingredients to any note you want to display. This description is visible, along with the product photo and other options, by tapping with two fingers on the product.
-
Barcode: You add a barcode to the product. This can be used for various purposes, including using a barcode reader to enter inventory when you receive the goods.
-
Attributes: You add identifiers to a product. For example: if you have an organic sirloin, you can identify it as "ORG".
-
Allergens: Easily mark all allergens contained in this product. They will be displayed on the same screen as the description when you tap with two fingers on the product in the app.
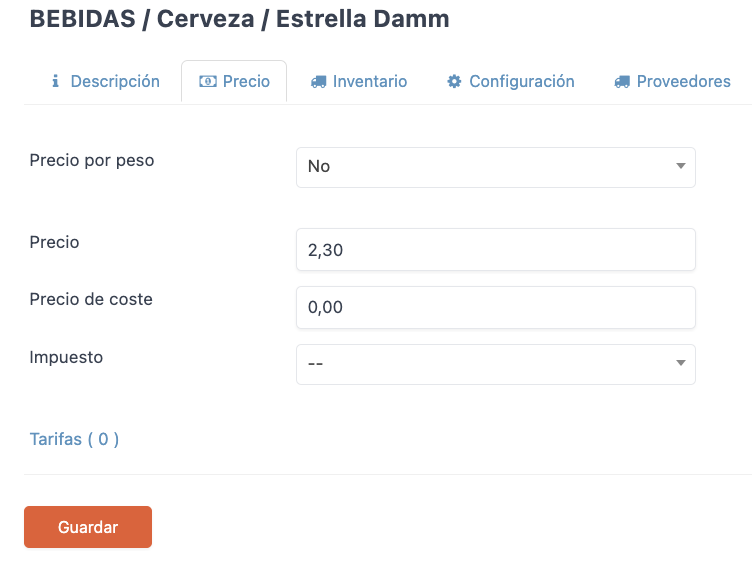
PRICE:
-
Price per weight: You select:
-
No: You do not use weight.
-
Yes, proportional extras: When calculating the weight extras, it does so proportionally.
The calculation formula would be: (Product x Product Weight) + (Modifier Price x Product Weight).
Example: You have a Lobster at $10 / KG that has a modifier "Truffle Sauce" with a surcharge of $2.
It would be like this: (10 x 0.75 KG) + (2 x 0.75 KG) = $9 -
Yes, extras separate: Adds the modifier price separately from the weight price, so the modifier price will always be the same.
The calculation formula would be: (Product x Product Weight) + Modifier Price.
Example: You have a Lobster at $10 / KG that has a modifier "Truffle Sauce" with a surcharge of $2.
It would be like this: (10 x 0.75 KG) + 2 = $9.5
FROM VERSION 4.4 OF THE APP ONWARDS
-
-
Price: You add the selling price of the product. By default, with taxes included.
-
Cost Price: You add the cost price (without taxes included) so that REVO can calculate the selling margin.
-
Tax: You select a tax for this product.
Note that if the tax is already selected in the category or group, it is not necessary to configure it in the product. However, if selected in the product it will work just as well.
-
Rates: From here you can add different rates with amounts for this product. They must be created beforehand. For more information, click here.
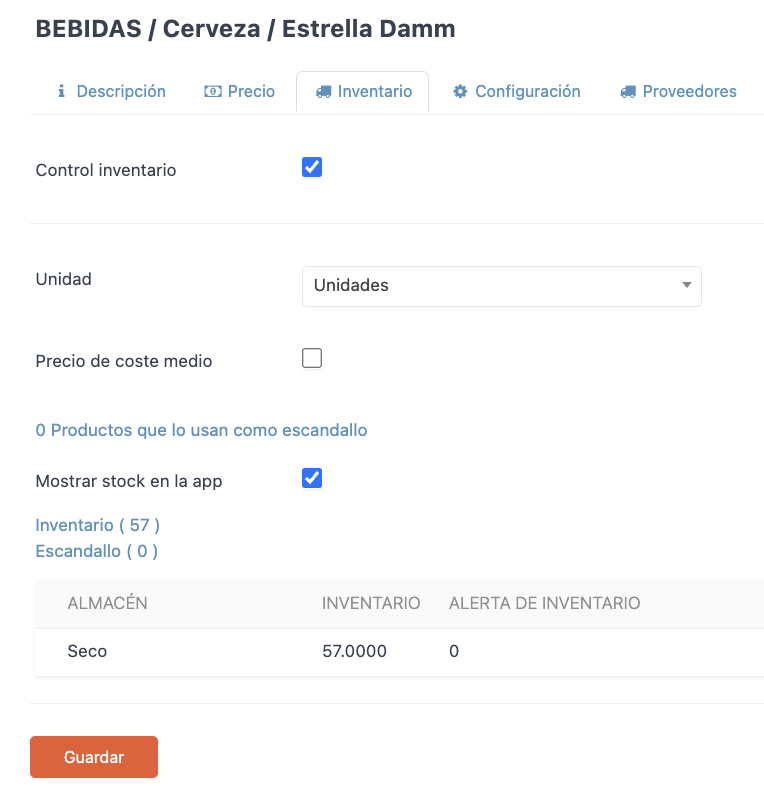
INVENTORY:
-
Inventory control: Activate this option if you want to manage the inventory of this product. Once activated, the following options are displayed.
-
Unit: Select the management unit for this product.
It is very important that the units of each product are the same both in the product, in the warehouse, and in the purchasing module if you use it.
-
Average cost price: Activate this option if you want REVO to calculate the average cost price of this product if you use the purchasing module.
-
(x) Products use it as a recipe: This option indicates if this product is part of the recipe for other products.
-
Show stock in the app: With this option checked, if you have stock added, the app will show you an icon indicating the remaining units. You will see, quickly and intuitively, how the stock decreases as you sell products.
-
Inventory: You add the stock units to your inventory for this product.

-
Recipe: You add all the ingredients that are part of this product. Learn how to manage your inventory correctly from here.
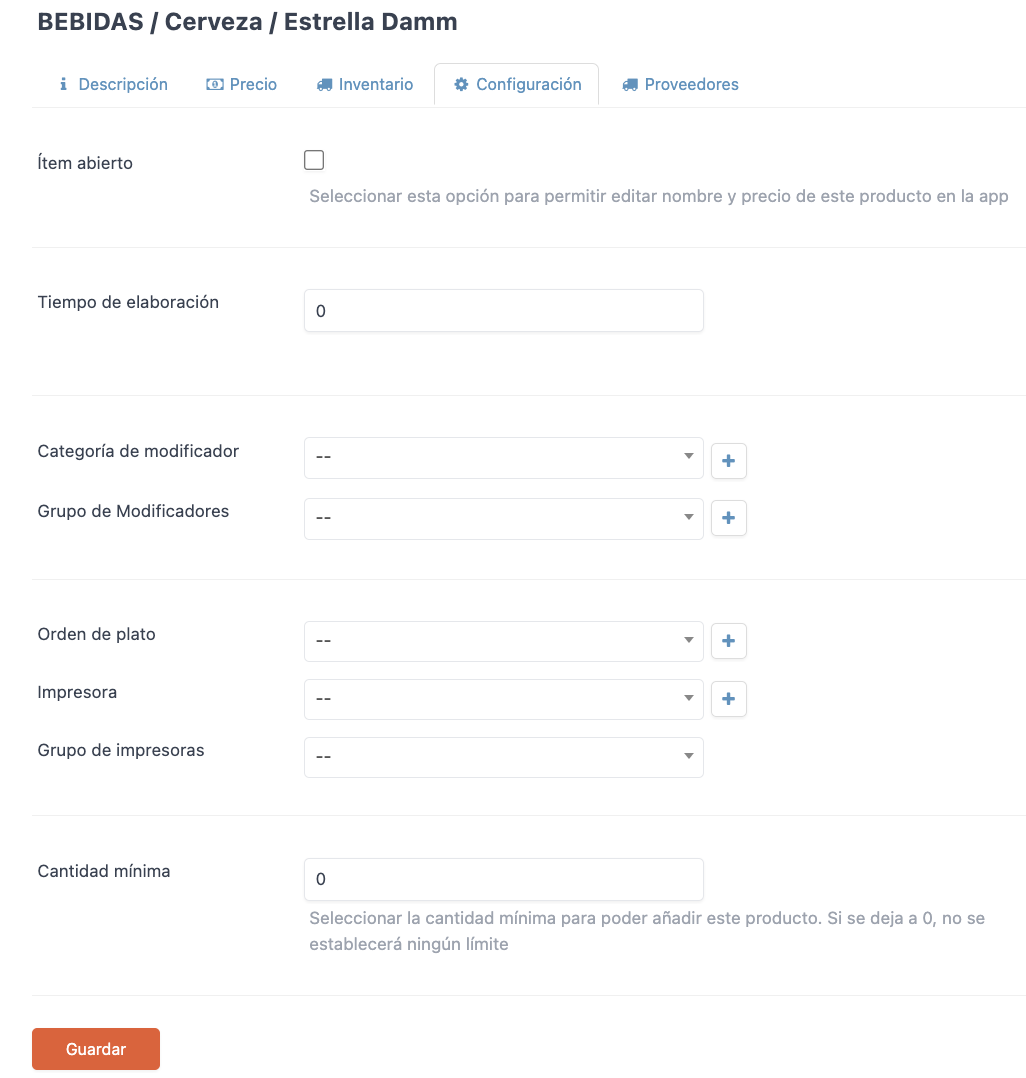
CONFIGURATION:
-
Open item: With this option activated, you can edit the name and price of this product in the app.
It is advisable not to activate this option for all products, as you could alter the statistics in the reports. A good way to avoid this would be to create a single product with the option activated. For example: Miscellaneous.
-
Preparation time: You add the preparation time of this product to have better control in the KDS.
-
Modifier category: Here you associate a modifier with this product. When you tap on the product, the modifier will appear. Learn more from here.
-
Modifier group: Here you associate a group of modifiers (more than one modifier) with this product. When you tap on the product, the group of modifiers will appear. More information here.
-
Plate order: Associate a default plate order. This way, in the app when you tap on the product, the plate order will be automatically assigned, thus gaining speed and agility when ordering. Recommended for drinks and desserts.
-
Printer: Here, you configure the printer where the order tickets will be printed for this product. You must first configure the printers in your company. Learn more here.
-
Printer group: If you want to print order tickets on multiple printers at the same time, you must configure a printer group. Learn from this link.
-
Minimum quantity: This option is used to enter the minimum quantity required to insert the product into the order.
SUPPLIER:
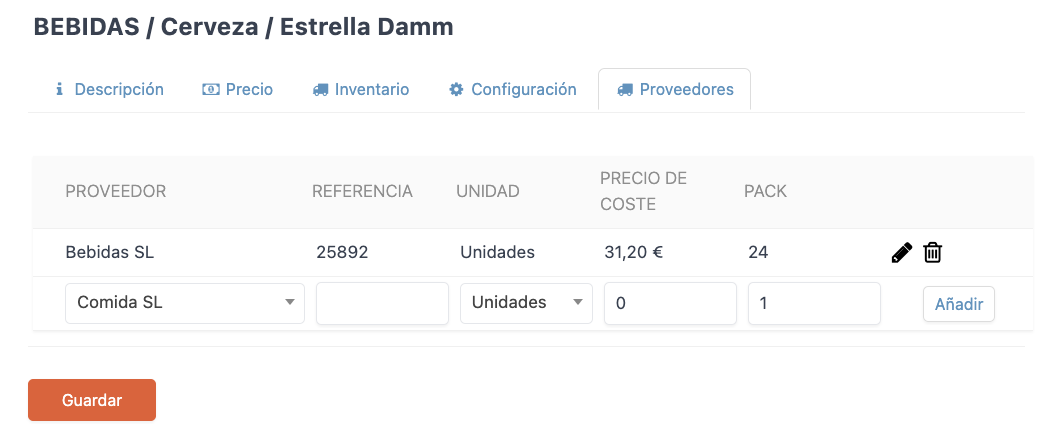
If you have configured your suppliers with associated products, from this tab you can select it from the dropdown and it will add the information.
Remember to SAVE to apply all the changes made.
For more information on different products: